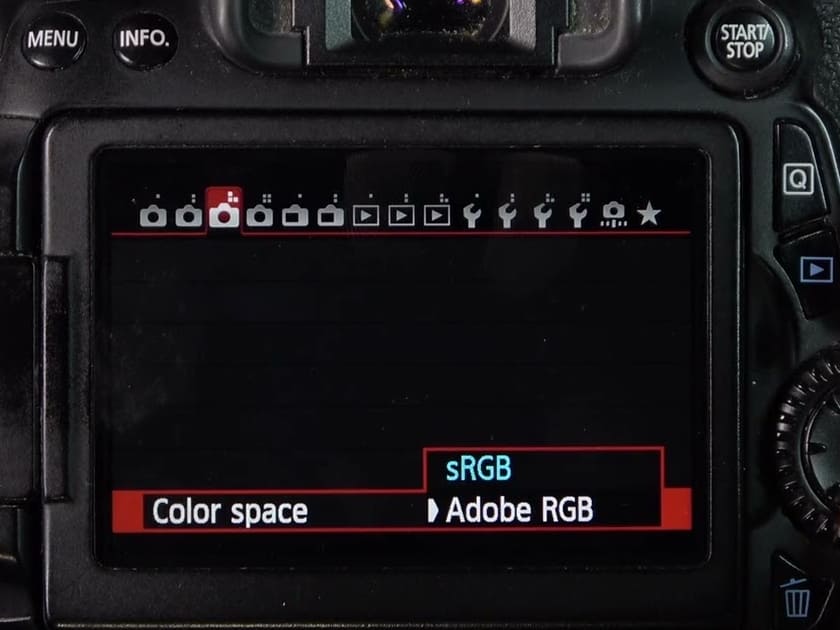
Camera Color Space: sRGB or Adobe RGB?
There is one camera setting that is easy to overlook, but it can also cause big problems: color space. Many people do not pay much attention to whether they choose sRGB or Adobe RGB when taking photos. Then, when they post the photos on social media, they find that the image looks dull and the skin tone seems off.
So what is going wrong? Today, let's explain it clearly: how should you choose the color space on your camera?

In this article, you will learn:
- What Is Color Space?
- sRGB vs. Adobe RGB: What Is the Difference?
- Why Does Adobe RGB Make Photos Look Worse?
- How Should You Choose a Color Space?
- Conclusion
What Is Color Space?
In general, digital cameras offer an important setting called color space. It decides which color range the camera uses when it outputs a photo. In simple terms, different color spaces affect how many colors a photo can show and how those colors look in the final image.
One thing to note is that the color space setting in the camera mainly affects JPEG files, as well as the preview image and histogram on the camera screen. If you shoot in RAW, this setting usually does not directly affect the original image data itself.
That is because RAW files record the original data captured by the sensor, which leaves more room for editing later. By contrast, sRGB and Adobe RGB are color spaces used for output during post-processing. They are not the color range of the RAW file itself.
In other words, a RAW file can later be converted to sRGB, Adobe RGB, or another color space that fits the final output.
So if you usually shoot RAW and you are comfortable editing your photos later, you do not need to worry too much about color space when shooting. But if you often shoot JPEG, or you want to share photos quickly, then color space is something worth choosing carefully.
sRGB vs. Adobe RGB: What Is the Difference?
A simple way to think about it: sRGB is like a 12-color watercolor box for students, while Adobe RGB is like a 48-color watercolor box for professional artists.
sRGB is a color space standard created by Microsoft together with companies like HP, Mitsubishi, and Epson. Its main goal was to give computers a shared standard for handling digital images.
sRGB has a smaller color range and covers about 35% of the colors the human eye can see. But it has better compatibility, so it is the common language for the internet, phones, regular monitors, and home printers.
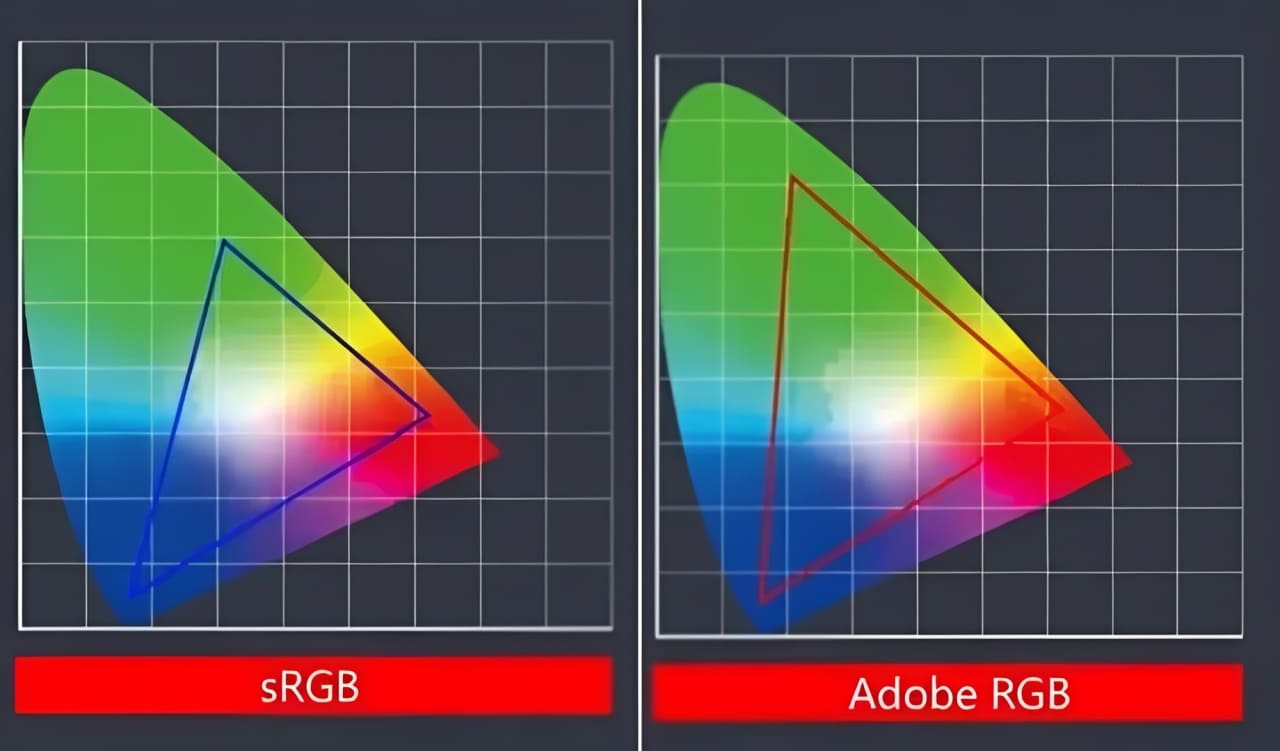
Adobe RGB is a color space standard launched by Adobe in 1998. It has a wider color range and can show smoother color transitions. In print output, Adobe RGB is also much better than sRGB.
Of course, to show more colors, you also need better gear and the right software. For example, you need a professional wide-gamut monitor and color management software.
Why Does Adobe RGB Make Photos Look Worse?
When you set your camera to Adobe RGB and then share the photo on social media right after shooting, you may notice something confusing: the photo looks worse.
That is because most normal image viewers and phone browsers do not understand Adobe RGB. They will simply treat it as sRGB on their own. As a result, colors that should look bright, like green and blue, get mapped into the wrong space. The photo then looks less saturated, dull, and as if there is a dirty layer of glass in front of it.
Adobe RGB only really works well when you have a calibrated wide-gamut monitor, and when you embed the correct color profile in Photoshop. In that case, if you use Adobe RGB through the whole process, from shooting to editing to printing, then Adobe RGB can do its job.
How Should You Choose a Color Space?
So, for photographers and photography fans, which color space should you choose? Here are three practical tips:
1. For everyday use and social media: just choose sRGB
What you see is what you get. If the photo looks vivid and full on the camera screen, it will also stay that way when you send it to your phone. That is all you need.
2. If you need to print photos and you know color management: choose Adobe RGB
This is best for photographers who already have a wide-gamut monitor and the right software setup. When saving your files, keep the original in Adobe RGB. If you need to share it with others, remember to save a separate sRGB version.
3. If you shoot RAW most of the time: sRGB is fine
A RAW file is like "raw data." The color space, white balance, and picture style in the camera do not change the file itself.
When you open it in Lightroom, you can always convert it to sRGB, Adobe RGB, or even the larger ProPhoto RGB later.
It is still a good idea to set the camera to sRGB. That makes previewing and choosing photos faster, and the camera screen itself is already sRGB, so the preview will look more accurate.
Conclusion
In this post, we briefly introduced the color space setting on cameras, looked at the difference between sRGB and Adobe RGB, and talked about which one you should set when shooting. The conclusion is actually very simple: for most photographers, sRGB is enough.
That is because sRGB is more universal. Whether you are posting on social media, uploading to a website, or showing photos to a regular client, it is more consistent and less likely to cause dull or strange-looking colors. Adobe RGB is only worth considering when you have a solid post-processing workflow and your work is mainly for print or professional output.
Of course, if you shoot RAW, then you do not really need to worry too much about this setting. The color space of a RAW file can be chosen and changed later during editing, rather than being fixed at the moment you take the photo. You can choose the color space when you export the file in your editing software.
So when you shoot in RAW, color space is not that important. What really matters is who will see the final image, what software you use, and where you plan to share it.
At the end of this post, we want to share a quick message and recommend TourBox, a creative controller that many photographers love. If photo editing is an important part of your workflow, TourBox can greatly improve your editing experience and the final quality of your work.

When you edit photos with TourBox, you can clearly feel the effect of each small adjustment. It feels more like you are shaping the image by hand, instead of just using software. That kind of control is something a mouse and keyboard cannot really match.

Also, using TourBox's physical dials to adjust settings is more precise and detailed than dragging sliders with a mouse. You do not need to keep staring at the slider position. Instead, you can make small, step-by-step adjustments, just like fine-tuning focus by hand, until everything looks right. You will find that the final editing results with TourBox are far better than with traditional controls.