Dynamic Panel V2 Is Here: What's New
Many photographers like to check the before-and-after result in real time when editing photos. Because of that, a lot of people prefer using a desktop for photo editing. A larger screen shows more detail and makes it easier to see the whole image.
Still, no matter how big the monitor is, the panels in Lightroom / Lightroom Classic always take up a fair amount of screen space. You can hide them when needed, but it can still feel a little annoying if you have to switch them on and off often.
To solve these problems in photo editing, our team introduced the Dynamic Panel in TourBox Console 5.10.0. And in TourBox Console 5.12.0 Beta 5, we upgraded Dynamic Panel again and launched Dynamic Panel V2. This update gives a full upgrade to four common tools in Lightroom and Lightroom Classic, and it offers a more native Adobe-like experience:
- Tone Curve: finer color control with the dial and wheel.
- Crop: more detailed and flexible composition adjustments.
- Color Grading: a more direct way to pick and adjust colors.
- Presets: easier preview of filter effects through the flexible panel.
Why Did We Make This Upgrade?
In short, this upgrade was made to solve common workflow pain points photographers face in Lightroom and Lightroom Classic, especially when using Tone Curve, Crop, Color Grading, and Presets. That is why we built Dynamic Panel V2.
These four editing tools are used a lot in commercial photography, portrait photography, and landscape photography. So we also highly recommend it for professional commercial photographers, portrait photographers, landscape photographers, and photography enthusiasts.
Dynamic Panel V2 is especially useful in two common cases:
- In portrait editing, after applying a batch of presets, you can quickly fine-tune exposure with the Tone Curve.
- In landscape editing, because the light and dark contrast is often strong, the Tone Curve is often needed for more precise exposure adjustments.
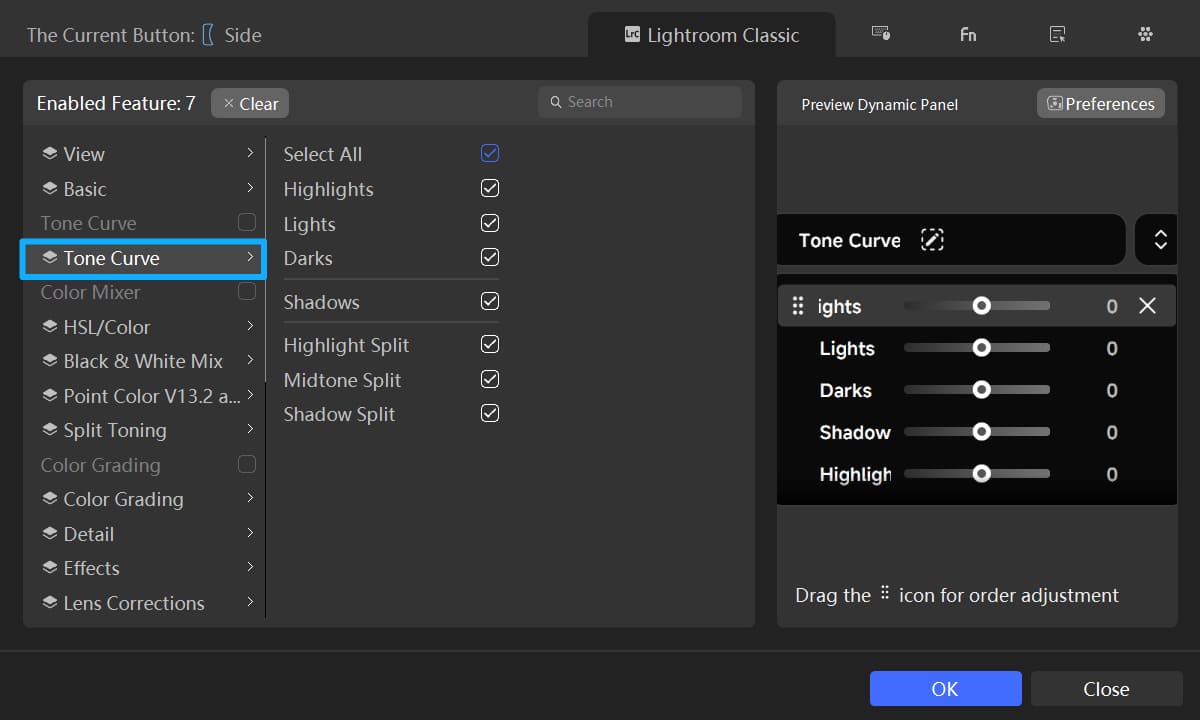
One thing to note: in this Dynamic Panel V2 upgrade, Tone Curve, Crop, and Color Grading are all special panels. That means they cannot be used on the same button at the same time as the general option setup, which uses the parameter bar style.
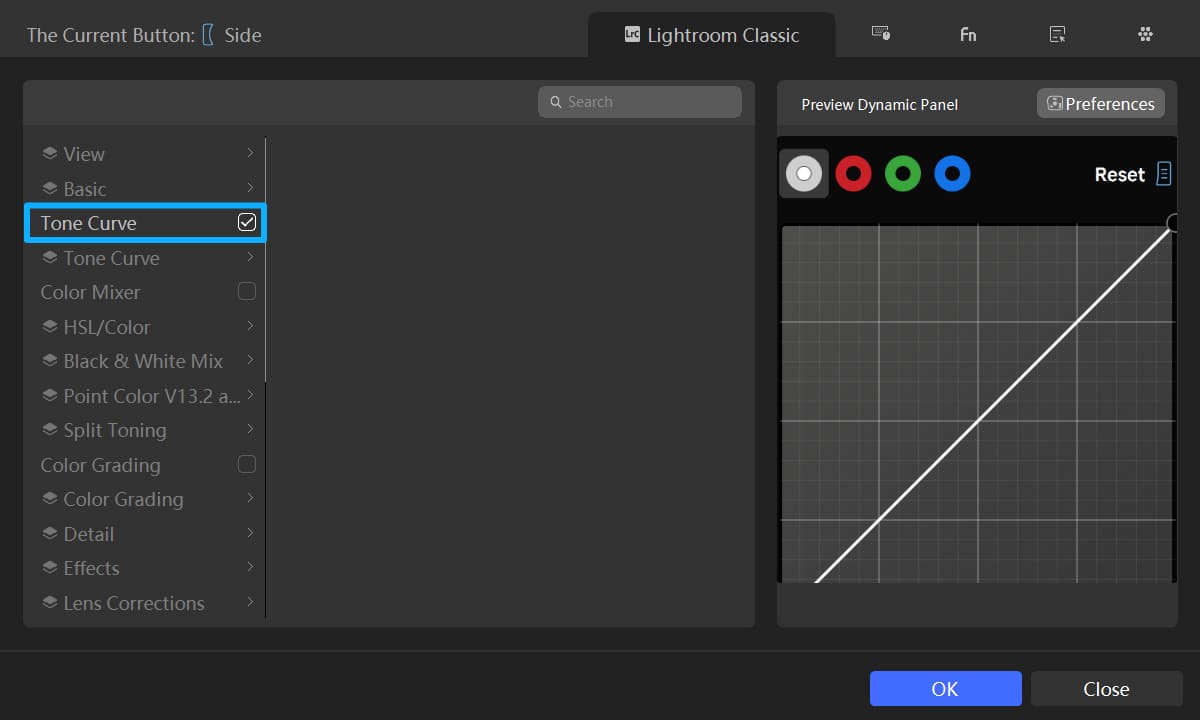
That said, we still keep the parameter bar version of these three tools. You can choose the one that fits your workflow best.
Feature Compatibility
1. Supported platforms:
- Windows
- Mac
2. Supported software versions:
- Lightroom Classic: version 14.1 or later (Some features may not work well on earlier versions.)
- Lightroom: version 9.0 or later (This feature was built based on this version. Lightroom is an online app, so we recommend using the latest version for the best experience.)
Dynamic Panel V2: A Detailed Guide
1. Tone Curve
| Traditional Tone Curve | Dynamic Panel V2 |
|---|---|
| You need to look for the panel in the list on the right, or remember the shortcut to jump to it. | You can call up the panel right where your mouse is, so you can use it quickly without moving the mouse back and forth. No need to remember shortcuts. |
| You adjust the curve by clicking and dragging the control points with the mouse. For fine-tuning, you need to hold Alt / Opt and drag with the mouse, which many people do not know. Most of the time, users just move the mouse very carefully for small adjustments. | Just turn the Knob or Scroll to create control points, and use the dial and wheel together for both fine adjustments and step-by-step control. |
Dynamic Panel V2 brings back the most commonly used features from the native Tone Curve panel in Lightroom and Lightroom Classic. It offers four curve modes: point curve, and the red, green, and blue curve channels. It also supports combined mouse and TourBox control.
You can add a control point, adjust its position, or delete the selected point with TourBox. You can also create a point with the mouse, drag to adjust its position, and double-click to delete the selected point.
2. Crop
| Traditional Crop | Dynamic Panel V2 |
|---|---|
| You have to use the crop panel on the right, or work directly on the canvas in the middle with the mouse. Either way, you need to keep moving the mouse back and forth. | You can call up the panel right where your mouse is, so you can use it quickly without moving the mouse back and forth. No need to remember shortcuts. |
| Some features, like flip horizontal/vertical and changing the aspect ratio, do not show clearly in the software. You have to remember the shortcuts yourself, and they are easy to forget. | The panel is simple and efficient, so it is easy to use. |
| To adjust the composition, you can drag the image in the canvas with the mouse or use the arrow keys. To fine-tune the crop, you need to drag the corners or use the angle slider in the crop panel on the right. This means more mouse movement between different areas. | The panel has a special optimization for Composition Mode. In this mode, it uses a separate set of controls, which makes fine-tuning faster and smoother. |
Using the Crop feature in Dynamic Panel V2 makes it easier to crop your image and improve the composition.
You no longer need to switch back and forth between the mouse and keyboard. You can handle basic cropping directly from the crop panel with tools like Angle and Aspect. With our specially developed Composition Mode, you can also fine-tune the angle, position, and zoom more smoothly, so it is faster to find the look you want.
The Crop panel in Dynamic Panel V2 includes 7 functions: Angle, Aspect, Rotate Left, Rotate Right, Switch Ratio, Lock Ratio, and TourBox's exclusive Composition Mode.
After you use Aspect, a second-level size menu will appear, making it easy to switch between photo ratios and customize them as well.
Our exclusive Composition Mode includes the following functions and supports custom button mapping:
- Angle
- Vertical Pan
- Horizontal Pan
- Zoom & Reframe
- Reset Crop
- Previous Photo (not editable)
- Next Photo (not editable)
3. Color Grading
| Traditional Color Grading | Dynamic Panel V2 |
|---|---|
| With the traditional workflow, you need to manually look for the right panel in the list on the right, or use a shortcut to jump to it. | You can bring up the panel right where your mouse is. There is no need to move the mouse back and forth, and you do not need to remember complex shortcuts. |
| When adjusting settings, you mainly rely on the mouse. If you hold Alt / Opt, you can make even finer adjustments. | Just hover over a color to preview it first. Then use the TourBox Knob to adjust hue and the Scroll to adjust saturation. The whole color grading process becomes more direct and more precise. |
With Dynamic Panel V2 Color Grading, you no longer need to carefully drag those tiny color controls with the mouse. It makes it much easier to create a more cinematic look.
We worked hard to bring back the core functions of the native Color Grading panel in Lightroom and Lightroom Classic. The interaction is very close to Adobe's built-in panel, so if you are already used to Adobe's color grading tools, you can get started with Dynamic Panel V2 very quickly.
When using the color grading wheels, we recommend using TourBox together with the mouse. You can use the mouse to switch between different wheel modes, then point to the wheel and use the TourBox Knob to adjust hue and the Scroll to adjust saturation. Pressing the Knob can also quickly reset the current wheel.
4. Preset
| Traditional Presets | Dynamic Panel V2 |
|---|---|
| You can only preview the effect by hovering over items in the list with the mouse. | You can bring up the panel right where your mouse is and preview effects quickly. You can also use mouse hover, or the TourBox Scroll to switch between presets fast, which makes custom preset setup much quicker. |
Keep your favorite Lightroom and Lightroom Classic presets close at hand. Just scroll through different styles to see the effect in real time, without digging through a long preset list or clicking back and forth. It makes browsing faster and the whole process smoother and more efficient.
One thing to note: real-time preview for presets only works when the Dynamic Panel is set to Presets. So we recommend keeping your commonly used presets in one Dynamic Panel, instead of mixing them with other color tools, which can make the panel feel cluttered.
More Features Are on the Way
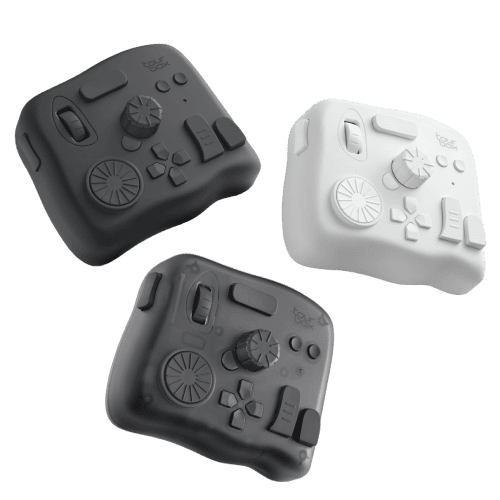
If you haven't tried TourBox yet and like what you've seen so far, click the link below to find the TourBox model that fits your workflow best.
We're continuing to improve Dynamic Panel and will keep adding new features in future updates. We also plan to bring Dynamic Panel support to more photo editing software, including Camera Raw and Capture One, so stay tuned.
To learn more about the Dynamic Panel, click the link to our Detailed Page.


