TourBox for DaVinci Resolve: HoverAdjust, Shuttle Browse & Playback
DaVinci Resolve's Speed Editor is famous for being intuitive and precise. But its cost, size, and steep learning curve mean many Resolve users still rely on a keyboard and mouse. Constant dragging and switching keys causes fatigue and hurts precision and timing.
If you've been editing and color grading in DaVinci Resolve with a keyboard and mouse for a long time, you'll be excited by the new features TourBox just added.
In the TourBox Console 5.10.0 update, we introduced three handy tools: HoverAdjust, Shuttle Browse, and Shuttle Playback.
These three features make editing and color grading in DaVinci Resolve feel as natural and direct as driving. Before we dive into the details, take a quick look at the short video below to see what's new.
How to Get and Use TourBox's New Features for DaVinci Resolve?
First, download the latest TourBox Console (version 5.10.0 or newer) from our website. That will let you use the new features we built for DaVinci Resolve.
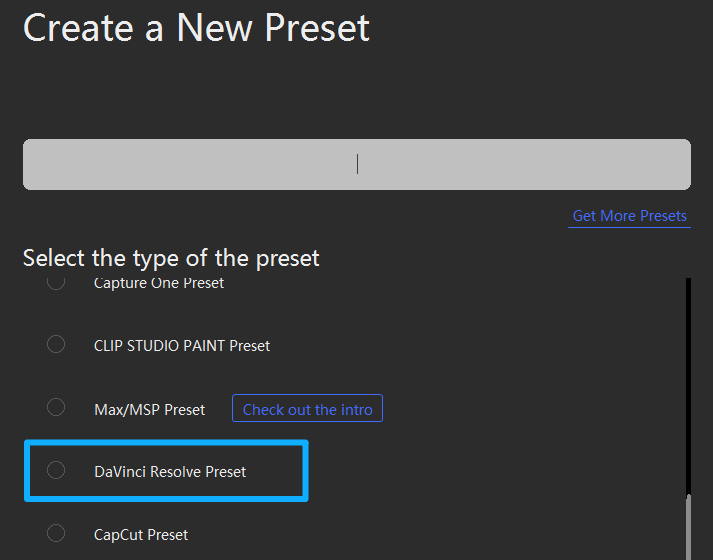
After you update TourBox Console, open it and create a new DaVinci Resolve preset. This step is important — it will save you a lot of setup later.
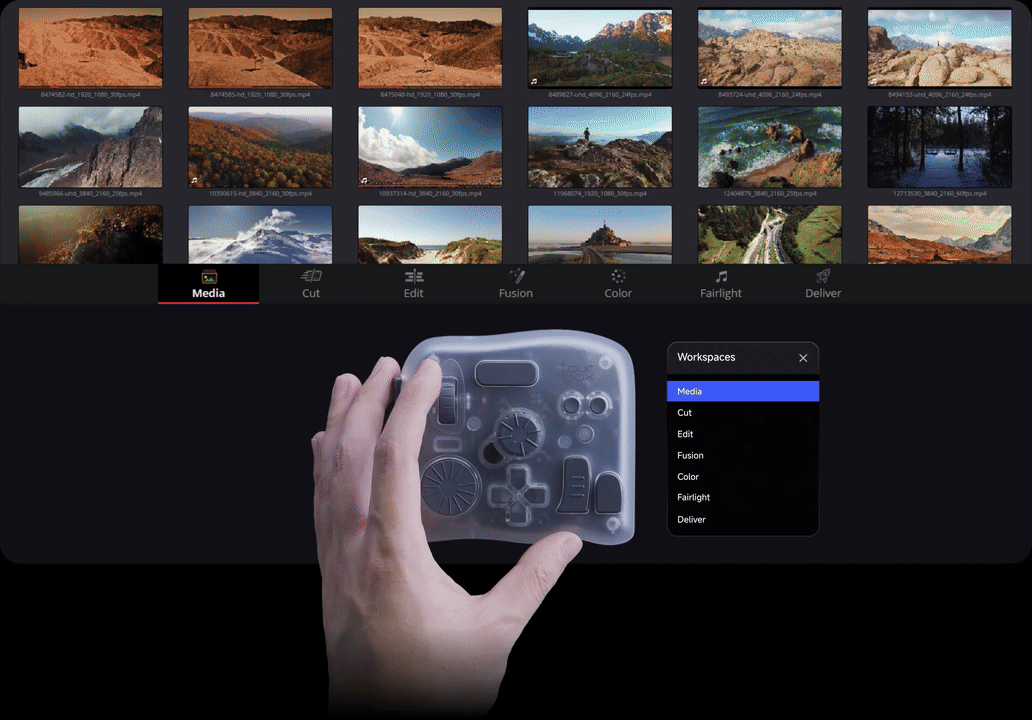
When you create the new DaVinci Resolve preset, you'll notice it's different from past versions. The preset now includes seven sub-presets: Media, Cut, Edit, Fusion, Color, Fairlight, and Deliver. Each one matches one of DaVinci Resolve's workspace pages.
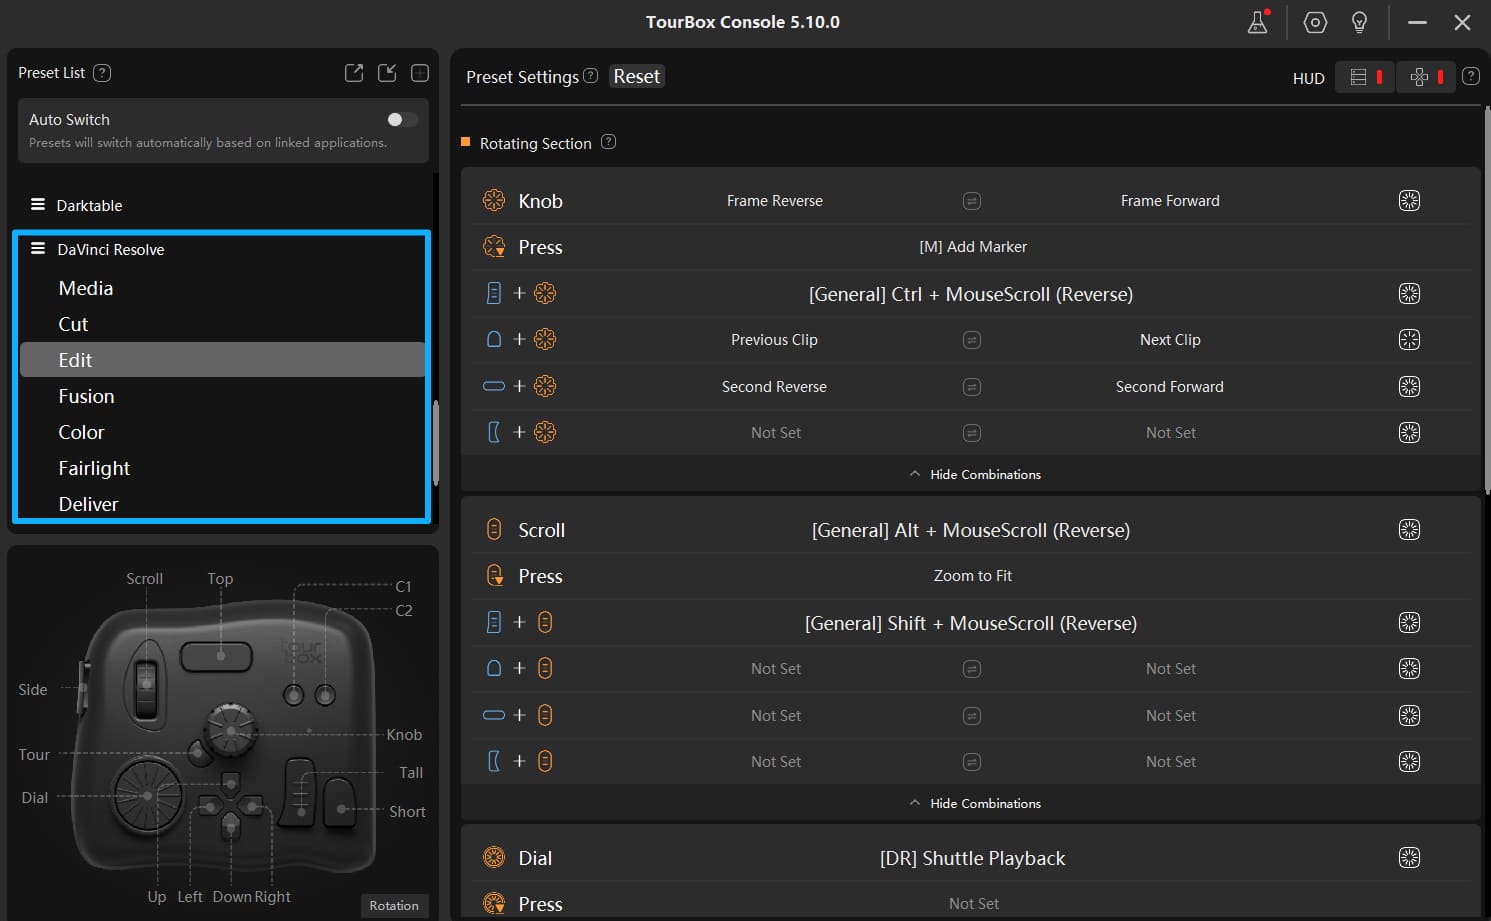
You can customize the button and knob assignments for each sub-preset to match how you work. When you're editing or color grading in Resolve, TourBox will automatically detect the current page and switch to the correct sub-preset.
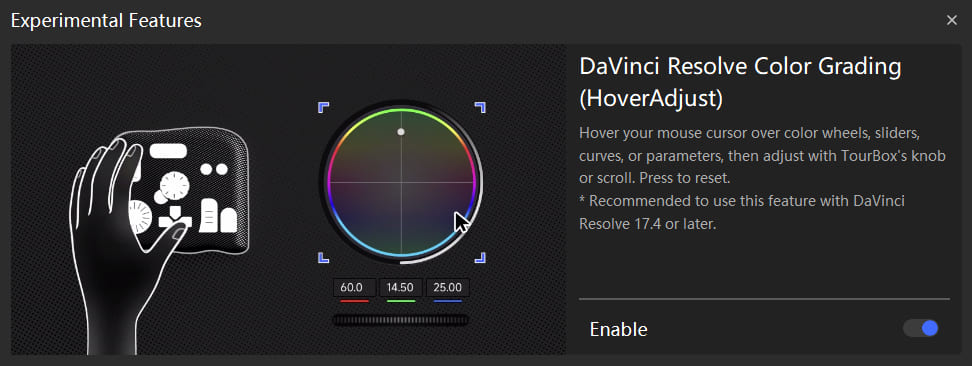
To enable HoverAdjust, open TourBox Console and go to the top-right menu called "Experimental Features." HoverAdjust is on by default, but you can toggle it there.
To use the Shuttle Browse and Shuttle Playback features, click any knob, and then you can find them on the DaVinci Resolve page in the settings panel. You will see the two new features there.
What Is HoverAdjust and How to Use It?
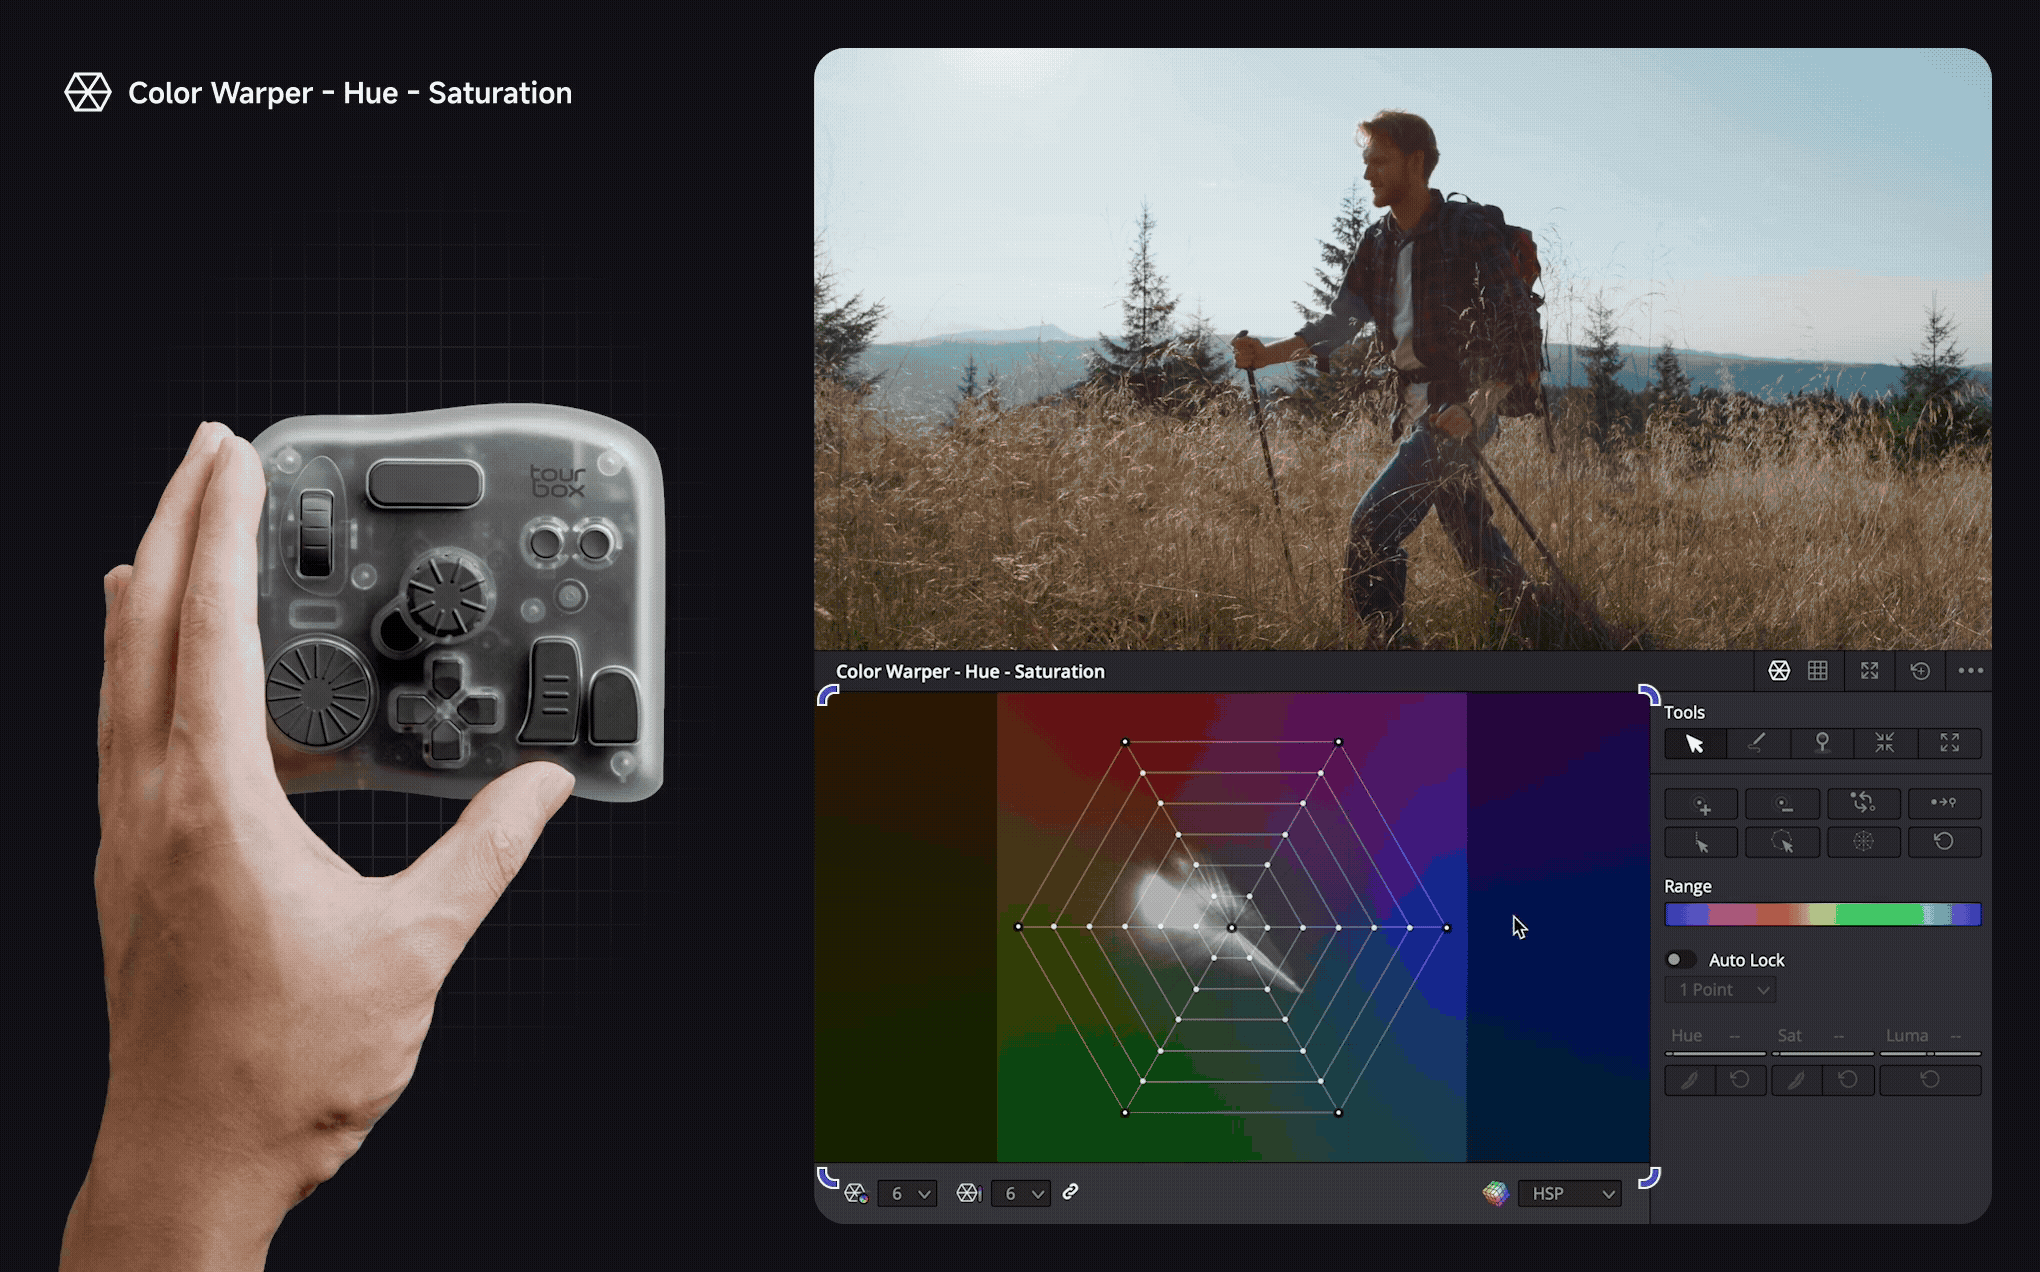
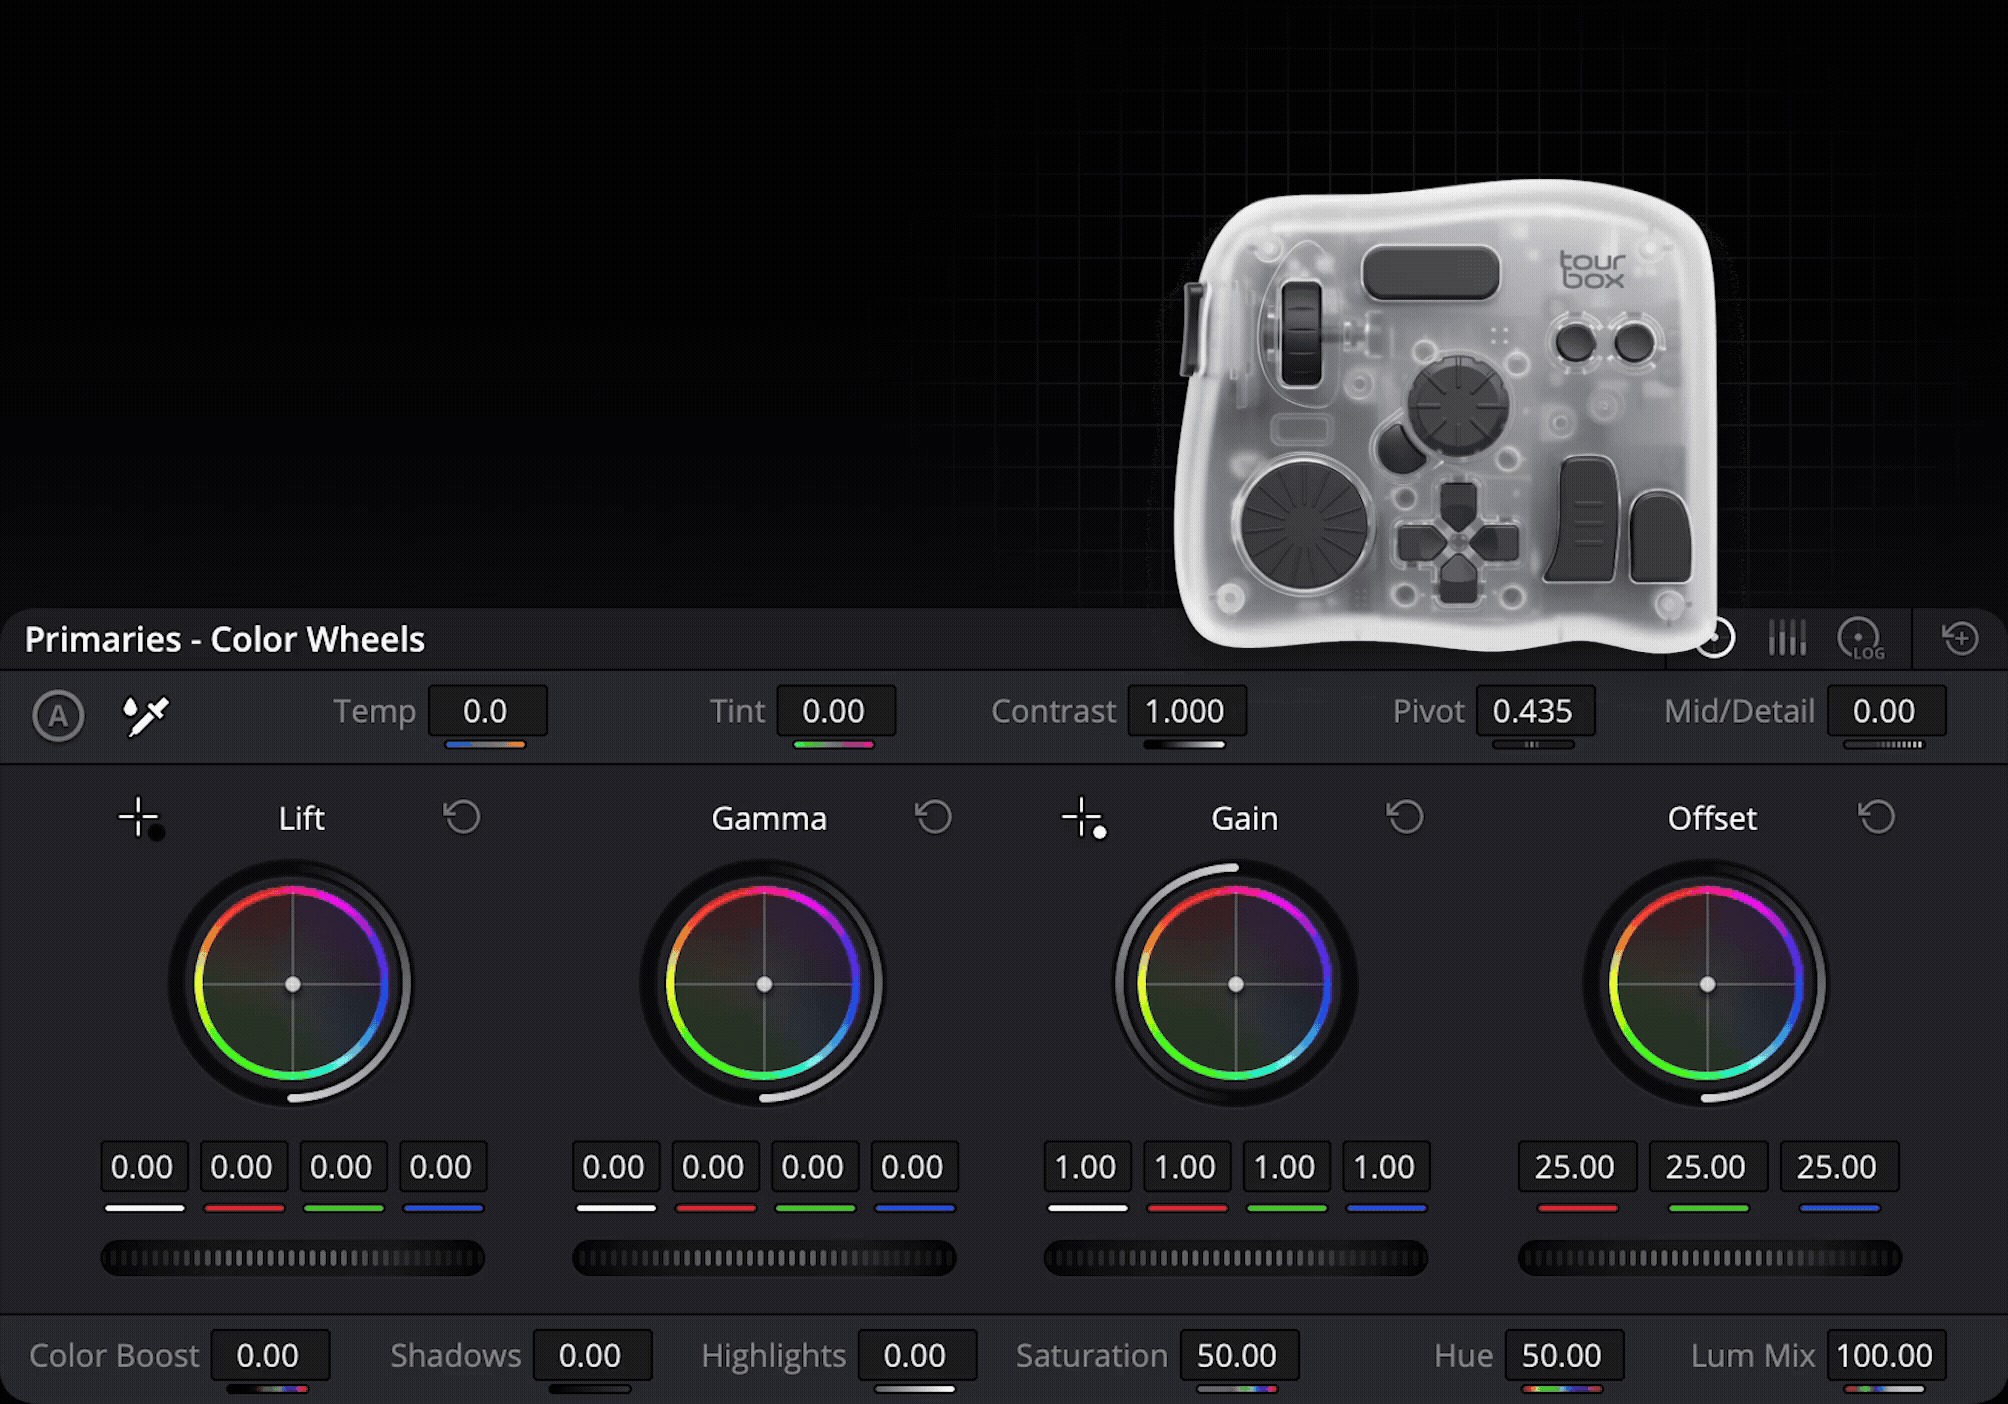
When you use the mouse to drag curves, color wheels, or other controls in DaVinci Resolve, the value can easily slip or drift when you release. That makes it hard to land on the exact number you want.
Therefore, TourBox made HoverAdjust for DaVinci Resolve. It's fully compatible with the Color page.
When your mouse hovers over a color wheel, slider, curve, or number box, TourBox recognizes it. The knob temporarily takes over fine adjustments for that control. Move the mouse away, and the knob goes back to its normal timeline control.
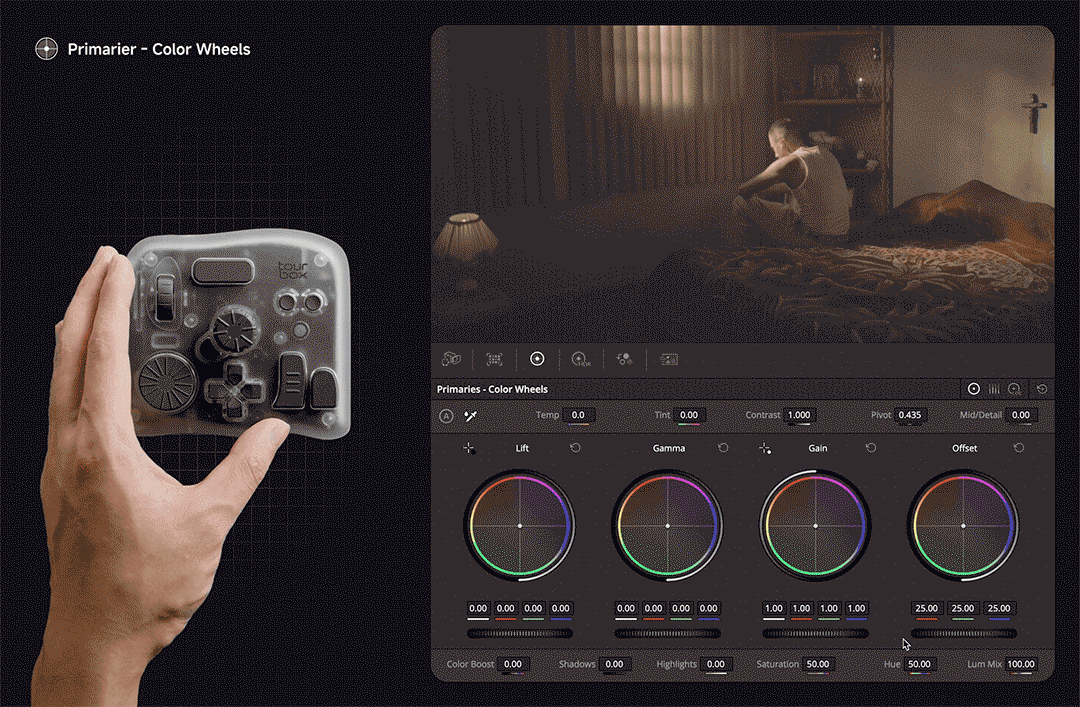
Whether it's Color Wheels, Curves, or Color Warper, you can use HoverAdjust on any Color page tool that normally needs mouse clicks and drags.
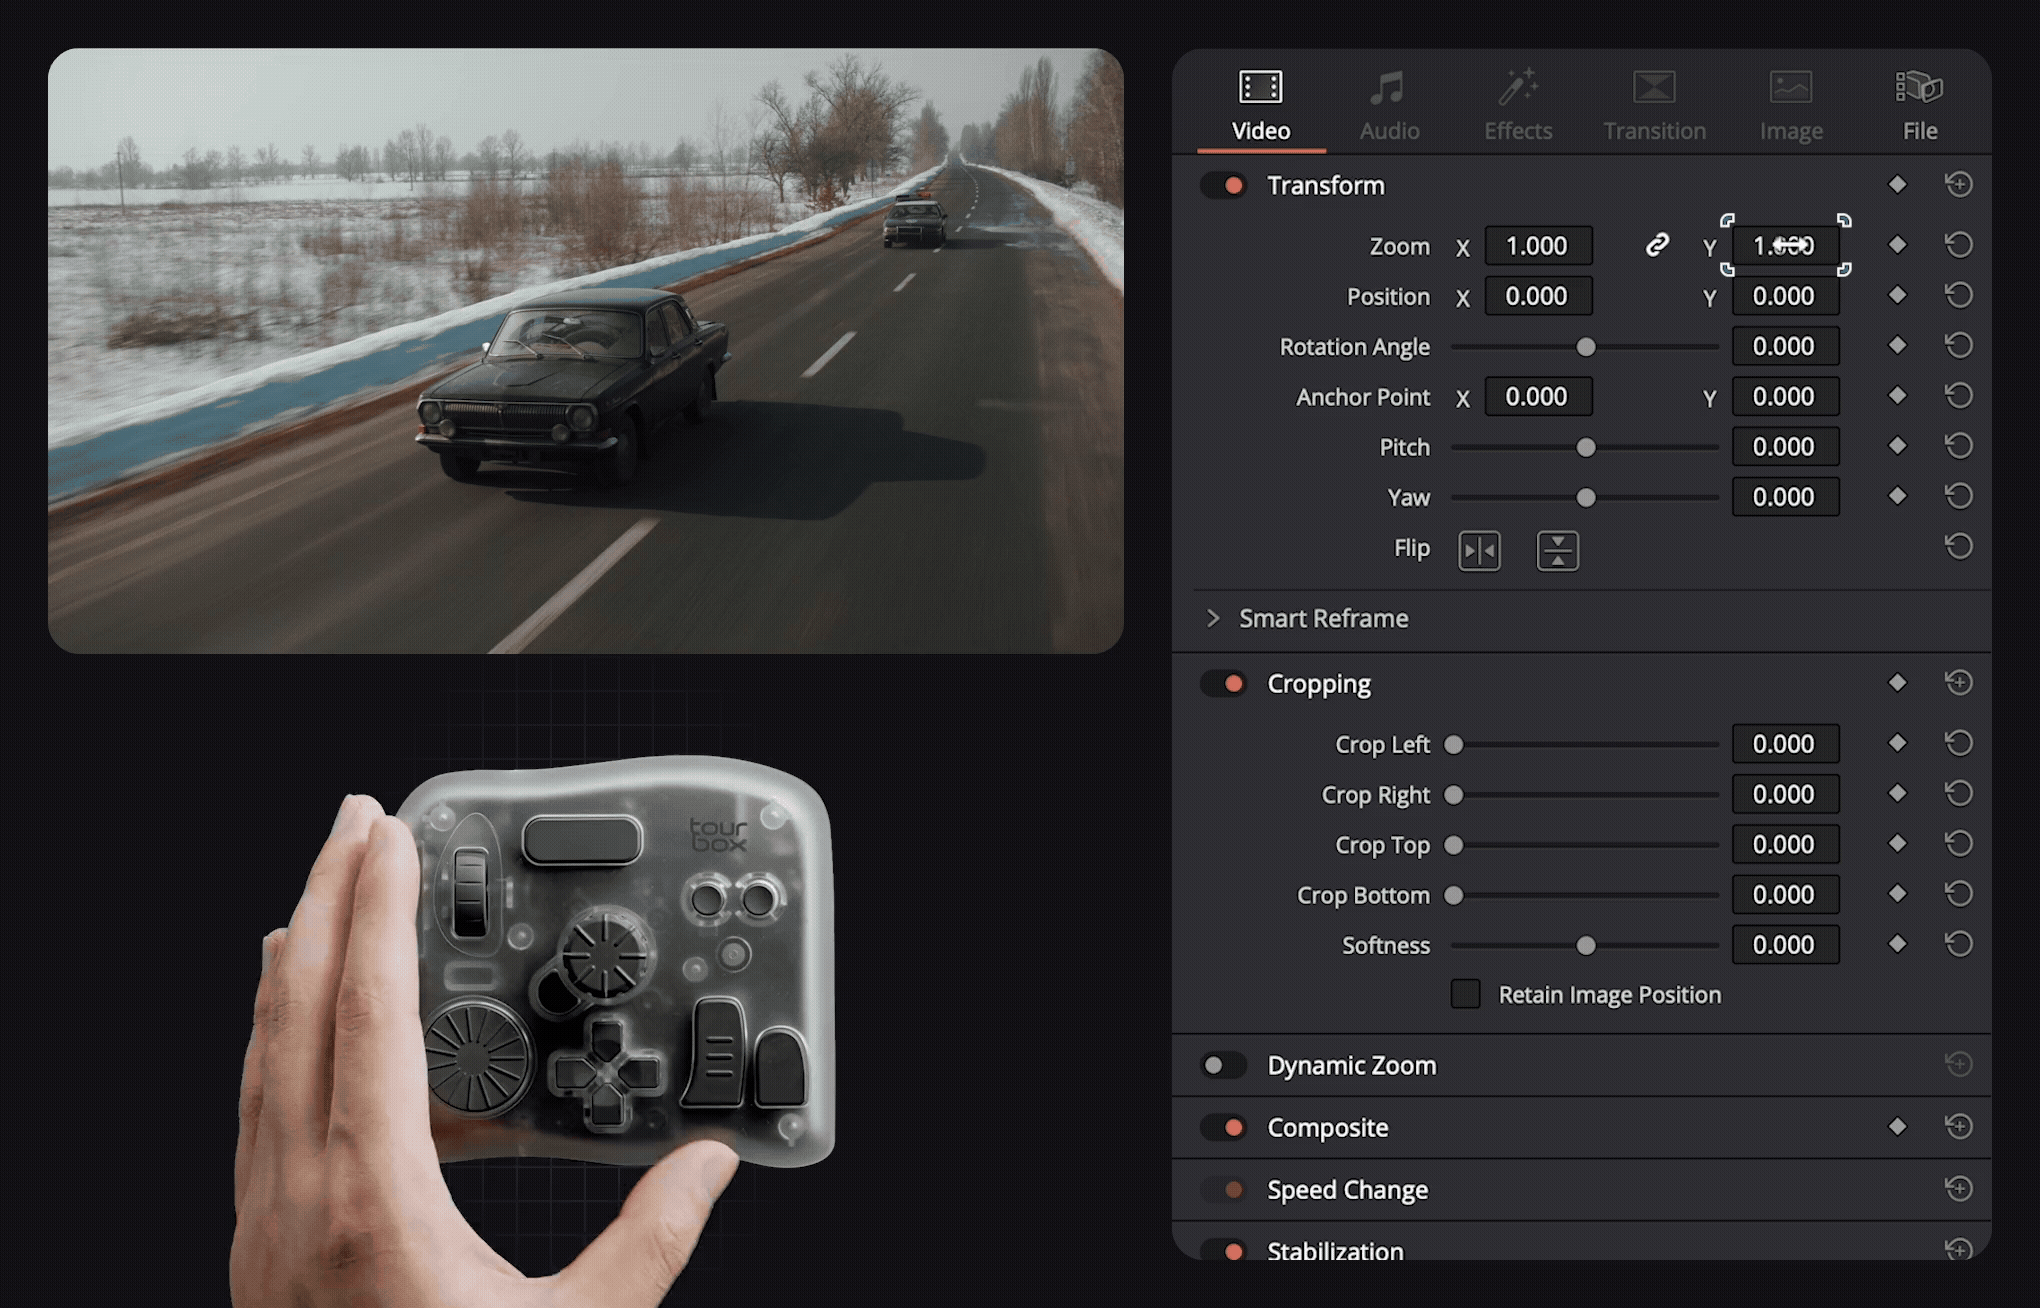
We're still building HoverAdjust for the Edit and Fairlight pages. Right now, though, you can use TourBox to tweak controls on Edit and Fairlight by using the built-in "Mouse Drag Simulation" function.
Also, if you take a little time to explore, you'll find you can combine a HoverAdjust flow with TourBox Console's mouse-macro positioning. Map a button to jump to a control, then turn the knob to change it — it frees up your mouse hand.
Why you should definitely try HoverAdjust:
- You don't need a big color control surface. You can adjust what you see on screen.
- No more values drifting when you let go, and your hands get much less tired.
- It doesn't overwrite your knob assignments. Point, nudge, move away, and you’re back on the timeline in one smooth flow.
- For most users who don't have a control surface, TourBox is more affordable, more portable, and easier to use in many situations.
What Is Shuttle Browse and How to Use It?
TourBox brings the touchpad's sideways inertia swipe to a knob: turn the dial to speed up, and when you let go, it keeps gliding.
This fixes the slow, clumsy process of dragging the scrollbar to find a spot on long timelines. It also stops your flow from getting broken when you switch back and forth between mouse and keyboard.
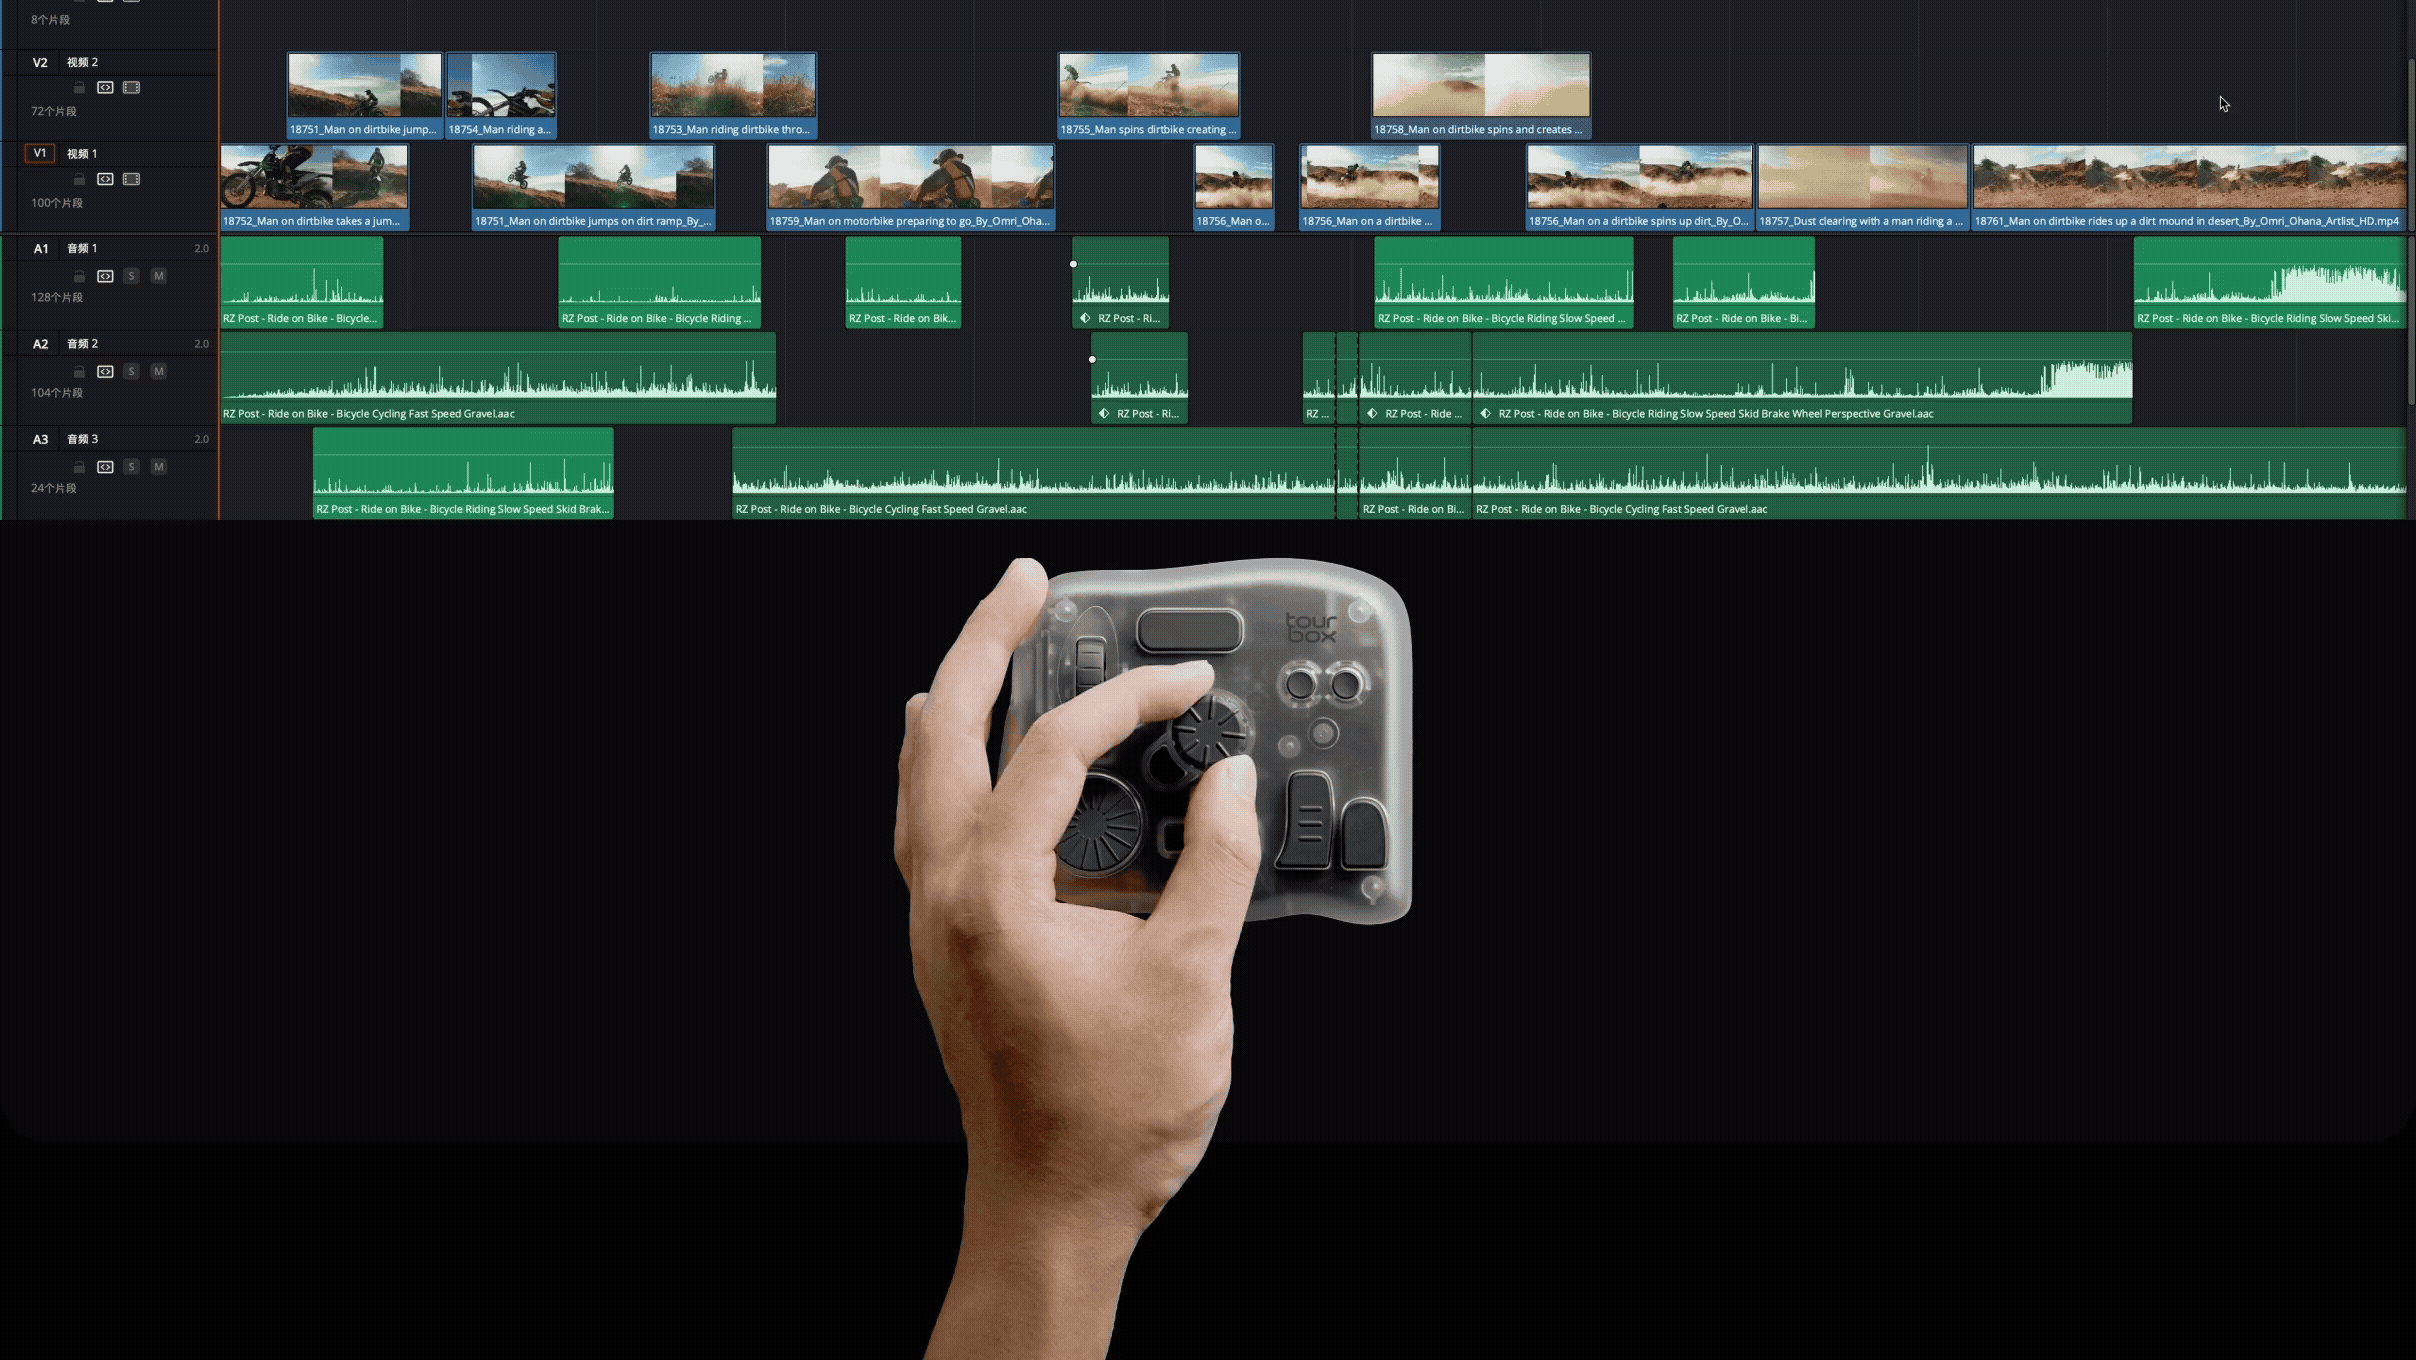
Compared to mouse work, you can use one finger to flick the TourBox dial to quickly preview the timeline. That replaces holding-and-dragging with the mouse or the Shift + mouse-wheel combo.
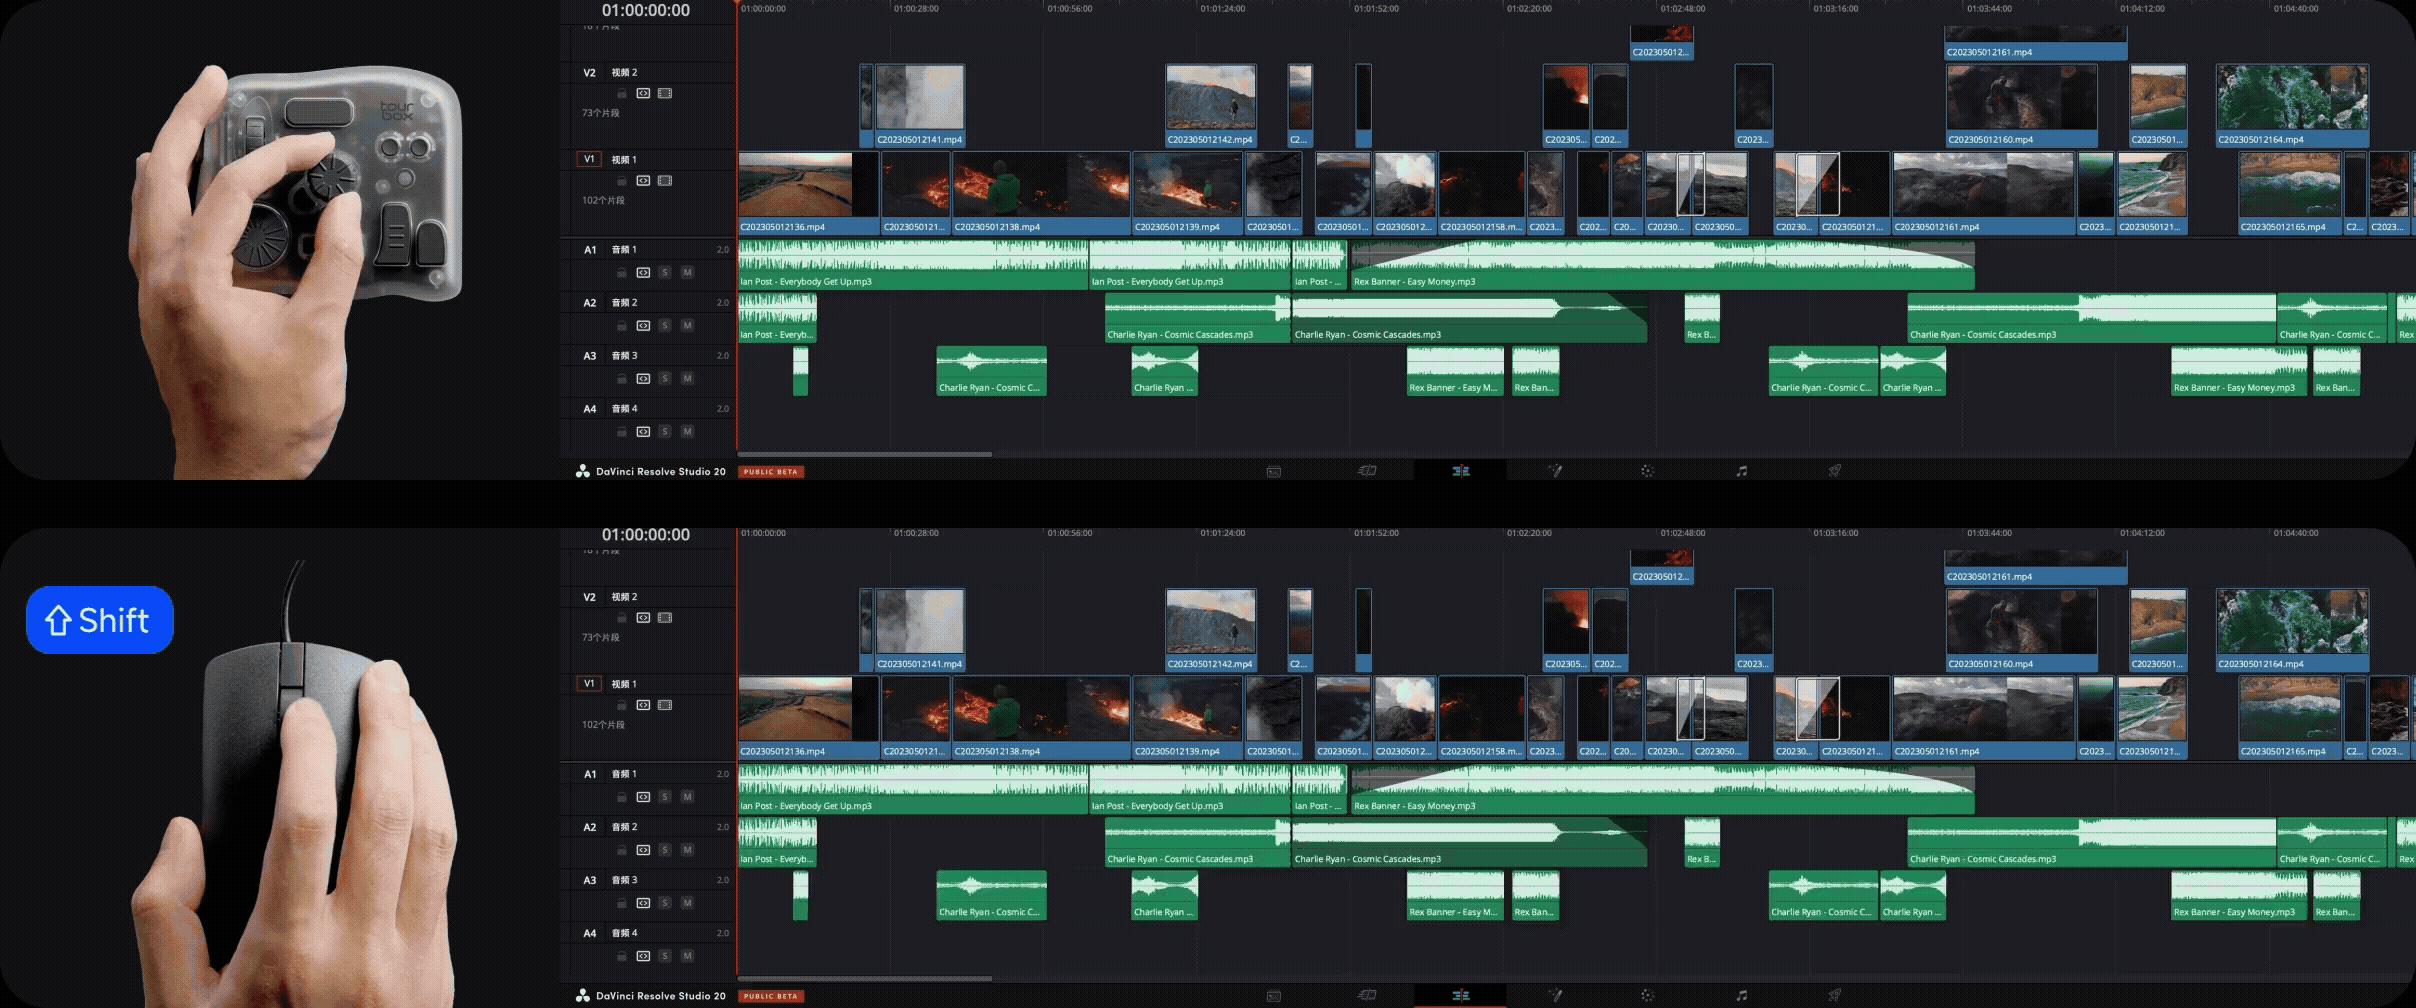
One thing to note: on the Cut page, it moves in single- or multi-frame inertial steps, while on other pages it scrubs smoothly along the timeline.
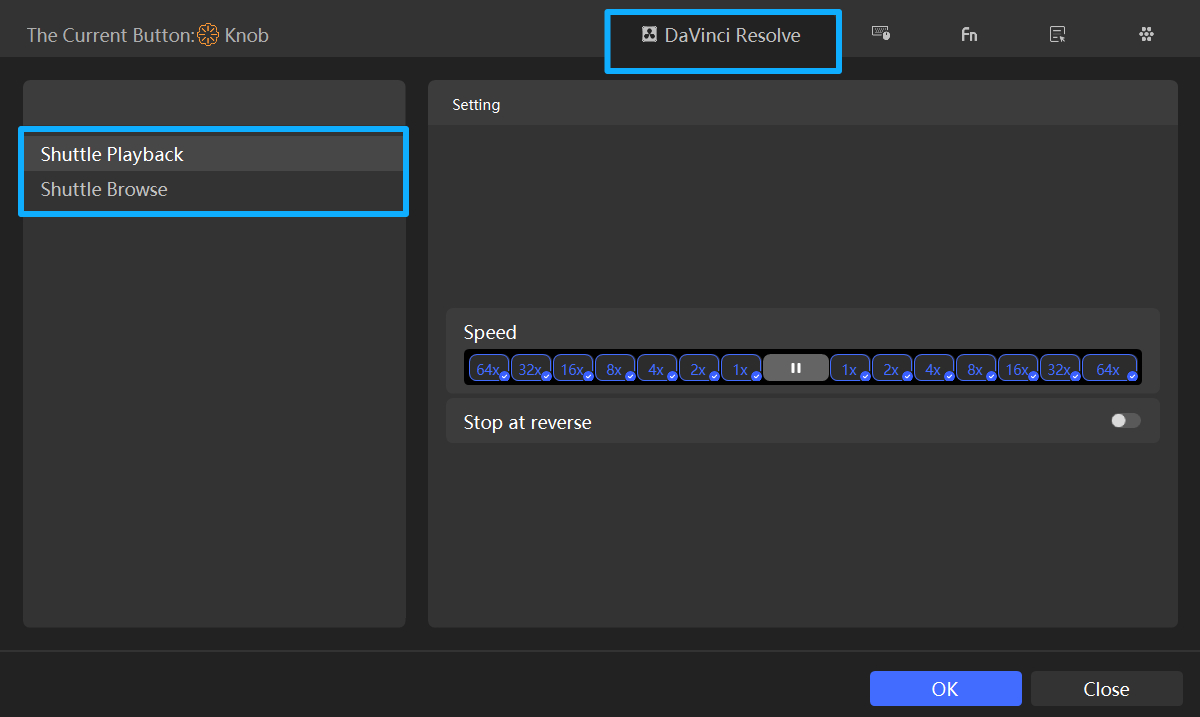
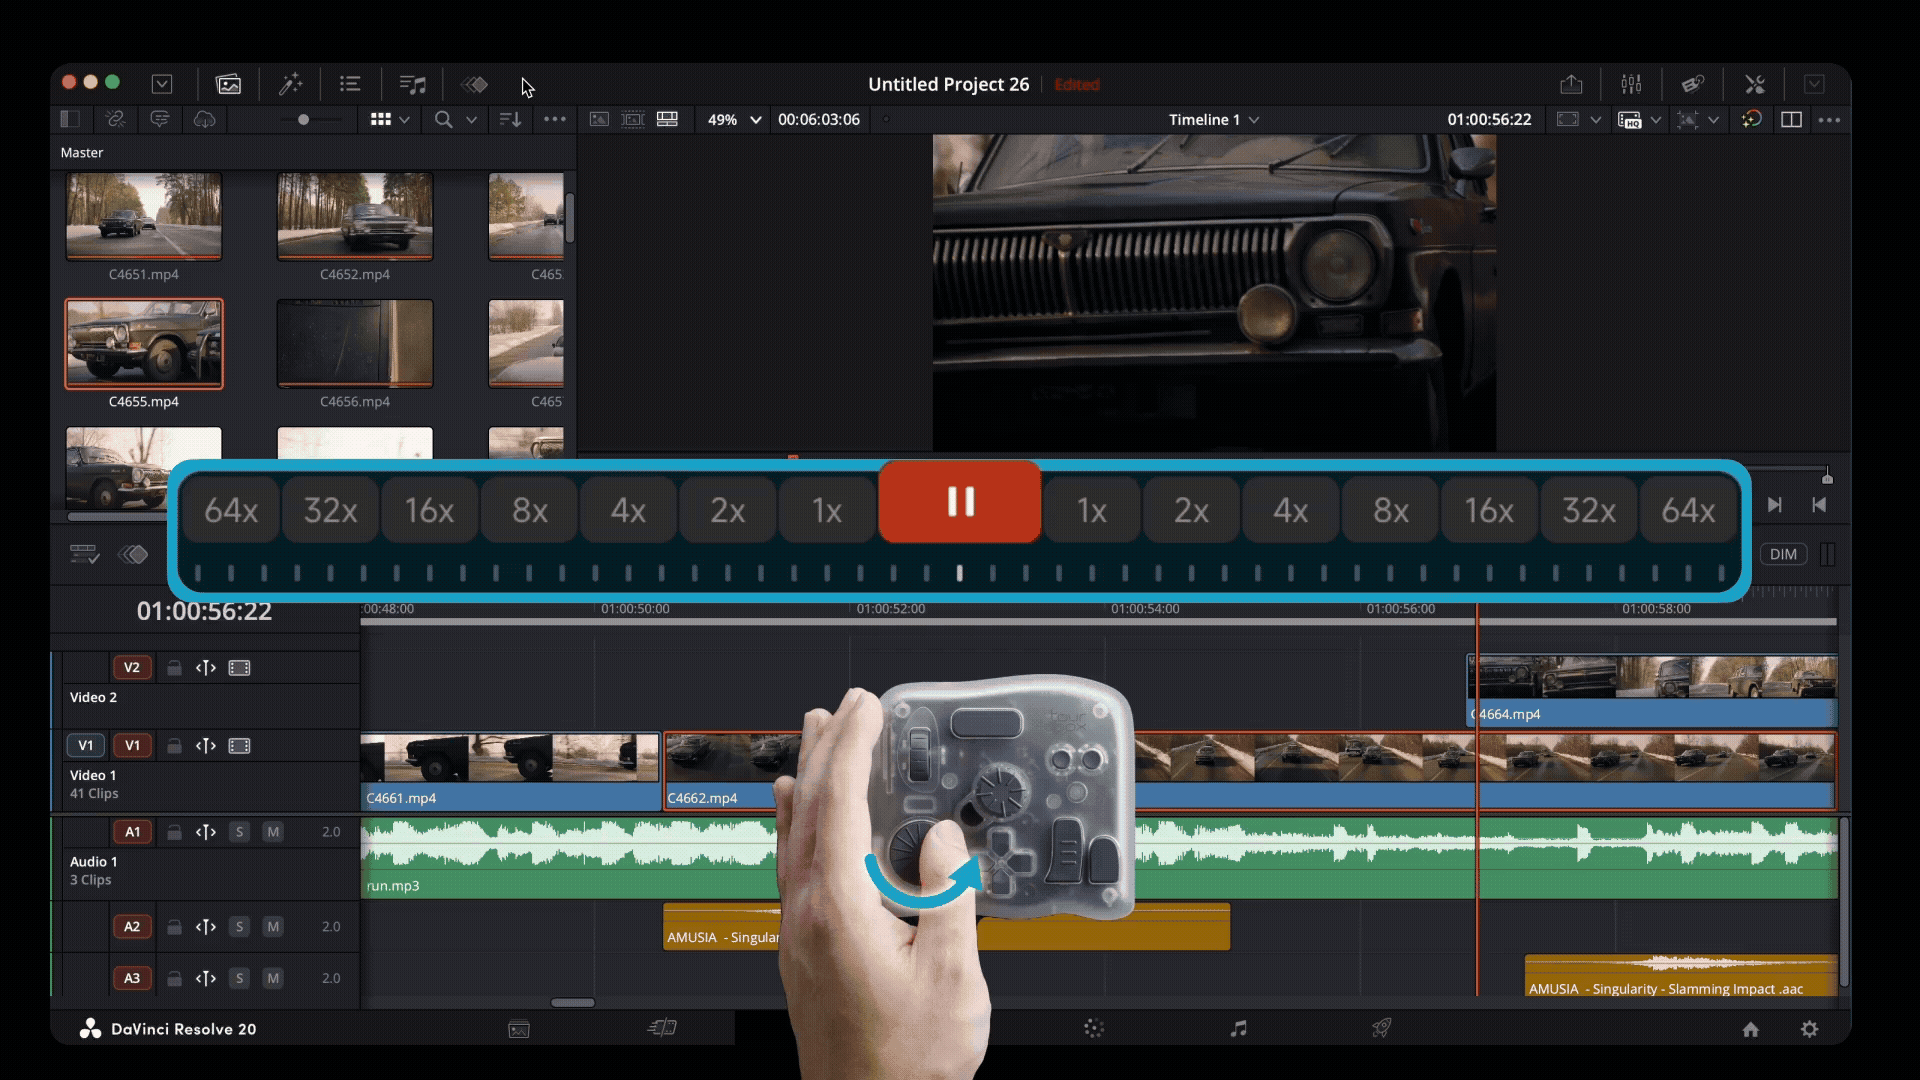
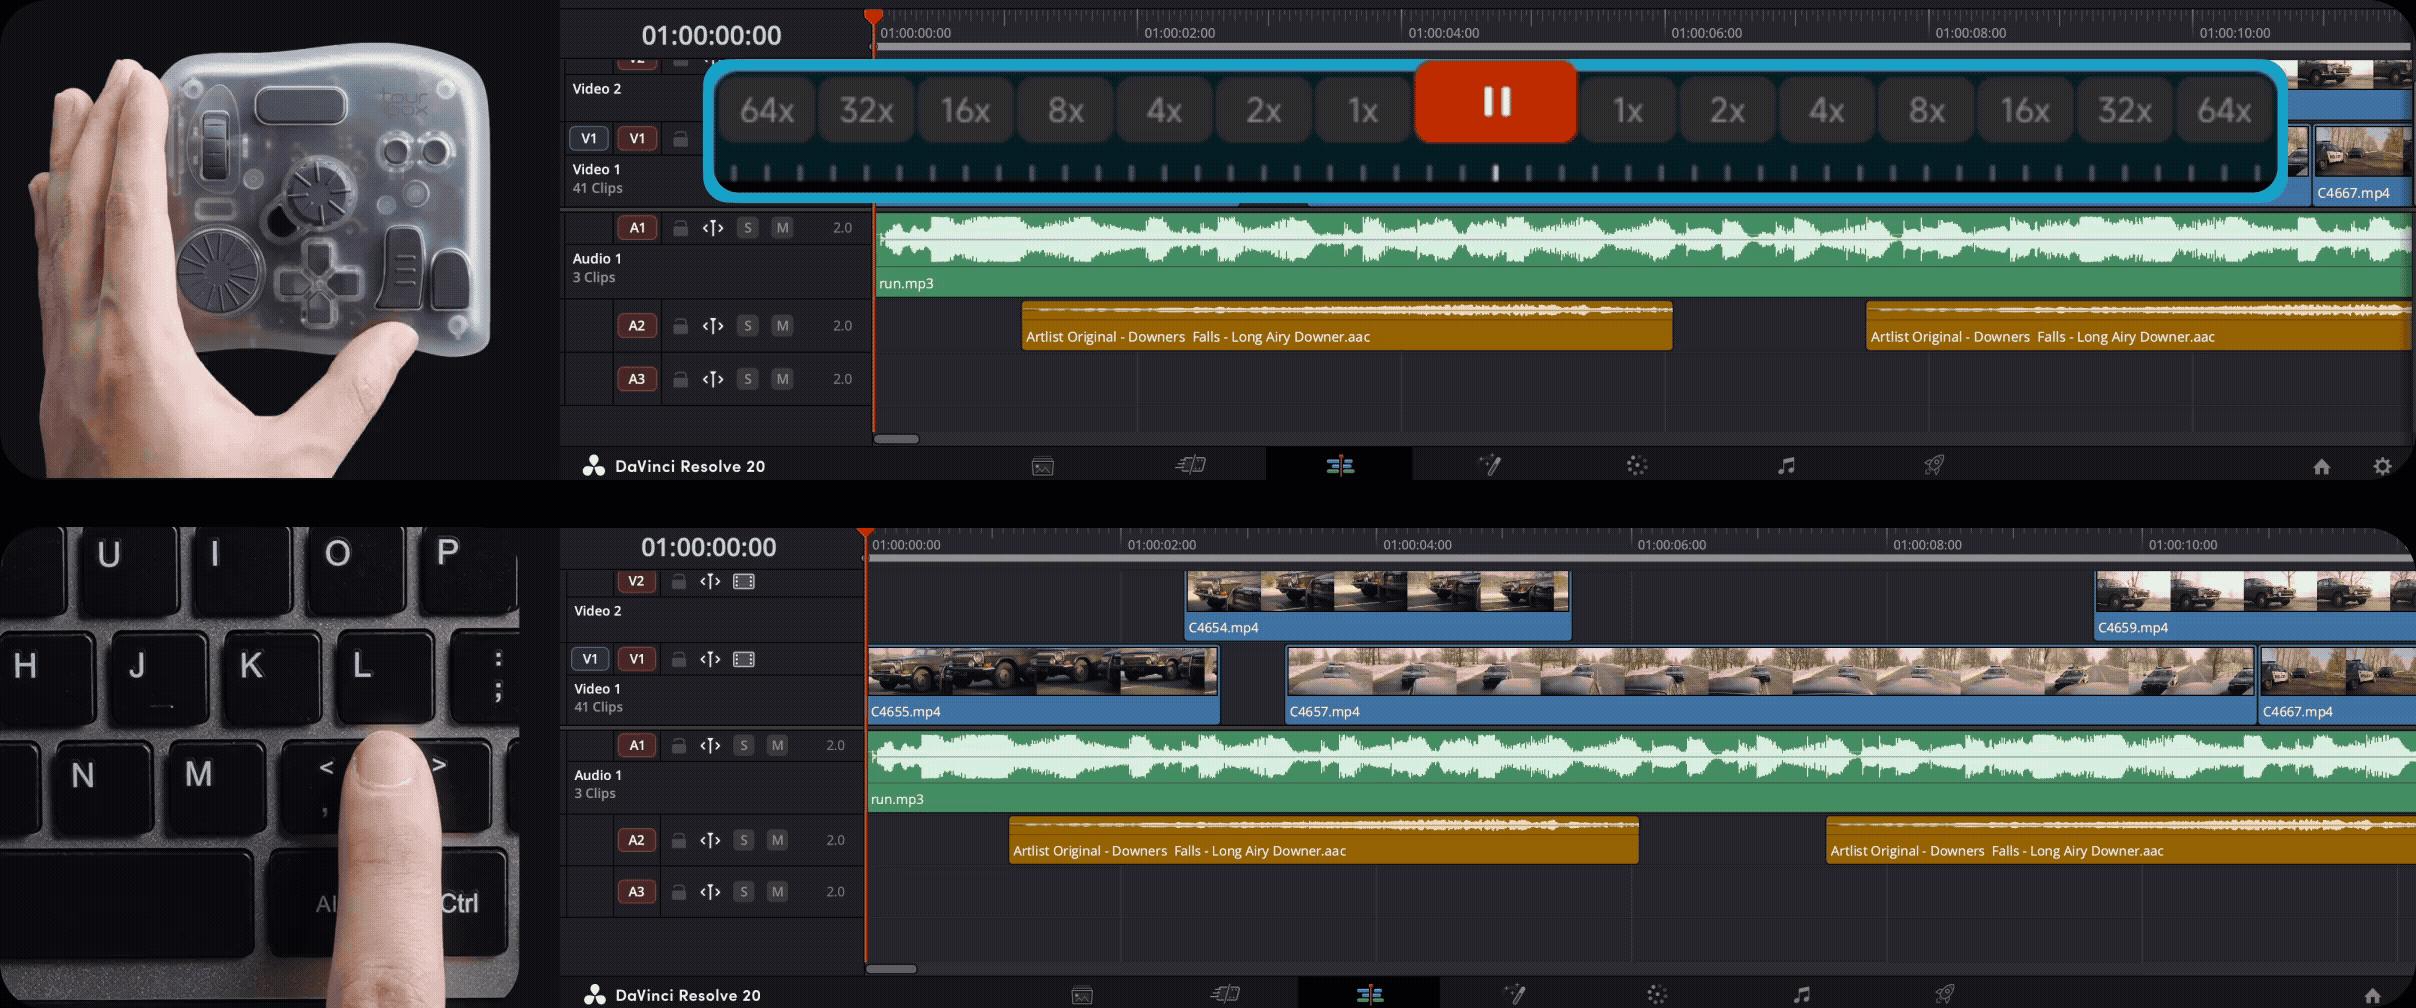
What Is Shuttle Playback and How to Use It?
If you often use JKL to control playback speed in DaVinci, you'll love this feature.
It combines forward/reverse playback and speed into a single knob. Turn the knob forward to step up the speed. Turn it backward to step the speed down.
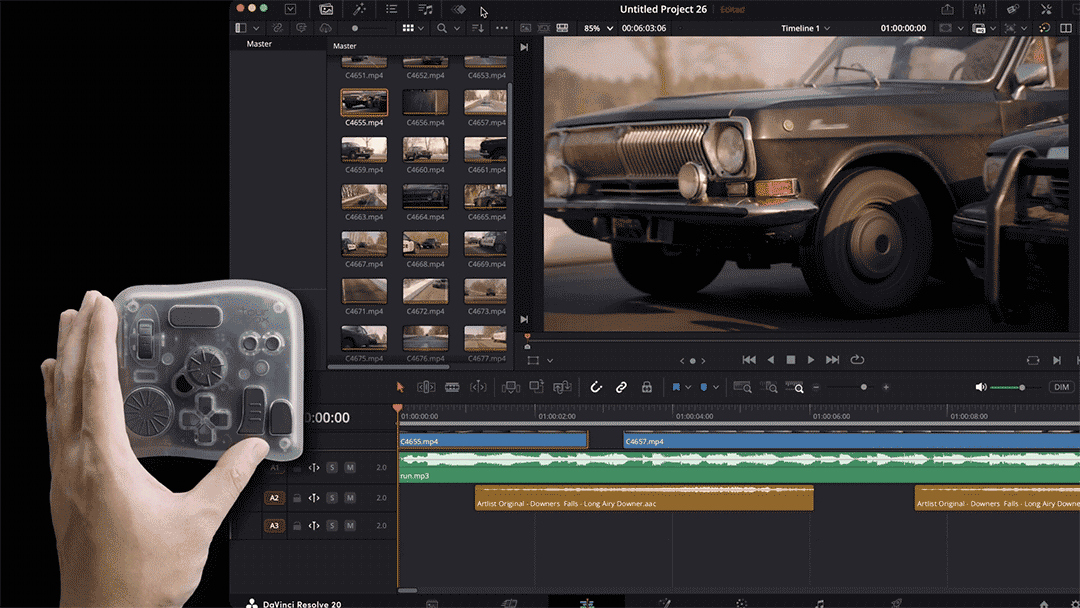
Playback speeds range from 1× to 64×. To change the playback speed level, open the TourBox Console, click Shuttle Playback on the DaVinci Resolve page, and then select the desired speed level from the panel on the right.
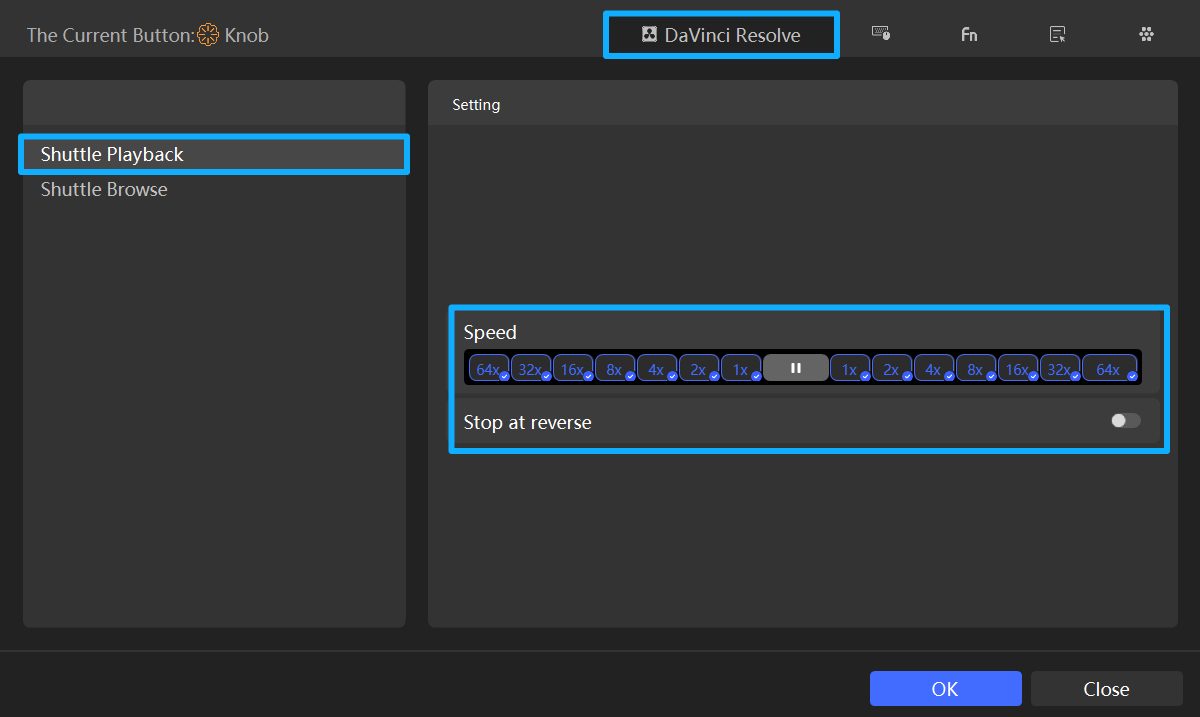
For example, you can keep only 2×, 16×, and 64×. Then the knob will only jump between those steps, and the UI will show the current speed in real time.
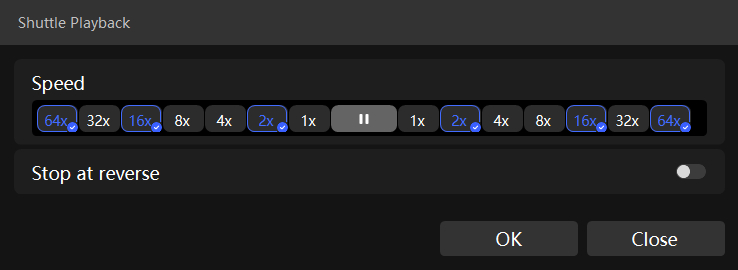
You can also enable "Stop at reverse," so a light backward turn will pause playback.
To drop from 64× down to 32×, just turn the TourBox knob in reverse. With the keyboard JKL method, you'd have to pause first and then press from 0 up to 36×.
If you do long screenings or reviews often, this driving-style speed control feels more natural. It's smoother than JKL's stepped jumps and breaks your flow less.
A New Experience Across the Whole DaVinci Resolve Workflow
Traditional keyboard-and-mouse editing has problems. You jump between many keys, click and drag a lot, and actions get interrupted. Switching between common commands can feel clumsy.
TourBox's layout of dials, wheels, and buttons gives you a smooth, connected way to work in DaVinci Resolve. It speeds up tasks like media management, editing, color grading, switching workspaces, and creating color nodes.
For most users who don't own an expensive control surface, TourBox offers a compact, affordable alternative. It lets you work with fewer steps, less hand movement, and easier control.
So if you're already a TourBox user and you use DaVinci Resolve, update your TourBox Console now and try the new features to see how they change your workflow!
If you haven't tried TourBox yet and these new features sound interesting, click the link below to find the model that suits you best.

For more details about this TourBox update for DaVinci Resolve, visit Our Page to learn more.