[TourBox Tips] How to Efficiently Trim Clips in DaVinci Resolve?
Want to master the quick editing tricks using TourBox in DaVinci Resolve? This simple tutorial has got you covered.
First, let's go over the four keyboard shortcuts you'll need for fast editing in DaVinci Resolve:
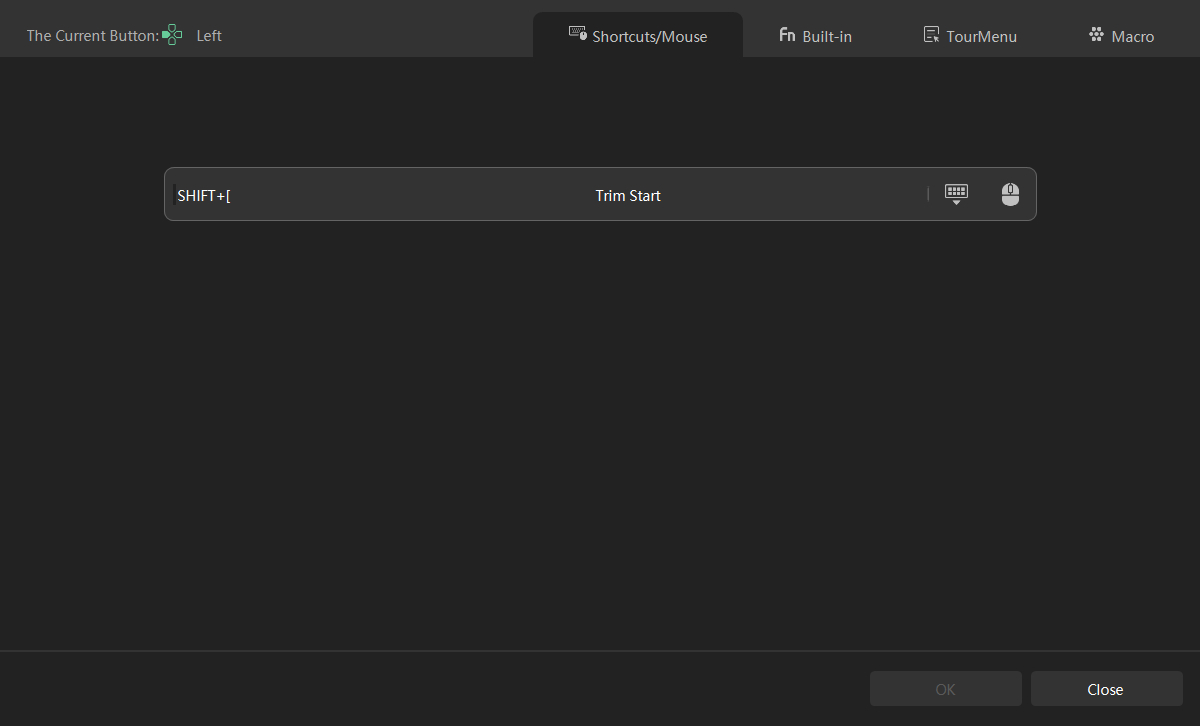
- "Shift + [": Trim Start
- "Shift + ]": Trim End
- "Ctrl/Cmd + Shift + [": Start to Playhead
- "Ctrl/Cmd + Shift + ]": End to Playhead
Assign "Shift + [" and "Shift + ]" to the Left and Right buttons on TourBox, respectively. Then, assign "Ctrl/Cmd + Shift + [" and "Ctrl/Cmd + Shift + ]" to the combination actions of "Top + Left" and "Top + Right" on TourBox.
To achieve quick editing, you also need to set up the positioning of the playhead on the timeline. Assign the commands "Frame Left" (the left arrow key on the keyboard) and "Frame Right" (the right arrow key) to the Knob control on TourBox.
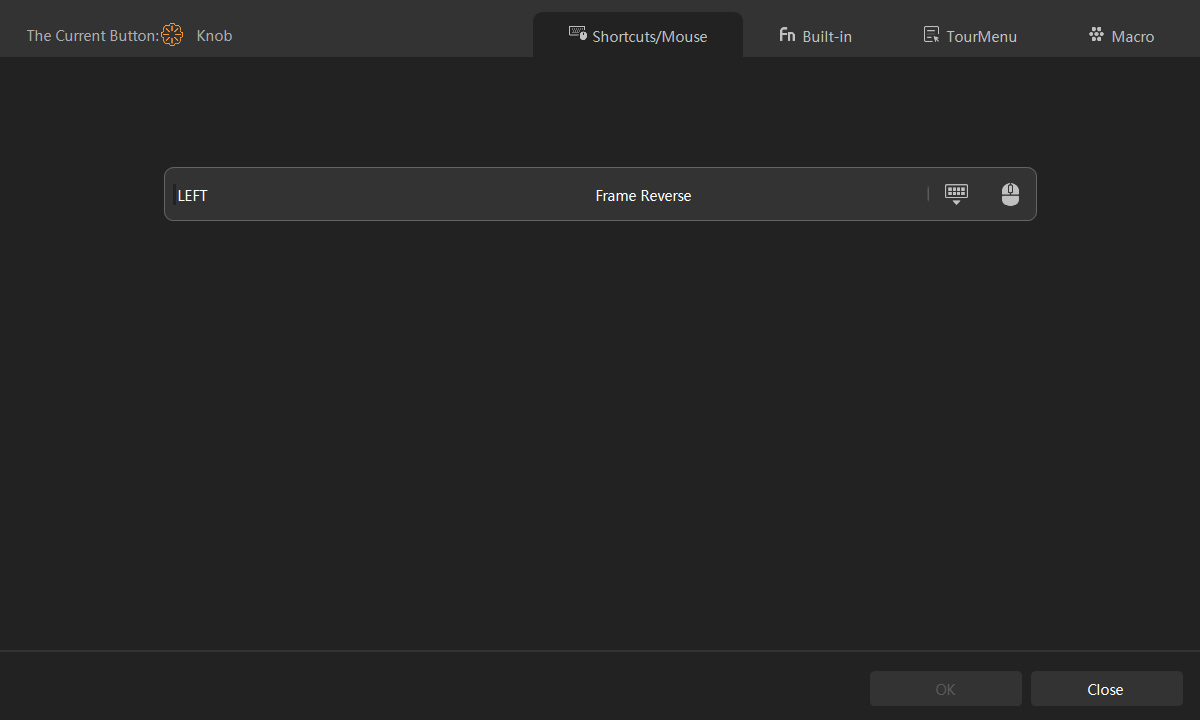
You can control the movement of the playhead by rotating the Knob control (adjust the rotation speed in TourBox Console).
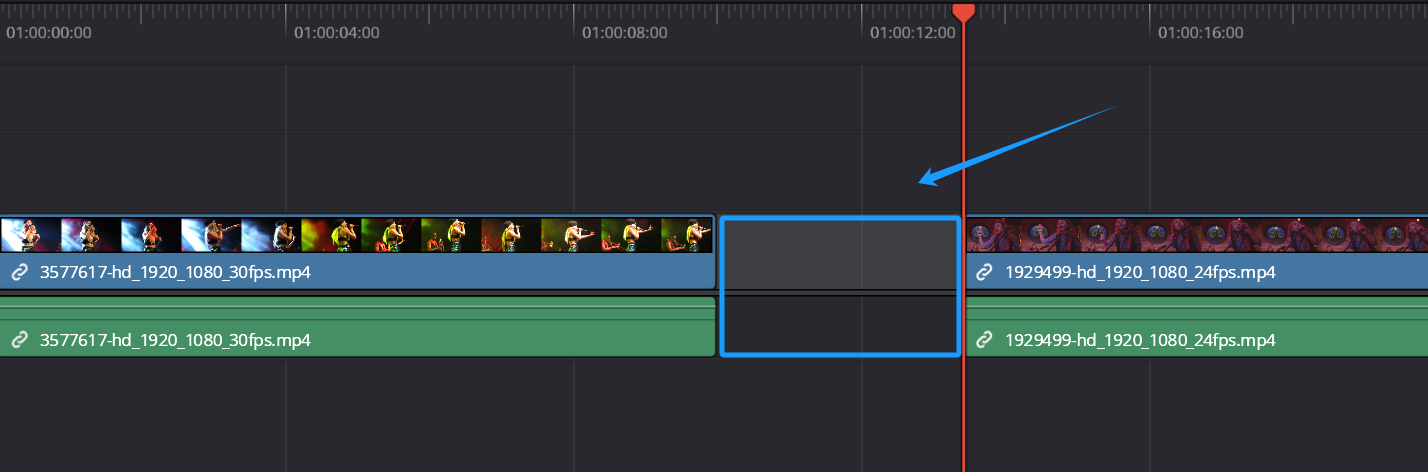
When the playhead is positioned at the desired clip, press the Left button on TourBox (Trim Start). You'll notice that the content before the playhead is deleted, creating a gap between the previous clip and the current one.
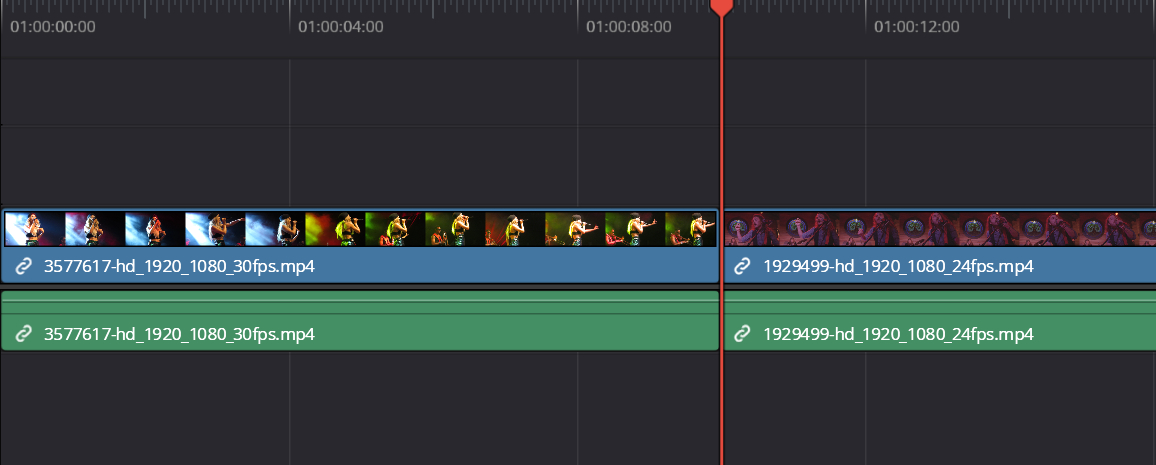
Press the combination action "Top + Left" on TourBox (Start to Playhead), and you'll see that the gap between the two clips is deleted. In other words, the start of the current clip aligns with the end of the previous clip.
Apply the same logic to the other two operations. Give it a try in DaVinci Resolve, and you'll see TourBox truly elevating your editing speed!