An Ultimate Guide to Depth of Field in Photography
Immerse yourself in a scene for a moment: a crisp winter morning, frost glittering on the edges of leaves, the world hushed and still. Your camera is in your hands, and you're aiming to capture that solitary bird perched on the icy branch, a stark contrast against the muted backdrop.
Yet, how do you make that bird pop, ensuring its sharp details are the star of your photograph, while the background is just an artistic blur? The answer lies in a pivotal photography concept called Depth of Field.
This universal principle is your secret weapon to manipulate the focus of your photographs, bringing depth to your close-up macro shots or bestowing a dreamy blur to your wide-ranging scenic vistas. It's your magic wand to transform simple captures into visually stunning masterpieces.
Are you ready to unlock this powerful tool and elevate your photography skills to new heights? Let's embark on this enlightening journey together.

In this article, you will learn:
- What Is Depth of Field?
- Why Is Depth of Field Important?
- Three Factors Affecting Depth of Field
- How to Use Depth of Field in Photography?
- How to Calculate Depth of Field Precisely?
- Frequently Asked Questions About Depth of Field
What Is Depth of Field?
Imagine you're looking at a photograph. Your eyes are immediately drawn to a specific point, vividly clear and sharply defined. This is the focal point, the heart of the image where the photographer's lens was precisely aimed.
Surrounding this point, there's an area where other elements also come into sharp relief, appearing clear and well-defined. This isn't just a coincidence - it's the result of a fundamental principle in photography known as depth of field.
Depth of field is like the canvas on which a photograph paints its story. It's a dynamic playground that can be manipulated and adjusted by the photographer to control the degree of clarity and blur in the image, shaping the viewer's focus and attention.
The concept of depth of field can be divided into two broad categories: deep depth of field and shallow depth of field. Each of these offers a unique visual style, and understanding them both can greatly enhance your photographic skills.
Deep Depth of Field
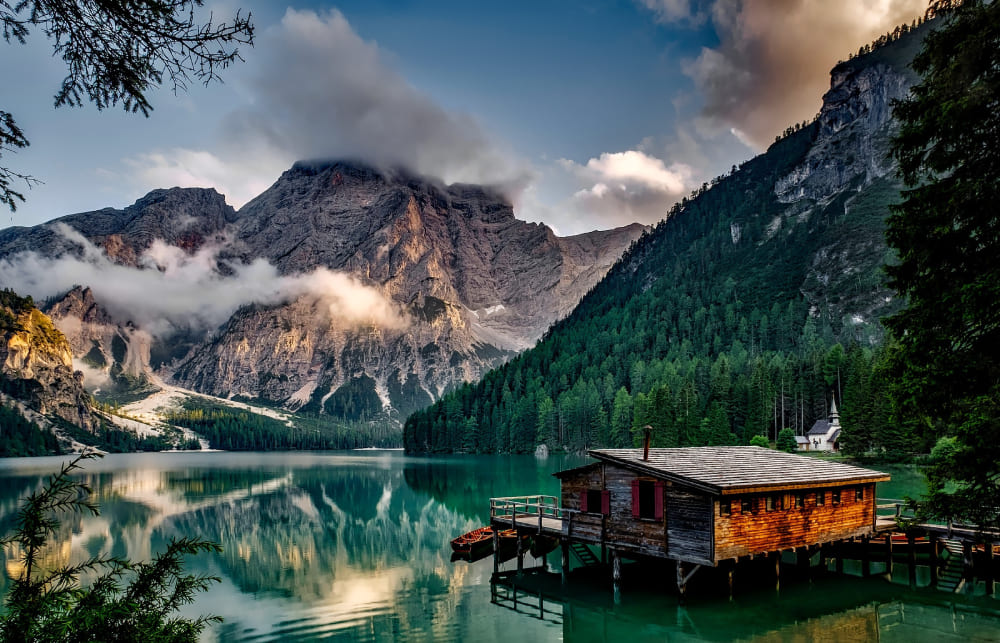
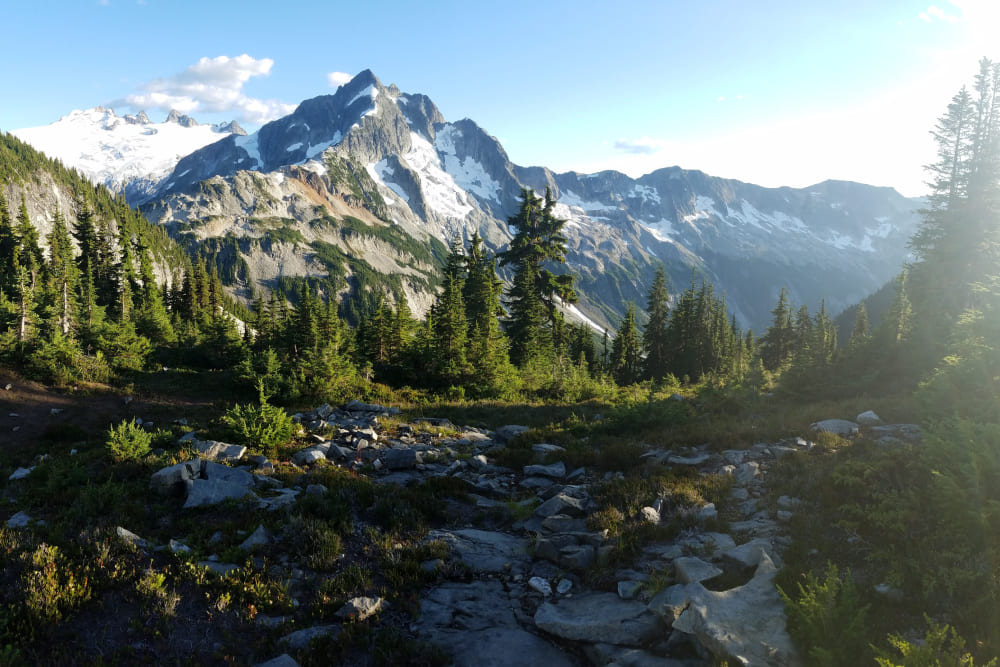
When an image captures a broad range of detail from the foreground to the background, it's said to have a deep depth of field. It's like a wide-angle lens on a panoramic vista, presenting everything clearly without favoring any particular element.
Deep depth of field is like the grand maestro of landscape photography. It allows every detail, every leaf, and every mountain peak to be showcased with a clear effect, telling a story that spans the entire scene.
As an example, take a look at the photograph below. Notice how the entire scene, from the closest huts to the distant mountains, is wrapped in a blanket of sharpness and clarity. This is the power of a deep depth of field.
Shallow Depth of Field
On the other hand, there's the shallow depth of field, where only a thin slice of the image is in sharp focus. It's like a spotlight on a stage, drawing your eye to the key performer while the surroundings fade into a soft, dreamy blur.
Shallow depth of field is the darling of portrait photography. It isolates the subject, making them stand out against a beautifully blurred background, free from any distracting elements. It's a powerful tool for focusing attention and creating a sense of depth and dimension in the photograph.
But it's not just limited to portraits. A shallow depth of field can also add drama and intensity to macro photography, street photography, and photojournalism, creating a strong impact with its selective focus.
The photo below is an example of using a shallow depth of field in portrait photography.

Why Is Depth of Field Important?
The depth of field is like a magic wand that can transform an ordinary photo into a stunning work of art. It refers to the area in a photograph that is in focus, creating a zone of sharpness that can make or break an image's impact.
In portrait photography, for instance, a shallow depth of field can be the secret ingredient that elevates an ordinary photo to something extraordinary.
By blurring the background and keeping the main subject in sharp focus, you can make them stand out and create a sense of depth and dimensionality.
On the other hand, a deep depth of field is indispensable in landscape photography, where you want to capture every detail of the scene, from the foreground to the background.
By keeping everything in focus, you can transport the viewer to the heart of the landscape and make them feel like they're right there with you.
By mastering the art of depth of field, you can take your photography to the next level. You can use it to create a sense of drama, mood, and atmosphere in your photos, and to guide the viewer's attention to where you want it to go.
So, if you're serious about photography, understanding and controlling the depth of field is a skill you can't afford to ignore.
Three Factors Affecting Depth of Field
Let's embark on a journey to explore the magical world of photography, where we'll uncover the secrets of 'Depth of Field'. Picture this: depth of field is like the stage of a theatre; it can be either shallow or deep, depending on the three primary actors:
- Aperture
- Camera-to-Subject Distance
- Focal Length
By harmonizing their performances, we can manipulate the depth of our stage, creating mesmerizing effects in our photographs..
1. Aperture
Our first actor is the Aperture, the eye of the camera. It's a dynamic character, adjusting its size to control the amount of light entering the camera. This is expressed as an 'aperture value' such as f/2, f/2.8, f/4, and so forth.
Here's the twist: a larger aperture (smaller value like f/2) narrows the depth of field, focusing on a specific subject while blurring the background, ideal for soulful portraits.
Conversely, a smaller aperture (larger value like f/11) broadens the depth of field, bringing both the foreground and background into focus, perfect for sweeping landscapes.
In other words:
- Large Aperture = Small Aperture Value = Shallow Depth of Field
- Small Aperture = Large Aperture Value = Deep Depth of Field
Adjusting the aperture (aperture value) is the simplest way to control the depth of field when shooting.
Here are the examples:
- If you're shooting a landscape and want deep depth of field, set the aperture to around f/11 - typically everything from the foreground to the background will be in focus.
- If you're shooting a portrait and want shallow depth of field, set the aperture to around f/2.8 - you'll typically get a nice background blur effect.
Watch the relevant YouTube video (made by Apalapse) or read the related article here: What is Aperture?
2. Camera-to-Subject Distance
Our second actor is the Camera-to-Subject Distance, the physical space between the camera and the subject. The nearer you get to the subject, the more shallow the depth of field turns out to be.
Imagine a close-up of a vibrant flower, its petals in sharp focus while the surrounding garden merges into a dreamy blur. However, if you step back, the depth of field expands, allowing more elements into the clear focus zone.
This actor, though, needs to tread carefully since moving nearer to or further from the subject can affect its size within the frame.
3. Focal length
Our final actor is the Focal Length, the camera lens' magnifying power.
Longer lenses (like 100mm) are drama queens; they steal the spotlight, creating a shallow depth of field that draws attention to specific subjects.
Shorter lenses (like 50mm), on the other hand, are the ensemble cast, spreading the focus more evenly for a deeper depth of field.
But remember, the performance of the Focal Length is always intertwined with the Aperture and the Camera-to-Subject Distance.
(Related article: What is Focal Length?)
These three actors together weave the magic of depth of field. Like a director, you can adjust their performances to create your masterpiece - be it a portrait imbued with emotion or a landscape brimming with life.

How to Use Depth of Field in Photography?
Understanding depth of field is crucial in photography, as it helps you create more creative and visually appealing images.
It refers to the area of the photograph that appears in focus, and it's controlled by the aperture, distance to the subject, and focal length.
Here's a step-by-step guide to help you achieve the depth of field you want:
Step 1: Choose Aperture Priority or Manual Mode
Select either aperture priority or manual mode on your camera, as these modes allow you to control the aperture and depth of field.
Aperture priority mode is suitable for beginners, as it sets the shutter speed for you, while manual mode gives you more control over both the aperture and shutter speed.
Step 2: Determine the Depth of Field You Want
Take a close look at the scene and decide if you want a shallow or deep depth of field. If the background is distracting, a shallow depth of field is best. However, if the background adds to the beauty of the scene, use a deep depth of field.
Step 3: Adjust the Aperture, Distance to the Subject, and Focal Length
To achieve a shallow depth of field, use a long lens, set the aperture as large as possible, and get as close to the subject as possible. For a deep depth of field, use a wide-angle lens, stay far away from the subject, choose a smaller aperture, and focus on one-third of the scene.
How to achieve a shallow depth of field effect:
- Use a long lens as much as possible.
- Set the aperture as large as possible.
- Get as close to the subject as possible
- Make sure not to ruin the composition, and press the shutter button.
How to achieve a deep depth of field effect:
- Use a wide-angle lens as much as possible
- Try to stay as far away from the subject as possible without sacrificing the composition.
- Choose a smaller aperture, usually f/8 or larger aperture is ideal.
- Focus on one-third of the scene, and then press the shutter button.
Step 4: Use Depth of Field Preview
Many cameras have a depth of field preview button that allows you to see the actual depth of field effect in real time before taking the picture.
Step 5: Check the Depth of Field
After taking a photo, review it on the camera's LCD screen to ensure the depth of field is correct. If necessary, reshoot before the lighting changes.
By following these steps, you can achieve the depth of field effect you want in your photographs and take your photography skills to the next level.
Here is a YouTube tutorial (made by Photography Life) on how to use depth of field in photography:
How to Calculate Depth of Field Precisely?
For most photographers, estimating depth of field while shooting is enough, especially since checking the LCD screen afterward can help identify any issues.
However, in certain situations, such as landscape or macro photography or product photography, precise depth of field measurement is crucial, as there may not be a chance to reshoot if something goes wrong.
To accurately calculate depth of field, you have a few options:
- Depth of Field Charts: These charts show the range of depth of field for different apertures and lens-to-subject distances. You can print and laminate physical copies, but if you use multiple lenses, you'll need different charts for each one.
- Depth of Field Calculators: These calculators allow you to input the focal length, distance to the subject, and aperture, and then give you the depth of field range. While they are very flexible, it may not always be convenient.
- Depth of Field Apps: Numerous depth of field applications, both complimentary and premium, are available that amalgamate the features of the two depth of field aids discussed above. For example, PhotoPills provides both a calculator and an adjustable chart that allows you to input your focal length and immediately recalculate your depth of field range.
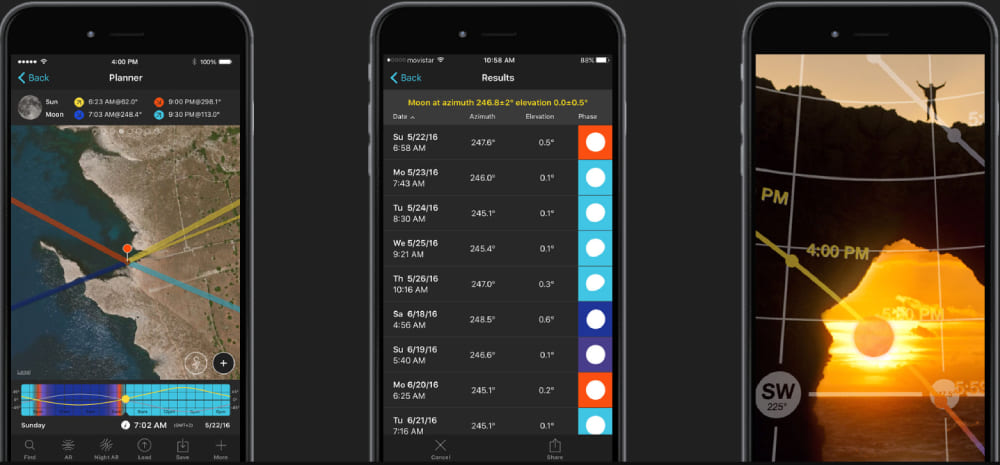
PhotoPills offers helpful photography tools like sunrise/sunset times and directions, a hyperfocal distance calculator, and more.
Frequently Asked Questions About Depth of Field
After reading the above introduction, we believe you have a basic understanding of depth of field. You may, however, still have questions about it. We have compiled a list of frequently asked questions for your convenience to address any issues you may have.
- How does depth of field improve my photos?
Keeping photos clear is important. Knowing how to make some parts clear and others blurry is a useful artistic technique for creating impressive effects.
- How can I precisely adjust the depth of field for every photograph?
To find the exact depth of field for a certain focal length, you can use charts, calculators, or apps.
- Can I adjust the depth of field to make everything clear?
Yes. You can learn about the concept of hyperfocal distance. When you focus at this point, you'll maximize depth of field and usually ensure clarity across the entire image.
- What is the background blur effect?
The background blur effect occurs in areas outside the focus point of an image (i.e., outside the depth of field range). The background blur effect can create a strong blur effect.
To get a good background blur, use a shallow depth of field. You can also improve the blur by increasing the distance between the subject and the background.
- How can I increase the efficiency of photo editing during post-processing?
One solution we would recommend is the TourBox. It can be a valuable tool for photographers looking to optimize their post-processing workflow.

TourBox is a compact and intuitive editing controller that can greatly enhance your workflow efficiency. It offers customizable buttons and dials that can be programmed to perform frequently used editing functions, such as adjusting exposure, contrast, saturation, and more.
With TourBox, you can streamline your editing process and reduce the amount of time it takes to make adjustments to your photos. Additionally, TourBox is compatible with a variety of popular editing software, including Adobe Photoshop, Lightroom, and Capture One, so you can use it with your preferred editing tools.
Congratulations! You now have a better understanding of the fascinating world of depth of field. But don't think of depth of field as just a technical term for professionals - it's a basic concept that anyone with a camera can apply.
Unleash your creativity and experiment with different aperture settings, play with focus, and see what kind of unique shots you can create. By mastering depth of field, you can capture your viewer's attention, evoke emotions, and tell captivating stories through your photography.
So grab your camera, get out there, and start exploring the endless possibilities of depth of field!