What Is the Free Layer in CapCut?
When using CapCut, you may come across a setting called "Free Layer." So, what exactly is the Free Layer, and what is its purpose?
The Free Layer is a core feature of CapCut that allows you to freely add and adjust elements within your video, giving you more freedom and flexibility in your video editing.
Keep reading as we delve into this tutorial to provide you with everything you need to know about the Free Layer feature in CapCut.

In this article, you will learn:
- What Is the Free Layer in CapCut?
- How to Enable Free Layer in CapCut?
- Final Thoughts About CapCut Free Layer
What Is the Free Layer in CapCut?
The Free Layer is a really interesting feature in CapCut, and it has a significant impact on your editing experience.
When you enable the Free Layer in CapCut, you can freely move text, stickers, effects, filters, and adjustments to lower tracks. This gives you more flexibility in your editing.
Before enabling the Free Layer, you couldn't place any image or video tracks above the text, stickers, effects, filters, and adjustments added to your track.
You can try it out in CapCut. When you continue adding a video clip to a track above these layers, the clip will automatically be placed below these layers. In other words, you can't have any image or video tracks above these layers.
However, once you enable the Free Layer, these layers can be moved below tracks with images or videos. You can freely add image or video clips above these layers, just like layers in Photoshop. You have the freedom to adjust the order of these tracks.
Enabling the Free Layer has both advantages and disadvantages:
- For Text and Stickers, the disadvantage is that if there are images or videos on the tracks above, at the same time and position, the segments on the upper tracks will cover them.
- For Effects, Filters, and Adjustment, the advantage is that their effects only apply to the segments on the tracks below, and they don't affect the segments on the tracks above.
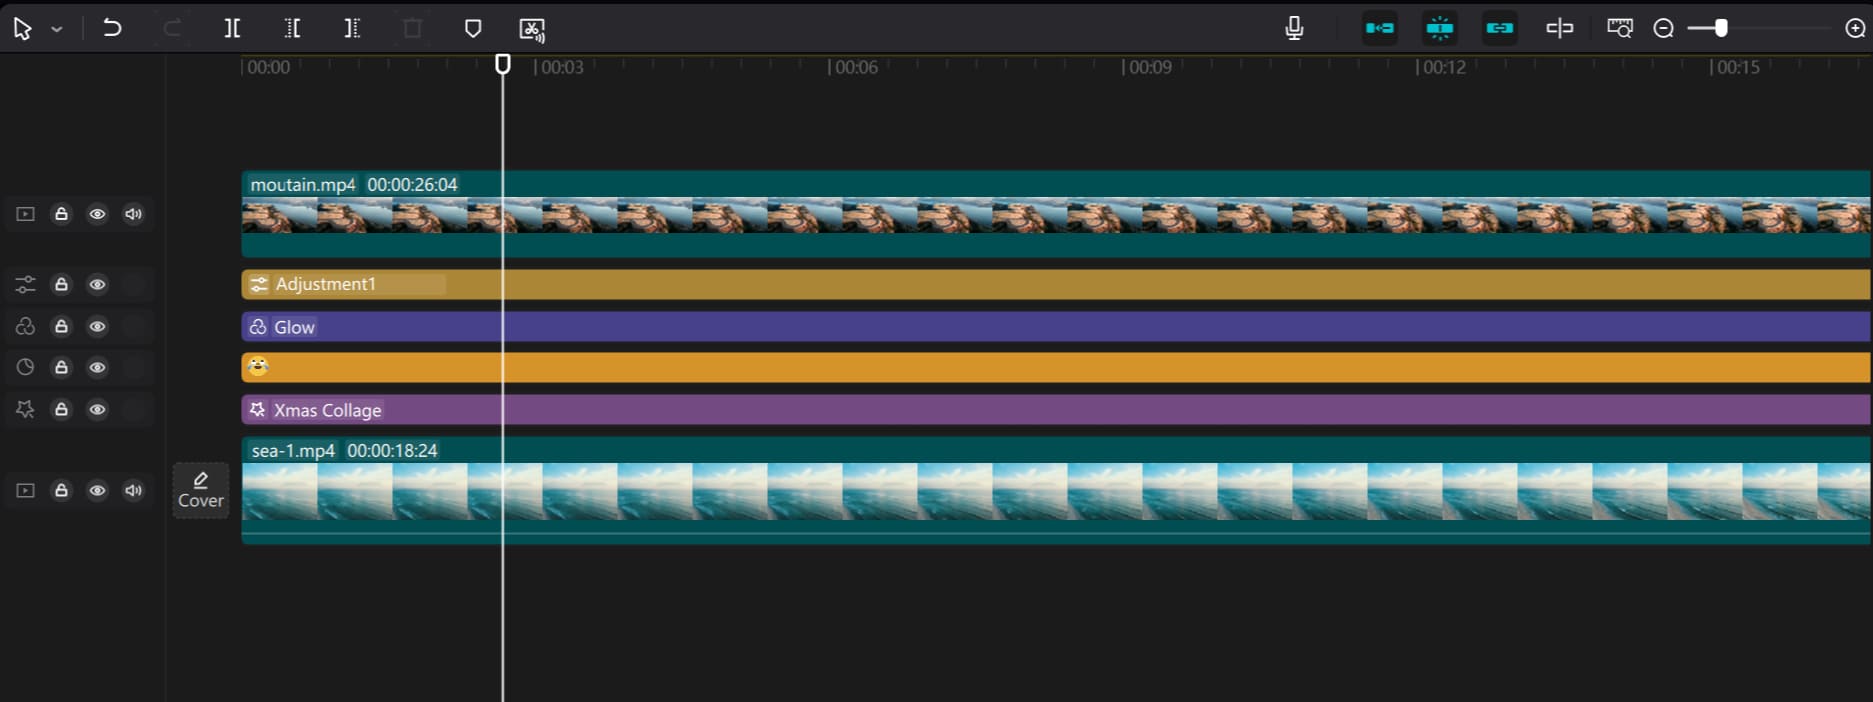
Once you activate the Free Layer in CapCut, as shown in the image below, you can freely add multiple texts, stickers, effects, filters, and adjustments between two video clips without being limited by the layer order.
When using the CapCut PC version, you may need to zoom in, move the timeline, and make precise edits down to the frame. You may have also noticed that using a combination of keyboard shortcuts and mouse can be inefficient and frustrating.
That's where TourBox comes in as a creative tool that will impress you. TourBox simplifies every step of your video editing process, particularly when it comes to timeline control. It allows you to have a more intuitive, flexible, and precise control over everything.

TourBox will make you realize that video editing is an art form. Check out our page on video editing to learn more about TourBox and how it can enhance your editing experience.
How to Enable Free Layer in CapCut?
Enabling the Free Layer in CapCut can be done in two scenarios: before starting a project and during a project. We will use the PC version of CapCut to guide you through the steps for both settings.
1. Before Starting a Project
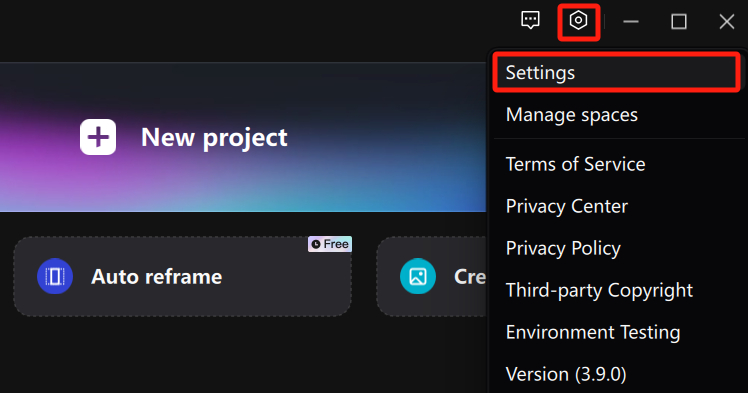
When you open CapCut, don't rush to create a new project. Instead, click on the "Settings" icon in the top right corner and select "Settings" again from the pop-up menu.
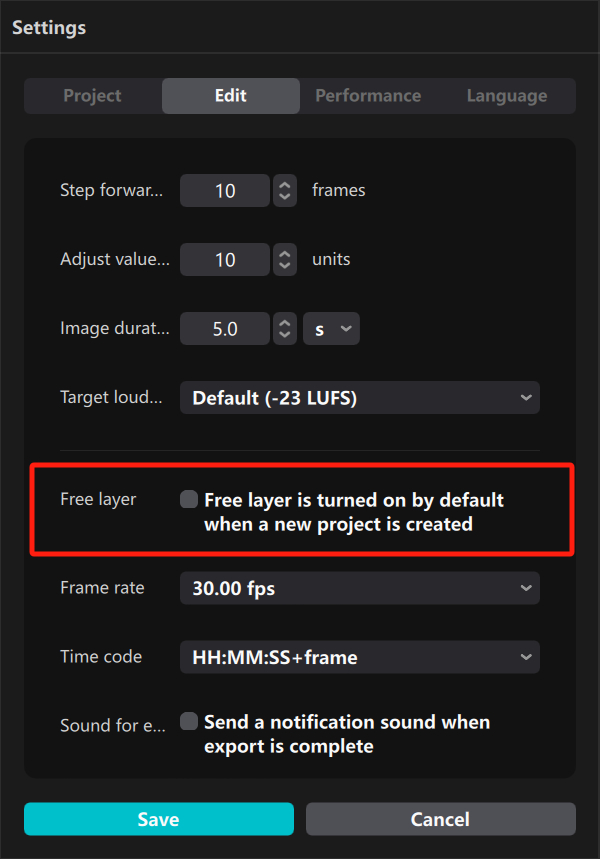
In the Settings panel, switch to the "Edit" tab and check the option next to "Free Layer." Then, save the settings.
This way, when you create a new project, CapCut will automatically enable the Free Layer by default.
2. During a Project
After creating a new project in CapCut, refrain from importing your clips for editing right away. Instead, focus your attention on the Details panel on the right side and click the "Modify" button at the bottom right corner.
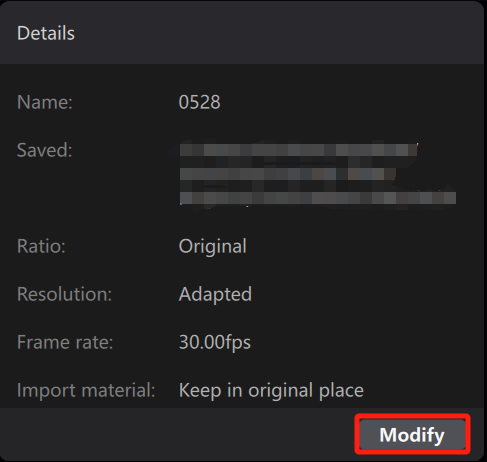
Next, enable the "Free Layer" feature in the "Project Settings" panel that pops up. Once you save the settings, the Free Layer will be activated for your project.

Additional Tip:
Enabling the Free Layer in the project settings only affects the current project and does not impact other projects.
Once the Free Layer is enabled and saved for a project, it cannot be disabled. Therefore, before enabling the Free Layer during a project, make sure you fully understand what it entails and the changes it will bring.
Final Thoughts About CapCut Free Layer
In CapCut, the "Free Layer" is an incredibly useful feature that allows you to freely move and adjust the various layers and tracks in your video editing.
This means you can arrange the position and order of videos, images, text, or effects, making your video editing more personalized and professional.
It's important to note that once you enable the Free Layer in your CapCut project, you cannot disable it for that specific project.
Product Recommendation:
If you're interested in TourBox, why not start with the TourBox Lite? It offers great value for money and is perfect for first-time users of TourBox.
