What Is LUT? A Simple Guide to Color Lookup Tables
Open DaVinci Resolve and load a LUT. A flat, gray image can come to life in an instant. But the real creative work is only just beginning. Without LUTs, we'd be matching the color of each shot by hand. If we lean on LUTs completely, though, our work can lose its personality and soul.
So, are LUTs your helpful assistant, or a cage for your creativity?

In this article, you will learn:
What Is a LUT?
LUT (Look-Up Table) is a color-mapping tool. It takes each pixel's RGB values as an index, looks up a matching output RGB value in a predefined table, and uses that to change an image's exposure and color.
Put simply, a LUT is like a digital filter: give it the same input, and it always produces the same output. With a LUT, a colorist can change the overall look of a shot with one click — for example, boost contrast, tweak white balance, or create a mood.
Technically, there are two main types of LUTs: 1D LUTs and 3D LUTs.
- 1D LUT: This looks up values independently for each color channel (R, G, B). Each channel has its own one-dimensional mapping. 1D LUTs are good for simple changes like brightness, contrast, gamma, or white balance — for example, making the image uniformly brighter or increasing contrast. But they can't change saturation or mix channels, because the channels are handled separately. That means you can't get complex color-mixing effects with a 1D LUT.
- 3D LUT: This maps RGB values in three dimensions into a 3D color cube. A 3D LUT handles all color information together, so it can map very rich colors or colors outside a normal film gamut. Because it accounts for interactions between channels, a 3D LUT can do more complex color changes, like changing saturation or blending red and blue channels.
In short: use a 1D LUT for simple per-channel adjustments; use a 3D LUT for precise, complex color work. 3D LUTs are the main choice for modern creative grading.
So what does a LUT actually do?
The core value of a LUT is to connect and unify different color spaces. In digital workflows, we often move between color spaces or need to match them, and LUTs act like a translator.
For example, many cameras record in Log to preserve wide dynamic range. Log footage looks flat and gray. A conversion (or "technical") LUT quickly turns Log into Rec.709 or another monitoring color space so the image looks normal again.
In cinematic grading, colorists use style or creative LUTs as a starting point. A style LUT can give a shot a mood — a classic film look, a teal-orange tone, or heavy contrast — and then the colorist refines it by hand.
On multi-camera shoots or long projects, different cameras or shots from different times can have visible color differences. Sharing a LUT helps keep the look consistent across all footage.

To summarize, LUTs are mainly used for:
- Color-space conversion — e.g., convert Log to Rec.709 so footage displays with normal exposure and color.
- Creative base — apply a style LUT to set the look (teal-orange, film emulation, high contrast), then fine-tune.
- Multi-camera consistency — use the same LUT across cameras to keep color and tone uniform.
How to Use LUTs in DaVinci Resolve?
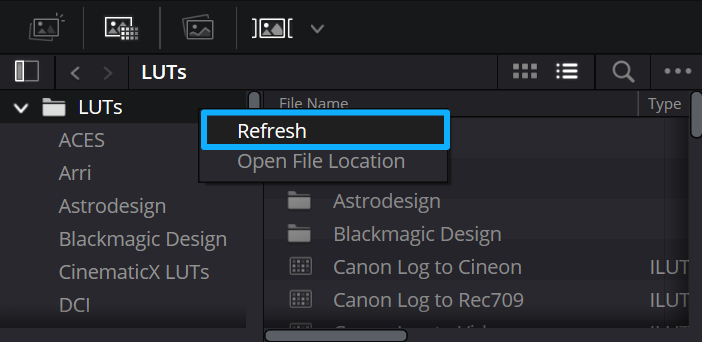
DaVinci Resolve natively supports importing and using LUT presets. To start, copy the downloaded LUT files (common formats are .cube and .3dl) into Resolve's LUT folder, then click Refresh, as shown below.
DaVinci Resolve will then detect and load the new LUTs. After import, you'll see those presets in the LUT menu on the left side of the Color page. Click a LUT to apply it to the current node. You can then adjust exposure, contrast, saturation, and other settings to shape the look.
In short, a LUT is only the starting point. After applying a LUT, colorists usually make further tweaks for each shot — using curves, local adjustments, and other tools—to reach the final look the director wants.
LUTs speed up and standardize color changes, but the real craft comes from the careful fine-tuning that follows.
If you use DaVinci Resolve for color grading on a regular basis, a DaVinci Resolve Speed Editor can really speed up your work and improve your workflow. Another option worth considering is the TourBox controller.

TourBox's new algorithms and control-recognition now fully support all DaVinci Resolve parameters. It works with every color panel: Color Warper, Curves, HSL, or any slider you use.
Just hover your cursor over a control and turn a knob, and grading becomes quick and easy. Say goodbye to endless clicking and dragging. Your color work becomes faster and more intuitive.

Best of all, TourBox is competitively priced and works in any creative app, not just DaVinci Resolve. If you're interested, visit our DaVinci Resolve page to learn more.
How to Think About the Role of LUTs?
1. Don't Over-Rely on Them
Think of a LUT like a compass that points you toward a look. Good editors and colorists use LUTs as a starting point, not the final answer. If you lean too heavily on preset LUTs, your work can start to look the same as everyone else's.
2. Fit Them into Your Workflow
When you apply a LUT matters. Technical LUTs (for example, Log → Rec.709) usually go first to convert footage into a standard color space. Creative LUTs come after, adding a specific style. In professional work, the order and how you combine LUTs should be planned.
Conclusion
In the digital imaging age, LUTs have become an essential tool for creators. They simplify tricky technical steps and make color management faster. They give you a creative starting point, spark visual ideas, and help keep colors consistent across large projects.
But like any powerful tool, a LUT's value depends on who's using it. Leaning too much on preset LUTs can make your work feel lifeless. Used well, though, they can unlock a lot of creative potential.
True color grading begins with a LUT but doesn't end there. It takes technical know-how, an artist's eye, and your own personal touch. Where technology meets art, a LUT is the bridge — and the creator is the one who builds the final look.