2 Ways to Smooth Skin in Photoshop: Simple and Efficient
Smoothing skin in Photoshop is a key step to enhance the quality of portrait photos. Blemishes, acne, and large pores can take away from the overall look of an image.
With the right techniques in Photoshop, you can make skin look smooth and refined while keeping its natural texture intact.
In this tutorial, we will show you two simple methods for how to smooth skin in Photoshop. Let's get started!

In this article, you will learn:
- Method 1: Smoothing Skin with Channels in Photoshop
- Method 2: Using Neural Filters for Skin Smoothing
- Conclusion
Method 1: Smoothing Skin with Channels in Photoshop
There are many ways to smooth skin in Photoshop, but let's start with a popular method: using Channels.
This method is simple, quick, and works well for photos that don't require heavy retouching.
Start by opening the photo you want to edit. Duplicate the layer first, then use the Spot Healing Brush Tool or the Patch Tool to remove any large blemishes, like pimples.
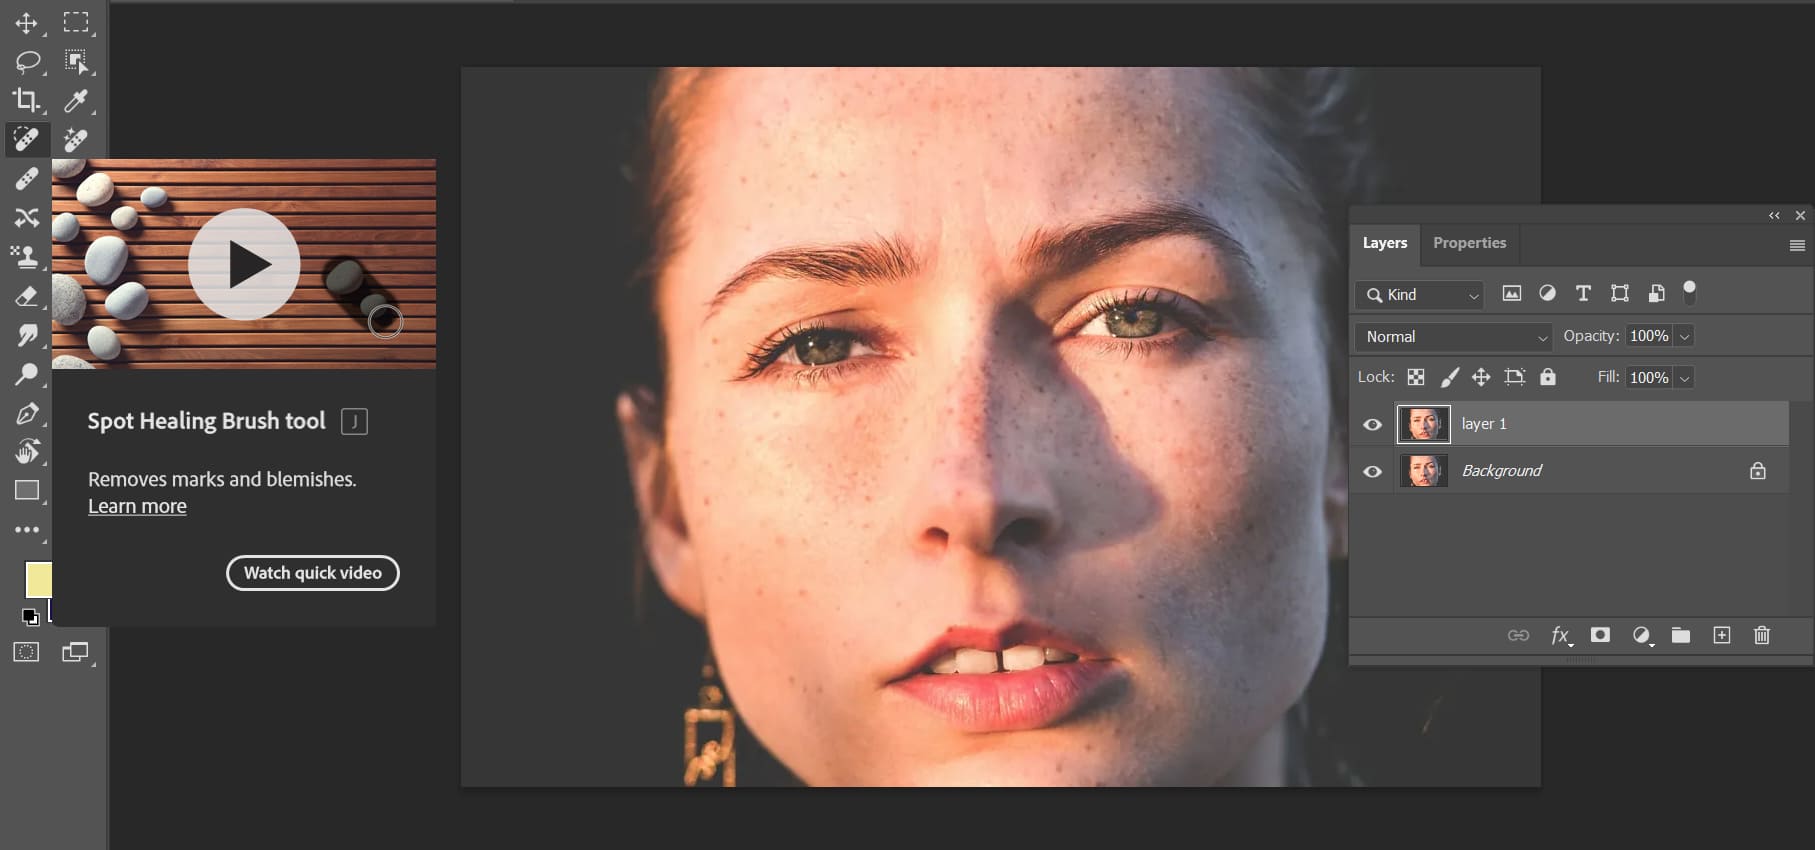
You don't need to be too detailed at this stage — just focus on clearing up the most obvious imperfections to make the skin-smoothing process easier later.
Next, switch to the Channels panel and look for the channel — Red, Green, or Blue — where the skin imperfections are most visible. In this example, we will use the Blue channel.
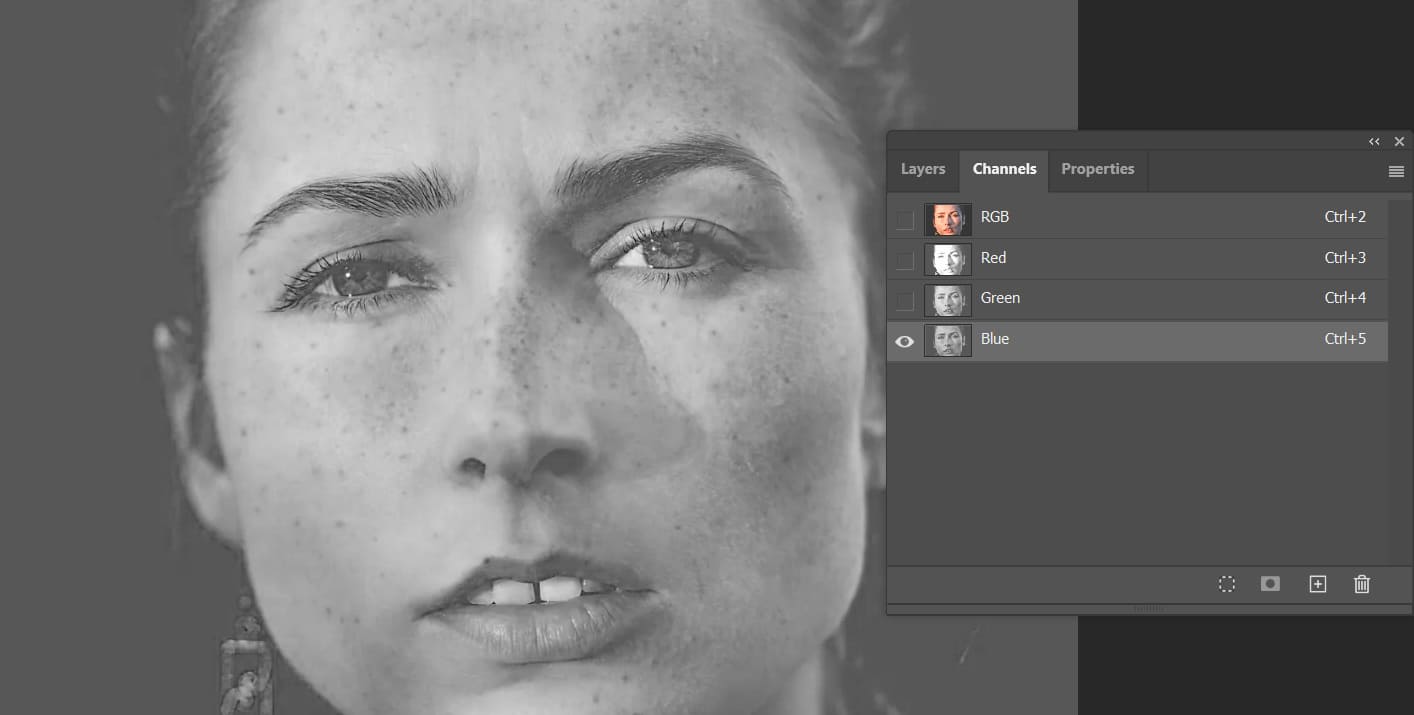
Drag the selected channel down to the Add New Channel icon at the bottom of the panel to create a duplicate.

Now, go to the Filter menu, choose Other, and then select High Pass. Adjust the Radius value to suit your photo.
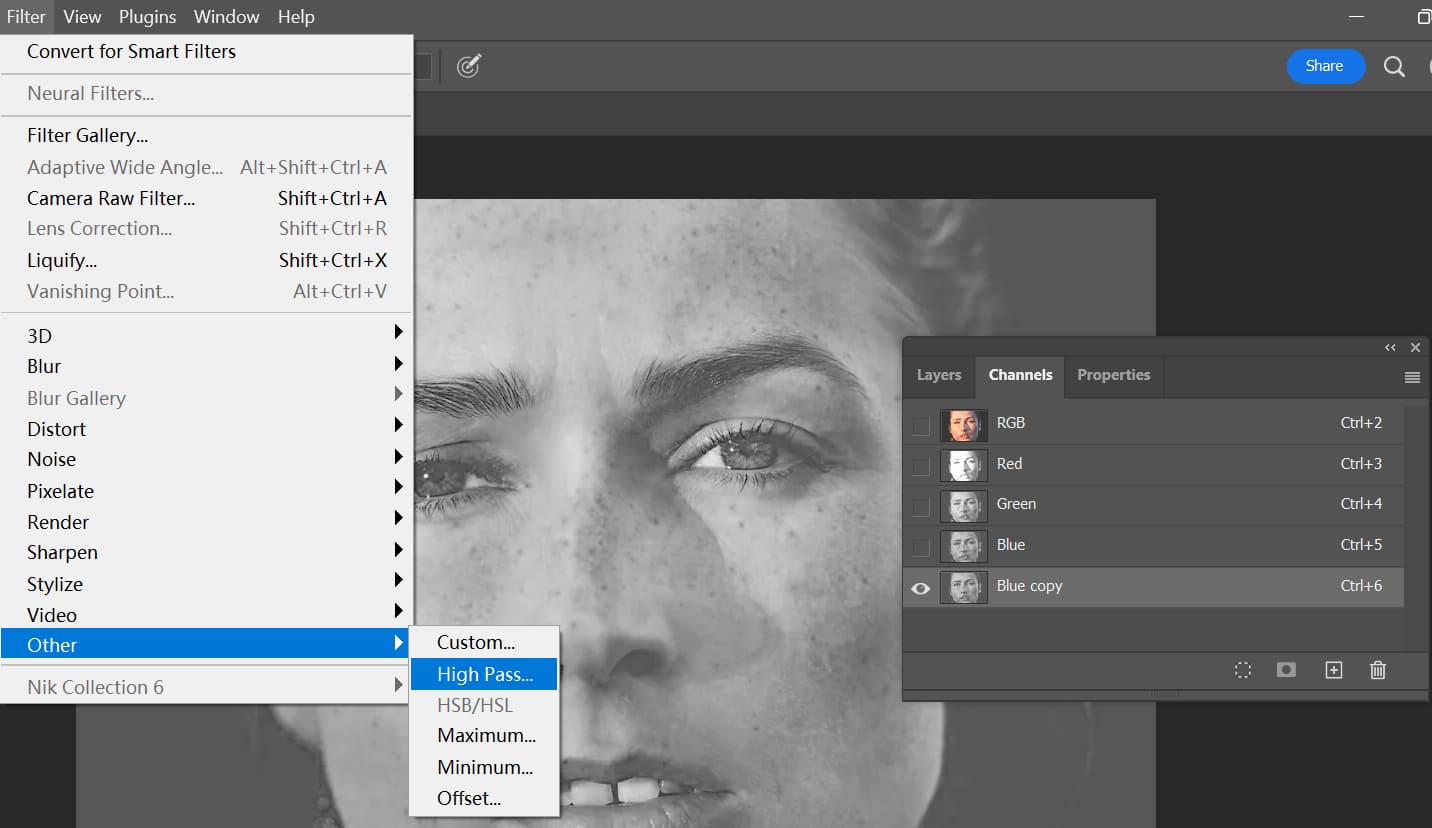
Set the radius so that the skin imperfections are clearly visible but not overly sharp. A good range to start with is 10-20 pixels.
If the radius is too low, the smoothing effect won't be noticeable. If it's too high, the skin may look unnatural.
Next, go to the top menu bar in Photoshop and click Image, then select Calculations.
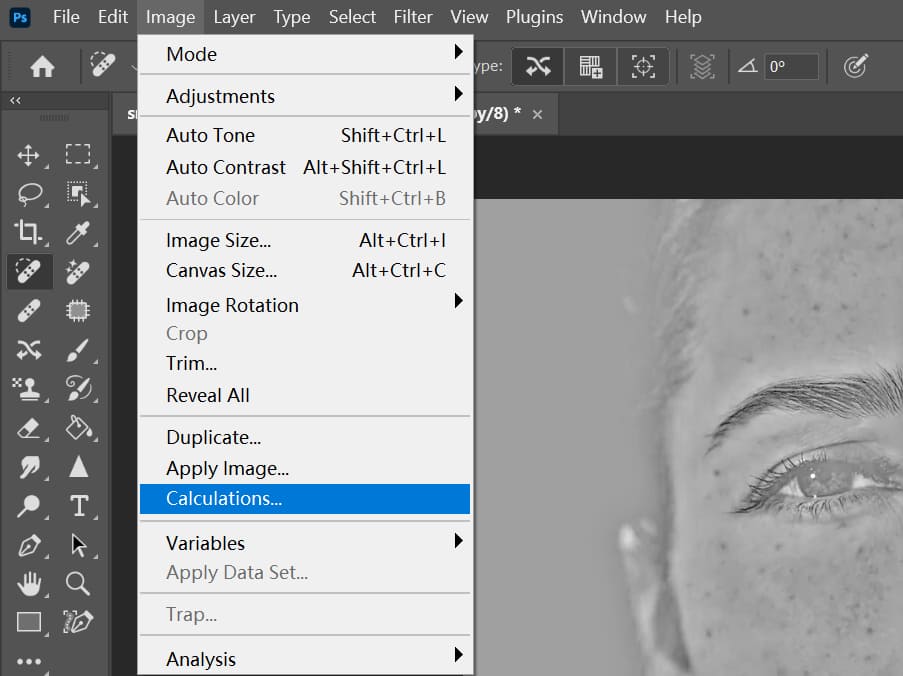
In the panel that pops up, leave most of the settings as they are. Just change the Blending to Hard Light.
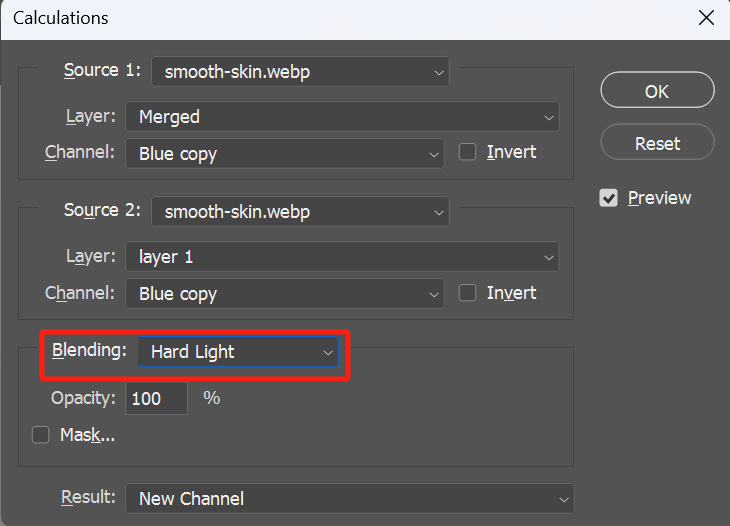
Once you apply this, a new Alpha Channel will appear at the bottom of the Channels panel.
Repeat the Calculations step two more times, following the same process. If your photo has a lot of imperfections, you can repeat this step a few extra times for better results.
Once you've completed the previous steps, hold down Ctrl (or Command) and click on the Alpha channel at the bottom of the Channels panel (in this case, Alpha 3). This will create a selection on your image.
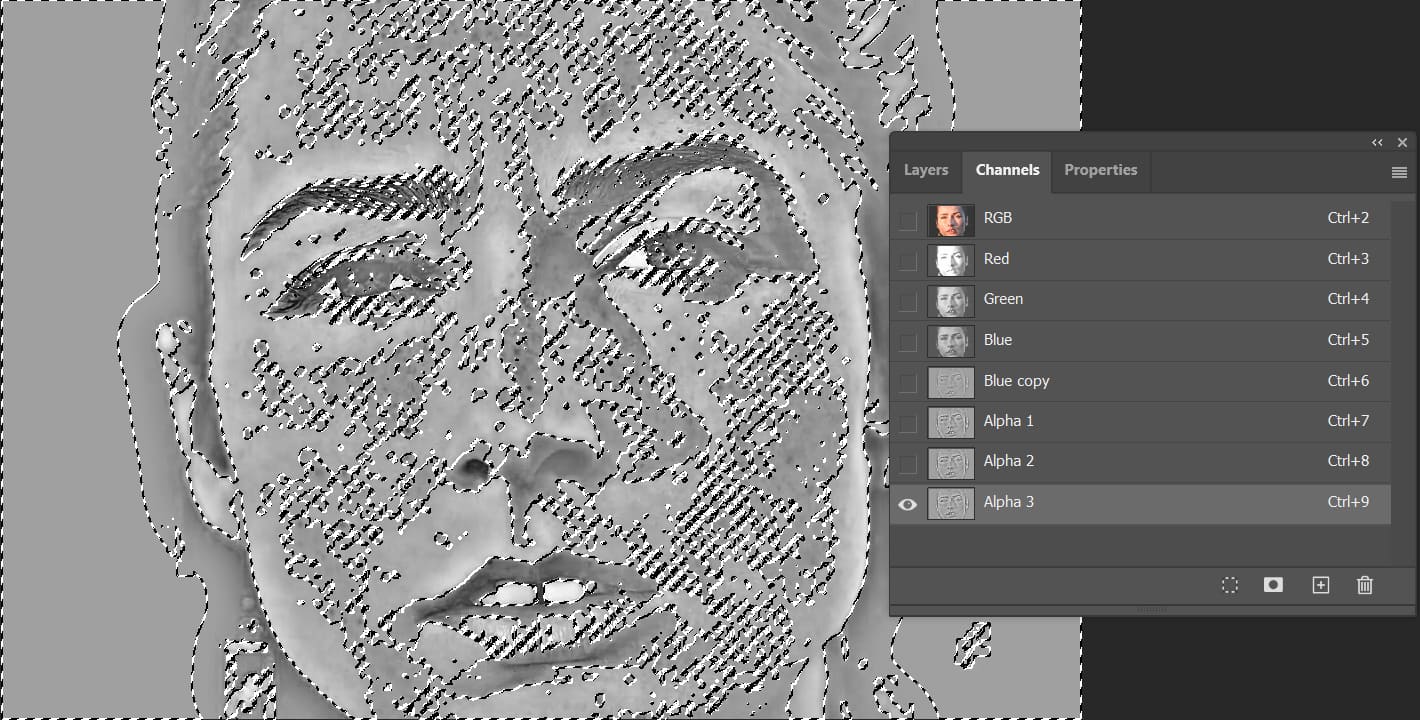
Next, click on the RGB channel and make sure the invisibility of all the Alpha channels. At this point, everything except the blemishes is selected.
Since we want to work on the blemishes, press Shift + Ctrl (or Command) + I to invert the selection. Now, only the blemishes are selected.
Go back to the Layers panel and create a Curves adjustment layer. Gently lift the middle part of the curve to brighten the selected areas. You can also use the Levels adjustment layer for this adjustment if you prefer.

As you brighten the curve, you will see the blemishes on the face gradually fade away. Adjust the brightness and fine-tune the effect until the result looks natural and balanced.
Be careful not to overdo the curve adjustment here. If the brightness is increased too little, the smoothing effect won't work. But if it's too much, it can cause banding or distortion.
At this point, the channel-based skin smoothing process is essentially complete. However, if the selected area includes facial features, hair, or parts of the background, these areas might also become overly smooth and lose detail.

To fix this, switch to a black brush, adjust its size and opacity, and paint over the Curves adjustment layer mask. This will exclude those areas from the smoothing effect.
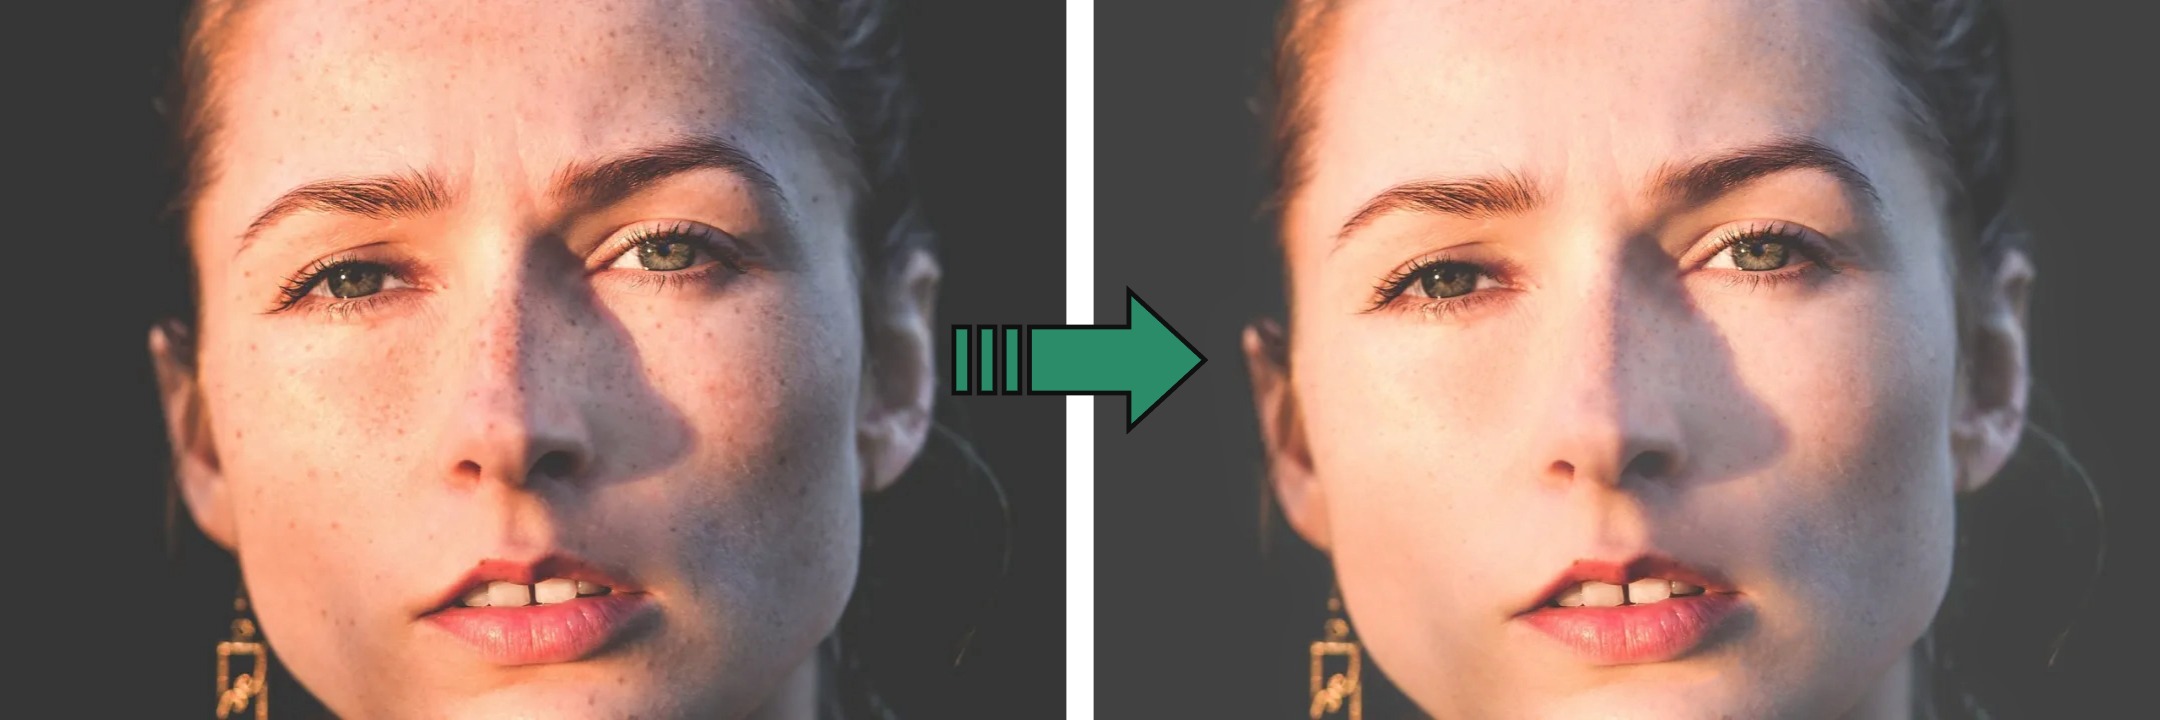
Now, let's take a look at the final smoothed portrait. If the effect seems too strong, you can go back and fine-tune the previous steps to bring back some natural skin details.
Using channels for skin smoothing in Photoshop is straightforward. Even beginners can pick it up quickly and achieve efficient results without spending too much time.
The main challenge lies in setting the right High Pass filter value and making precise curve adjustments. But with a little practice, you will master it in no time.
Method 2: Using Neural Filters for Skin Smoothing
In the previous section, we explored how to smooth skin using channels. Now, let's look at a simpler and faster alternative: Photoshop Neural Filters.
Neural Filters in Photoshop are powerful tools powered by AI technology. They can automatically detect skin areas in portraits and apply smart smoothing adjustments.
Follow these steps to use this feature:
- Open the Neural Filters Panel: Open your photo in Photoshop. Go to the top menu and click Filter > Neural Filters to bring up the Neural Filters panel.
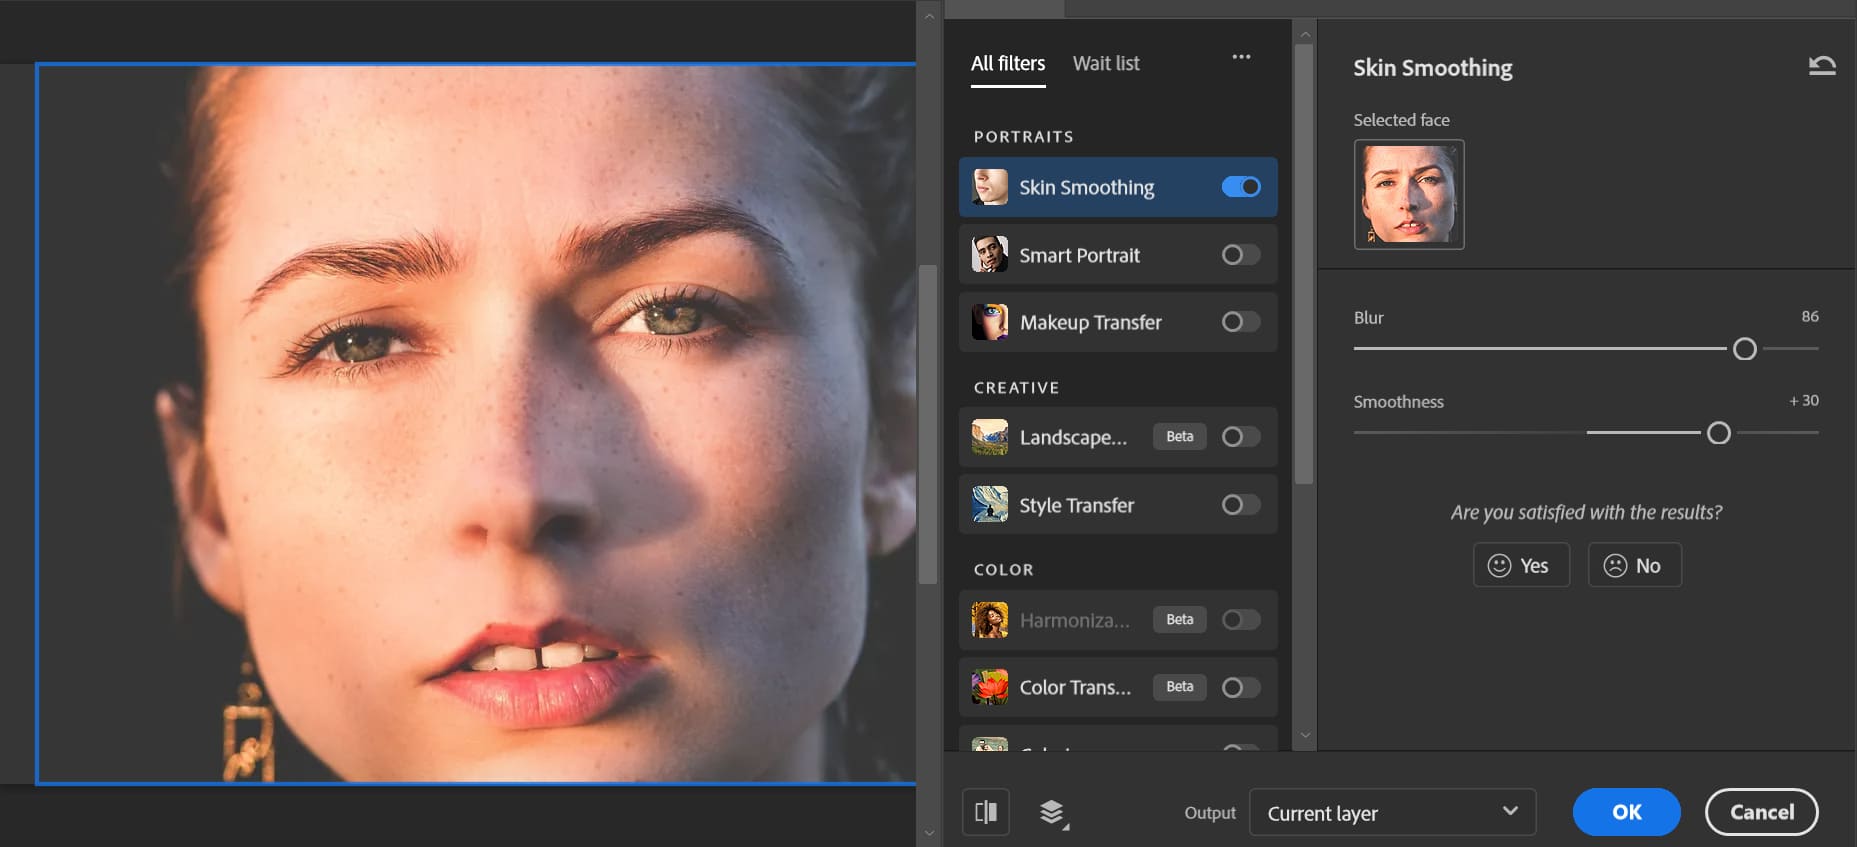
- Enable the Skin Smoothing Filter: In the Neural Filters panel, locate the Skin Smoothing filter. If you see a cloud icon next to it, you'll need to download it from the cloud first by clicking the icon. Once it's downloaded, turn the filter on.
- Adjust the Smoothing Settings: After enabling the filter, you'll see two sliders: Blur and Smoothness. Adjust these sliders to control the level of skin smoothing and detail preservation. Tweak them until you're happy with the result.
- Choose an Output Option: Before applying the filter, choose how you want to save the results. You can output to the current layer, duplicate layer, duplicate layer with a mask, new layer, or as a smart filter. For flexibility, it's best to choose New Layer or Smart Filter, so you can make changes later if needed.
- Apply the Filter and Fine-Tune: Click OK to apply the filter. If some areas, like the eyes or lips, look overly smoothed, use a layer mask and the brush tool to restore the original details in those parts.
By following these steps, you can quickly smooth skin in portraits using Neural Filters and achieve natural results.
Compared to traditional manual methods, Neural Filters are more straightforward and efficient, making them perfect for handling large batches of photos in a short time.
Conclusion
In this tutorial on how to smooth skin in Photoshop, we shared two simple and beginner-friendly methods.
However, as we mentioned, there are many other ways to achieve skin smoothing. If you're curious, check out the link below to explore another portrait retouching tutorial.
Further Reading:
No matter which method you use, skin smoothing is rarely a one-step process — even with the advanced Neural Filters. You'll still need tools like the Spot Healing Brush to address specific imperfections in the photo.
This means you'll often find yourself adjusting brush sizes, zooming in and out, or rotating the image to get the best editing angle. While these are basic tasks, they can become tedious and make your workflow feel inefficient.
That's why we would like to introduce you to TourBox, a creative tool loved by photographers and digital artists alike. It works like a game controller, allowing you to perform all these repetitive tasks with one hand effortlessly.

TourBox lets you customize every button to fit your workflow, helping you edit photos much more efficiently. If this sounds interesting, visit our photo editing page to see how TourBox can simplify every step of your editing process.