[TourBox Tips] How to Quickly Access Lumetri Scopes in Premiere Pro?
In Adobe Premiere Pro, Lumetri Scopes are crucial color correction tools that help you evaluate and adjust the colors of your edits.
So, how can you use TourBox to directly access the Lumetri Scopes panel and enhance your color grading?
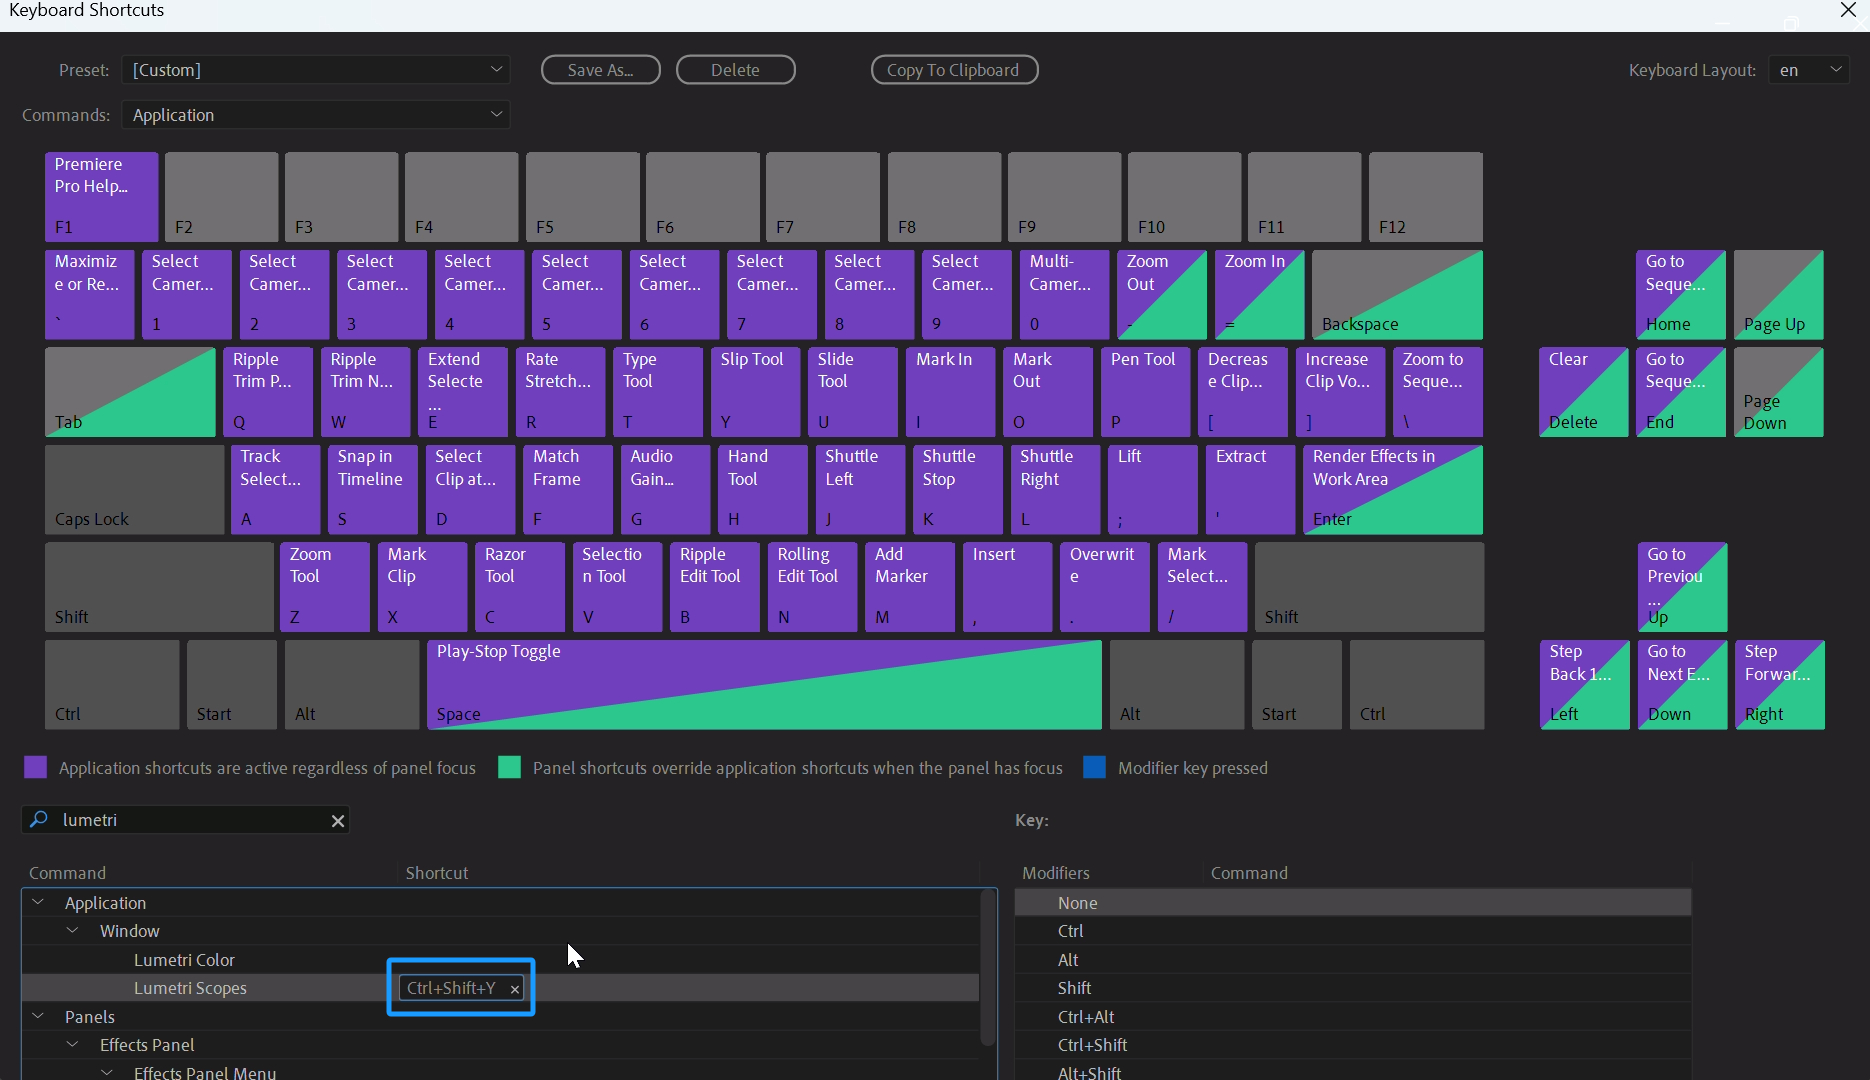
Firstly, you may encounter the issue that Lumetri Scopes cannot be directly accessed through keyboard shortcuts. Therefore, you need to navigate to the Edit menu bar in Premiere Pro and select "Keyboard Shortcuts" to access the settings panel.
Search for "Lumetri Scopes" in the Keyboard Shortcuts panel and set a shortcut key.
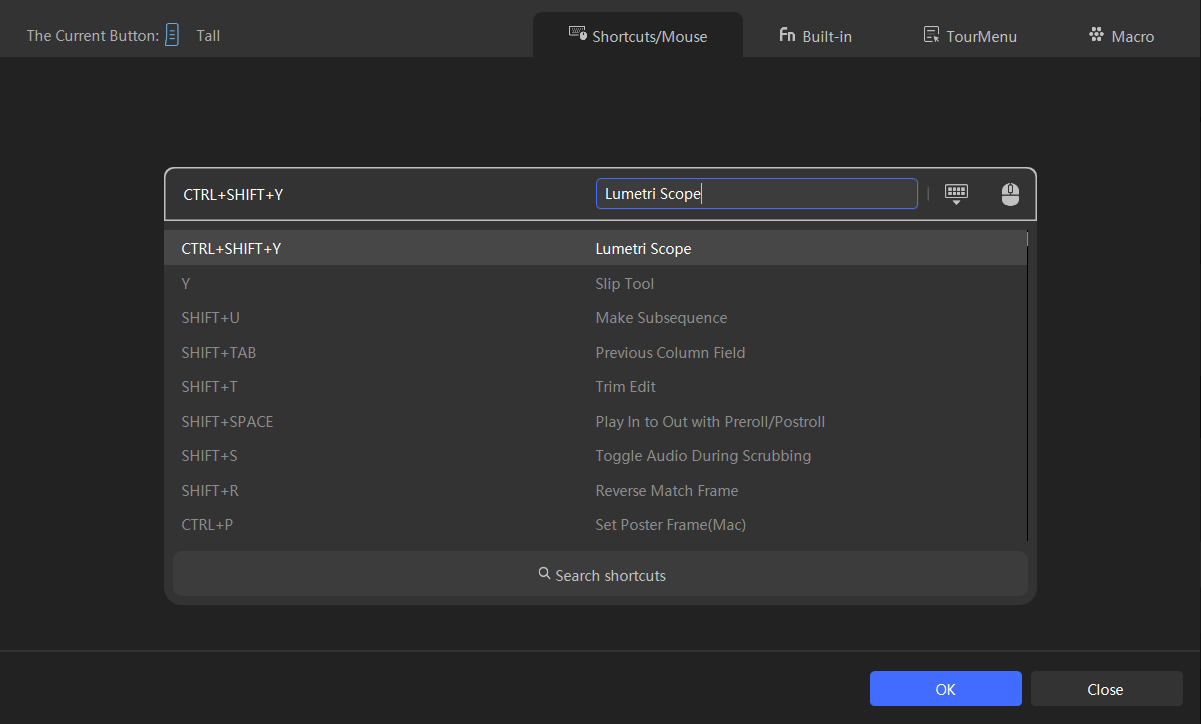
Next, in the TourBox Console, select a button and assign it the corresponding shortcut key you just set. Add a name to easily identify it later.
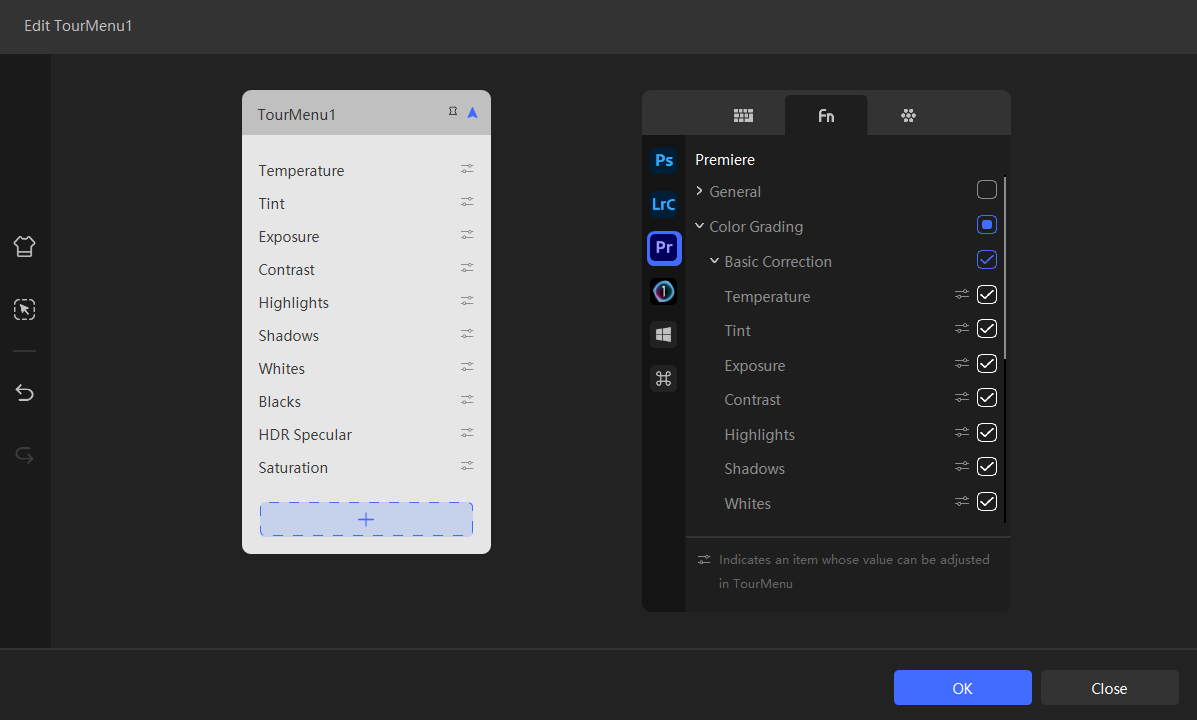
The TourBox Console includes built-in color grading parameters for Premiere Pro. Now, you can combine this with the TourMenu feature to make your color grading process even smoother.
Select a button in the TourBox Console and enter the settings page. Switch to the TourMenu page and then go to the Built-in Functions interface.
On the left side, choose the Premiere Pro logo icon in the Applications section. You will find all the Premiere Pro color grading parameters under the Color Grading directory.
Select your frequently used color grading parameters and add them to this TourMenu.
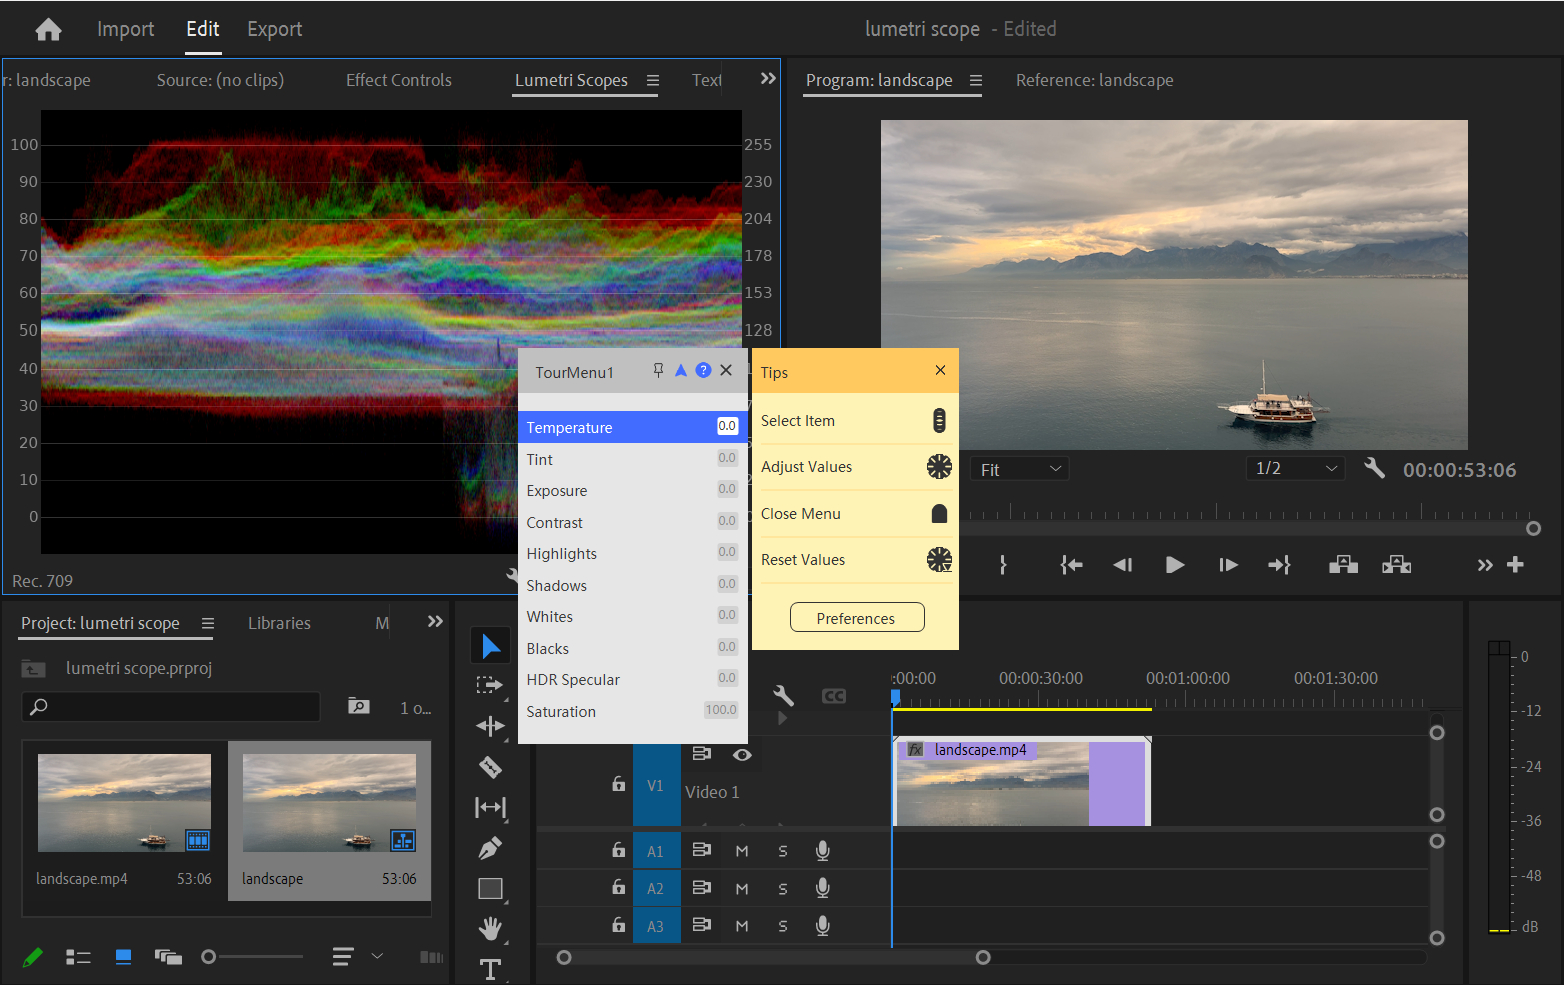
Voila! Now, you can return to Premiere Pro and easily access the Lumetri Scopes with a single press of a button. You can also access your TourMenu, which includes your favorite color grading parameters.
Use the Scroll control to select parameters and the Dial control to adjust them, while observing the Lumetri Scopes to assist you in making adjustments. Best of all, you can accomplish all of this with just one hand!