[TourBox Tutorial] How to Use TourMenu?
When using certain applications, relying solely on the buttons and combinations on TourBox may not be sufficient to address various situations and needs.
In such cases, you can enhance your control by setting up a TourMenu, allowing you to access a variety of functions you customize with just a press of a button on TourBox.
What Is TourMenu?
TourMenu is a customizable menu that you can set up according to your preferences. Just like the right-click menu that pops up on your computer screen, the difference is that you have full control to customize each command on TourMenu.
Each TourMenu can be configured with multiple shortcuts, including shortcuts, built-in functions, and macros. By pressing the corresponding button on TourBox, you can bring up the TourMenu and select the desired command to execute.
How to Set Up TourMenu?
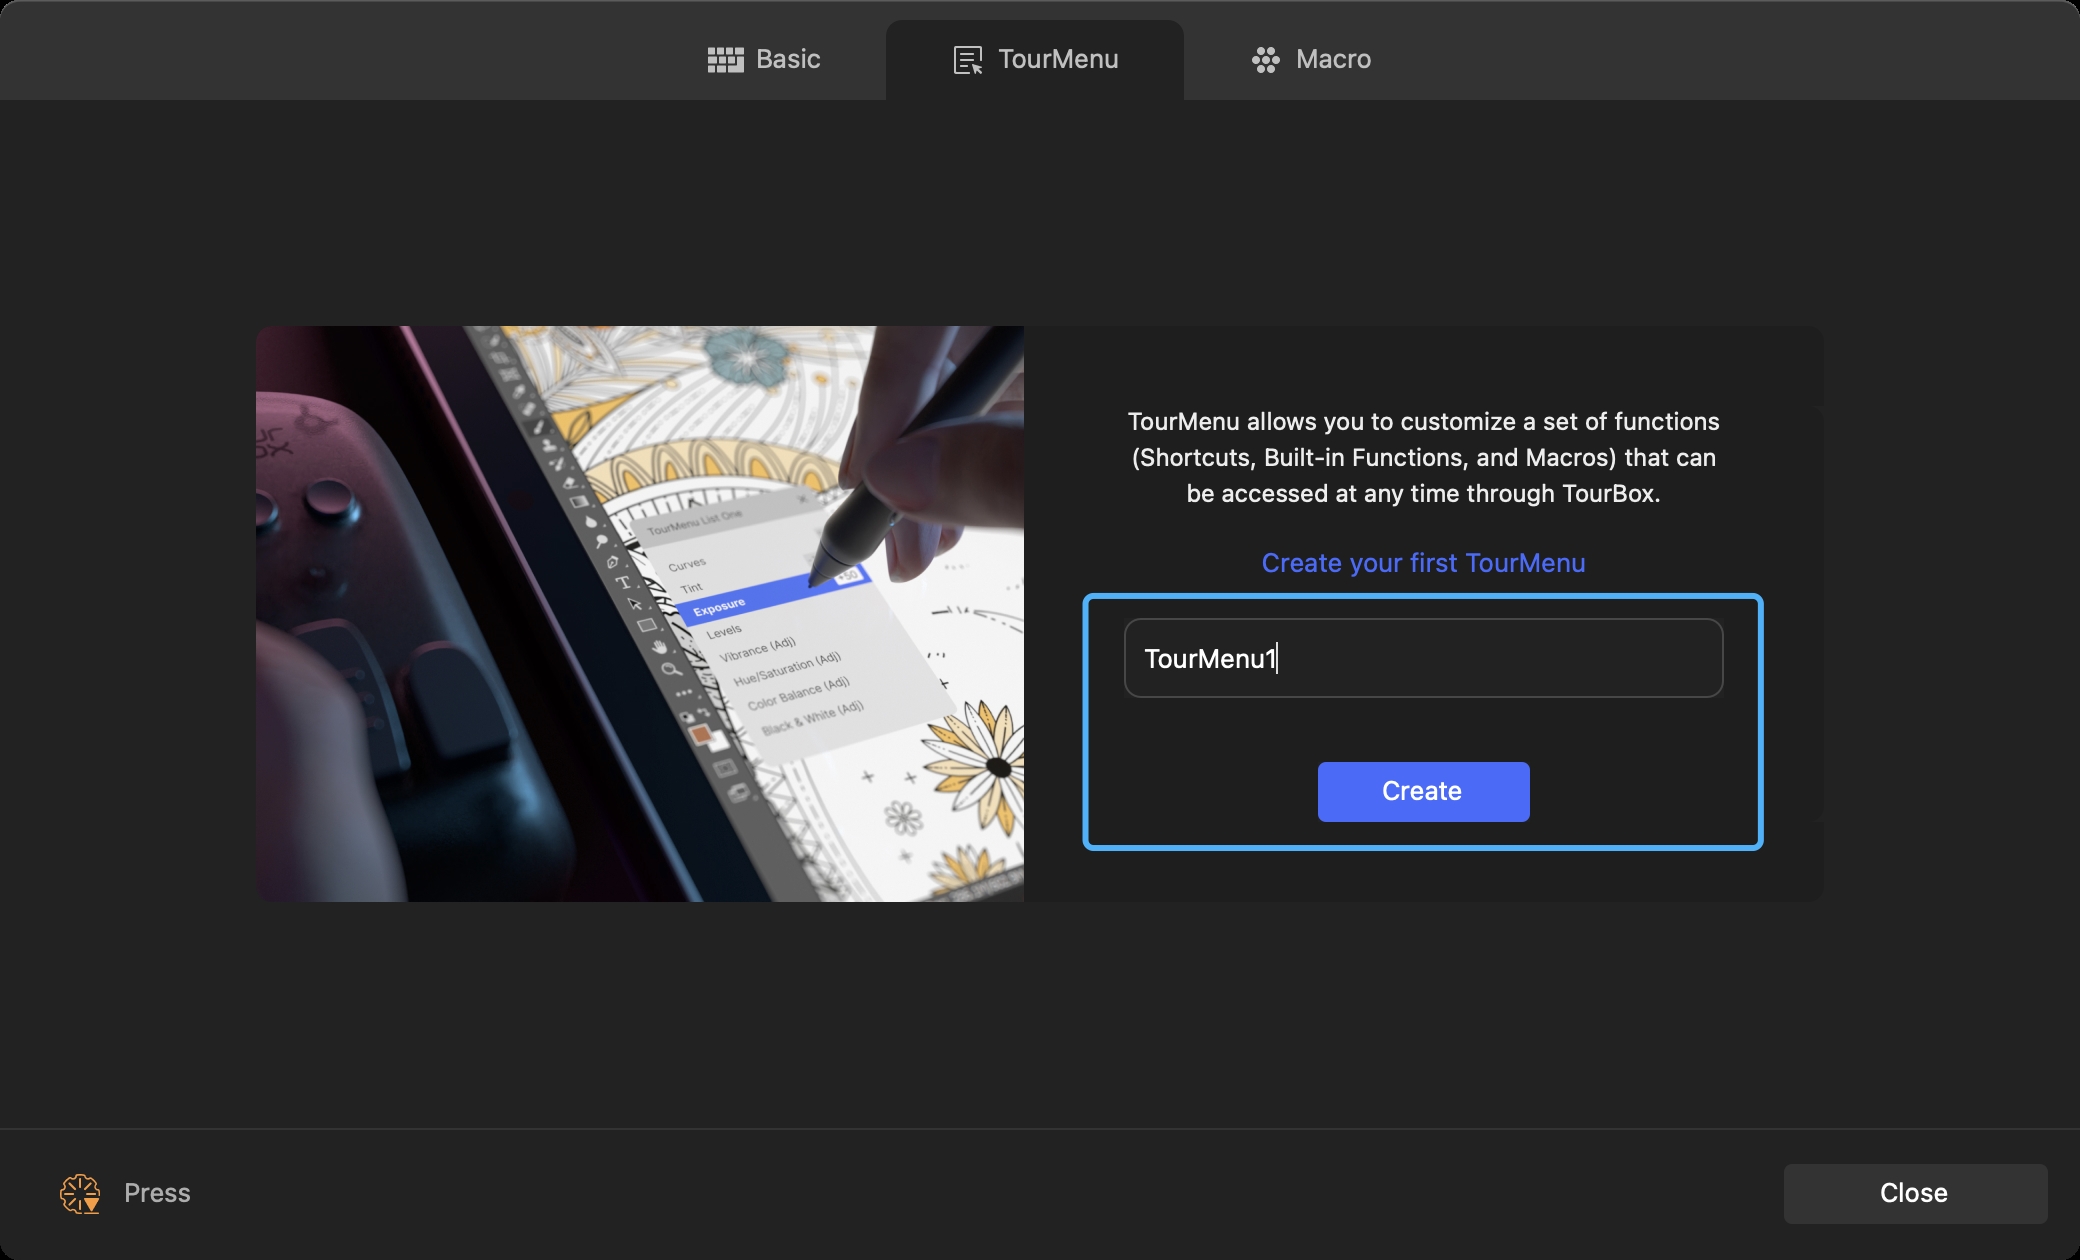
To set up TourMenu, navigate to the Preset Setting section in the TourBox Console and select the key you want to assign TourMenu to. In the pop-up window (Action Custom Panel), switch to the "TourMenu" setting interface.
If you are setting up TourMenu for the first time, you can give it a name of your choice and click the "Create" button to create a new TourMenu.
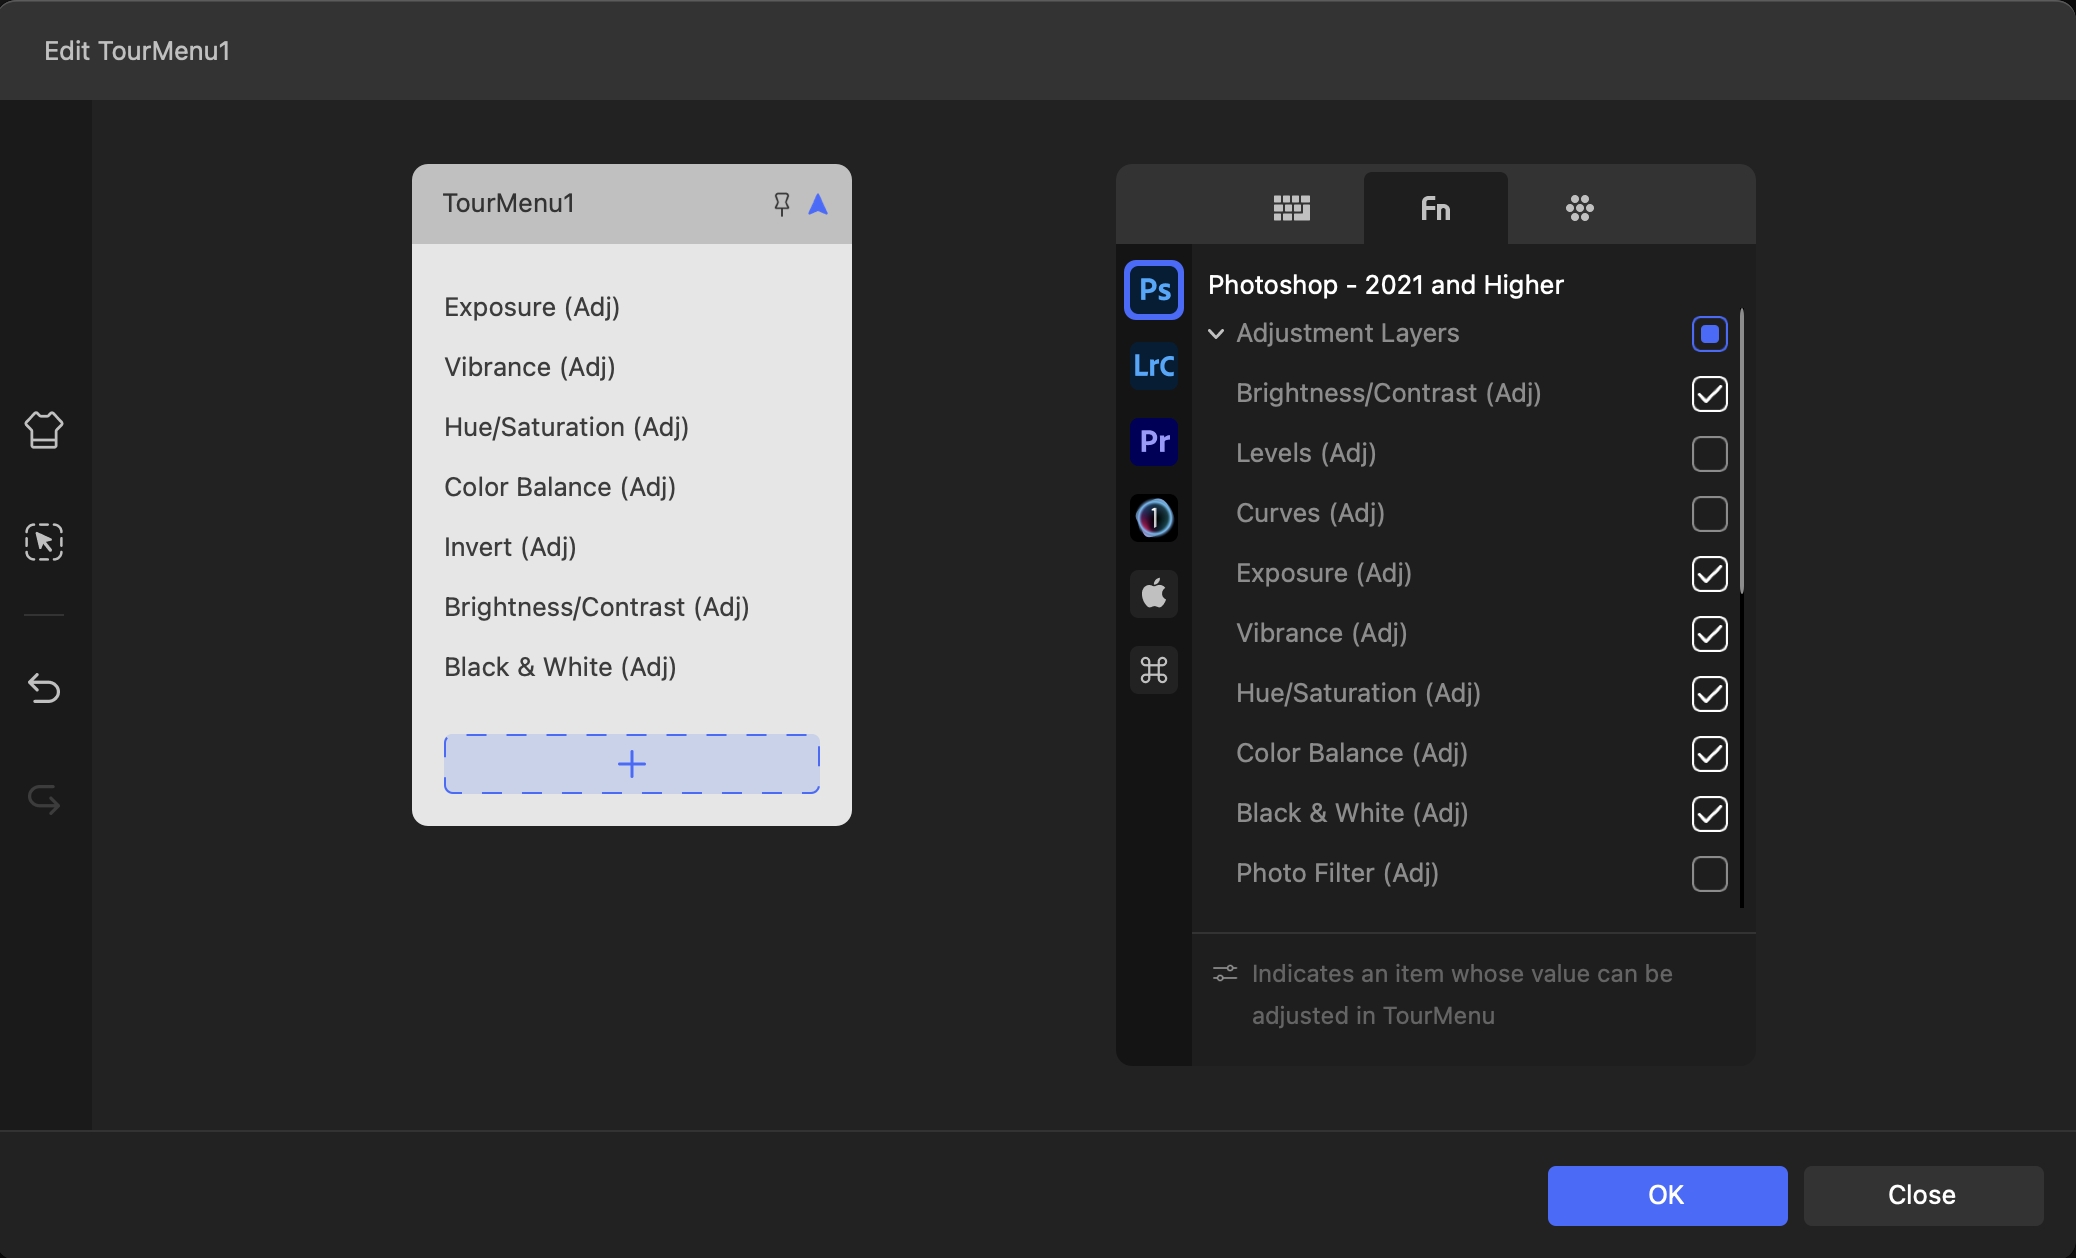
Next, click the "+" symbol to enter the editing page for TourMenu. Here, you can choose from shortcuts, built-in functions, and macros. Add multiple commands to this TourMenu for the selected key. Finally, click the "OK" button to complete the TourMenu setup.
Extra Tip:
You can assign multiple TourMenus to a single key. Simply revisit the TourMenu settings page and activate the desired TourMenu from there.

How to Use TourMenu?
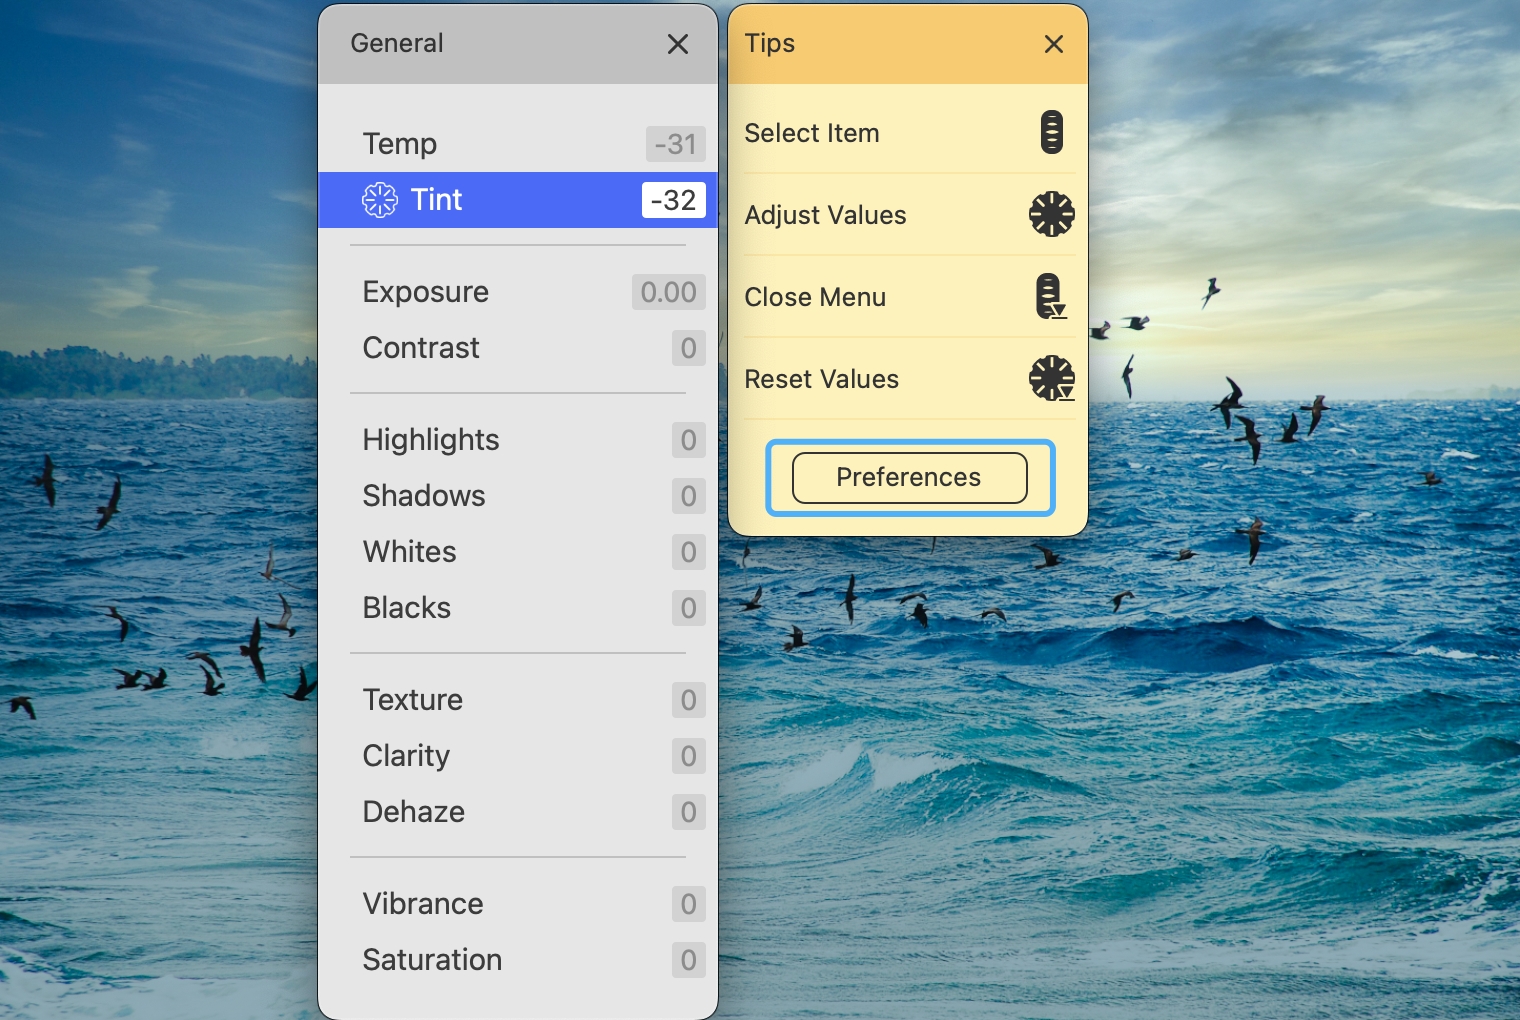
TourMenu operates similarly to the right-click menu you would typically access by clicking the right mouse button. With TourBox, you can simply press the key assigned to TourMenu to instantly bring it up.
You can interact with TourMenu by clicking with your mouse to execute the corresponding function. However, you have the option to exclusively use TourBox without relying on the mouse for TourMenu usage.
You can use the TourBox buttons to select, adjust, and execute items of TourMenu. By default, you can use the Scroll control to select items, the Dial control to adjust values, and the Tall button to execute actions.

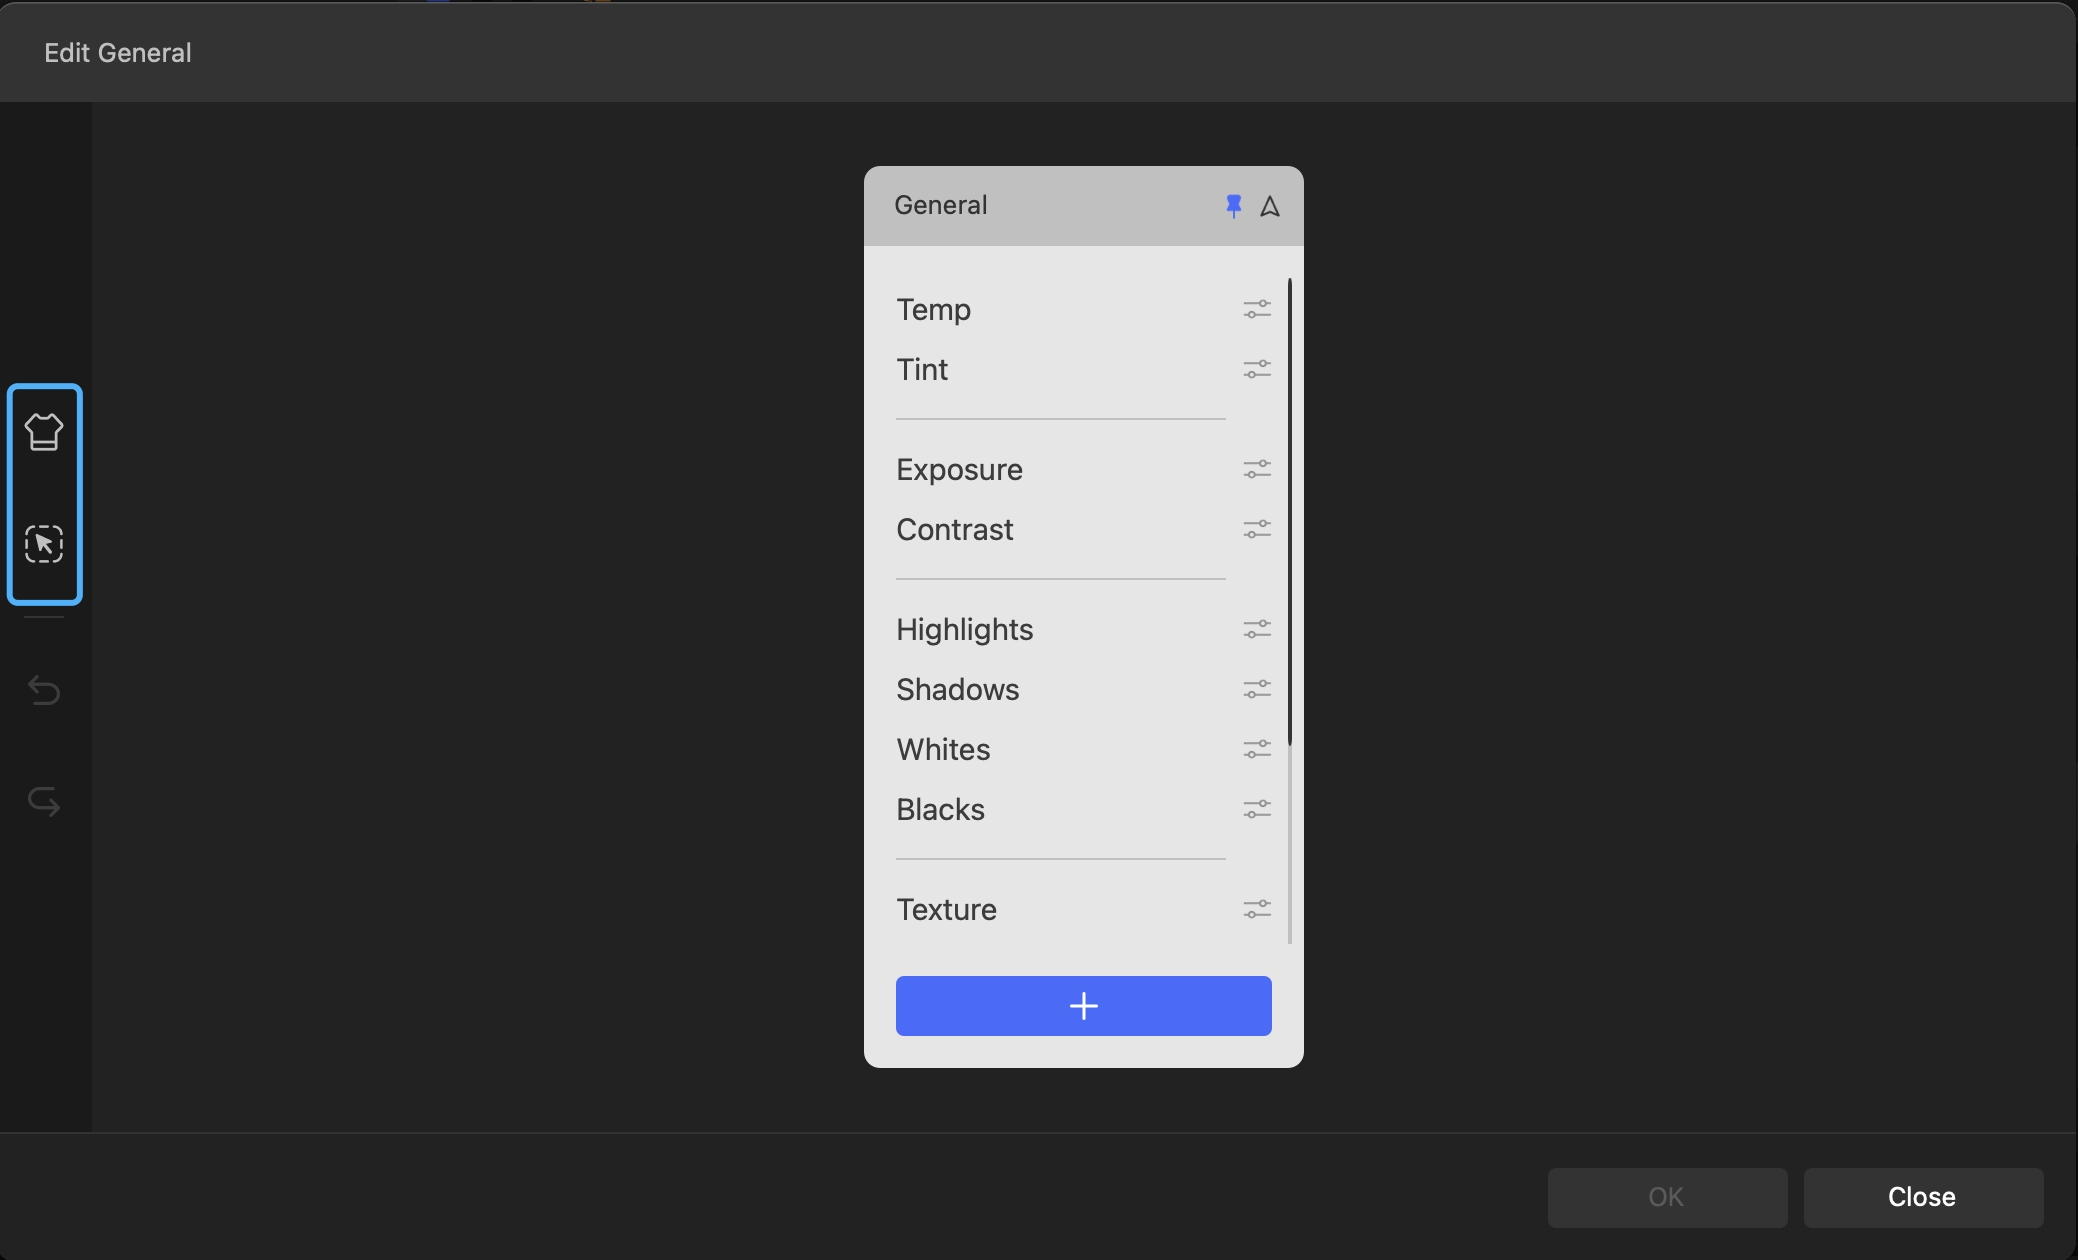
You can also customize these shortcut settings according to your preferences on the TourMenu Preferences page. There are two methods to access the TourMenu Preferences page:
Method 1: In the TourMenu settings page, click on the upward-pointing hand icon on the left to access the Preferences page.

Method 2: While using the application, press the key assigned to TourMenu, then click on "Tips" above TourMenu, and finally click on "Preferences" on the Tips page.
How to Customize the TourMenu Interface?
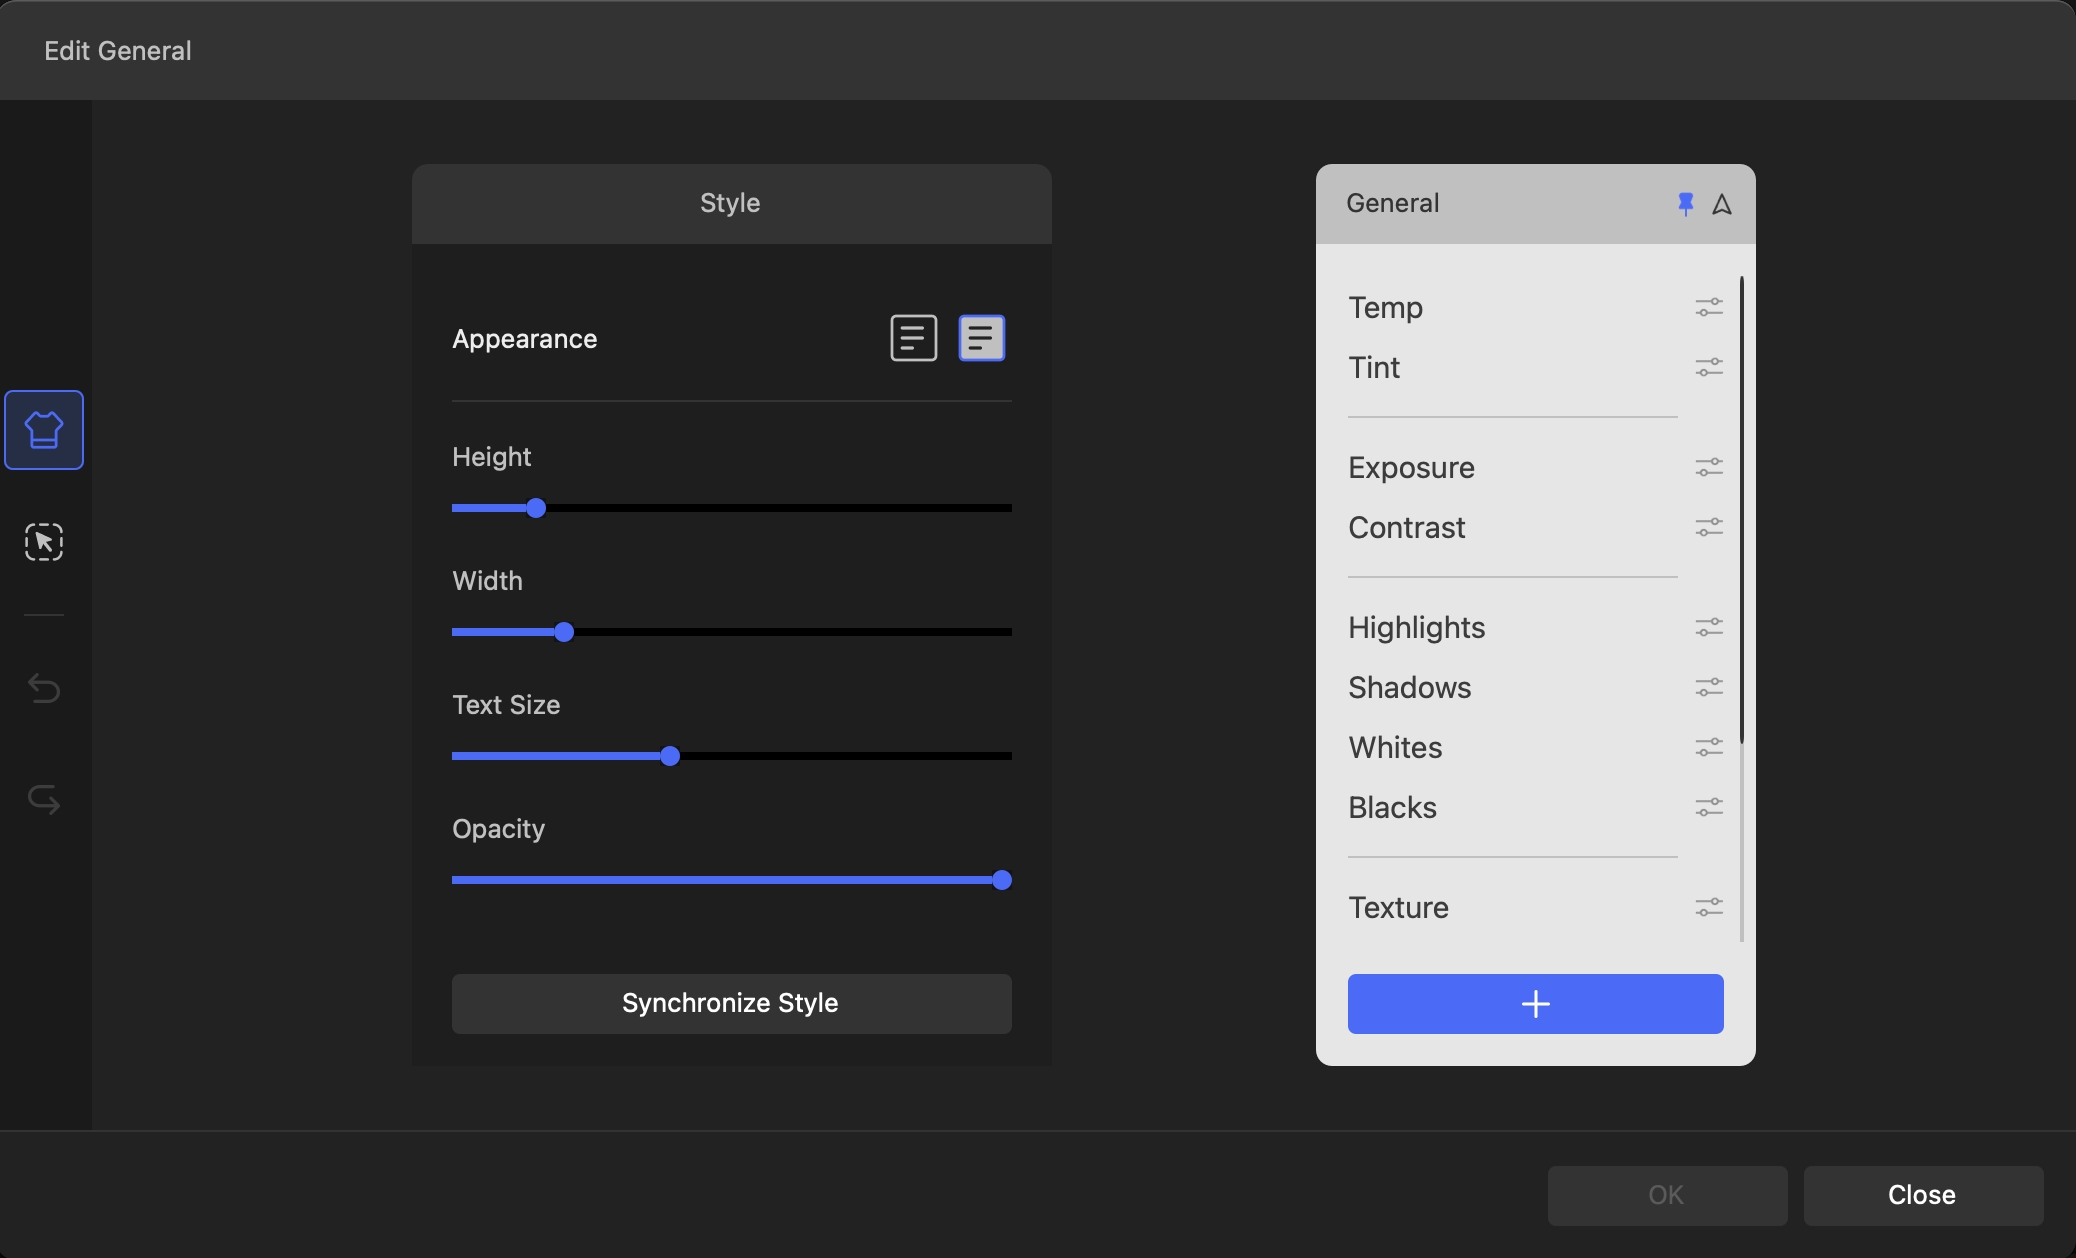
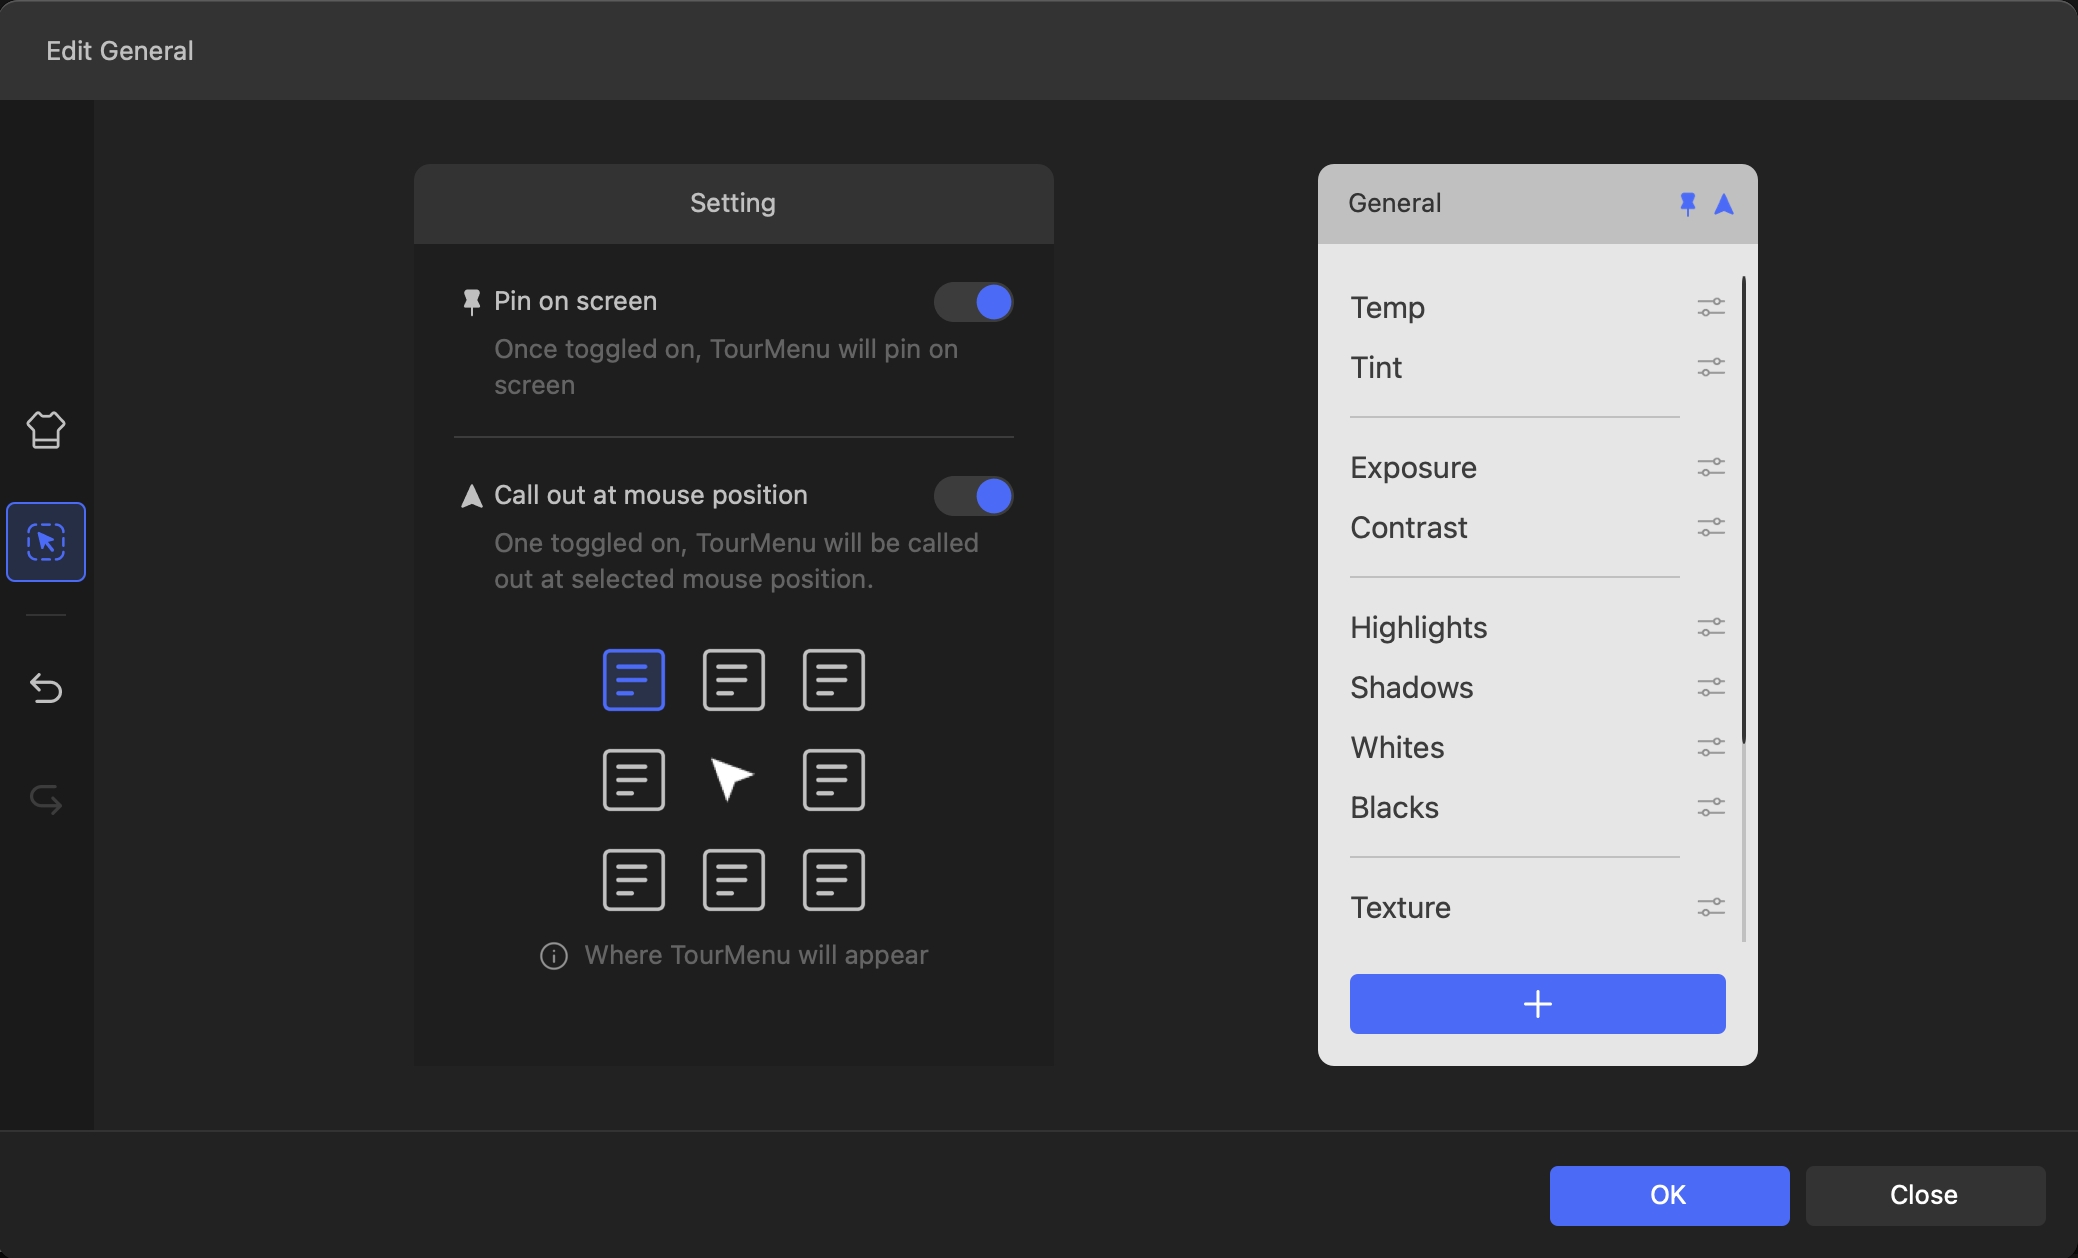
You have the flexibility to personalize the TourMenu interface based on your preferences. On the left side of the TourMenu editing interface, you will find two buttons: "Style" and "Setting."
Style: In the Style section, you can customize the appearance of the TourMenu, such as its height, width, text size, opacity, and more.
Setting: In the Setting section, you can adjust the TourMenu's position and choose whether it should call out at the mouse position or have a fixed location.
Have a Question?
To explore more about using TourBox and learn additional tips and tricks, check out our TourBox tutorials series.
If the tutorials above do not answer the questions you have, please contact support@tourboxtech.com.