[TourBox Tutorial] How to Assign Macro Commands?
In addition to assigning shortcuts and TourMenu to the buttons and rotating controls, you can also configure macros on the TourBox.
What Is Macro?
Macro refers to batch processing in computer language. With the macro feature on TourBox, you can execute a series of commands by pressing the corresponding button.
The best part is that setting up macros on TourBox is incredibly simple and doesn't require any programming knowledge.
Note:
You can set up a series of commands for macros on TourBox, including shortcuts, mouse actions, delays, text input, opening files, folders, and URLs.
How to Assign Macro Commands?
In the Preset Setting section of the TourBox Console, select the button, dial, or button combination you want to assign a macro to. Click on the Setup Area to access the Action Custom Panel.
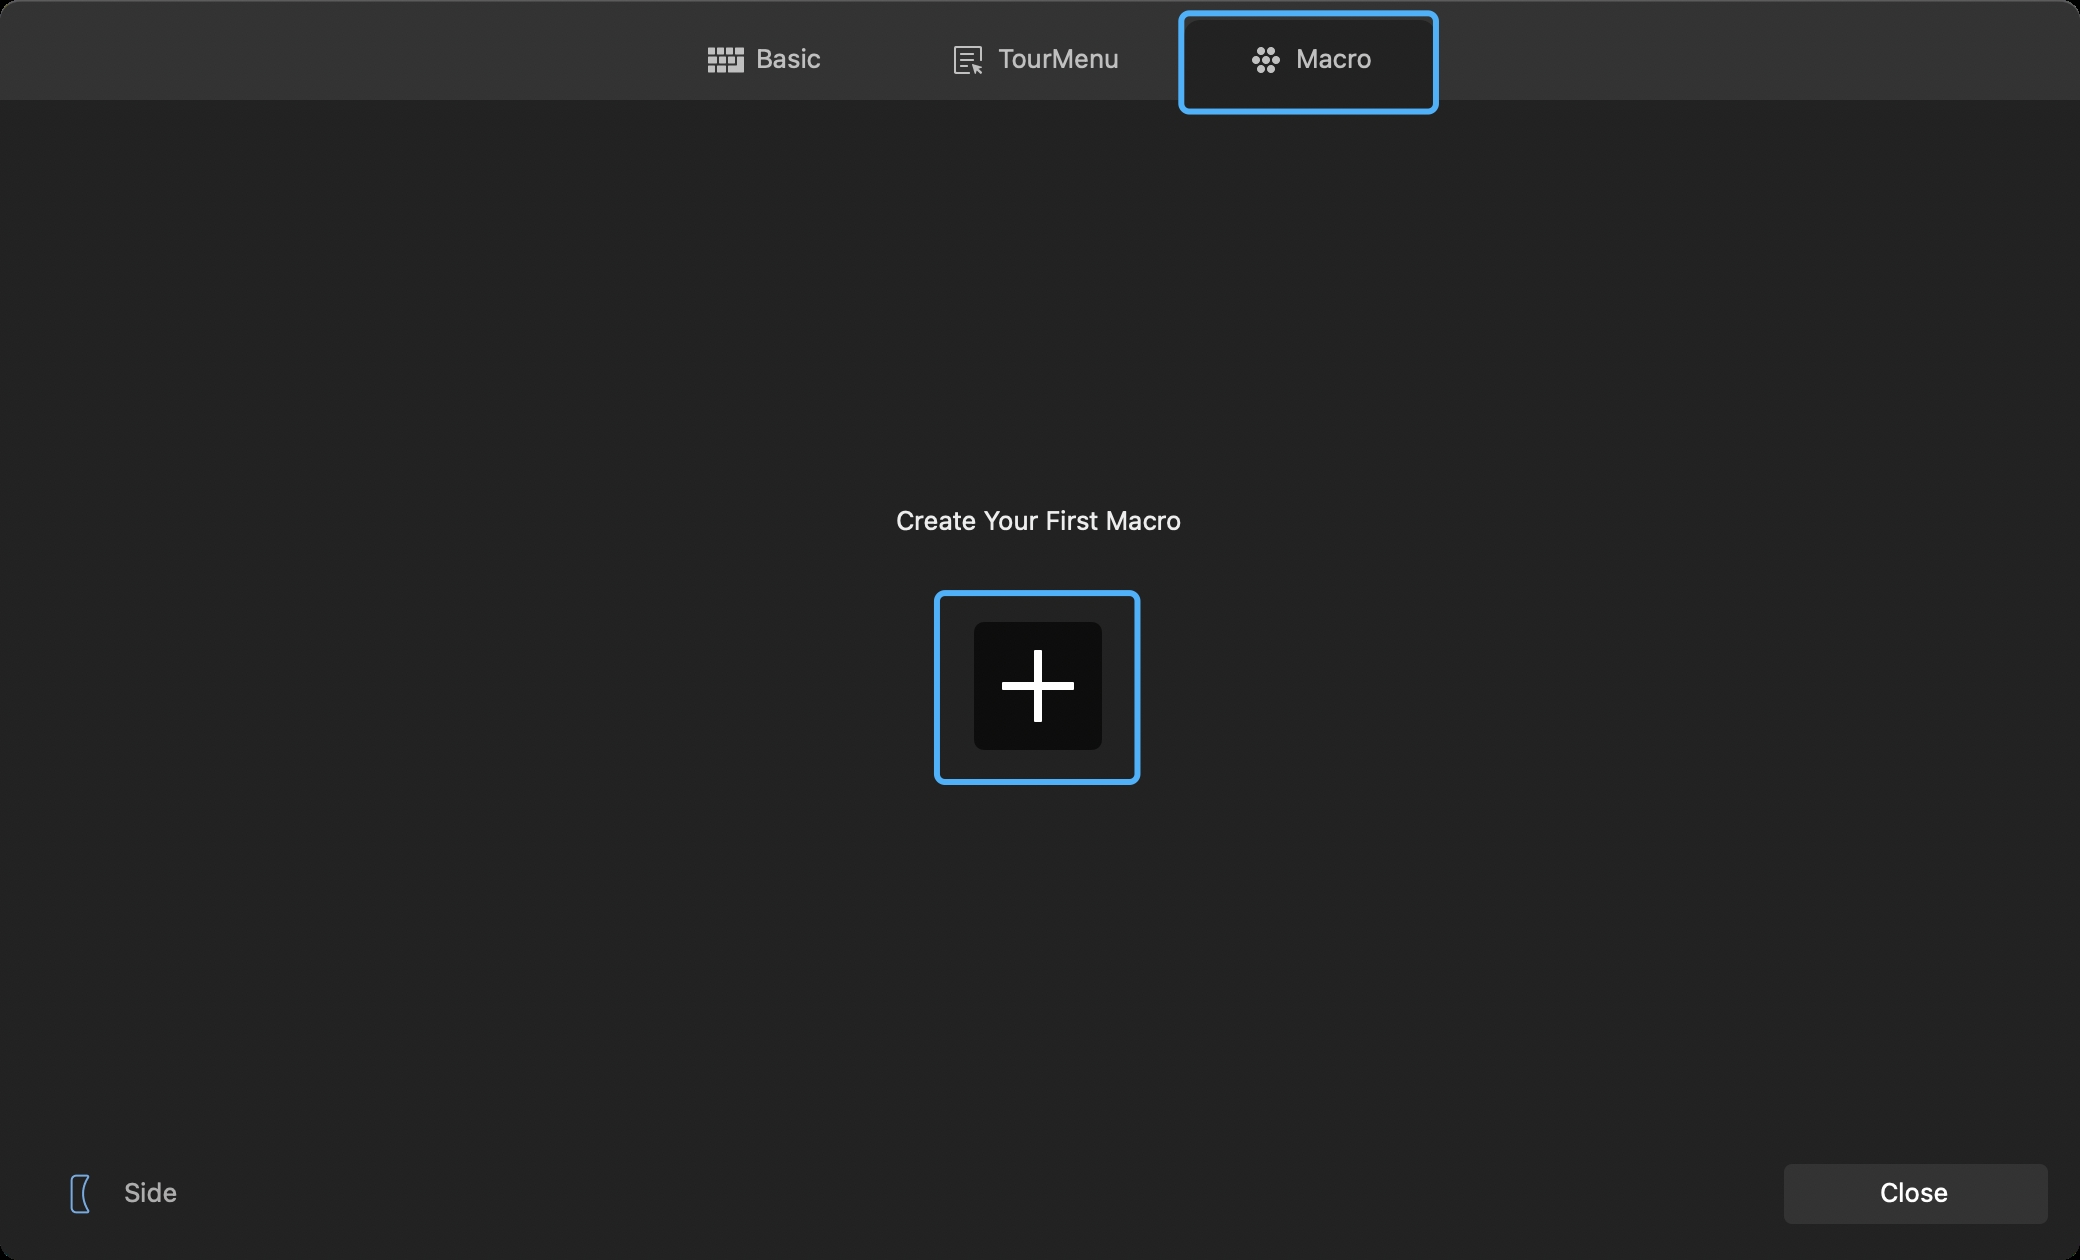
Switch to the Macros page at the top of the Action Custom Panel. Click the plus sign in the center of the page to give your macro a custom name, and then you'll enter the macro settings page.
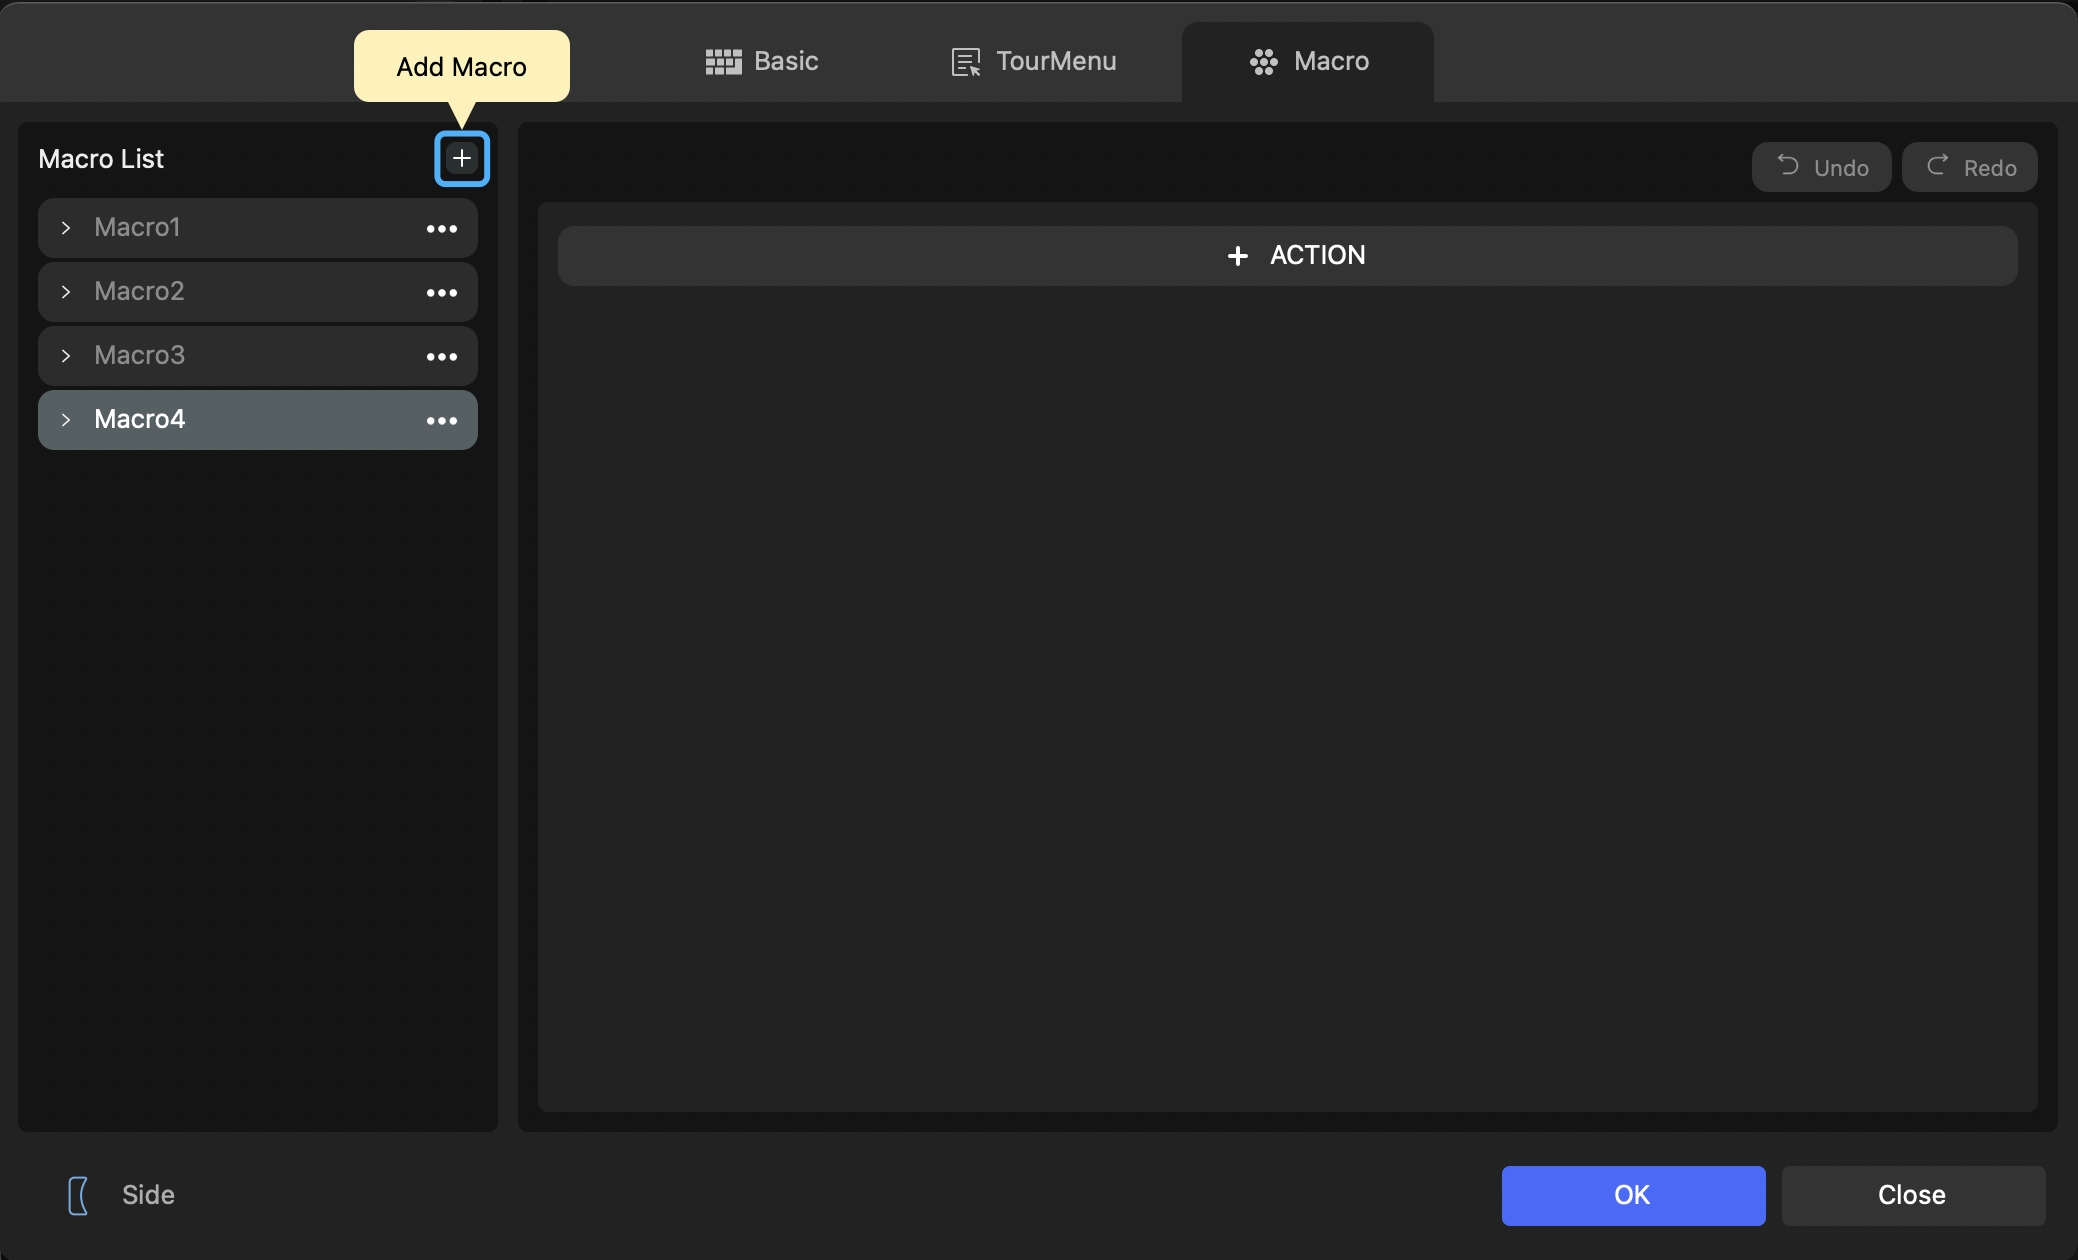
1. Macro List
On the left side of the macro settings page, you'll see a workspace called "Macro List". To add a new macro, click "Add Macro" at the top right of the Macro List.
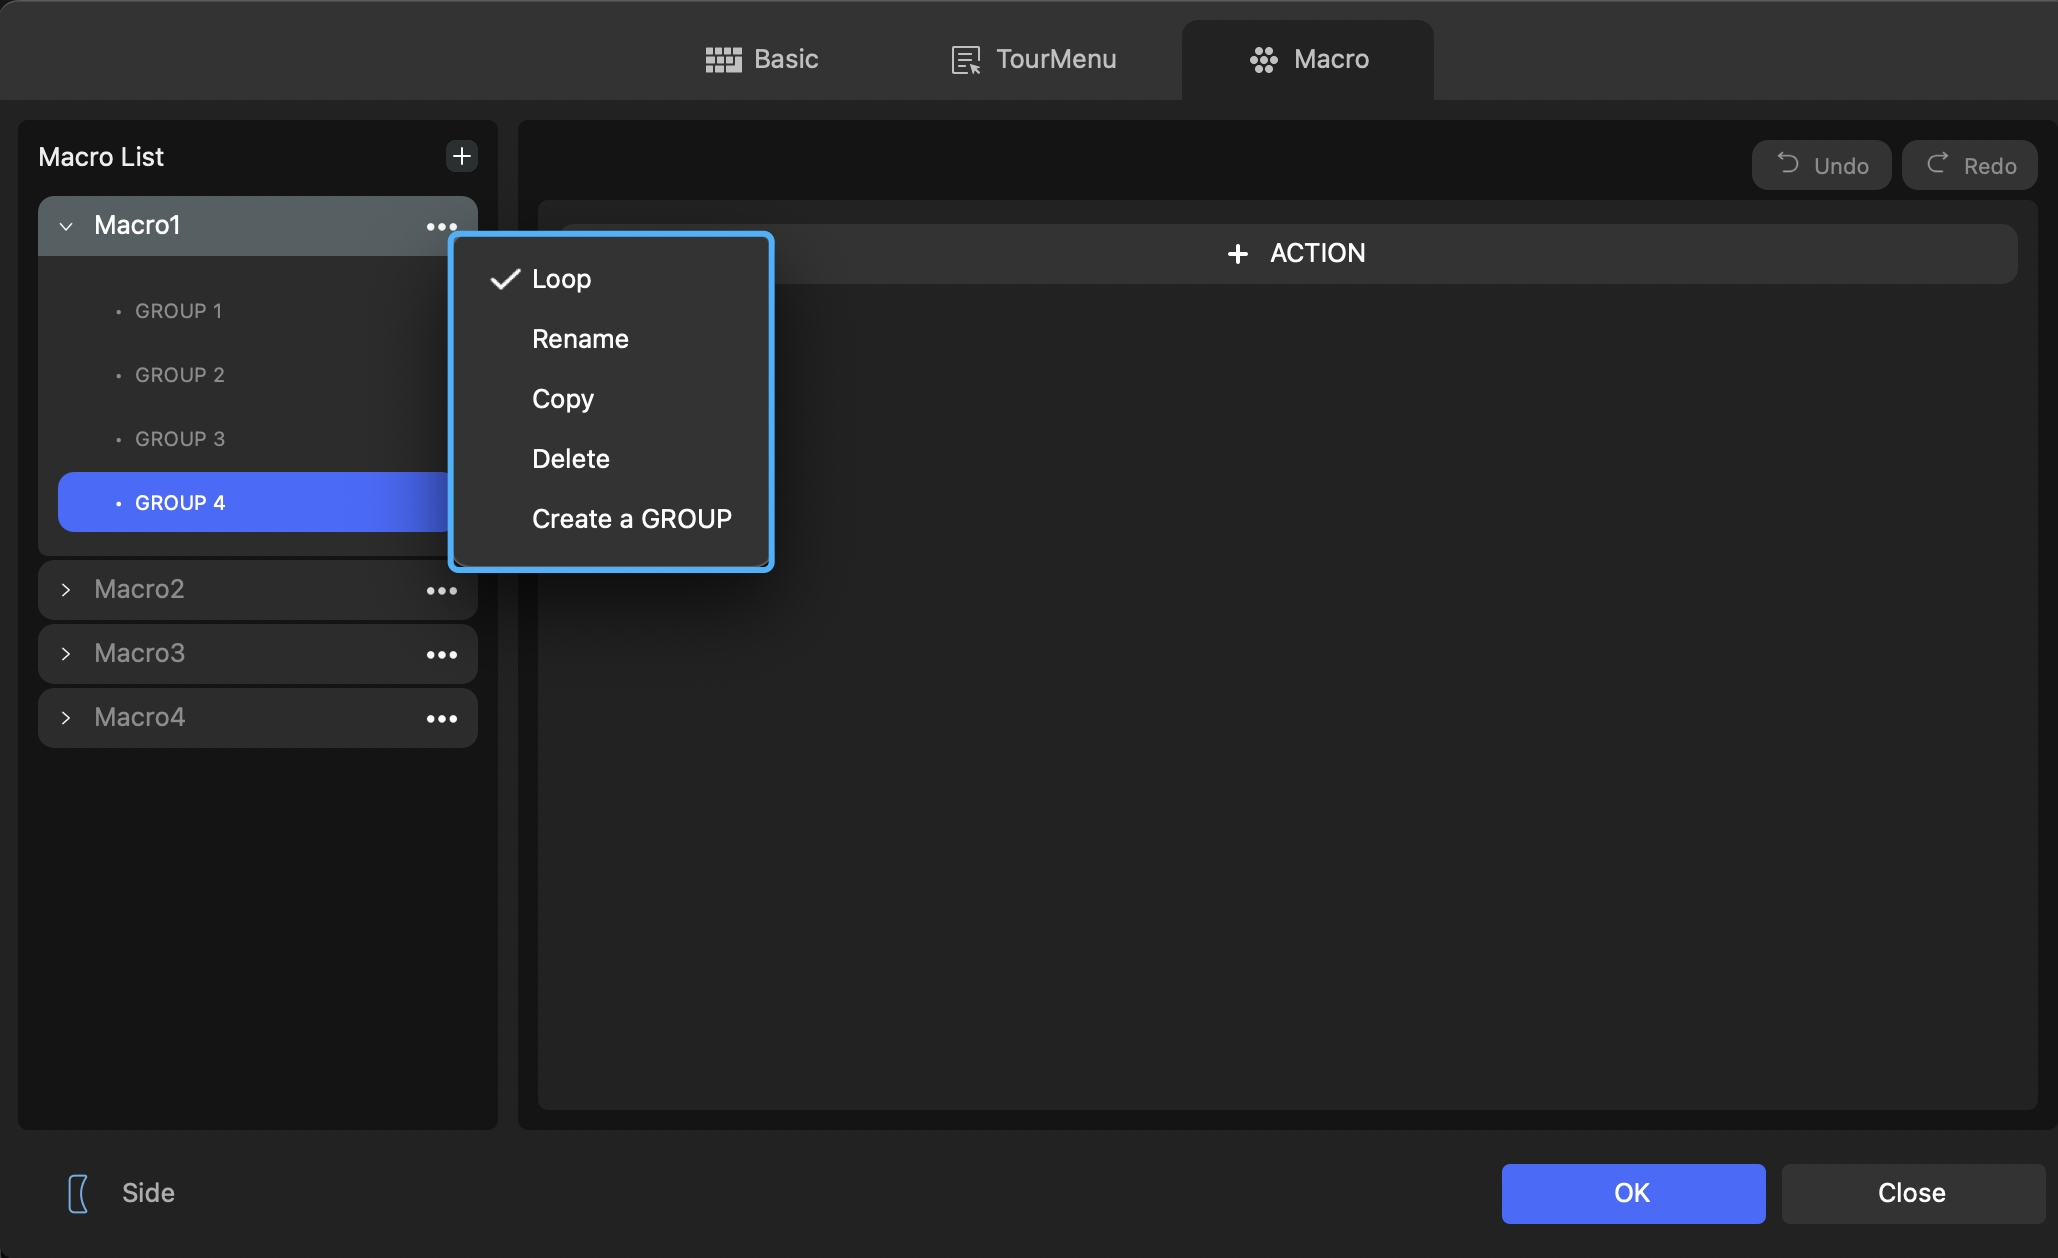
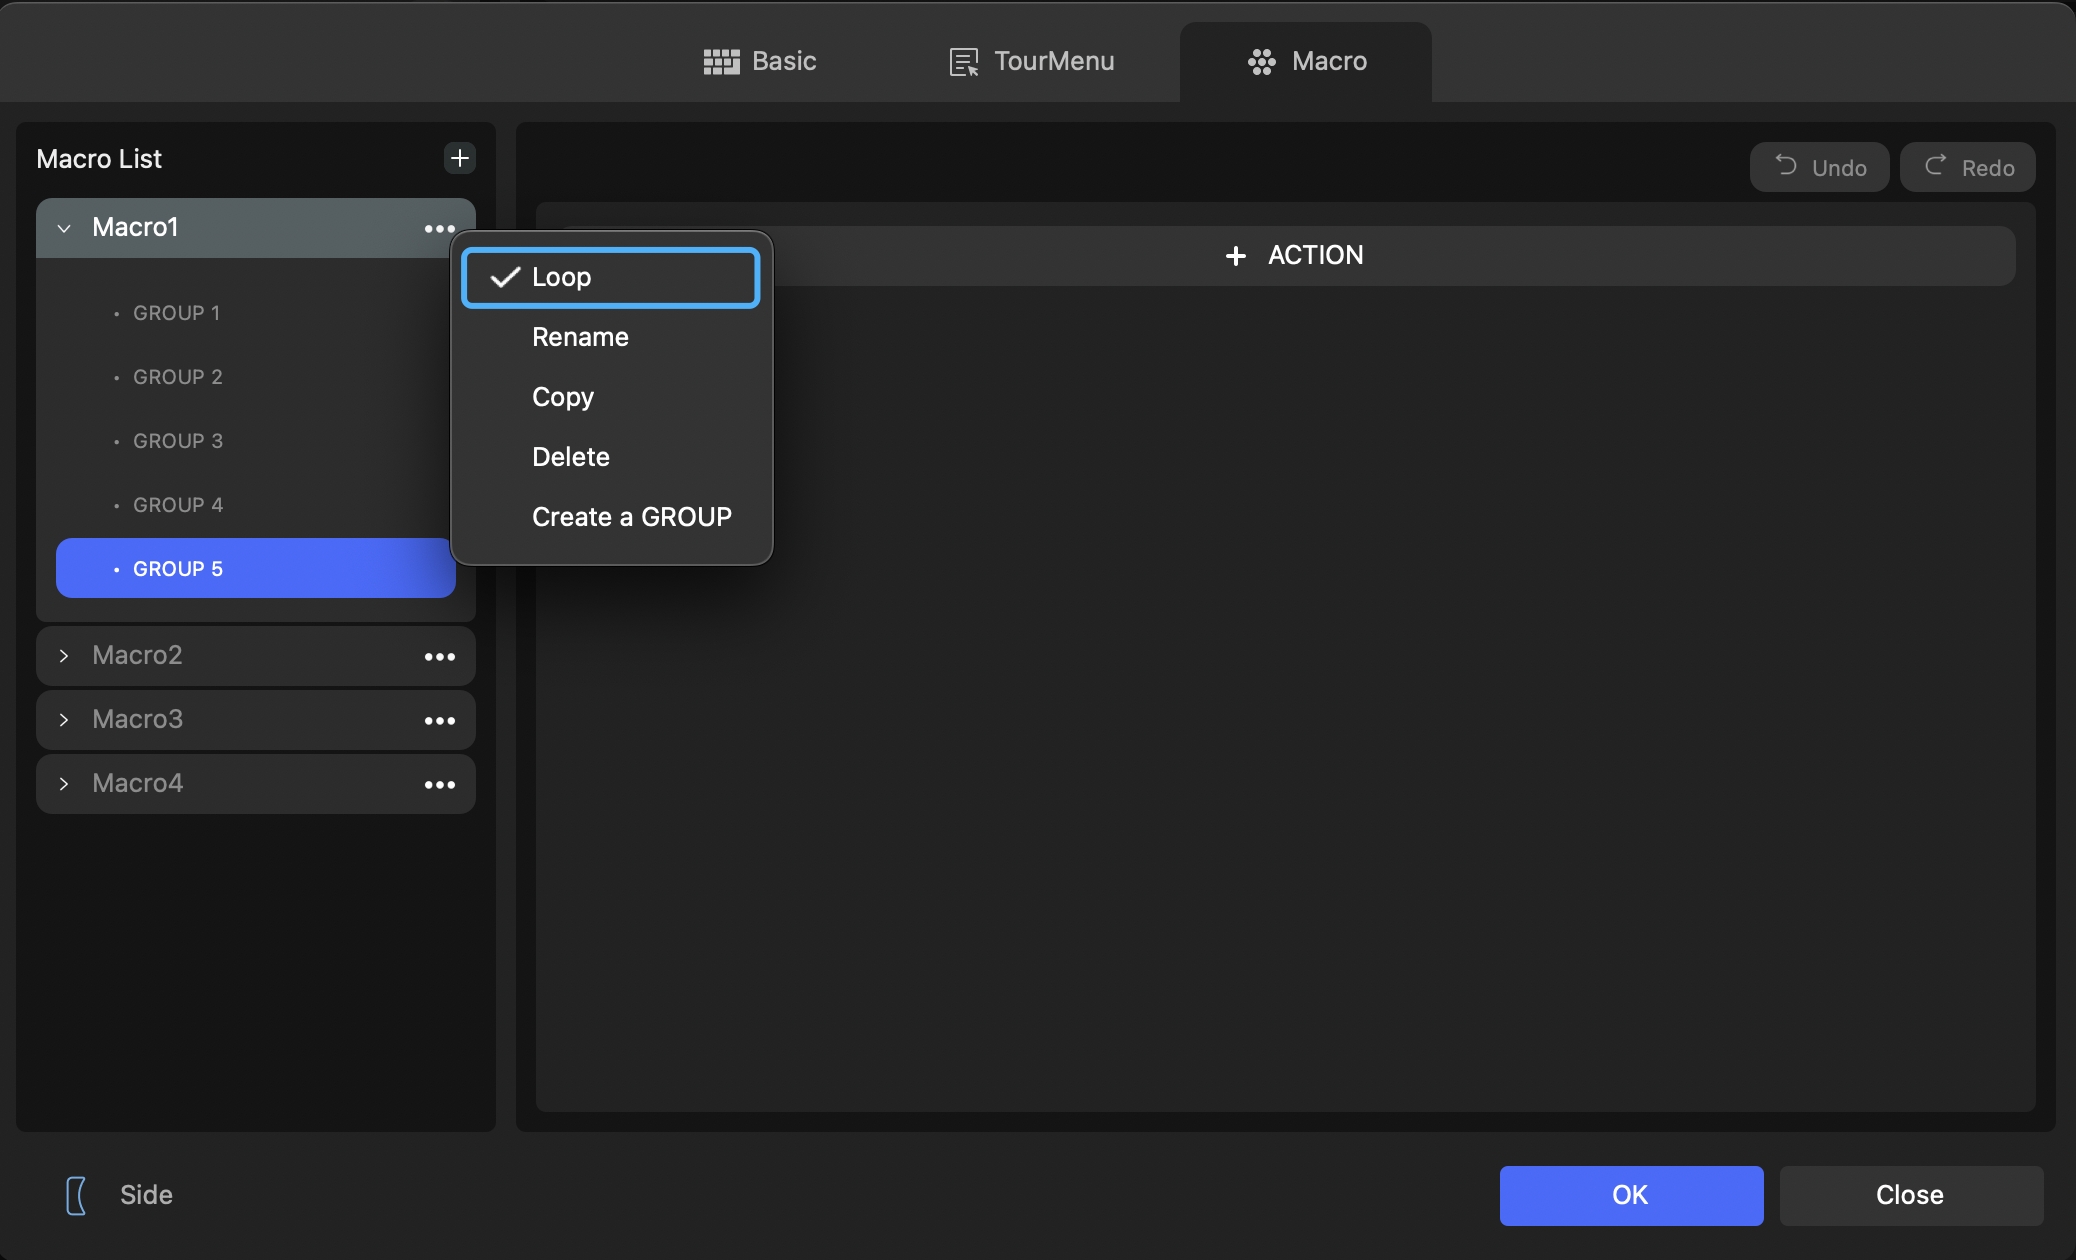
You can also customize macros in the Macro List further. Click the ellipsis icon on the right side of a macro in the Macro List, and a dropdown menu will appear.
From there, you can perform actions such as Loop, Rename, Copy, Delete, and Create a GROUP for the selected macro.
Note:
Macros in the Macro List are specific to the current application preset. This means you can only use them within the currently linked application. You can set up multiple macros and link them accordingly based on your specific usage needs.
2. Macro Action
On the right side of the macro settings page, you'll see an Action workspace. Click on "+ ACTION" to create a new action command.
In the action command settings panel, you'll find the following options:
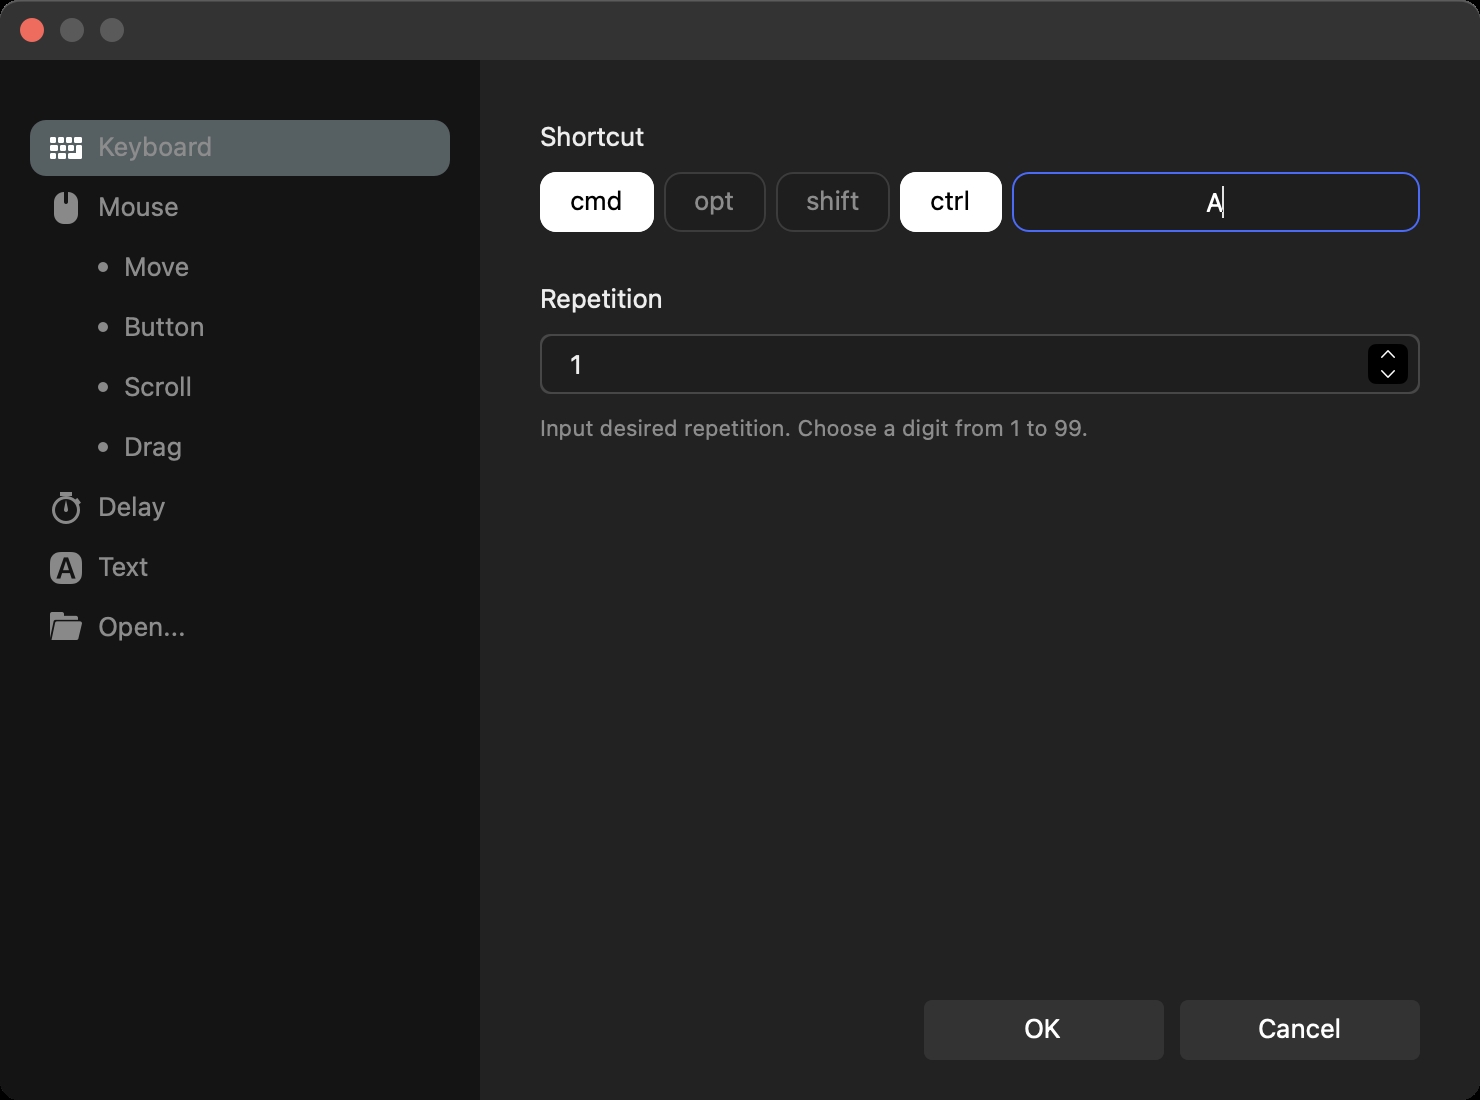
Keyboard
You can set a single key or key combination as a keyboard shortcut, and you can click on "Repetition" below to specify the number of times the shortcut should be repeated.
Mouse
You can assign actions for left-click, right-click, middle-click, double-click, scroll up, scroll down, mouse movement, and drag. You can also set the number of times the action should be repeated.
You can also perform mouse actions at the current position or at specific coordinates. Clicking on the mouse icon in the Location setting will open the coordinate positioning tool.
Simply position the mouse where you want the action to occur, press any button on the TourBox, and the coordinates will be automatically filled in the TourBox Console.

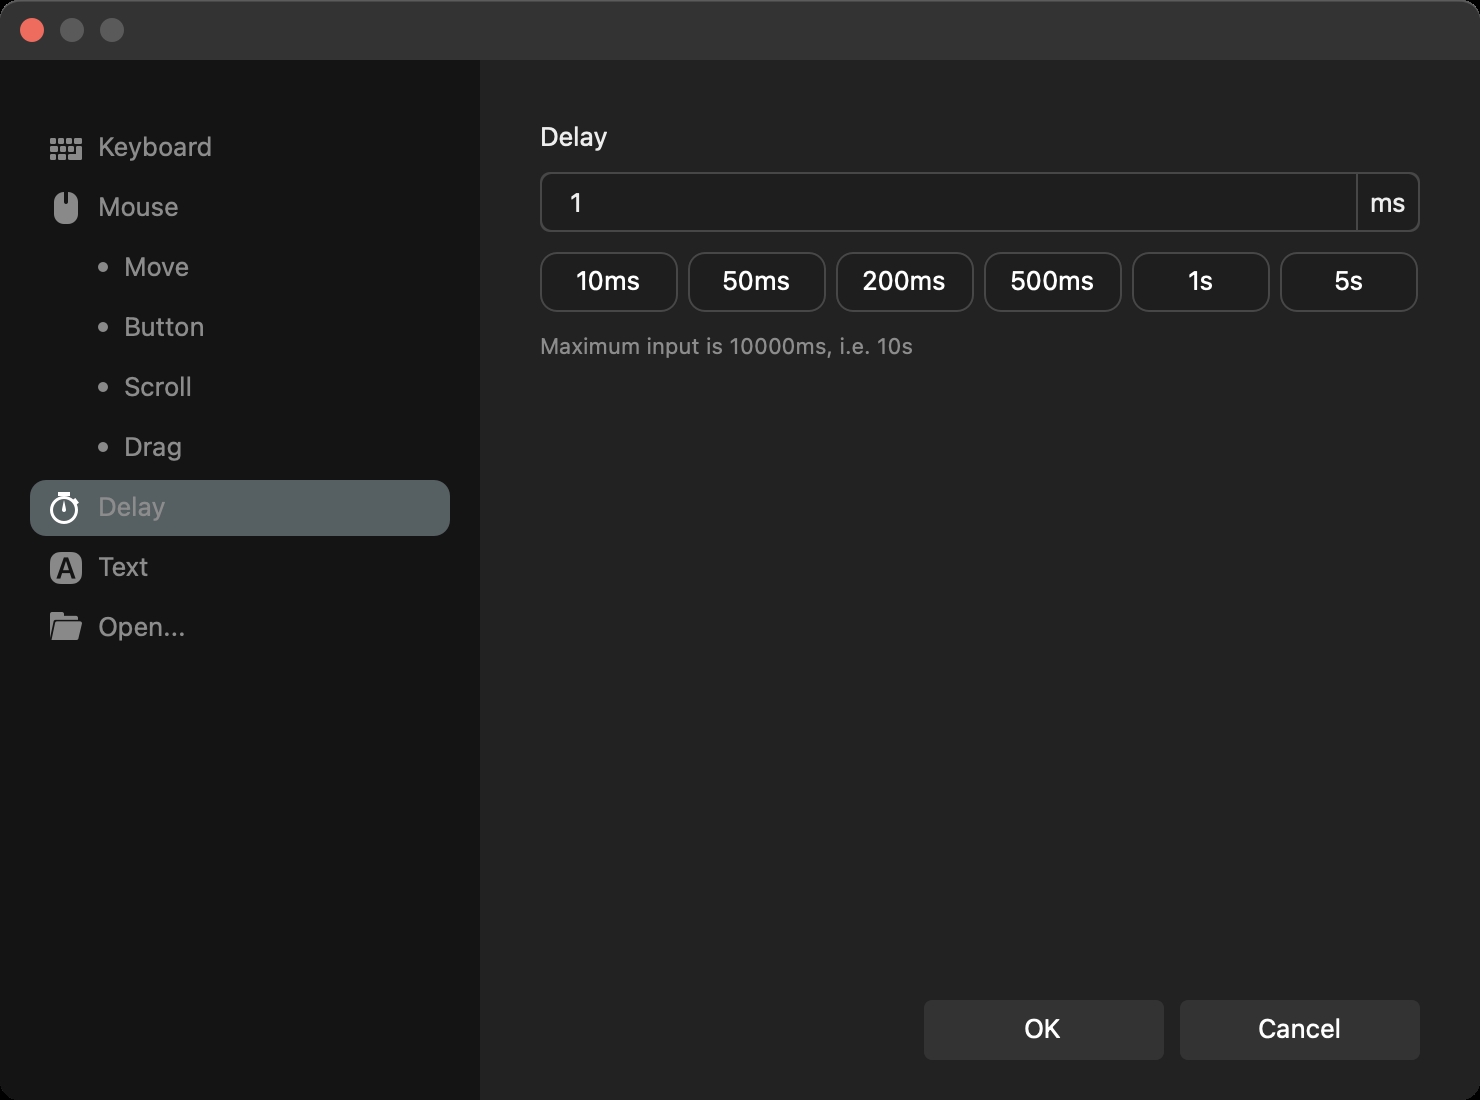
Delay
You can set a waiting time between two consecutive commands.
Note:
We recommend adding a delay of at least 50ms between different actions in macro settings. This ensures that your macro commands simulate manual operations, preventing software crashes that may occur when multiple actions are triggered simultaneously.
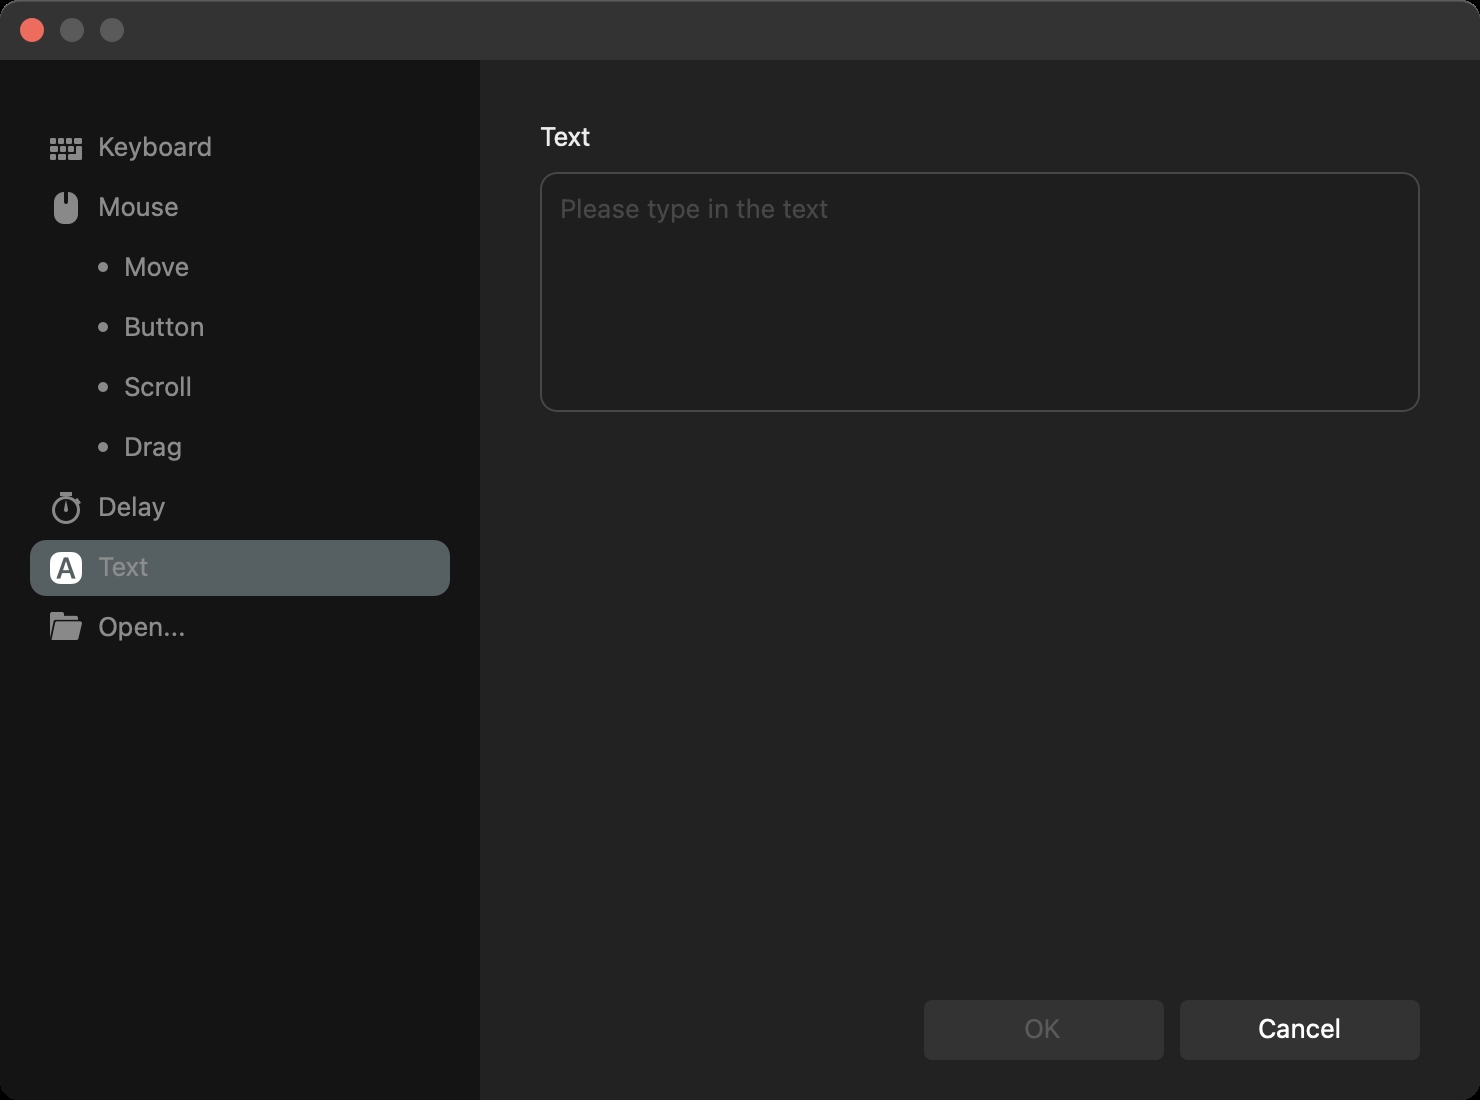
Text
You can enter text in the provided text box.
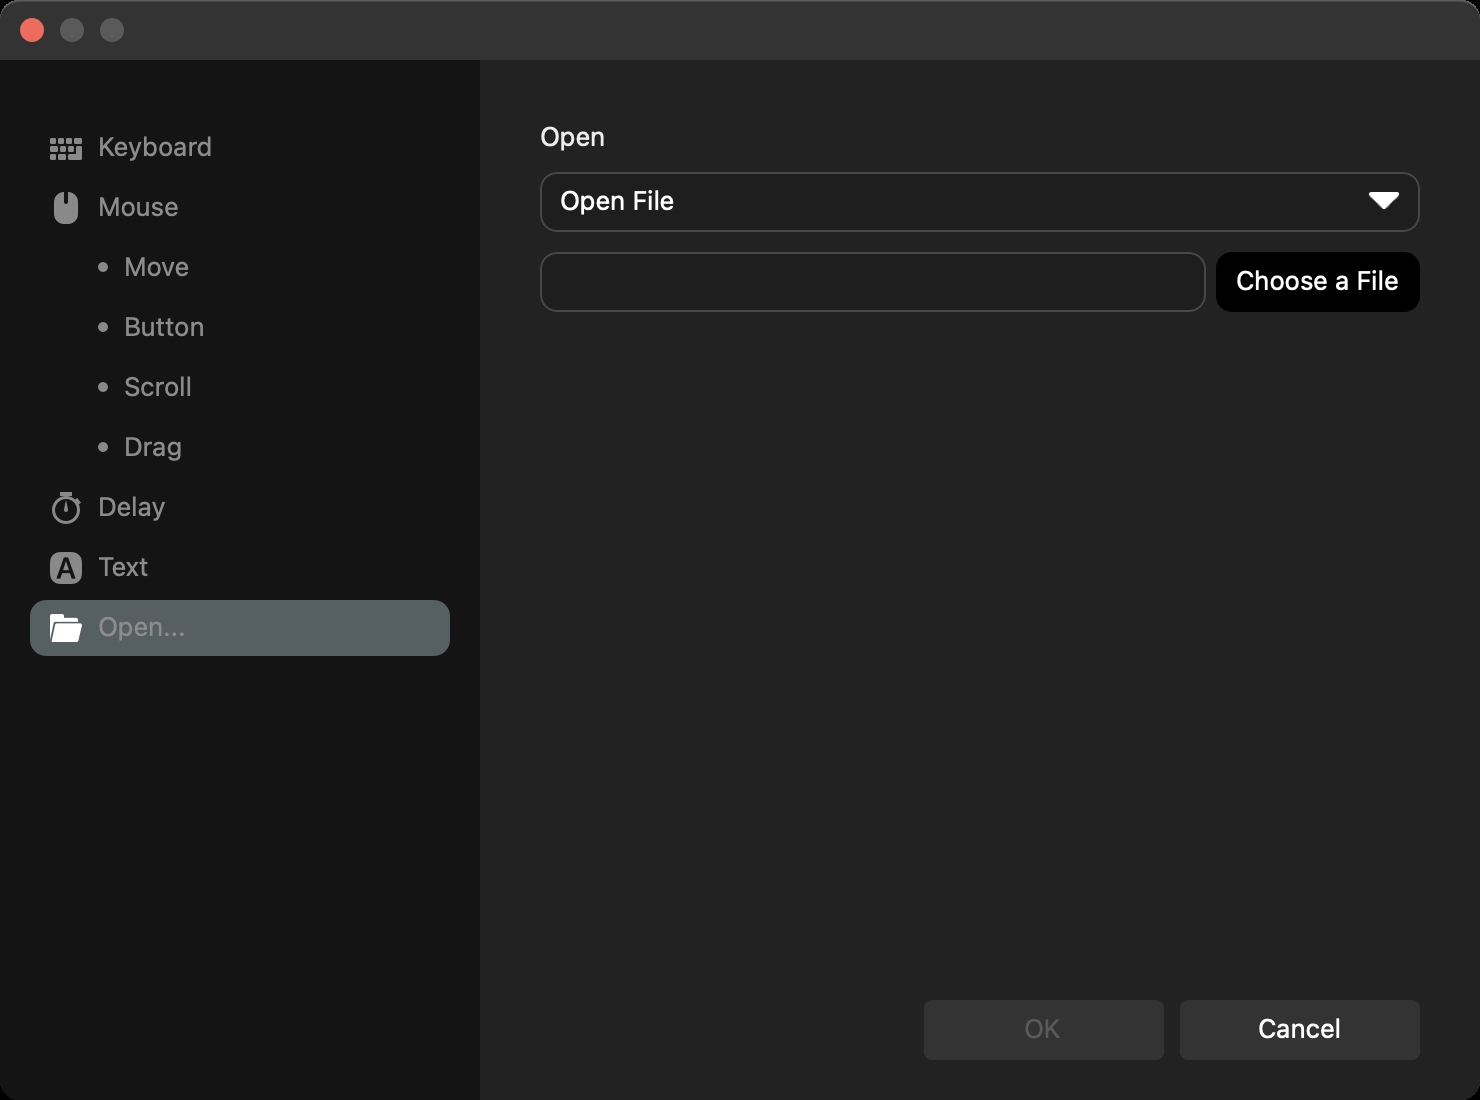
Open
You can set actions to "Open File," "Open Folder," or "Open Link" using the default browser.
Watch the video below to learn how to effortlessly achieve consistent batch color adjustments in Lightroom Classic using macros.
What Is a GROUP in Macro Settings?
If you have multiple actions you want to manually execute one by one instead of all at once, you'll need to utilize the GROUP feature within TourBox macros.
The GROUP feature allows you to bundle different actions into one macro. By pressing a TourBox button each time, you can sequentially execute a set of GROUP commands within that macro.
You can drag and rearrange GROUPs to adjust the execution order.
To create a GROUP, click on the ellipsis icon next to the macro in the macro list, then select "Create a GROUP" from the dropdown menu. This turns the macro into a parent set, with your created actions becoming its subsets.
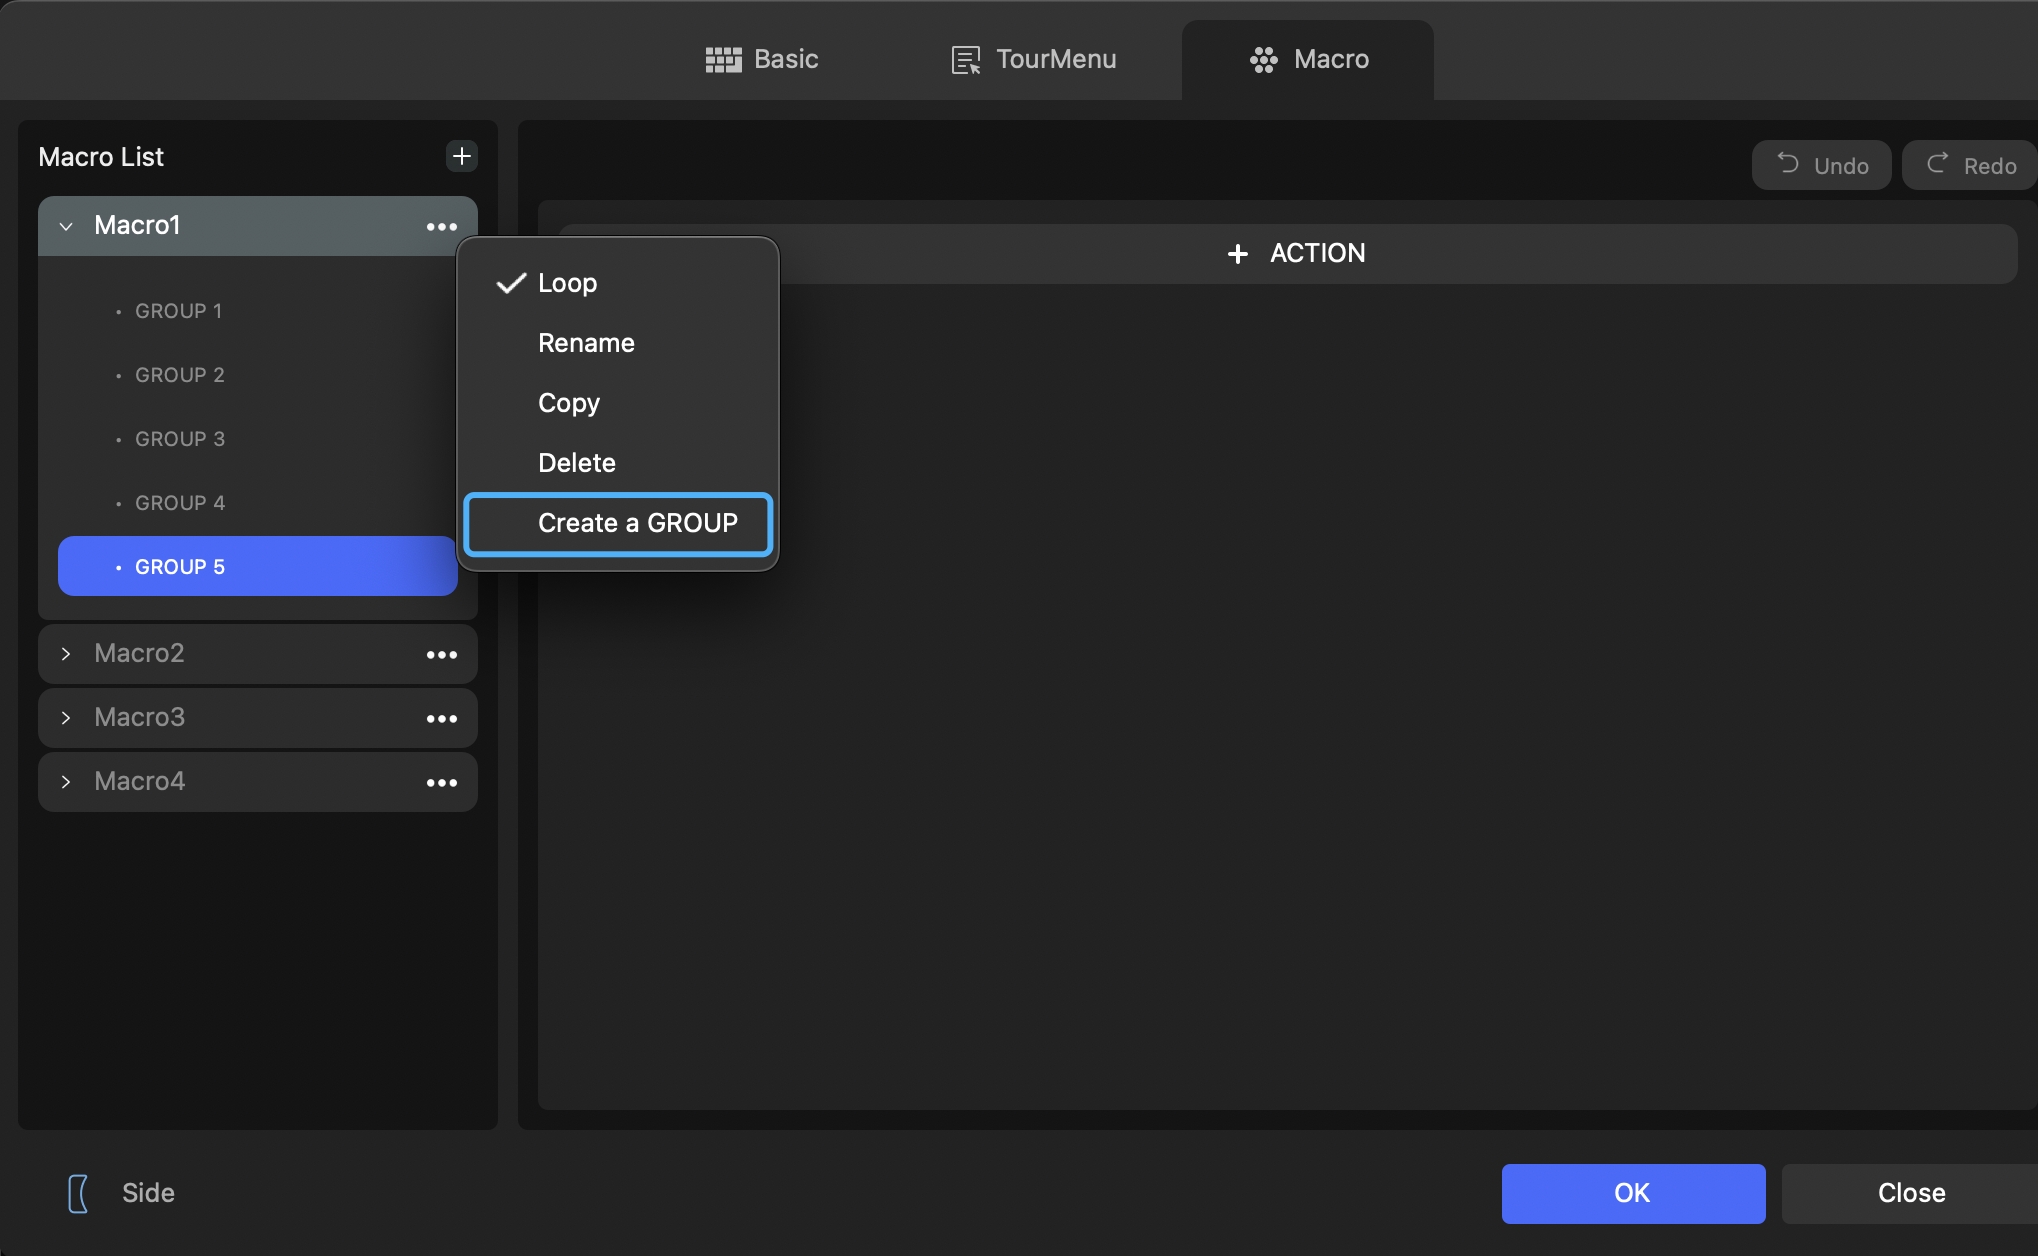
When you create a GROUP, two GROUPs labeled as GROUP 1 and GROUP 2 will appear below that macro. If you want to add more GROUPs, simply click "Create a GROUP" again.
At this point, you can choose the Loop option from the ellipsis menu. You can decide whether to enable Loop functionality.
With Loop enabled, once all actions within all GROUPs in the macro have been executed, it will start over and loop again.
If you don't choose the Loop feature, you can still execute each GROUP within this macro from top to bottom in sequence.
However, after completing all the GROUPs in the macro for the first time, you won't be able to start over and loop through each GROUP again. Each time you operate, you will always execute the last GROUP in this macro.
To change the execution order of the GROUPs within this macro, simply go back to the preset settings panel, click the downward arrow button next to the button assigned to the macro, and switch it to point upwards.
This way, the GROUPs will be executed in reverse order.

To learn more about how to use GROUP in TourBox macros, check out the article we share below.
Further Reading:
You can gain a practical understanding of how GROUP is applied by watching the short demonstration video below.
Have a Question?
To explore more about using TourBox and learn additional tips and tricks, check out our TourBox tutorials series.
If the tutorials above do not answer the questions you have, please contact support@tourboxtech.com.