[TourBox Tutorial] How to Use GROUP?
In the TourBox macro settings panel, there's a highly practical feature called GROUP.
You might not have used the GROUP feature much or even experienced it yet, but mastering its functionality can greatly expand the possibilities of your operations.
Therefore, we hope this short tutorial can help you thoroughly understand how to use TourBox GROUP and incorporate this interesting feature into your creative journey.
Before delving into the usage of TourBox GROUP, you may need to familiarize yourself with some preliminary knowledge about TourBox macro usage. Check out our tutorial on macros for more information.
Further Reading:
What Is TourBox's GROUP Feature?
Firstly, it's important to note that the GROUP feature is closely tied to macros.
A macro is a term used for batch processing. Simply put, in TourBox, a macro records a series of operational steps, allowing you to easily reuse these steps at any time through TourBox.
The advantage of macros is that they eliminate the need to repeat the same operations every time, boosting work efficiency and automating tasks.
The issue, however, is that invoking a macro executes all actions from the beginning in one go. If you prefer to manually execute actions in a macro one by one, rather than all at once, the standard macro setup won't meet your needs.
This is where the GROUP feature shines. GROUP enables you to bind multiple action sets into one macro, with each action set being independent.
Every time you press a designated TourBox button, you can sequentially execute one set of actions (one GROUP) within the macro.
In essence, GROUP allows you to manually control and execute each action set within a macro one by one.
How to Create a GROUP?
To create a GROUP, you can click on the ellipsis icon of a macro in the Macro List within the macro settings panel, then select "Create a GROUP" from the dropdown menu.
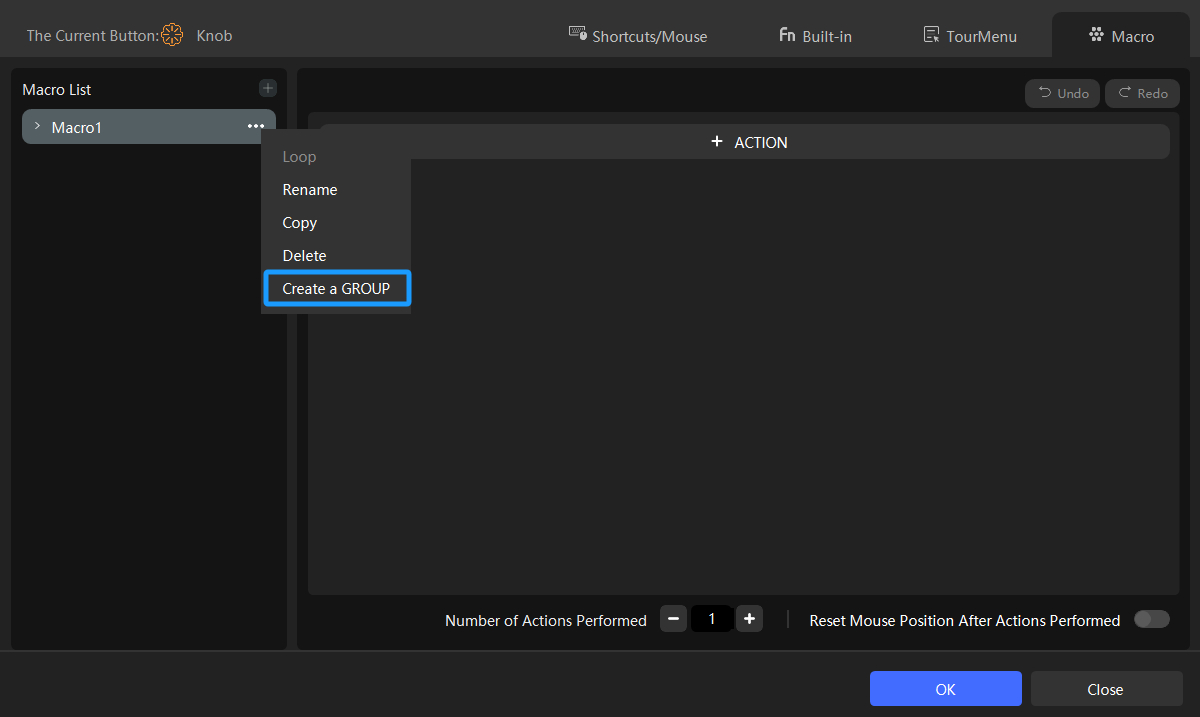
If you haven't created a macro yet, you can first create one and then proceed with the above steps.
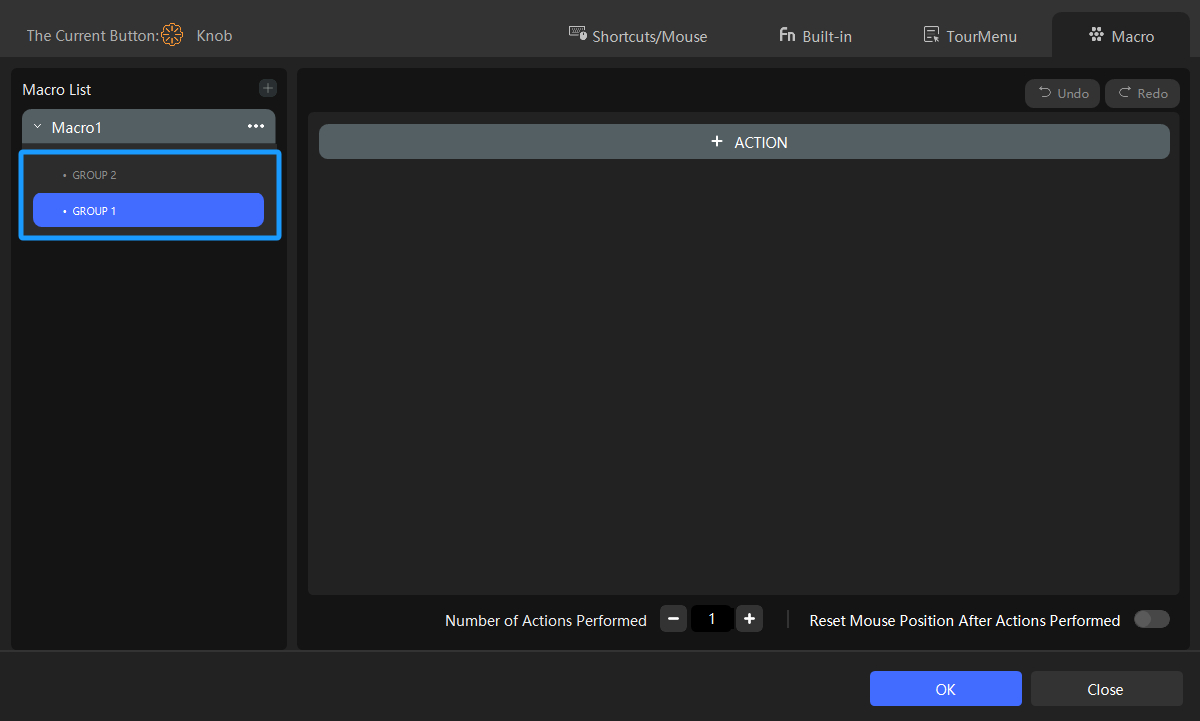
When you create a GROUP, two GROUPs, labeled GROUP 1 and GROUP 2, will appear below that macro. If you wish to add more GROUPs, you can click "Create a GROUP" again.
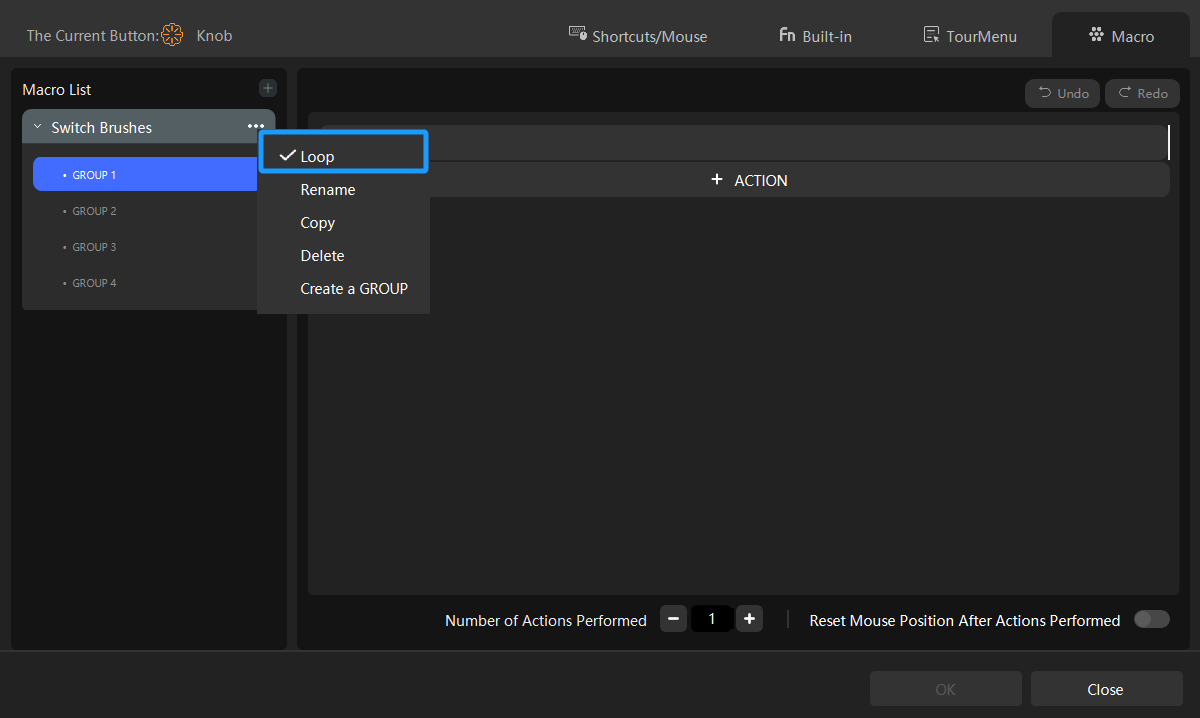
How to Set GROUPs' Loop Mode?
By default, GROUPs are set to loop continuously. This means that once all actions within all GROUPs of a macro have been executed, the macro will start over and loop through the GROUPs again.
If you disable the Loop mode, you can still execute each GROUP in the macro sequentially from top to bottom.
However, after completing all the GROUPs in the macro for the first time, you won't be able to loop through each GROUP from the beginning again. Instead, each operation will only execute the last GROUP in the macro.
You can choose to enable or disable the loop mode by selecting the option in the ellipsis menu.
How to Change the Execution Order of GROUPs?
In the Macro Settings panel, you can drag and rearrange the GROUPs to adjust the execution order.
If you want to quickly switch the execution order of GROUPs within a macro from ascending to descending, simply go back to the Preset Settings panel. Click the downward arrow button next to the button assigned to the macro, then toggle it to point upwards.
This way, the GROUPs will be executed in reverse order. Conversely, you can switch it back to the original order if needed.

Any Practical Example of Using GROUP?
You can check out the tutorial we're sharing below. In this guide, we demonstrate using TourBox's Knob to switch brush tools in Clip Studio Paint.
We utilized TourBox's GROUP feature for this setup. If you're interested, feel free to click to take a look.
Further Reading:
[TourBox Tips] Use Knob to Switch Brushes in Clip Studio Paint
By now, you should have a good understanding of how to leverage the powerful GROUP feature in TourBox. Consider where you could incorporate it into your creative journey!
Have a Question?
To explore more about using TourBox and learn additional tips and tricks, check out our TourBox tutorials series.
If the tutorials above do not answer the questions you have, please contact support@tourboxtech.com.