How to Add Stroke to Text in Photoshop: A Comprehensive Guide
When adding text to your Photoshop project, placing it directly over an image can sometimes make it hard to read.
Text strokes offer a great solution to this issue. In this tutorial, we'll share some methods and techniques to add strokes to text in Photoshop.
Learning how to create text strokes in Photoshop will enhance the flexibility of your design projects. Let's dive in and discover how to elevate your text designs with strokes in Photoshop.

In this article, you will learn:
- How to Add Stroke to Text in Photoshop?
- Advanced Tips for Adding Strokes to Text in Photoshop
- Final Thoughts About Adding Strokes to Text in Photoshop
How to Add Stroke to Text in Photoshop?
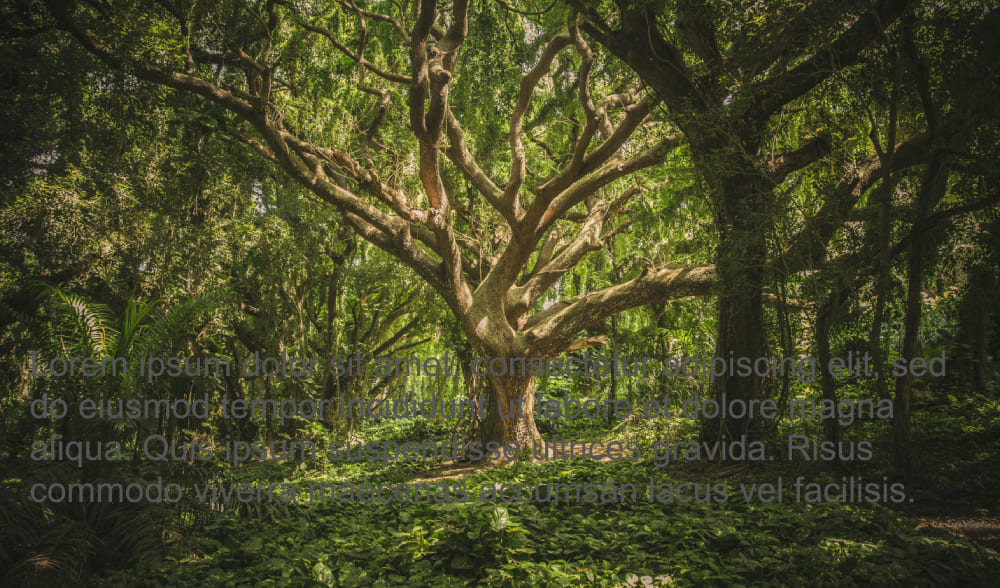
In Photoshop, when you directly add text to a photo (background image), the text may blend in with the background, making it difficult to read and distinguish.
For instance, in the photo below, we added a gray text that is almost indistinguishable without careful inspection.
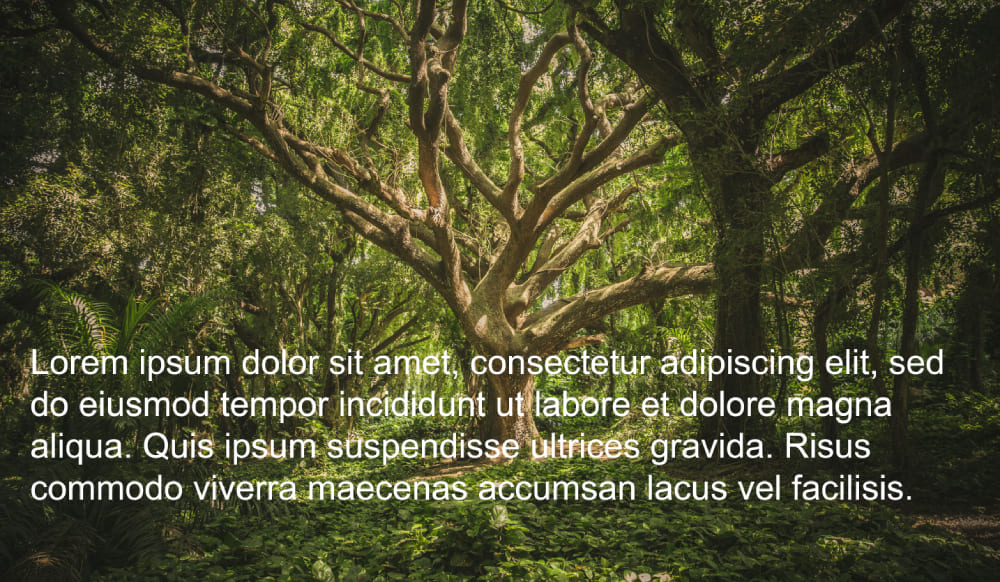
One way to enhance text legibility is to choose a text color that contrasts strongly with the background, such as white.
Another method to make text stand out is by adding a stroke around the text, making it easier to identify and read.
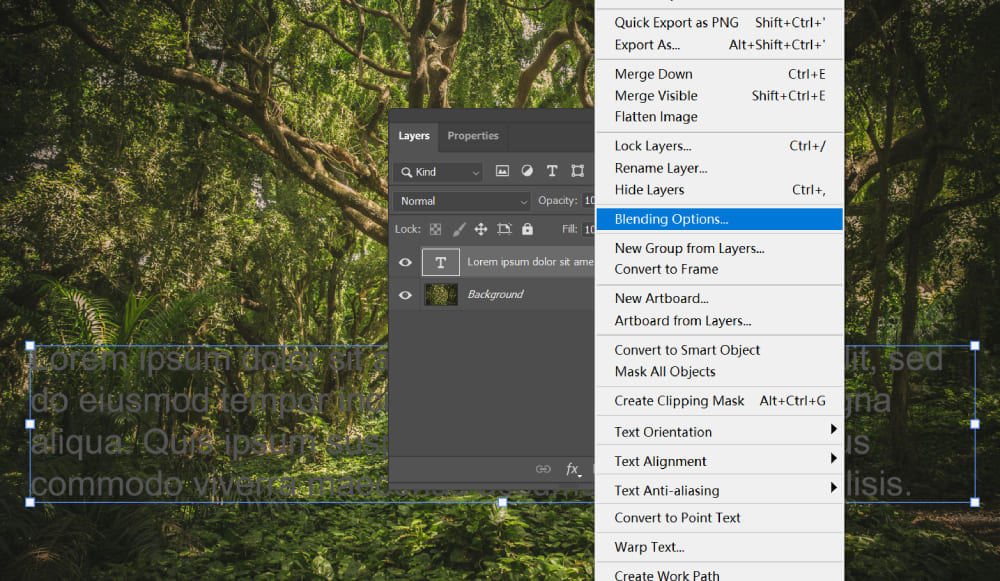
To do this, double-click on the text layer in the Layers panel (not on the text itself) to bring up the Layer Style panel for setting layer styles.
Alternatively, you can right-click on the text layer and choose Blending Options from the menu to access the Layer Style panel.
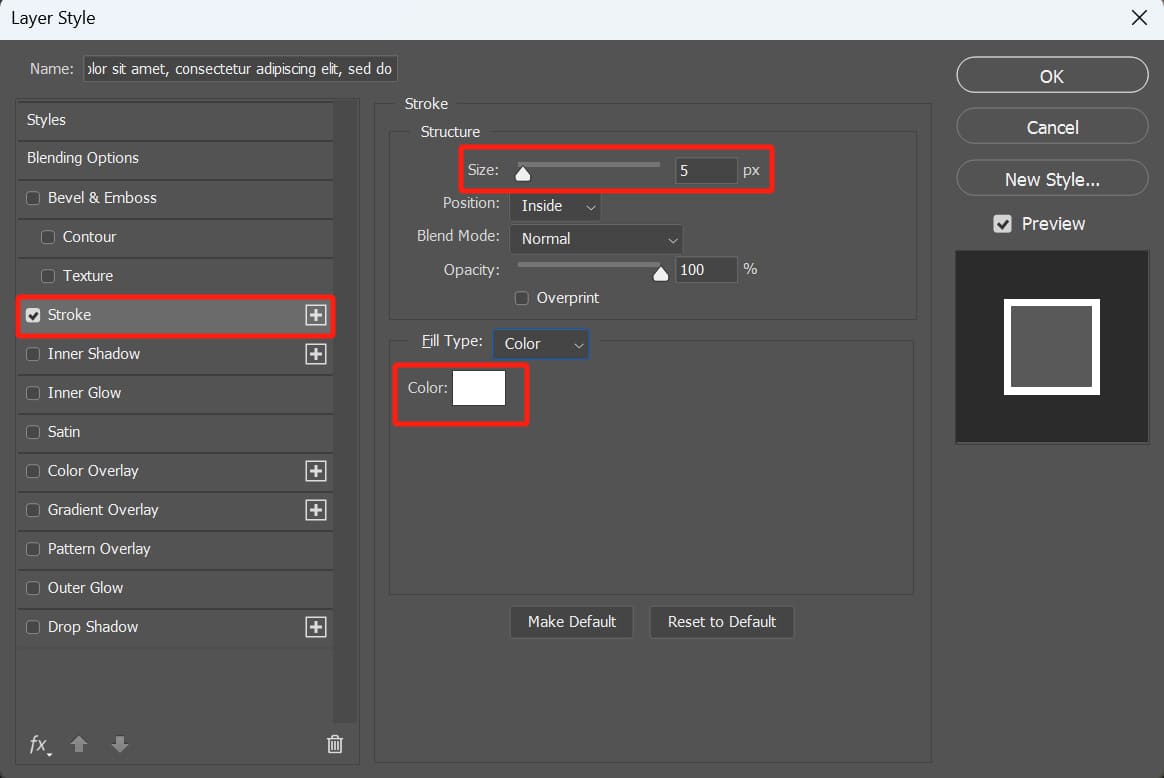
In the Layer Style panel, check the Stroke option under the Styles list on the left. This allows you to add a stroke to the text.
If you don't see any changes, it's likely because the stroke color matches the text color.
You can adjust the stroke's size and color, such as changing it to white, to make the text more visible.
Here are properties you can adjust for text strokes:
- Color: Change the stroke color
- Size: Adjust the thickness of the stroke
- Position: Specify where the stroke is placed around the text
- Opacity: Specify the opacity of the stroke
The position of the stroke is noteworthy. Depending on its placement, the text's appearance can vary significantly.
If the stroke is placed outside, it will outline the text externally. If inside, it will outline the text internally, affecting the text's size.
Feel free to experiment with different text and stroke colors to find the most distinctive and creative combination for your design.
Advanced Tips for Adding Strokes to Text in Photoshop
In addition to adjusting basic stroke properties like color, size, and opacity, you can explore more creative design options for strokes in Photoshop.
1. Add Patterns to Strokes
Within the Layer Style panel, you can select the Fill Type for strokes. Instead of using "Color," try experimenting with "Pattern" in the Fill Type options.
Photoshop offers default pattern choices for you to select from. Choose a pattern you like to apply as a stroke around your text. Alternatively, you can import your preferred patterns for text strokes.
Adjust the "Angle" and "Scale" according to your needs.

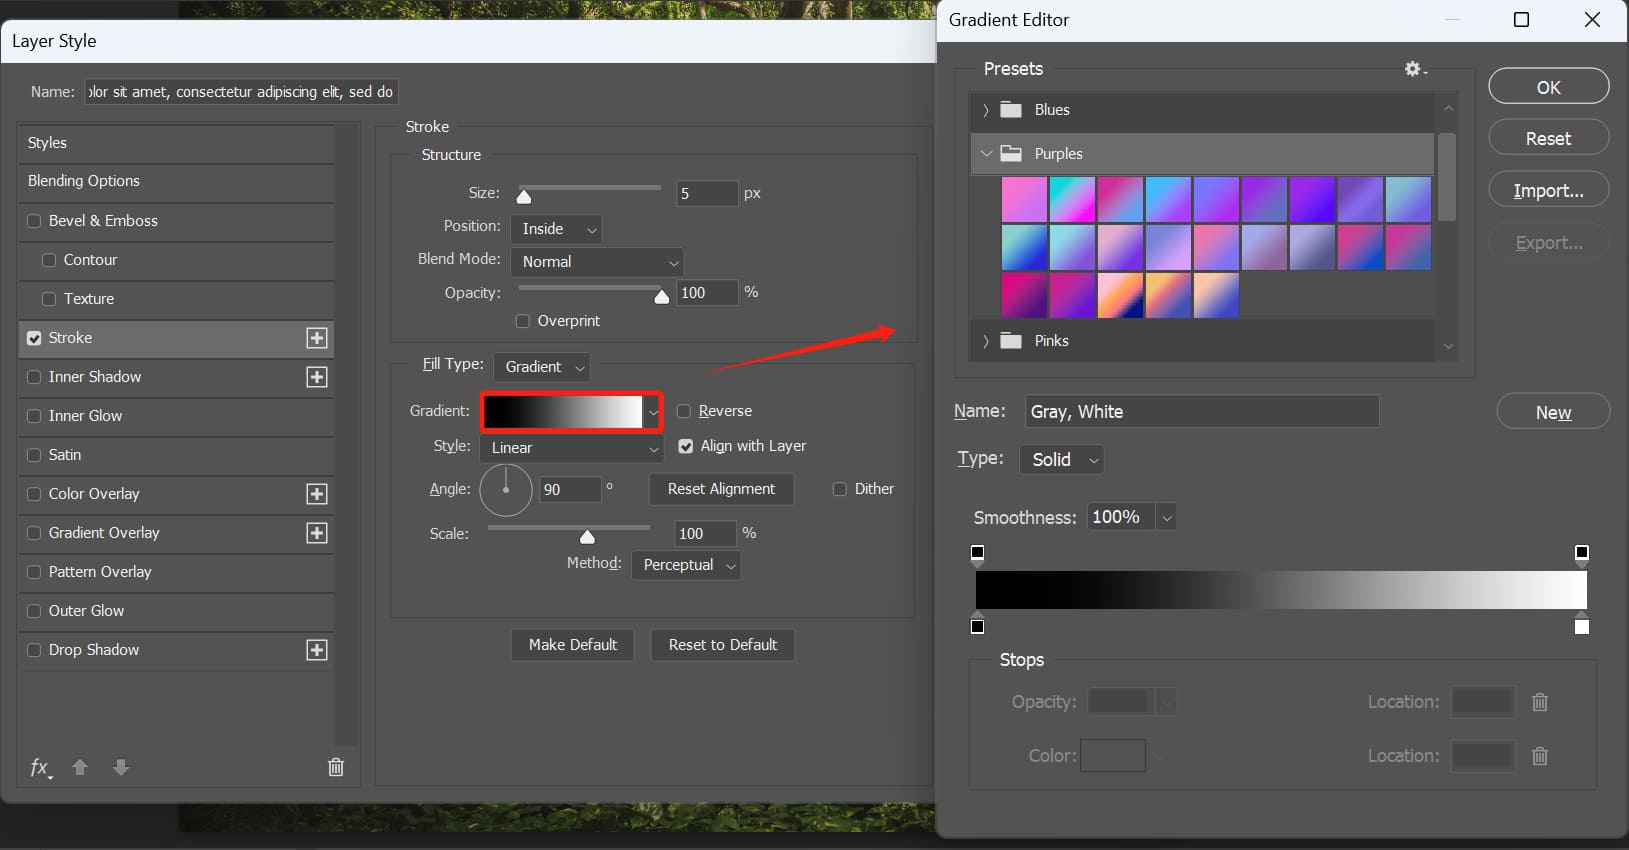
2. Apply Gradients to Strokes
Similarly, you can switch to a different look by choosing gradients in the Fill Type.
Creating gradient strokes is straightforward. Click on the Gradient bar to access the Gradient Editor panel, where you can adjust sliders and parameters accordingly.
Further Reading:
Mastering Gradients: 8 Photoshop Techniques You Can't Afford to Miss
If you find this process cumbersome, Photoshop provides a variety of attractive gradient presets for you to choose from. Simply select one you like and apply it to your text strokes.
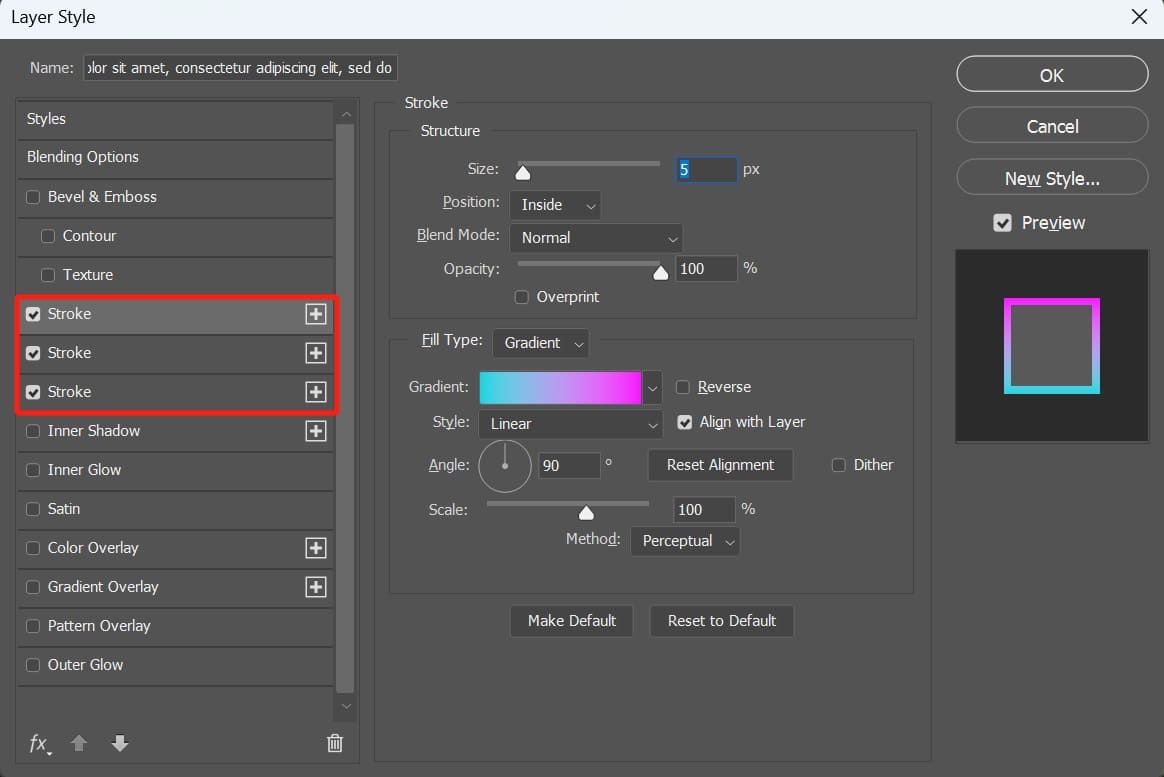
3. Stack the Strokes
You can stack multiple strokes, not just one. In the Layer Style panel, next to the stroke options, there is a "+" button. Clicking on it adds a new stroke.
For the second and subsequent strokes you create, you can freely adjust the color and thickness of the lines.
You can add as many strokes as you want, but be mindful of their placement. For instance, if you place two strokes on the text outside, they will overlap, with one stroke hiding behind the other in the view.
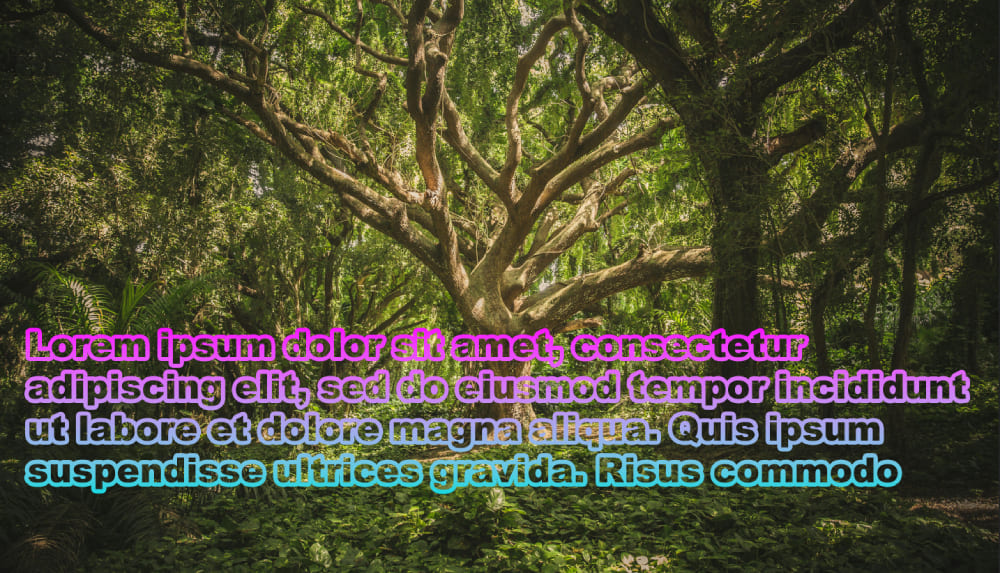
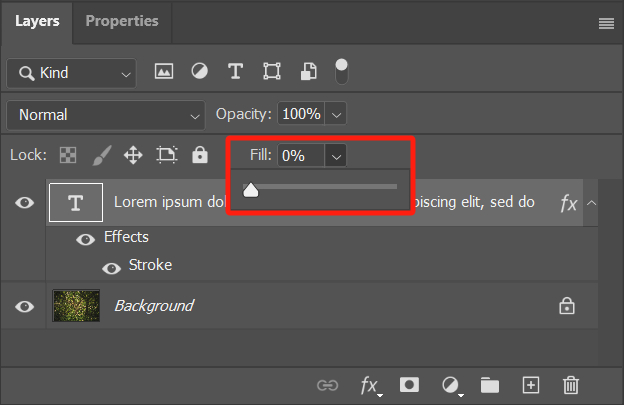
4. Only View Strokes of Text
Is there a way to display only the stroke of text without showing the text color, creating a hollow text effect like in the image below?
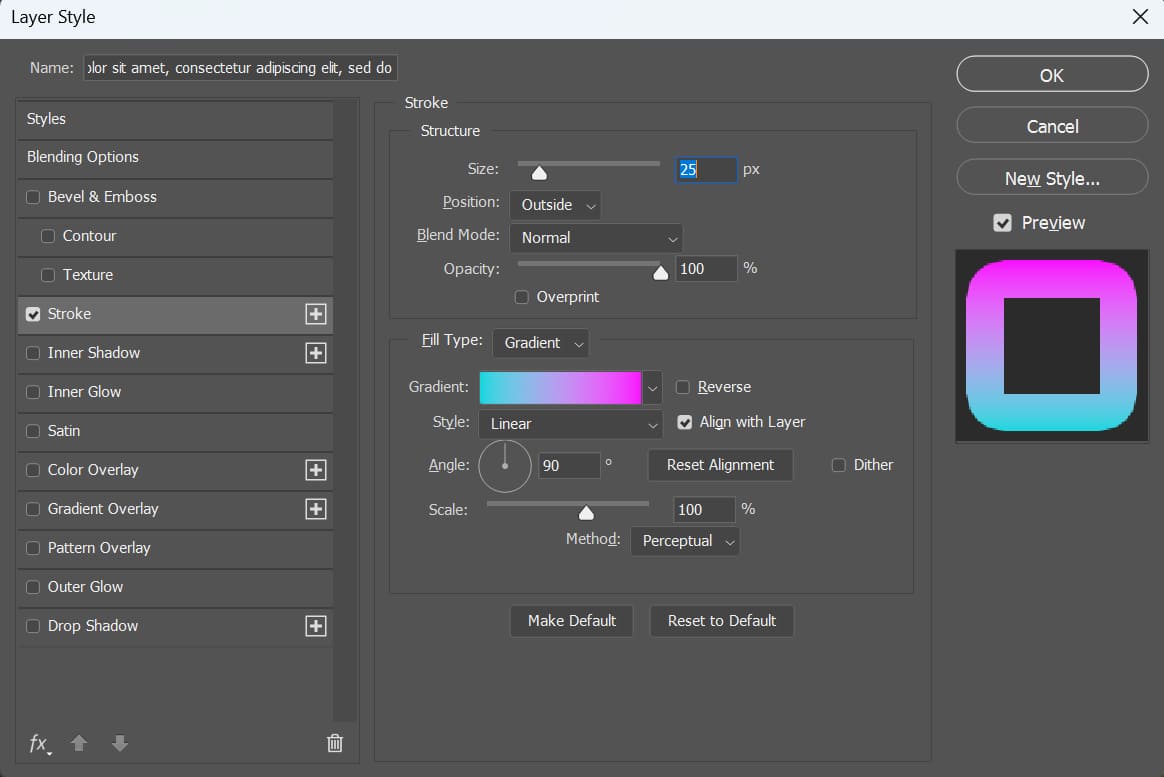
The specific setup is quite simple. First, to ensure a better text effect, you need to make the text bolder.
Then, in the Layer Style panel, create any stroke effect you desire. Here, we've demonstrated creating a gradient stroke effect.
It's important to note that here you should set the stroke position to "Outside," or else the stroke will encroach on the space of the hollow text. Experimenting with different position settings will help you understand the differences.
Switch back to the Layers panel. At the top right of the Layers panel, there's a slider to adjust the "Fill." Setting it to zero will remove the text color, leaving only the stroke visible.
Final Thoughts About Adding Strokes to Text in Photoshop
In this tutorial, we've shared how to add strokes to text in Photoshop, enhancing the readability and visual appeal of your text designs.
With these techniques under your belt, you can now create more dynamic and flexible text designs in Photoshop.
If you're looking to streamline your workflow further, consider using the TourBox.

When adjusting parameters like strokes, brushes, or color settings in Photoshop, TourBox provides precise control through its intuitive Knob. A simple twist allows you to finely adjust values, making the editing process more efficient and enjoyable.
Beyond mapping common software shortcuts to TourBox buttons, it offers a range of built-in functions and macros for advanced capabilities. Explore the possibilities with TourBox to elevate your creative projects!

Imagine using a game controller instead of a keyboard for your creative work. You're sure to enjoy the unique operating experience that TourBox brings to the table.