Mastering the Art of Black and White Photography: Techniques and Tips
Black and white photography, an essential realm of photographic art, has the power to accentuate the forms, textures, play of light and shadow, and intricate details within an image.
It captivates viewers with a profound and distinctive visual experience. Whether used in artistic expression or documentary storytelling, black-and-white photography holds immense significance.
In this article, we delve into the techniques of black-and-white photography. Get ready to embark on an artistic journey that is truly worth exploring.

In this article, you will learn:
- An Introduction to Black and White Photography
- How to Take High-Quality Black and White Photos
- Black and White Photography Post-Processing Techniques
An Introduction to Black and White Photography
Black and white photography, often referred to as monochrome photography, is a timeless medium that carries a rich sense of history, artistry, and emotion. It's defined by its simplicity in color — a spectrum from pure black to pure white and the many shades of gray in between.
The art of black and white photography is a study of contrast, texture, and shape. Without the distraction of color, the photographer's message is conveyed through the interplay of light and shadow, the patterns and lines of the subject, and the composition of the image.
This monochromatic style allows for a profound exploration of the subject's essence, often revealing a depth that could be overlooked in a color photograph.
A key figure in the world of black-and-white photography is Ansel Adams. Born in 1902, Adams is most renowned for his striking, black and white images of the American West, particularly Yosemite National Park.
His groundbreaking work in this medium has inspired countless photographers and artists around the globe. Adams was not just a photographer, but a dedicated environmentalist whose images reflect his deep respect for nature.
Black and white photography can be a powerful tool for storytelling, capable of evoking a wide range of emotions. It can strip away the unnecessary, leaving only the essential, and reveal a different perspective of the world, often more dramatic and profound.
In the sections to come, we will delve deeper into the fascinating world of black-and-white photography.
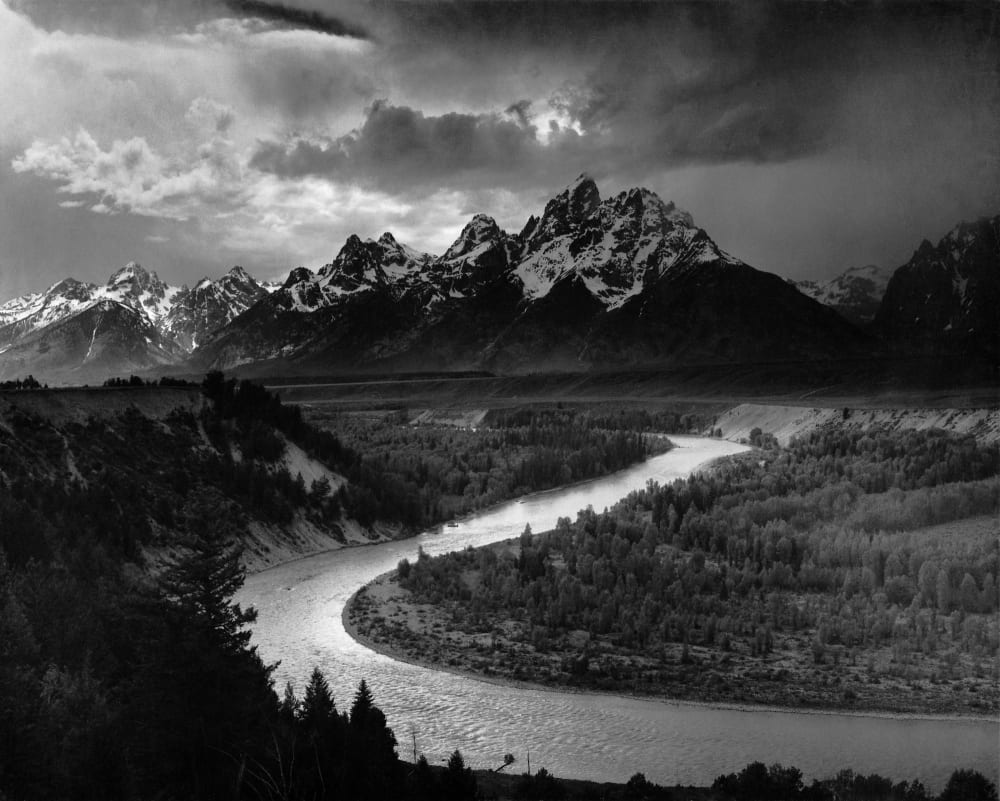
The Tetons and the Snake River by Ansel Adams
How to Take High-Quality Black and White Photos
In this section, we aim to provide an introduction that will help you gain a better understanding and mastery of the techniques and essence of black-and-white photography. By implementing these skills, you will be able to capture outstanding and distinctive black-and-white photos.
1. Contrast
Contrast is one of the key techniques in black-and-white photography. Since black and white photos consist only of shades of black, white, and gray, enhancing the tonal range through contrast is essential to add depth to the image.
While contrast can be adjusted during post-processing, it is best to pay attention to composition and lighting during the actual capture.
For instance, if you're photographing architecture, consider placing the building against a bright sky background to create a strong contrast. This will make the subject stand out more and result in a more dynamic photograph.

2. Color Conversion
Although black-and-white photos consist only of shades of black, white, and gray, a rich range of gray tones can be achieved through color conversion.
For example, when capturing a nighttime scene, converting the original color photo into black and white can better convey the atmosphere and feeling of the night. However, it's important to be mindful of preserving details and textures during the color conversion process to prevent the photo from becoming excessively dull.
Further Reading:
3. Focal Length
Focal length is a crucial technique in black-and-white photography. Different focal lengths can produce varying depth of field effects.
For instance, if you want to emphasize a particular detail in your photo, using a longer focal length can help blur the background, making the subject stand out.
On the other hand, employing a shorter focal length can create a wide-angle perspective, resulting in more impactful and visually striking photographs.
Further Reading:
4. Lighting
Lighting is an incredibly important element in black-and-white photography. Different lighting conditions can create various atmospheres and evoke different emotions.
For instance, when capturing street scenes, you can utilize the soft morning or evening sunlight to create a warm and romantic ambiance. On the other hand, if you want to capture a mysterious photo, shooting on cloudy days or during the night can create soft lighting and a sense of intrigue.
5. Composition
Composition is a highly important technique in photography, and it holds true for black-and-white photography as well. Composition helps you emphasize the subject, create a sense of depth, and provide visual impact.
For instance, utilizing techniques such as symmetry, repetition, and perspective can result in a balanced and visually appealing photograph.
Furthermore, in black-and-white photography, unconventional composition methods can be employed. For example, shooting from a low angle or capturing aerial views can create unusual visual effects, making the photo more captivating and distinctive.
Further Reading:
A Tutorial on Composition in Photography Inspired by Classic Films

6. Black and White Photography and Film Photography
The development of black and white photography can be traced back to the 19th century when photography relied on film to capture images.
With the rise of digital photography, black-and-white photography has also transitioned into the digital realm. Nowadays, we can capture black-and-white photos using digital cameras or smartphones.
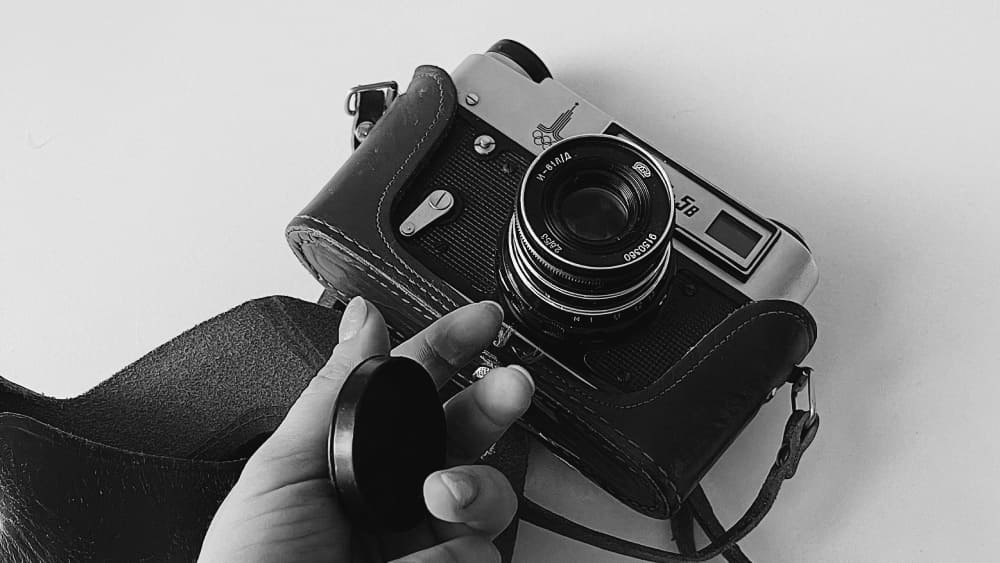
However, film photography remains a popular choice among photography enthusiasts and artists. Film photography has the ability to create more authentic, raw, and intricate images, and it holds a higher artistic value.
Therefore, if you have a strong interest in black-and-white photography, you may consider exploring film photography to experience its unique charm and aesthetic appeal.
Further Reading:
Beginner's Guide to Film Cameras: A Primer for Novice Photographers
Black and White Photography Post-Processing Techniques
Black and white photography can add depth and evoke emotions in a way that color photography sometimes cannot. But capturing the image is only half of the work. Post-processing is crucial to get the most out of your photographs.
Unlike color photography, black-and-white images rely heavily on shapes, forms, and contrasts to create a compelling image. The goal of post-processing is to enhance these elements to bring out the image's true potential.
In this section, we'll walk you through some of the most effective methods to post-process your black-and-white photos using Adobe Photoshop and Lightroom.
1. The Importance of RAW Format
Always shoot in RAW format if possible. RAW files contain a lot more information than JPEGs, allowing for greater flexibility in post-processing. This is especially important for black-and-white photography, where you need to manipulate the tones and contrasts effectively.
Further Reading:
2. Use Adobe Lightroom for Black and White Conversion
- Import and Select Image: Start by importing your image into Lightroom. Select the image you want to edit in the Library module.
- Convert to Grayscale: Move to the Develop module. Click on the "Black & White" option in the Basic panel to convert your image to grayscale.
- Adjust Tones: Use the individual color sliders in the B&W panel to adjust the brightness of corresponding tones in your image. Experiment with these sliders to achieve the desired look.
- Fine-tune the Image: Use the other tools in the Develop module, such as the Tone Curve, Detail, and Split Toning, to further refine your image.
Check out the following YouTube video (made by Anthony Morganti) about black & white conversion in Lightroom:
3. Use Adobe Photoshop for Black and White Conversion
- Open Image: Open your image in Photoshop.
- Convert to Black and White: Click on Image > Adjustments > Black & White. This will open a dialogue box with sliders similar to those in Lightroom. Adjust these sliders to get the desired effect.
- Adjust Levels: Use the Levels tool (Image > Adjustments > Levels) to enhance the contrast of your image.
Check out the following YouTube video (made by Robin Whalley) about black & white conversion in Photoshop:
4. Enhancing Contrast and Tones
Contrast is crucial in black-and-white photography to distinguish between different elements of the image.
You can use the Contrast slider in both Lightroom and Photoshop to adjust this. Additionally, the Tone Curve tool can be used to make finer adjustments to the highlights, lights, darks, and shadows.
5. Dodge and Burn Techniques
"Dodging" and "burning" are techniques used to lighten (dodge) or darken (burn) specific areas of your image. This can help to draw the viewer's eye to the subject or create a more balanced composition.
In Photoshop, these tools are found on the toolbar, or you can use the keyboard shortcuts O for Dodge and O + Shift for Burn. Select the tool, set the Exposure (usually between 5%-15% for a subtle effect), and paint over the areas you want to adjust.
6. Add Effects
Consider adding grain, vignetting, or other effects to your image. These can add character and mood to your black-and-white photos. In Lightroom, these options are found in the Effects panel, and in Photoshop, you can use the Filter menu.
Remember, the goal of post-processing is to enhance your image, not to drastically alter it. Always keep a copy of your original image, and make incremental adjustments, constantly comparing it with the original.
7. Use TourBox
In the realm of post-processing for black-and-white photography, photographers often find themselves engrossed in the intricacies of editing software, which can hinder their focus on the creative process itself. That's where TourBox comes in as a game-changer.

This innovative product effectively liberates photographers' productivity, streamlining their workflow and enhancing their efficiency.
With TourBox, photographers can effortlessly navigate through editing tasks, allowing them to fully unleash their creative potential and achieve exceptional results in their black-and-white photography endeavors
In conclusion, black and white photography is a highly intriguing and challenging form of photography that requires photographers to utilize techniques such as contrast, color conversion, focal length, lighting, and composition to create vivid, beautiful, emotionally expressive photos.
We hope that this article's introduction can assist you in better understanding and mastering the techniques and essence of black-and-white photography, enabling you to capture even more outstanding and distinctive black-and-white photos.