How to Use Photoshop Content-Aware Scale: A Step-by-Step Guide
In design and photo editing, adjusting image sizes is an unavoidable task. If you need to change the image proportions without affecting the main subject, Photoshop's Content-Aware Scale is a very handy feature.
So, how do you use Photoshop's Content-Aware Scale feature? Keep reading, as this tutorial will guide you through the basics and practical tips for using this feature.

In this article, you will learn:
- What Is Content-Aware Scale?
- How to Use Photoshop Content-Aware Scale?
- Methods and Techniques for Using Content-Aware Scale
- Explanation of Content-Aware Scale Command Options
- Final Thoughts About Content-Aware Scale
What Is Content-Aware Scale?
Content-Aware Scale is an intelligent feature in Photoshop that uses Adobe's AI technology to analyze important content in an image, such as people, objects, etc., and protects these areas from being stretched or compressed when scaling.
When resizing images in Photoshop, regular scaling affects all pixels uniformly. However, the Content-Aware Scale primarily impacts pixels in areas without significant visual content.
The Content-Aware Scale command is commonly used to enlarge or shrink scenes, adjust the proportion between subjects and backgrounds in an image, and alter the aspect ratio horizontally or vertically.
Let's try this Content-Aware Scale feature with the photo below.

The result of the Content-Aware Scale is as shown below: the background enlarges while the person's proportion remains unchanged.

Applicable Scenarios:
- Web Design: Resize images to fit various screens without affecting the main content.
- Poster Design: Alter image proportions while avoiding stretching or compressing key elements.
- Landscape Photo Adjustment: Expand background space to enhance composition effects.
How to Use Photoshop Content-Aware Scale?
In this section, we will quickly introduce you to how to use Photoshop Content-Aware Scale through a simple example.
Step 1: Open the Image
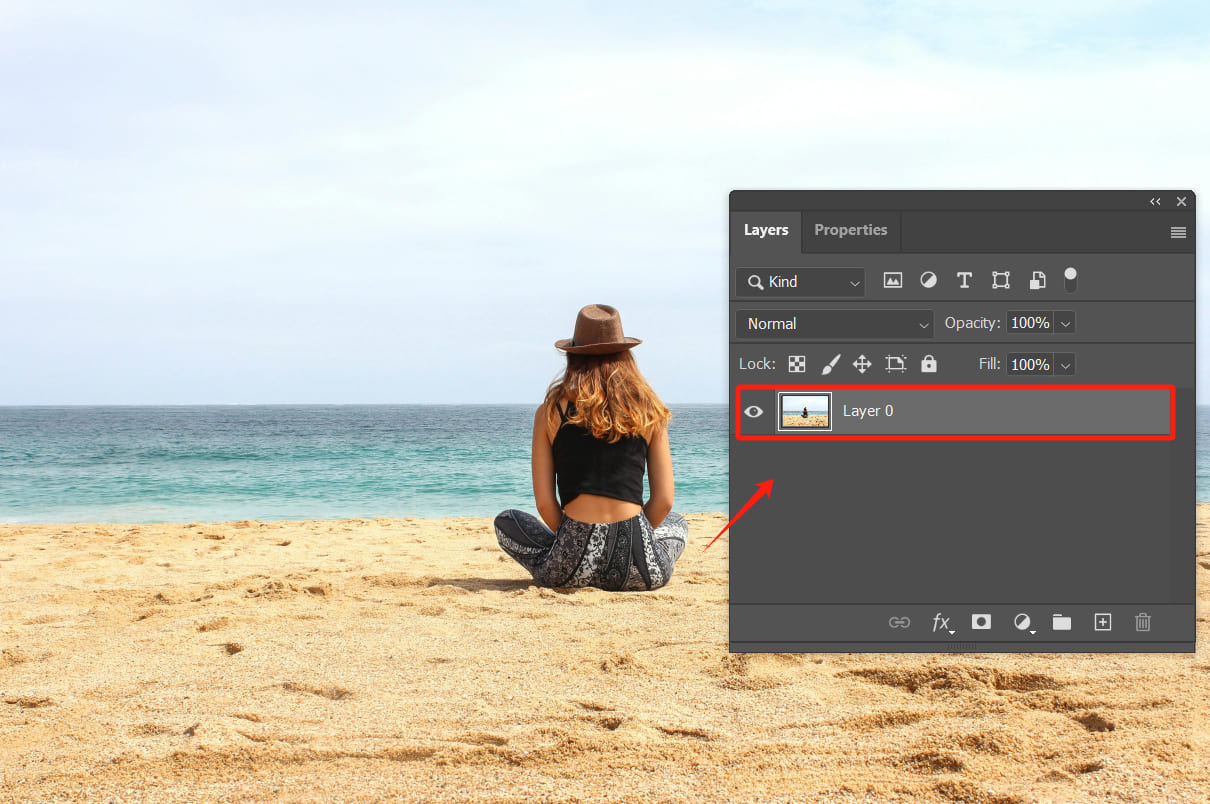
Open the image in Photoshop. In the Layers panel, convert the image from a background layer to a regular layer.
Step 2: Select the Content-Aware Scale Tool
Before using the Content-Aware Scale, we can use the Crop tool to expand the canvas.
The Canvas Size command can also be used to expand the canvas. However, generally, the Crop tool is more convenient.
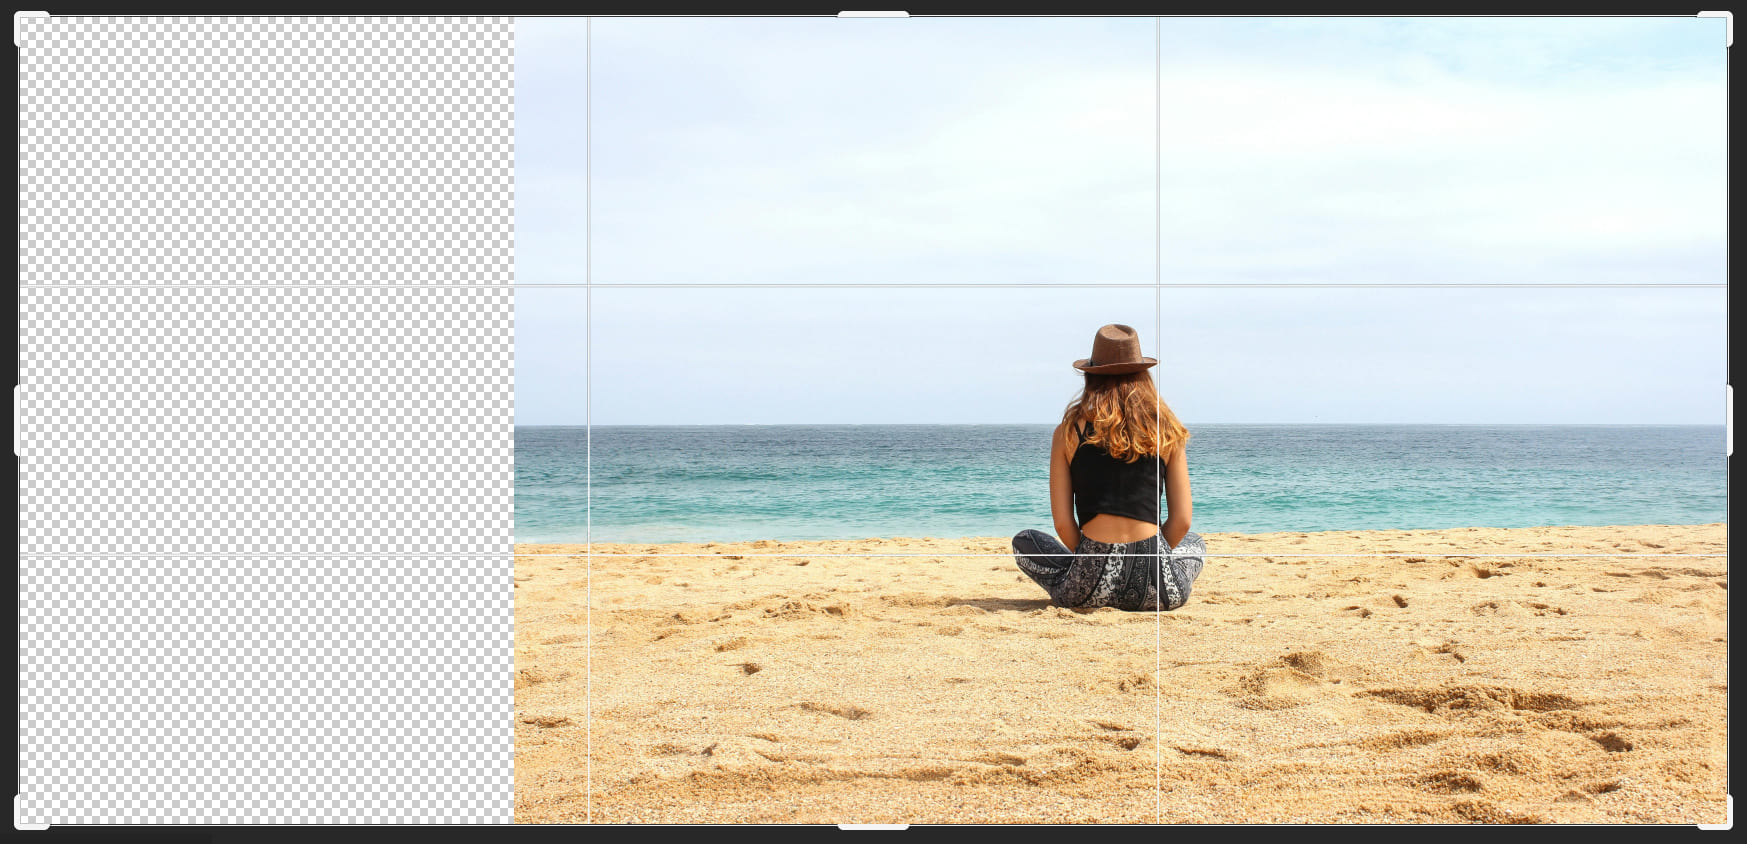
Expand the canvas to the size you desire, then select this layer in the Layers panel.
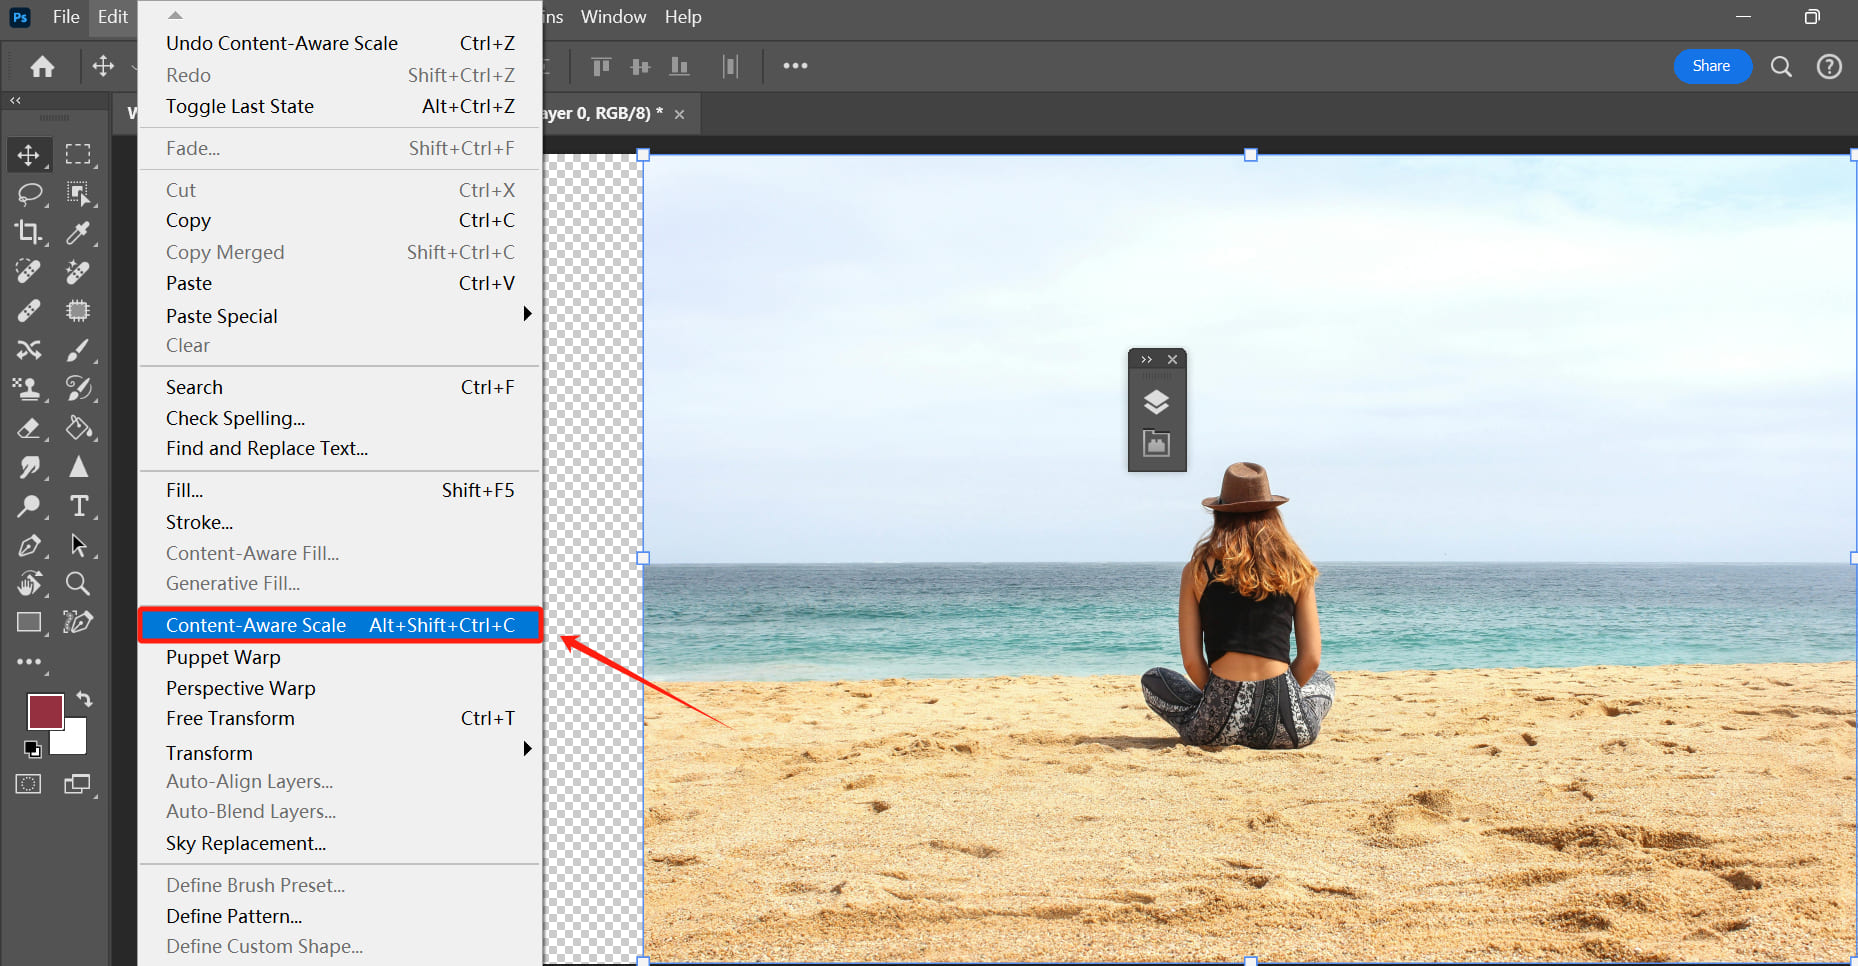
From the top menu, click on Edit > Content-Aware Scale.
An adjustment box will appear around the image, indicating that you can freely scale the image.
Step 3: Protect the Subject
To ensure that certain areas are not affected when scaling, you can use the following methods:
1. Direct Scaling
Photoshop automatically protects prominent subjects in the image, but it may not be perfect.
2. Protect Areas Using the Alpha Channel
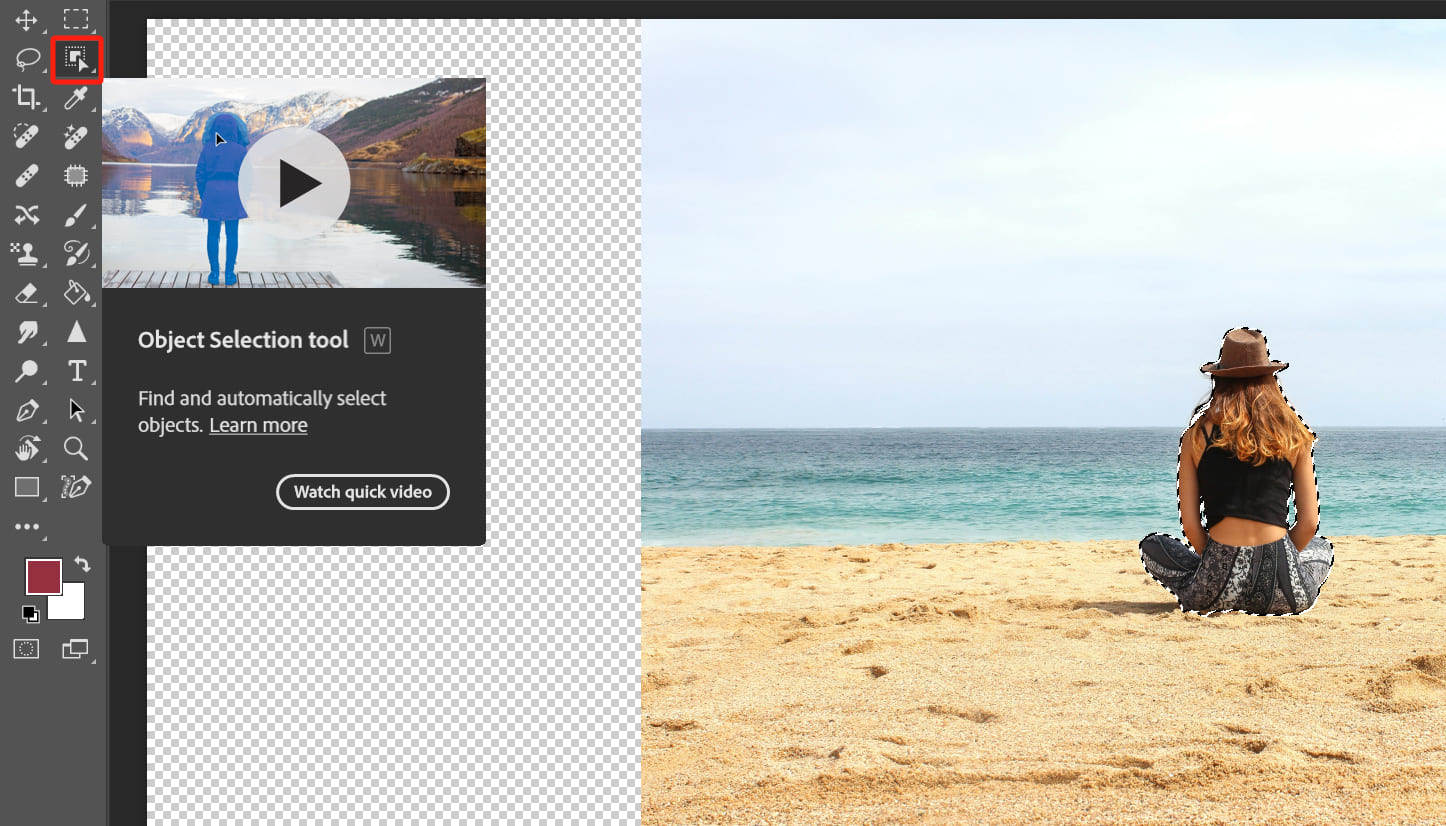
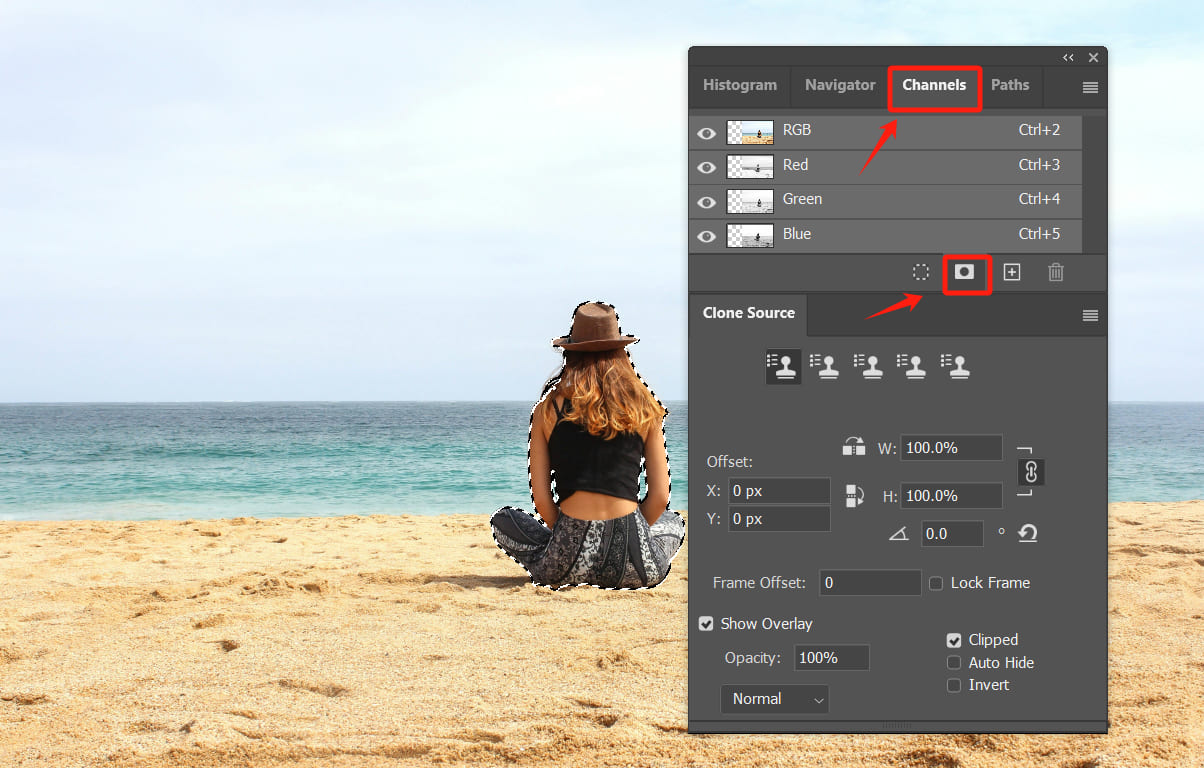
Select the Quick Selection (or Object Selection) tool in the toolbar and outline the area you want to protect (such as a person).
Create a new channel in the Channels panel. To do this, click the "Save selection as channel" button at the bottom of the panel. After successful conversion, an Alpha 1 channel will be generated.
View the Alpha 1 channel separately (hide other channels), and you'll see the selected area in white (with the rest in black).
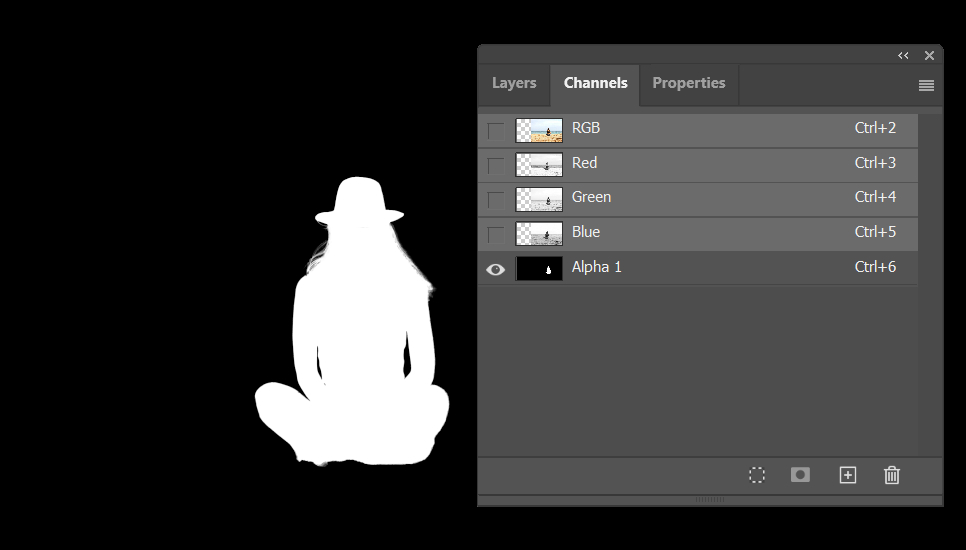
Hide the Alpha 1 channel and display the other channels. Return to the Layers panel and reselect that layer.
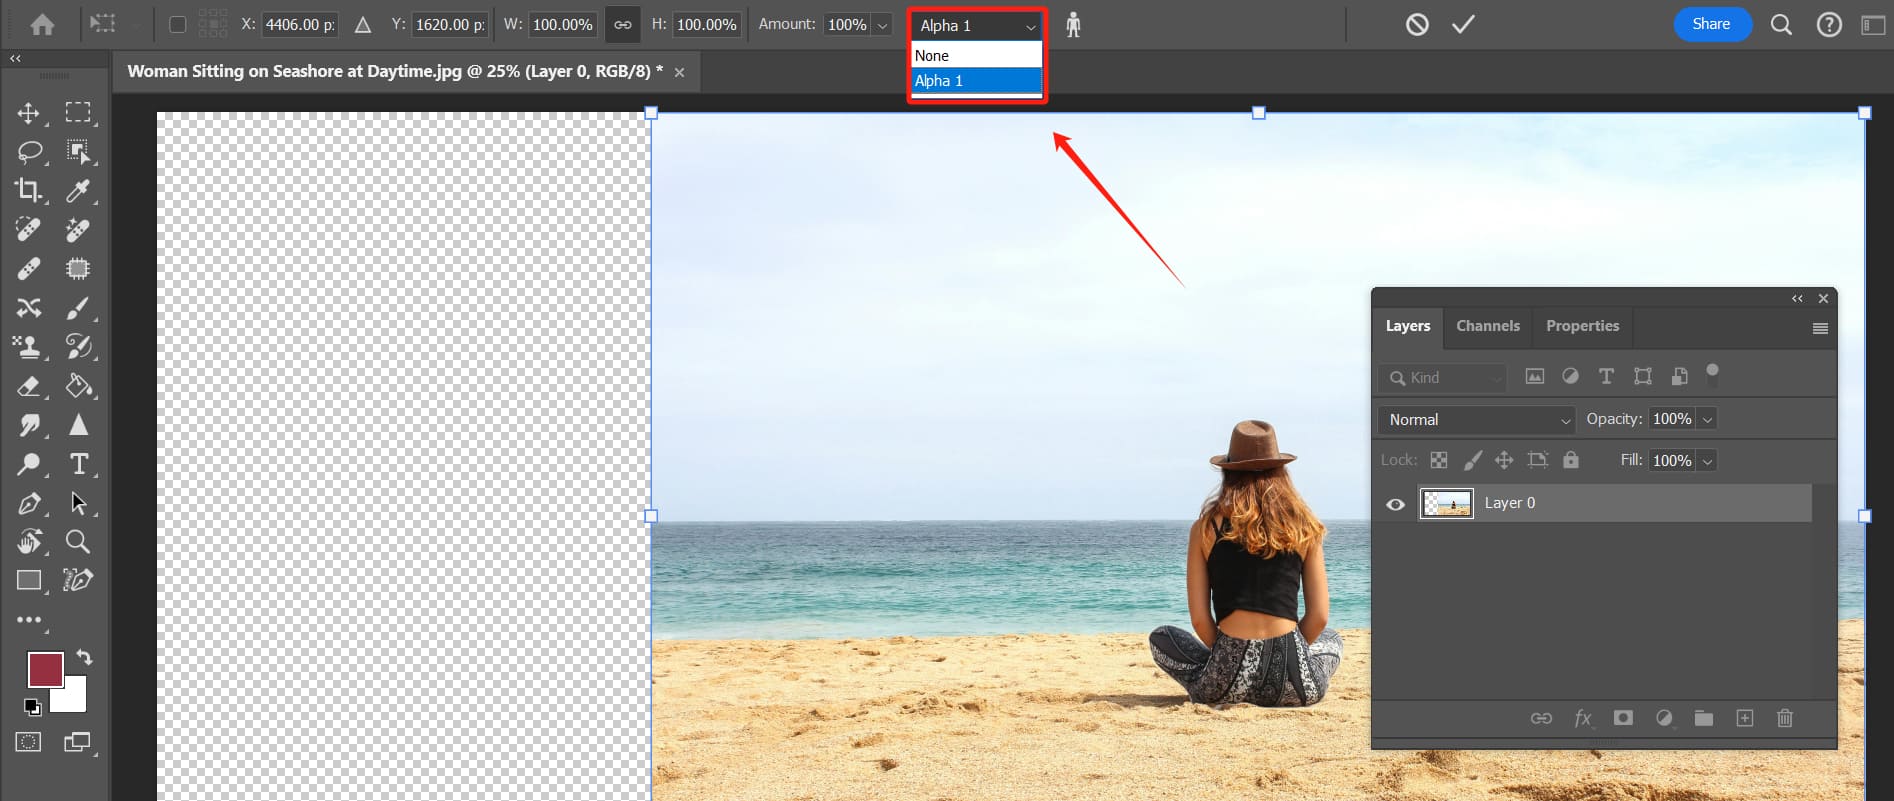
Click on the Content-Aware Scale tool and in its top settings bar, locate the "Protect" option. Choose the Alpha channel you created.
Step 4: Scale the Image
Drag the edges of the image to adjust its size and observe if the main subject area remains unchanged. If necessary, adjust the protection settings accordingly.
You can see that after our adjustments, the main subject (person) in the image maintains its natural proportions, while the background intelligently stretches to fill the new dimensions.

Methods and Techniques for Using Content-Aware Scale
Using the Content-Aware Scale in Photoshop may seem straightforward, but there are many methods and techniques that are easily overlooked when using this tool:
- The Content-Aware Scale is suitable for handling layers and selections. Before using this feature, a background layer must be converted to a regular layer.
- Before using the Content-Aware Scale, it's common to expand the canvas using tools like the crop tool or canvas size command.
- By default, when Content-Aware Scale is enabled, dragging the handles on the image frame scales it proportionally. Holding Shift while dragging allows free scaling, while holding Alt/Opt scales from a reference point.
- Adjusting the "Amount" value allows you to control the degree of distortion of the subject. At 0%, the identified subject scales equally. At 100%, distortion of the subject is minimized.
- You can protect specific areas by making rough selections with tools like the Lasso or Object Selection tools and saving them as an Alpha channel. Then, use the "Protect" option in the tool settings to prevent these areas from distorting.
Explanation of Content-Aware Scale Command Options
Like other tools in Photoshop, when you activate the Content-Aware Scale tool, a settings bar for that tool appears at the bottom of the top menu bar.

In this settings bar, you can adjust or set various parameters. These settings are not always necessary. You can customize them based on your needs:
- Toggle Reference Point: When checked, a reference point is displayed on the canvas.
- Reference Point Location: Click on the reference point to specify a fixed point around which the image will scale. By default, this point is at the center of the image. You can also directly drag on the canvas to change the reference point location.
- Use Relative Positioning for Reference Point: Click this button (the triangle button between X and Y) to specify a new reference point position relative to the current reference point.
- Position of Reference Point: Enter pixel sizes for the X and Y axes to place the reference point at a specific location.
- Set Horizontal/Vertical Scale: Specify the percentage by which the image should be scaled relative to its original size. Input the percentage for width (W) and height (H). Enable the "Maintain aspect ratio" button if needed.
- Amount: Specify the ratio of Content-Aware Scale to regular scaling (essentially the degree of distortion of the subject). The default value of 100% minimizes distortion of the subject. 0% indicates that the identified subject will scale equally.
- Protect: Select the Alpha channel that designates specific areas to protect.
- Protect Skin Tones: When enabled, it attempts to preserve regions containing skin tones in portrait photos.
You'll notice that even a tool like Content-Aware Scale in Photoshop, which may seem like it doesn't require parameter adjustments, still involves the need for various parameter tweaks.
In Photoshop, using most tools often requires fine-tuning their parameters. For instance, when dealing with complex image editing tasks, you may need to make numerous and frequent adjustments to the opacity of layers to test the best effects.
Moreover, if you create digital art in Photoshop, you'll often adjust parameters like brush opacity, size, and hardness. These repetitive tasks can disrupt your workflow and waste time.
We'd like to introduce TourBox to you, a creative controller that can significantly boost your work efficiency. By simply clicking on any parameter box in Photoshop, you can use TourBox's knobs to make precise and efficient adjustments to the parameters.

When you require exact parameter inputs, activating TourBox's Virtual Numeric Keyboard feature allows you to directly input parameters by clicking with the mouse (or stylus).
You can completely do away with your keyboard! It's like using a game controller to play video games!
Final Thoughts About Content-Aware Scale
If the background details are too intricate, the Content-Aware Scale may result in unnatural stretching effects. In such cases, you might want to consider trying Photoshop's Content-Aware Fill or Generative Fill (the preferred option).
We've previously shared how to use these two tools. If you're interested in learning more about these functions, you can click the link below.
Further Reading:
Next time you need to resize an image in Photoshop, skip the regular scaling tools. Give Content-Aware Scale a try—you'll appreciate its effect.
