Master Photoshop's Dodge and Burn Tools in 5 Minutes
Photographers can enhance the atmosphere, add depth, and guide the viewer's eye by adjusting the brightness and darkness of specific areas in their photos.
In Photoshop, there are various ways to modify the brightness and darkness of specific areas. However, two tools that are both simple and effective for this purpose are the Dodge and Burn tools, which we will explore in this article.

In this article, you will learn:
- How to Dodge and Burn in Photoshop?
- How to Use Photoshop Dodge and Burn to Enhance the 3D Effect in Photos?
- How to Use the Photoshop Dodge and Burn to Guide the Viewer's Eye?
- Frequently Asked Questions About Photoshop Dodge and Burn
How to Dodge and Burn in Photoshop?
On the left side of the Photoshop toolbar, click on the icon that looks like a lollipop to open a menu. From there, you can choose the Dodge tool, Burn tool, or Sponge tool.
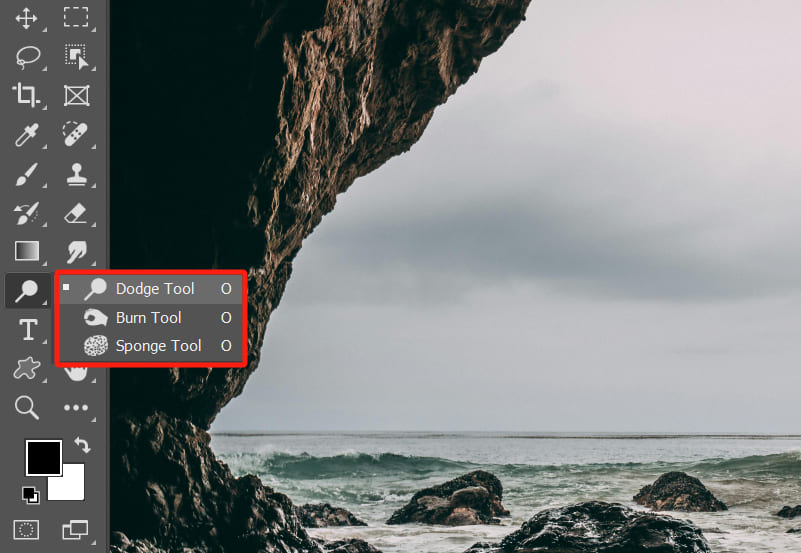
The icons for these three tools are actually inspired by traditional darkroom techniques if you're curious to learn more about that.
All three tools are used by brushing with a brush:
- When you select the Dodge tool, brushing with it will make the area brighter.
- When you select the Burn tool, brushing with it will darken the area.
- The Sponge tool allows you to selectively increase or decrease saturation with the brush.
In this tutorial, we primarily focus on the Dodge and Burn tools and won't go into much detail about the Sponge tool.
When you select the Dodge or Burn tool, the options bar at the top of Photoshop will show three main adjustments: Brush, Range, and Exposure.
1. Brush
The brush determines the shape, size, and hardness of each stroke when you apply the tool. It works just like adjusting regular brush parameters.
In most landscape photo editing, you can choose a round brush with hardness set to 0 for the best results.
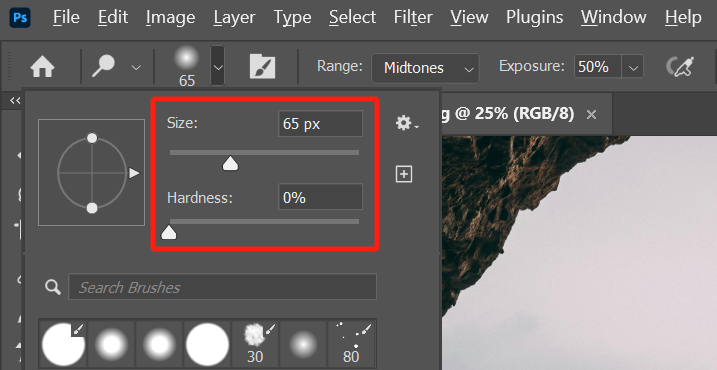
Adjust the brush size as needed based on the size of the area you're working on. The keyboard shortcuts "[" and "]" allow you to quickly decrease or increase the brush size.
Of course, there's an even better option: TourBox, a creative tool loved by photographers and digital artists. With TourBox, you can effortlessly perform tasks like canvas rotation, parameter adjustments, and brush resizing with just one hand.

You must be curious about how TourBox simplifies every step of photo editing. Check out our dedicated page on photo editing to learn more.
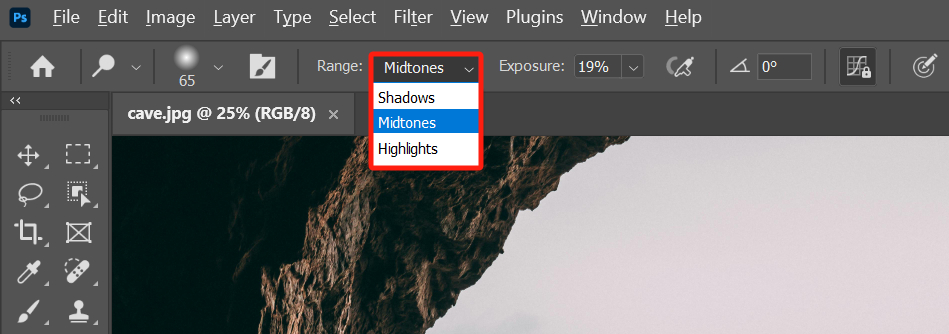
2. Range
In Photoshop's Dodge and Burn tools, you can also choose the range of the effect. The default is Midtones, but you can change it to Highlights or Shadows.
This is a crucial feature of the Dodge and Burn tools, allowing you to be more precise in your brush strokes without needing additional Photoshop tools like masks.
For example, if you use the Burn tool and select the Highlights to darken, your brush strokes will mainly affect the brighter areas and have minimal impact on the shadows.
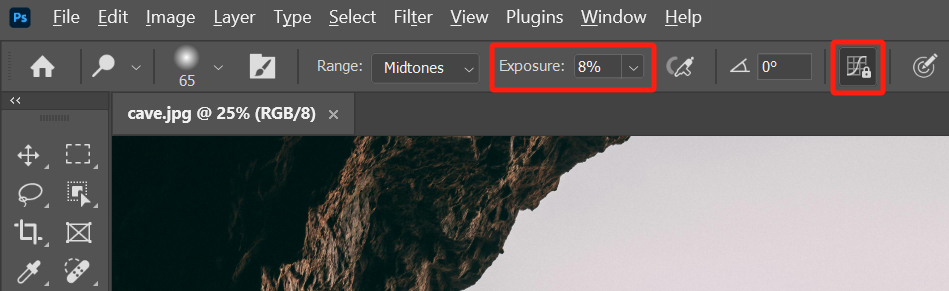
3. Exposure
Exposure determines the strength of the Dodge and Burn effect. It's recommended to set it below 20%, even between 3% and 8%. Adjust it gradually for a more natural result.
Regarding the "Keep Colors from Shifting Hue" option on the right side, we suggest keeping it at the default setting, which is checked.
How to Use Photoshop Dodge and Burn to Enhance the 3D Effect in Photos?
Surprising, isn't it? You can use Photoshop's Dodge and Burn tools to enhance the three-dimensionality and texture of your photos.
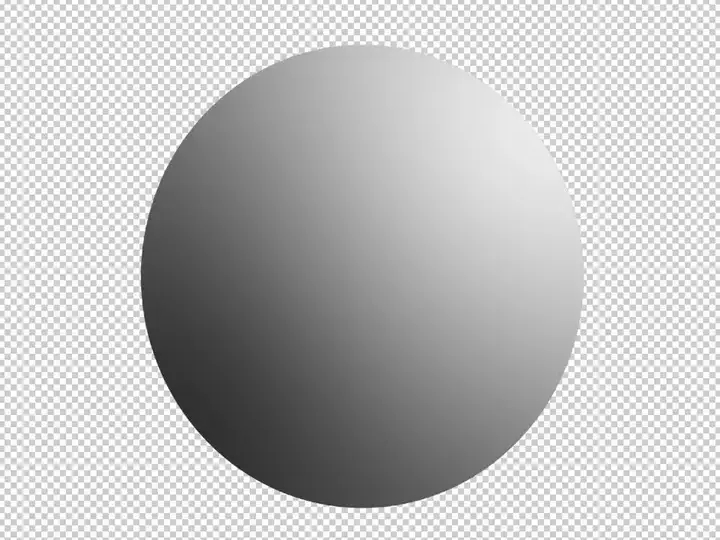
Just like in the image below, if you have a gray circle and you want to make it appear more three-dimensional, what should you do?

You can select the Dodge and Burn tools, set the range to "Midtones," and use them to add highlights and shadows to the flat circle through Photoshop editing.
Here's how: Use the Dodge tool to brighten the top-right corner of the circle. Then, use the Burn tool to darken the bottom-left corner of the image. With just a few strokes, the circle will transform into a sphere.
By repeatedly using the Dodge and Burn tools to enhance the contrast between light and shadow, the three-dimensional effect in the image becomes more pronounced. See, enhancing the 3D effect in photos is quite simple, right?
Of course, you can also use the Dodge tool to brighten the highlights and the Burn tool to darken the shadows in order to enhance the three-dimensionality of objects captured in a photo.
However, the enhancement's extent should align with the photo's lighting characteristics.
For example, in the photo below, you can use the Dodge tool to enhance the brightness of the highlights subtly. But in cloudy conditions, the 3D effect of the objects shouldn't be too strong, as it would make the editing obvious.
Besides enhancing the three-dimensionality, you can also use this method to bring out the texture of objects. In the photo below, the texture of the tree trunk is prominent, but the contrast between light and shadow is not enough, resulting in a lack of texture.
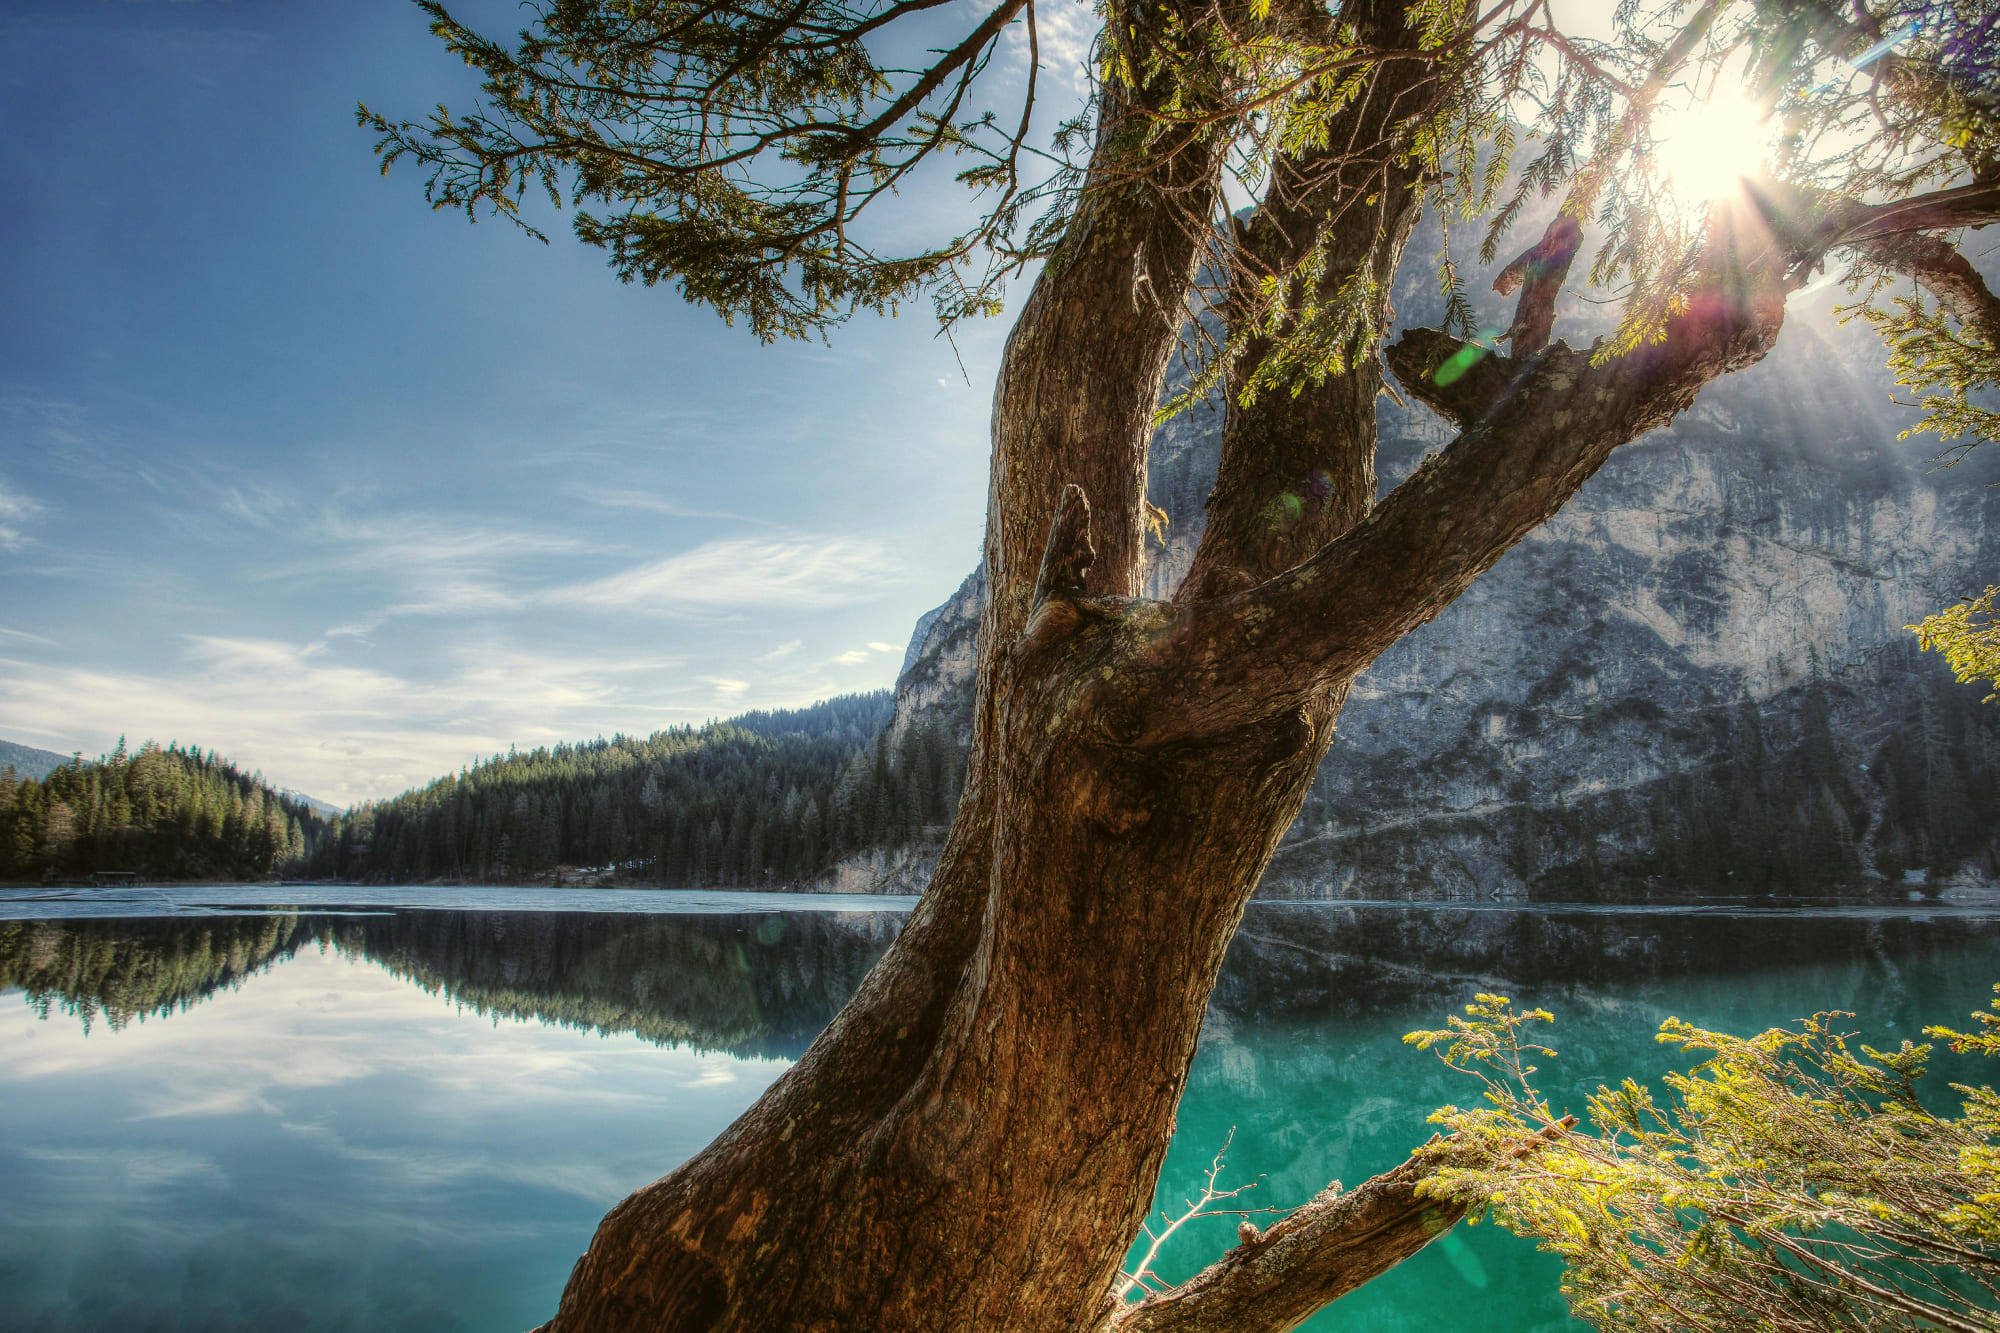
You can select the Dodge tool and set the range to Midtones and Highlights, then brush over the tree trunk. This will brighten the highlights on the trunk, while the shadow areas of the tree remain mostly unaffected.
As a result, the texture becomes more prominent, and the overall texture of the tree is enriched.
How to Use the Photoshop Dodge and Burn to Guide the Viewer's Eye?
When people look at a photo, they are initially drawn to areas with high contrast. So, you can use Dodge and Burn to enhance local contrast, highlighting a specific part of the photo and emphasizing the subject and points of interest.
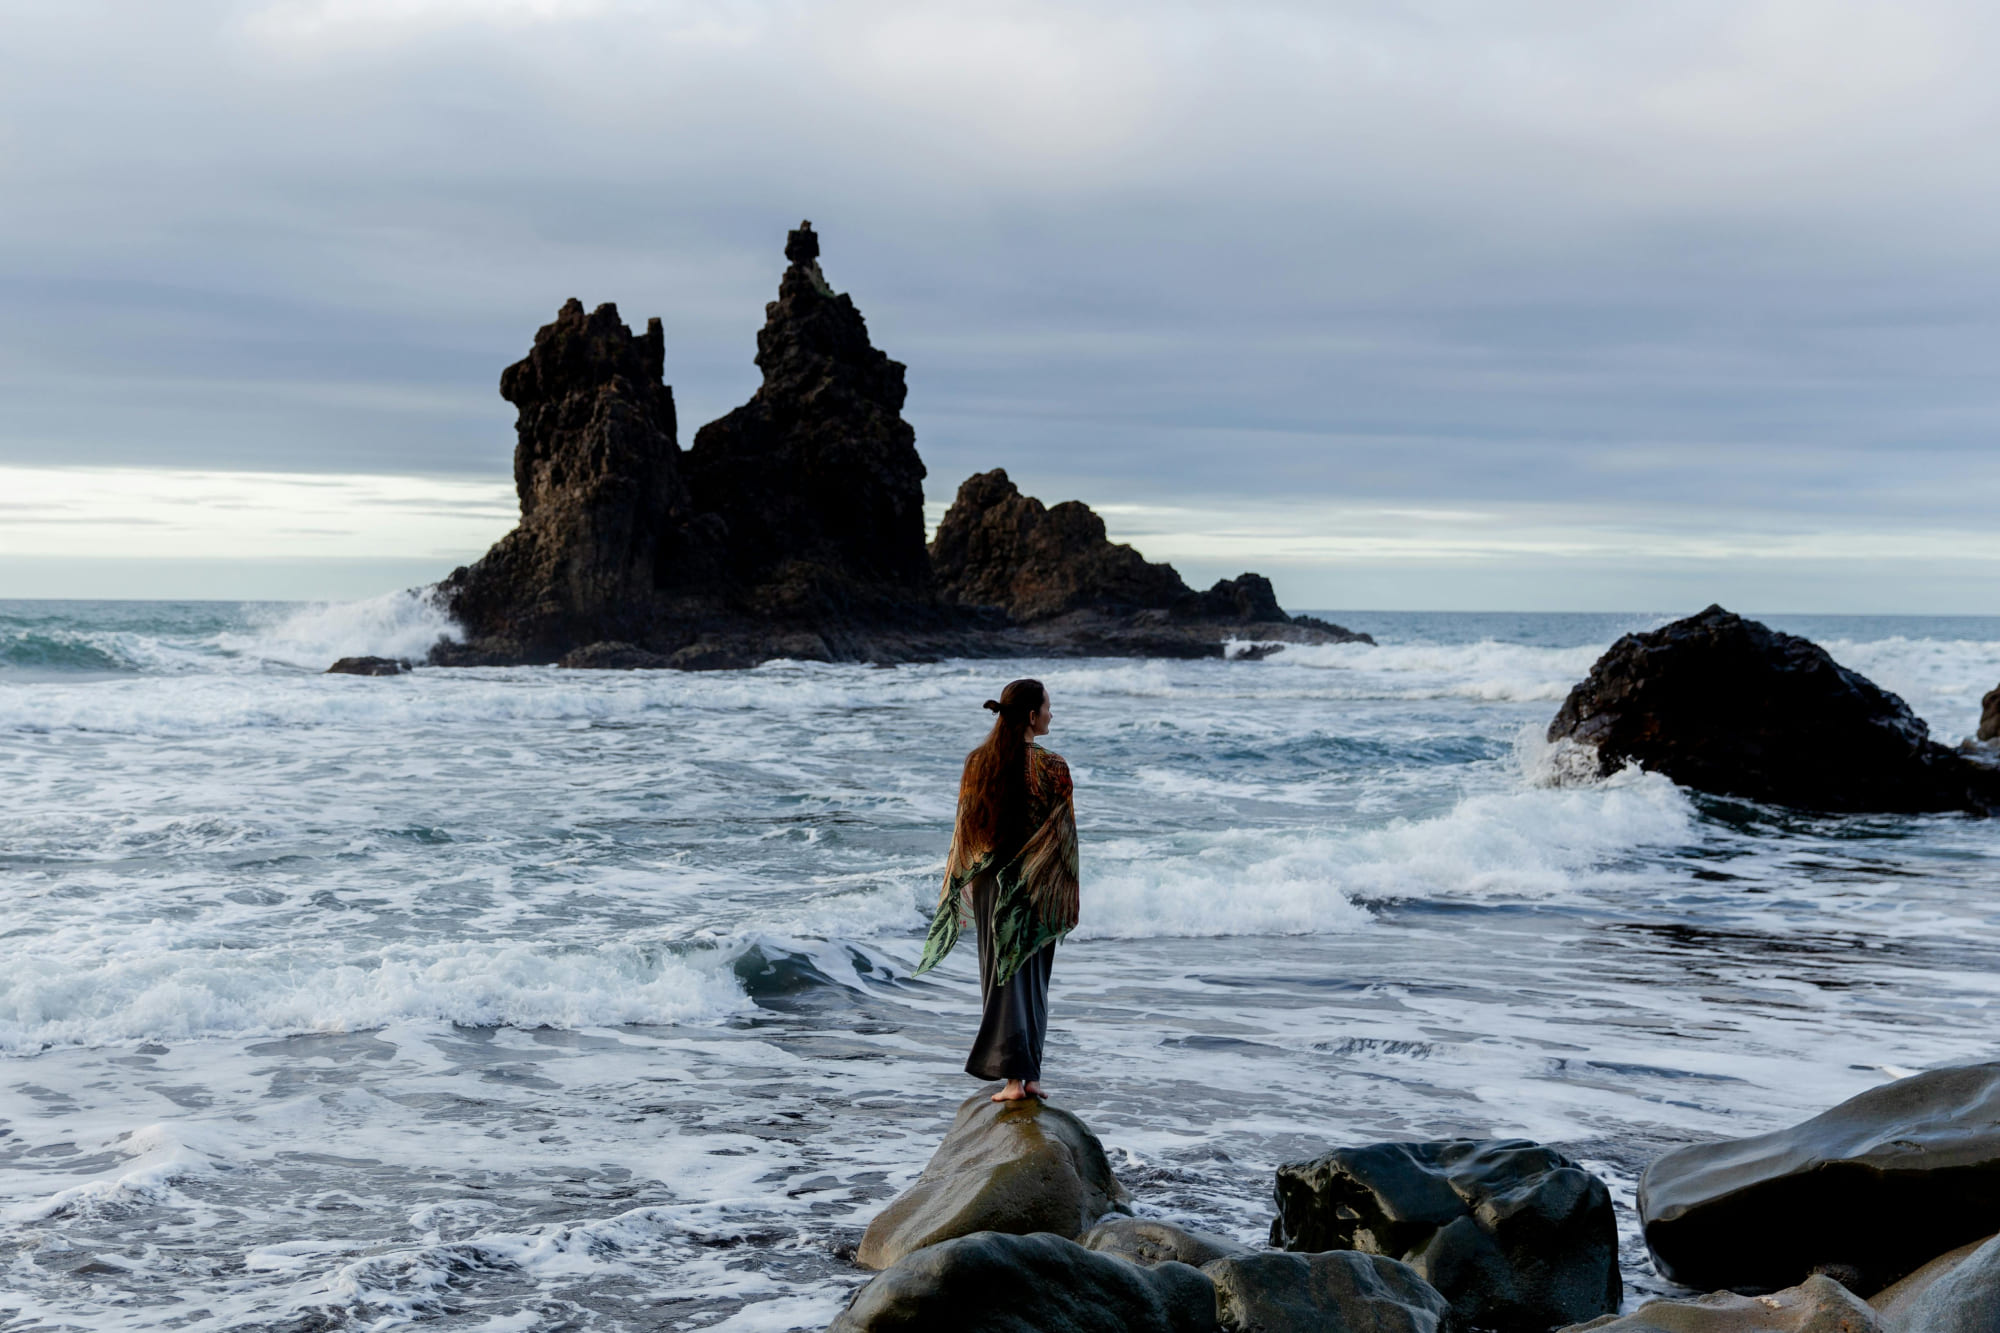
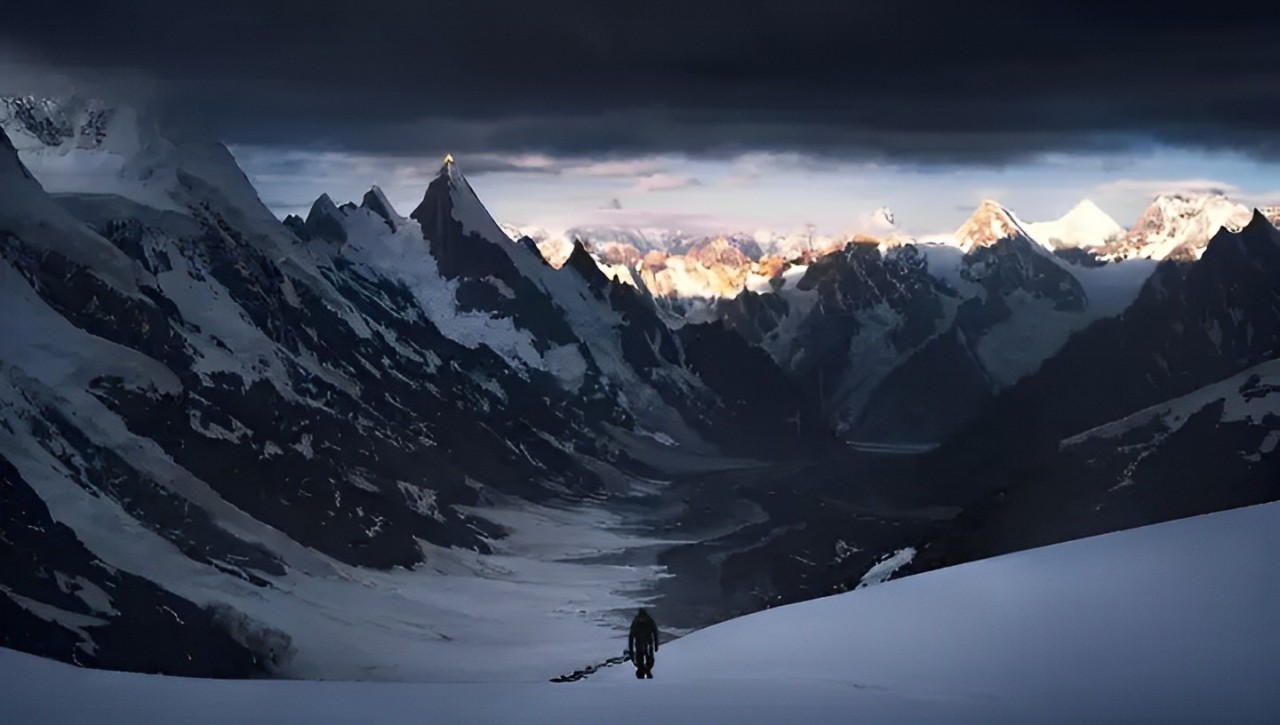
For example, in the photo below, the brightness difference between the person and the gray snow is not significant enough, making the subject not stand out. We bet you wouldn't notice the person in the photo at first glance.
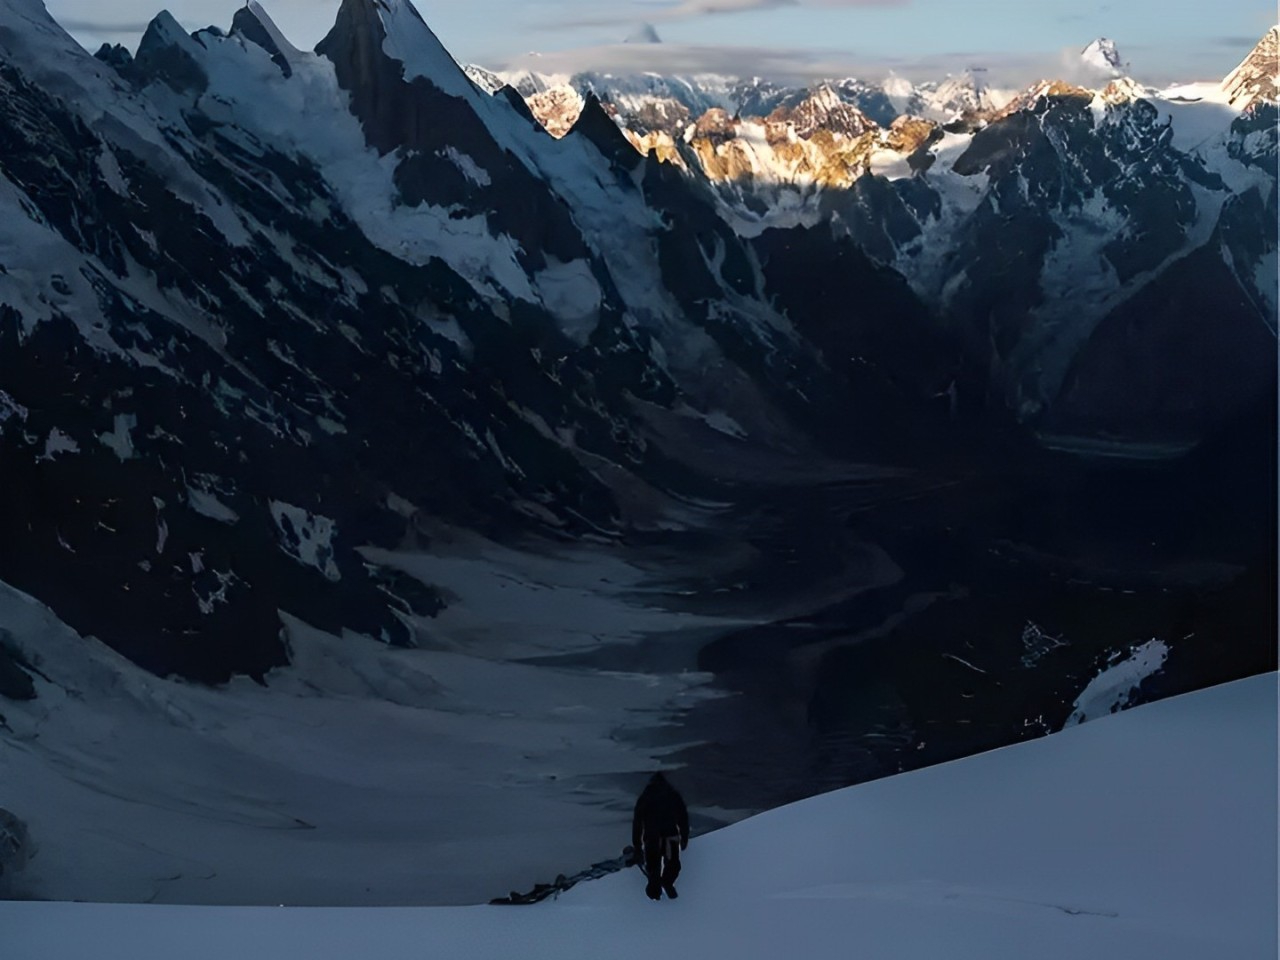
So, how can you use the Dodge and Burn tools in Photoshop to enhance the subject, guide the viewer's eye, and make them notice the subject right away?
To enhance the subject, you need to increase the contrast between the subject and its surroundings, either by darkening the person or brightening the surrounding white snow.
Here, you can select the Dodge tool, and set the range to Midtones, and the exposure to 10%. Slowly brush over the snow around the person.
Since the range is set to midtones, the brightening operation won't affect the dark person in the photo. Instead, it will brighten the grayish-white snow around the person.
As a result, the black figure stands out from the white snow, immediately grabbing the viewer's attention.
Frequently Asked Questions About Photoshop Dodge and Burn
Question: What Is the Dodge and Burn Tool in Photoshop?
The Dodge and Burn tool is a tool in Photoshop used to adjust the brightness of specific areas in an image. The Dodge tool darkens colors, while the Burn tool lightens colors.
Question: When Should I Use the Dodge and Burn Tool?
You should use the Dodge and Burn tool when you want to enhance the contrast in an image or adjust the brightness of specific areas.
Question: Are There Any Tips for Using the Dodge and Burn Tool?
When using the Dodge and Burn tool, it's recommended to first duplicate the layer and start with a small brush size and low intensity on the duplicated layer. Then, gradually adjust until you achieve the desired effect.
Additionally, selecting different ranges such as Highlights, Shadows, or Midtones can help you have more precise control over where the Dodge and Burn tool is applied.
Product Recommendation:
If you're interested in TourBox, you might want to check out our latest product, TourBox Lite. It offers great value for money and is perfect for first-time users of TourBox.

That concludes our introduction to the Dodge and Burn tools in Photoshop. We believe that mastering these tools will greatly enhance the visual impact of your photos in no time.