How to Set Up Dynamic Color Picker: Common Issues and Fixes
If you are a digital artist who uses CLIP STUDIO PAINT, you should definitely try our newly updated Dynamic Color Picker feature. You can learn more about what is included in this update in the blog post below:
Further Reading:
TourBox Console 5.12.0: Dynamic Color Picker for CLIP STUDIO PAINT
However, when you use this feature for the first time, you may run into a few issues. This blog will show you how to set up the Dynamic Color Picker and how to fix some common problems you may come across.
Before You Start
You need to set up Dynamic Color Picker in TourBox Console. If you have not installed TourBox Console yet, or if you are still using an older version, please visit our software download page and update to the latest version.
Dynamic Color Picker is included in TourBox Console 5.12.0 Beta 2 and later versions.
How to Set Up Dynamic Color Picker?
In TourBox Console, create a preset for CLIP STUDIO PAINT and assign the built-in Dynamic Color Picker function to any button except the Tour Button.
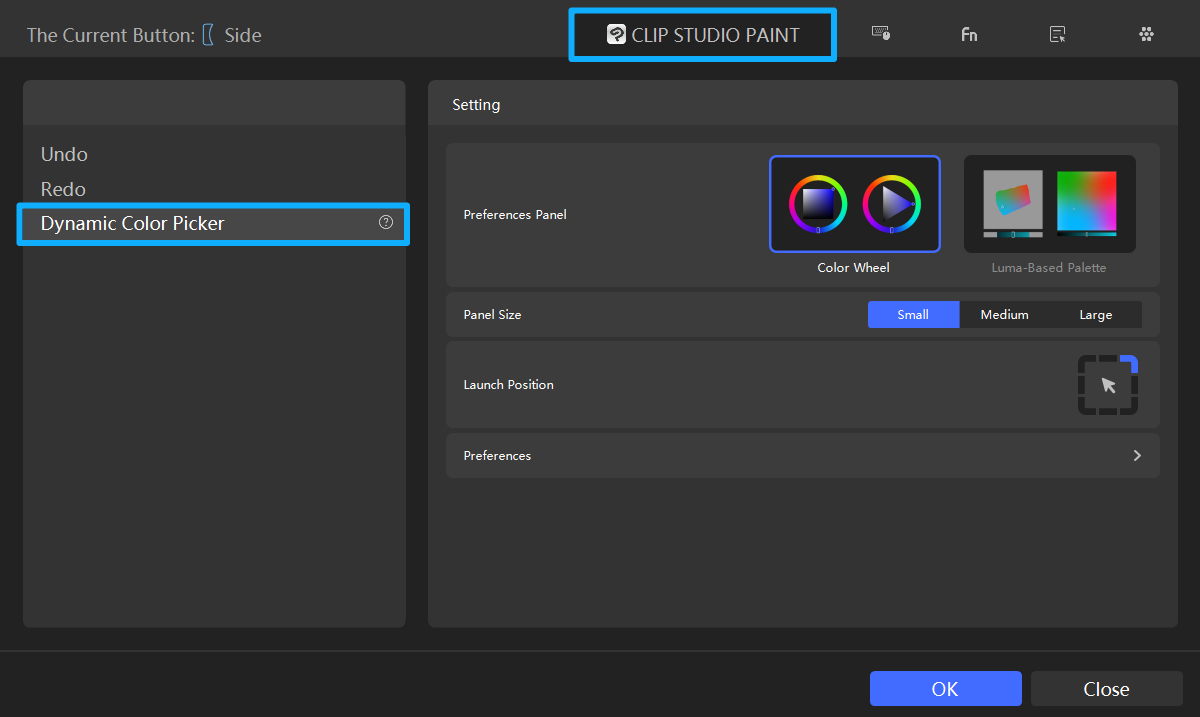
After you launch CLIP STUDIO PAINT, press the button you just set up. The system will automatically request the permissions it needs, and then you can start using it normally.
In some cases, though, you may need to grant the permissions manually. This step can be a little tricky, so let's look at how to fix those issues.
How to Grant Permission in CLIP STUDIO PAINT?
Launch CLIP STUDIO PAINT and press the TourBox button you just set up. At this point, you may see a permission prompt for Dynamic Color Picker on your screen.
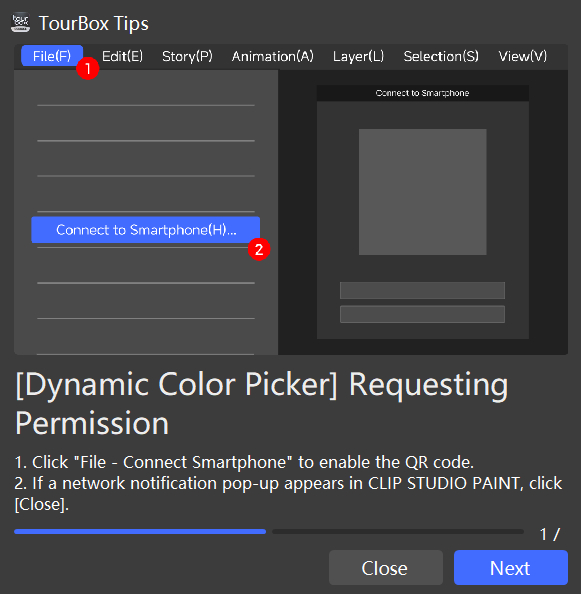
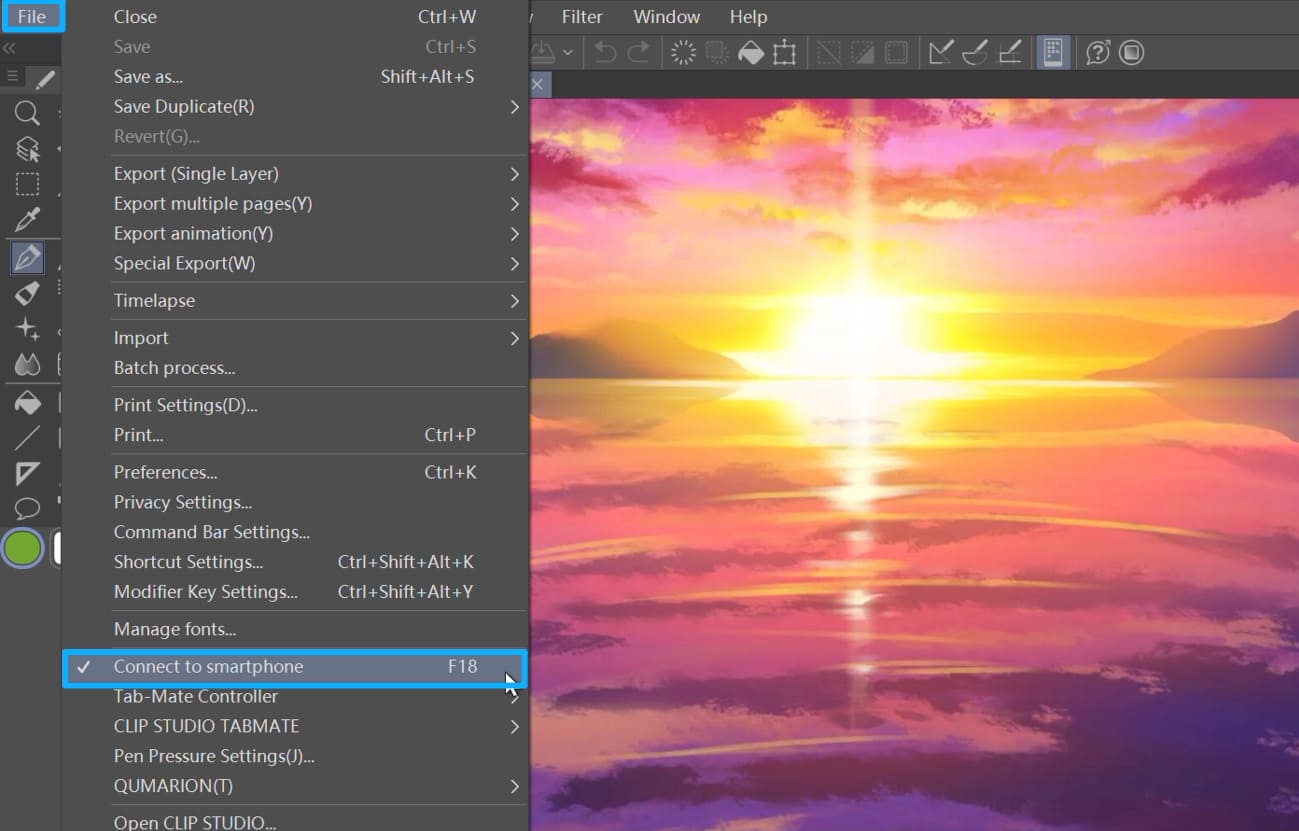
Follow the on-screen steps and, in CLIP STUDIO PAINT, click File → Connect to Smartphone.
A QR code like the one below will appear. In most cases, TourBox Console will read the QR code automatically and close this screen after the permission process is done.
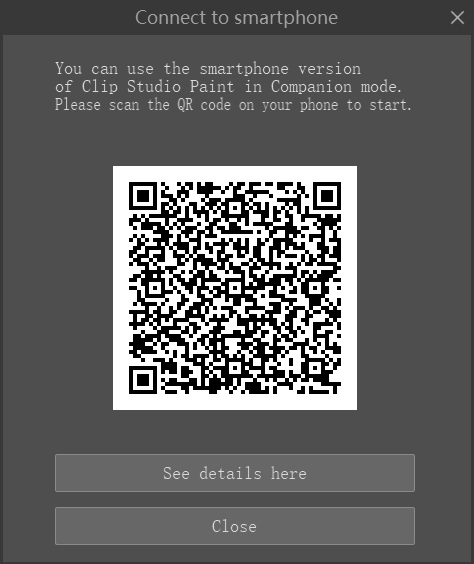
In rare cases, the QR code screen may not go away. If that happens, there is no need to scan it with your phone. Just click Close
Then click Next, and the permission setup is complete.
What If Permission Setup Fails?
If you see "Dynamic Color Picker Failed to Obtain Permission," it usually means you did not go through the Connect Smartphone step. You can also check your network and make sure your device is connected properly.
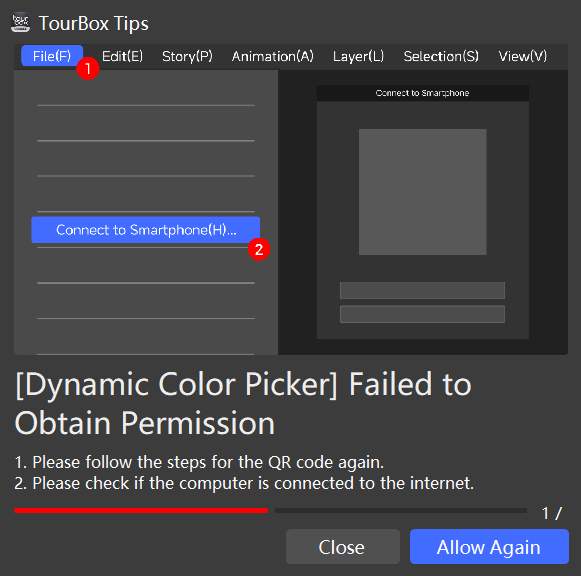
To fix this, follow the same steps again:
- Click File → Connect Smartphone again.
- Click Allow Again.
- Close the QR code screen that appears.
That will complete the permission setup. Once permission is granted, it will be enabled automatically every time you launch Clip Studio Paint. You do not need to go through the Connect Smartphone step again.
What If There Is No Free Button for Dynamic Color Picker?
At the moment, Dynamic Color Picker can only be assigned to a single button. In other words, you cannot set this new feature to a button combination.
The problem is that you may already have assigned other functions to all of TourBox's single buttons, and there may not seem to be any free button left for Dynamic Color Picker.
Do not worry. Dynamic Color Picker actually combines two steps in CLIP STUDIO PAINT — color picking on the canvas and opening the color picker — into one step.
That means you can use it to pick a color directly from the image, or use the color picker that appears with this feature.
So, you only need to replace the Alt / Option shortcut you previously assigned to a single button.
Are the Written Steps Still Not Clear Enough?
Take a look at the video below for a clear, step-by-step demo of how to set up and use Dynamic Color Picker.
If you have any questions during use, or any feedback or suggestions, please feel free to contact our support team.