Photoshop Gradient Map: A Simple and Efficient Color Grading Tool
In this article, we're diving into a Photoshop color adjustment tool called Gradient Map.
Despite its mystical name, Gradient Map is incredibly user-friendly, offering striking effects that can serve as your secret weapon in Photoshop color adjustments.
By utilizing Gradient Map in Photoshop, you can add different hues to various brightness ranges, enhancing your editing skills significantly. Without further ado, let's get started!

In this article, you will learn:
- How to Add Gradient Map in Photoshop?
- What Is the Purpose of Gradient Map?
- How to Use Gradient Map in Photoshop?
- Final Thought About Photoshop Gradient Map
How to Add Gradient Map in Photoshop?
You can add a Gradient Map effect by using an adjustment layer on your image in Photoshop.
To do this, open the image you want to edit after launching Photoshop.
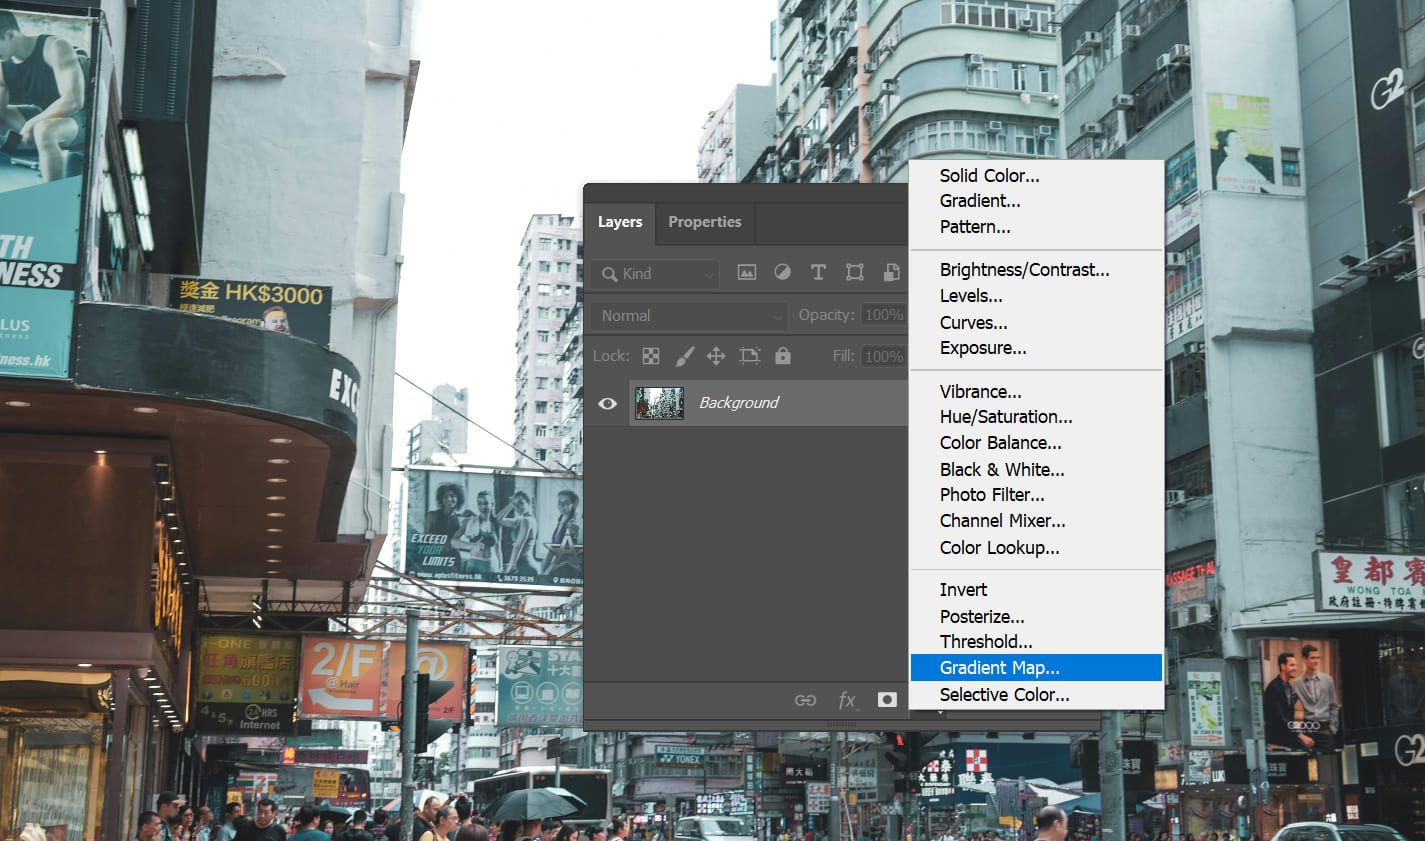
At the bottom of the "Layers" panel, click on the icon for "Create new fill or adjustment layer," then select "Gradient Map."
What Is the Purpose of Gradient Map?
The purpose of Gradient Map in Photoshop is to colorize based on brightness levels.
It allows you to apply different hues to various brightness ranges, smoothly transitioning between the two colors in a gradient fashion.
How to Use Gradient Map in Photoshop?
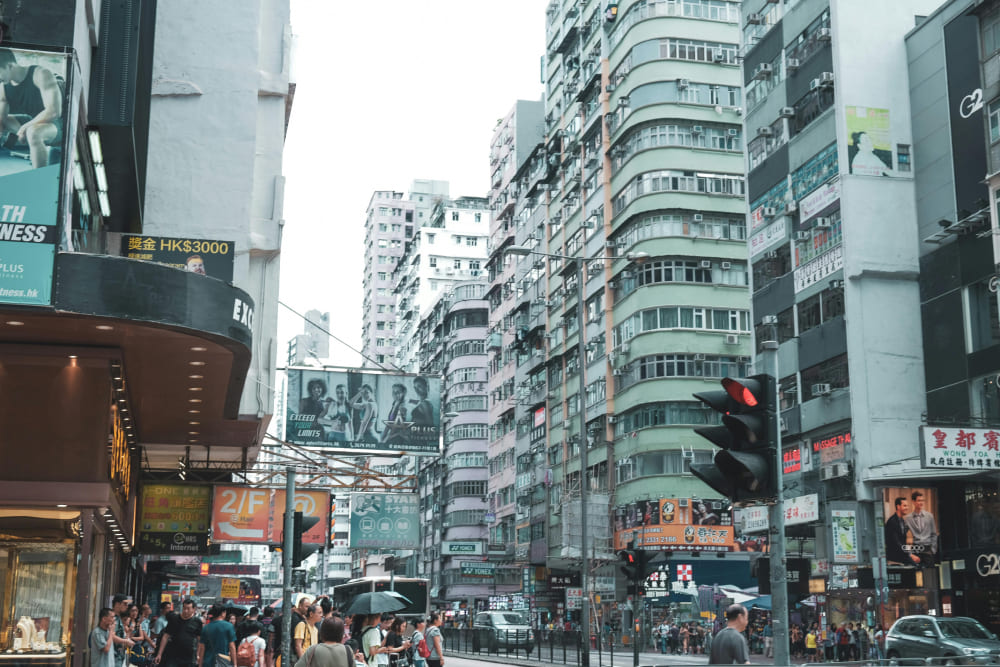
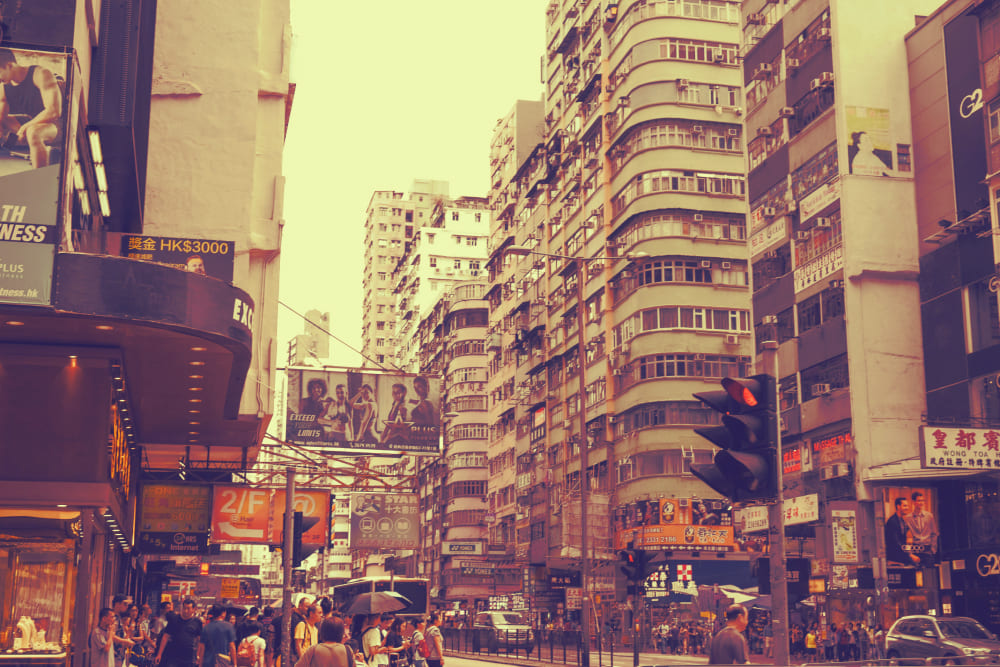
Let's take this photo of a Hong Kong street as an example.
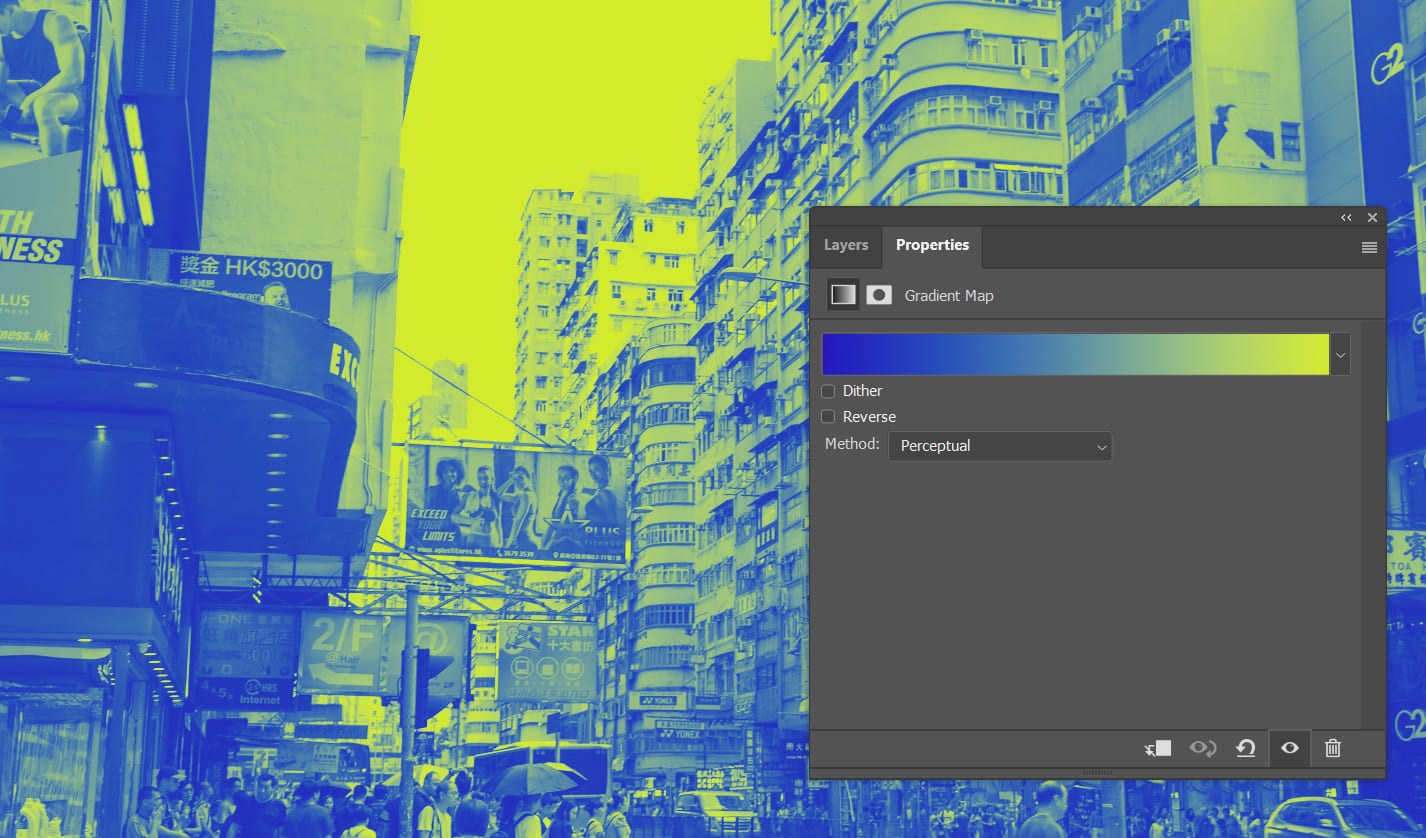
We applied the Gradient Map feature - bright areas turned yellow, while dark areas were tinted blue.
You'll notice the colors in the photo follow a smooth gradient transition between blue and yellow, creating a natural blend in the mid-tones.
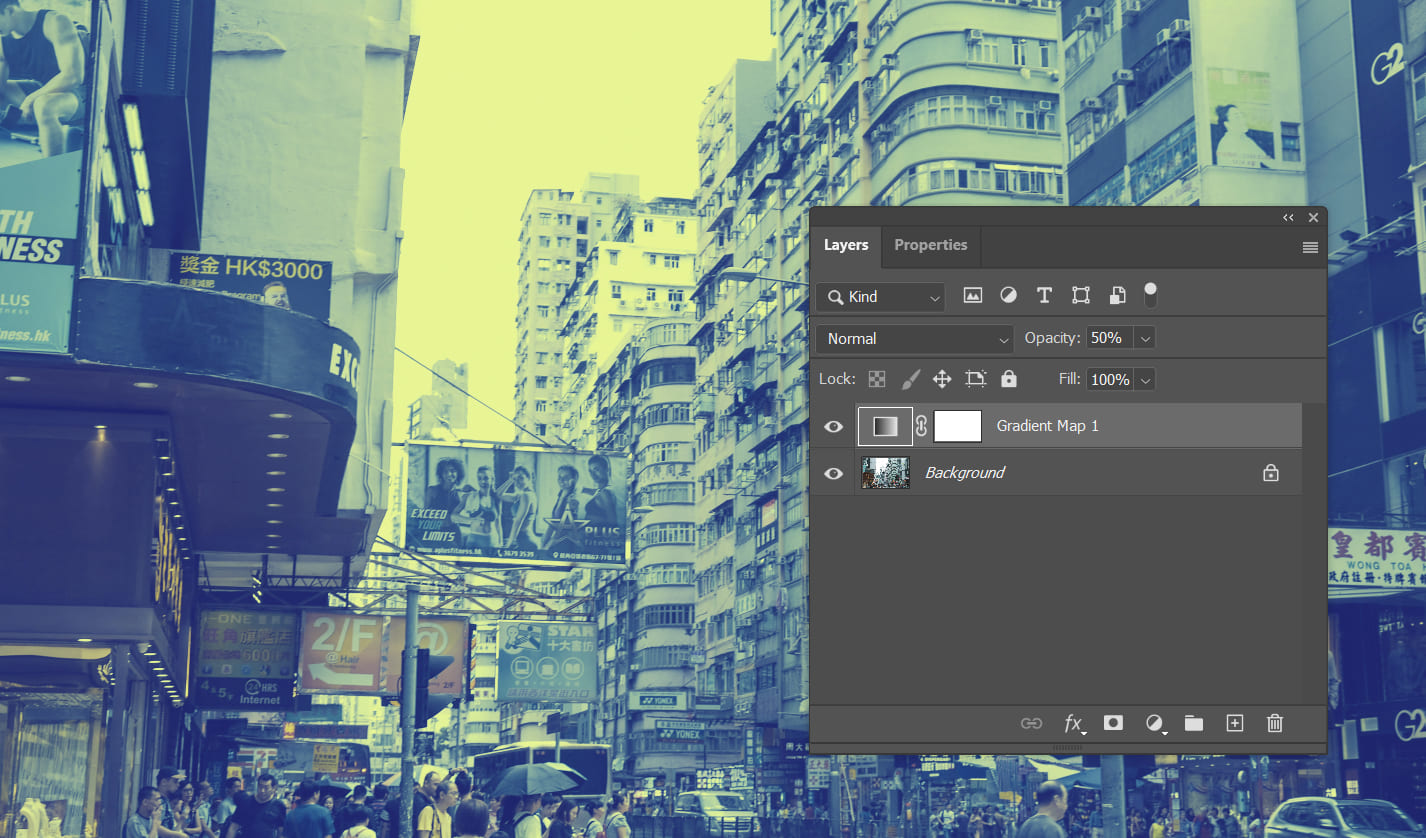
However, while the blue-yellow gradient effect is natural, it might not be the color vibe you're aiming for.
Don't worry. Head back to the Layers panel and reduce the opacity of this Gradient Map layer. Here, we lowered the opacity to 50%.
Now the photo has the nostalgic feel we desired, like an old-fashioned picture.
Let's try another experiment by adding an extra set of colors to the gradient: keeping yellow for highlights and blue for shadows, but introducing red for mid-tones.

Now the color gradient shifts from dark to light as follows: blue > red > yellow, transitioning in color as brightness changes.
Adjust the opacity of the Gradient Map layer a bit more, and you'll experience a whole new vibe.
After sharing a simple example of gradient mapping, let's delve into a more detailed explanation of gradient mapping.
Once you create a Gradient Map layer, your photo will default to black and white, with the properties panel shown below.
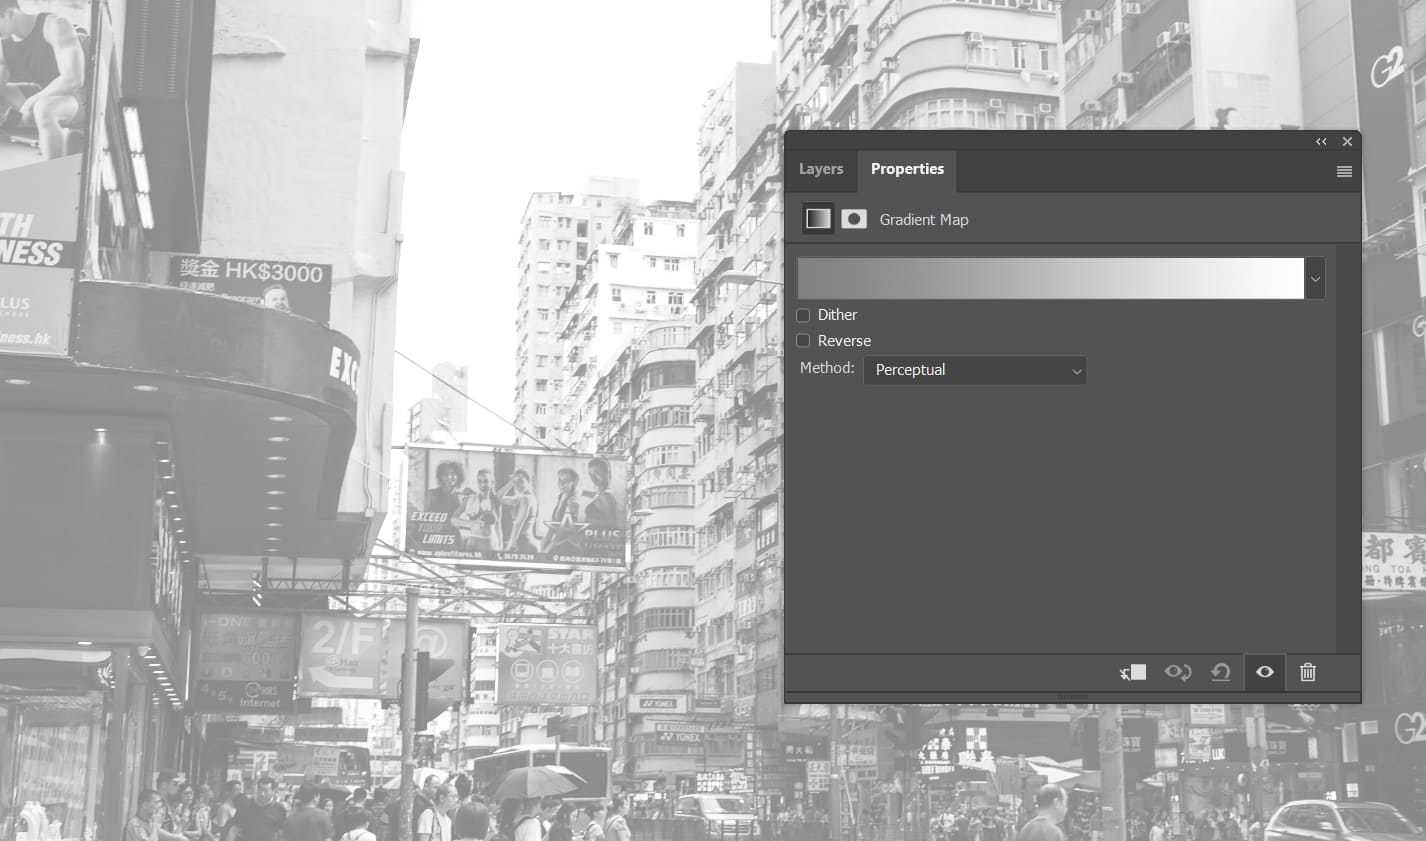
In this panel, you'll find a gradient bar: from dark to light > from black to white, which turns the image black and white.
Additionally, there are two options in this panel: "Reverse" to flip the gradient, and "Dither" to prevent color banding when dealing with large spans, usually not necessary.
Clicking the dropdown icon next to black and white reveals various color blocks, which are preset gradient mappings provided by Photoshop.
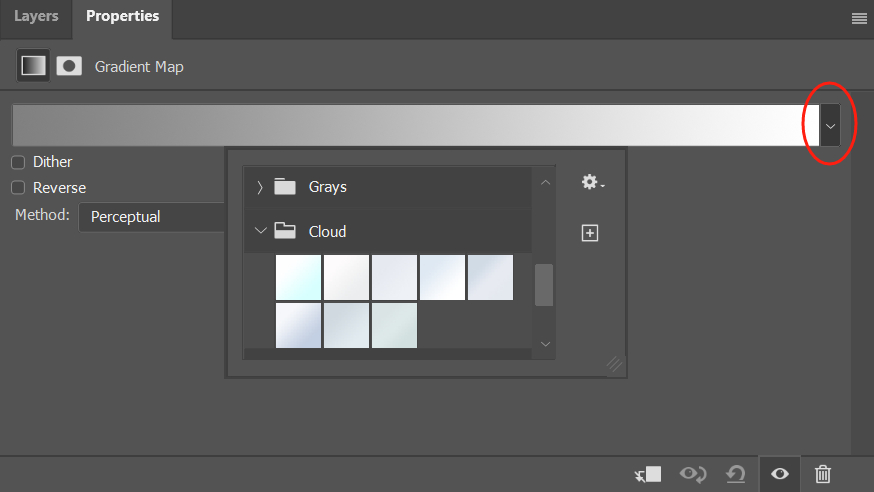
Select a preset you like, then observe the effect on the photo. If the color adjustment seems too strong, it's because all colors have been replaced. Simply reduce the opacity of the gradient mapping layer.
This is where the power of adjustment layers comes into play; lowering the opacity of the gradient mapping layer (usually below 50%) works best.
You'll notice that just within this settings panel, you have access to a vast array of presets, and the process is simple: create an adjustment layer > choose preset > adjust the opacity.
With gradient mapping, even for complex effects, a few clicks of the mouse are all you need! 15 seconds is often sufficient.
For a more advanced experience, click on the gradient bar to enter another "Gradient Editor" settings panel. While it may seem complex, it's actually straightforward.
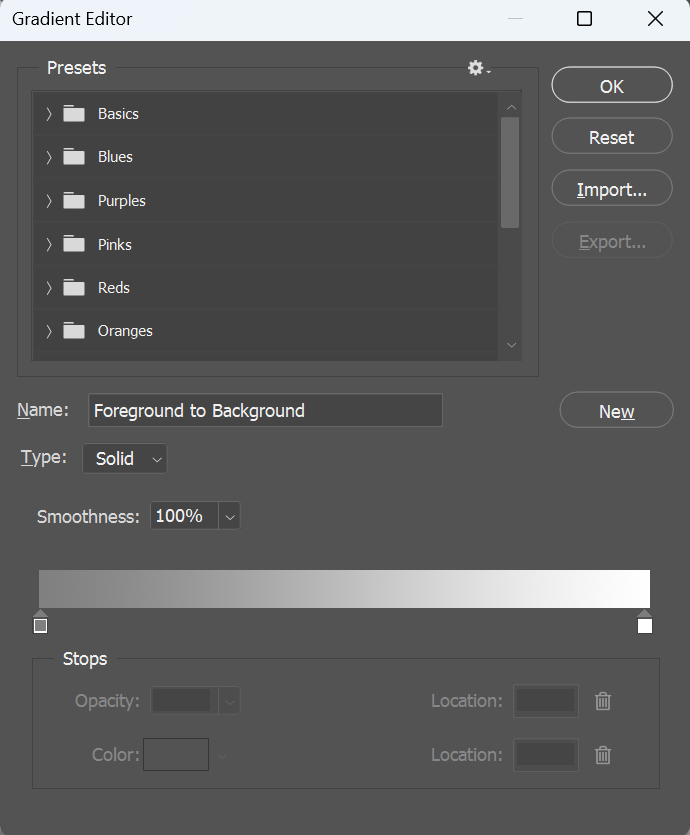
Essentially, you select a preset and then edit its details here, or create a new preset. You can also load presets shared by others in this interface.
One of the trickier aspects of the Gradient Editor might be the gradient bar. Here are a few simple tips:
- Click near the gradient bar to add a new color stop.
- Click and drag the small diamond to adjust the gradient's intensity.
- To set colors, click on a color stop, and the colors in the "Stop" area below can be modified. Clicking again opens the Color Picker panel, while double-clicking the color stop directly opens the Color Picker panel as well.
Further Reading:
Mastering Gradients: 8 Photoshop Techniques You Can't Afford to Miss
Final Thought About Photoshop Gradient Map
Gradient Map in Photoshop is an often overlooked yet incredibly practical and simple color adjustment tool. Especially in post-processing for photography, you can achieve stunning color effects without needing any knowledge of color theory.
What's great about Gradient Map is how quick and easy it is to use. With just a few mouse clicks, you can transform your images. Let us reiterate the process for using Gradient Map:
- Create a Gradient Map adjustment layer.
- Choose a preset or create your own.
- Adjust the opacity of the Gradient Map layer.
Product Recommendation:
After our introduction, you're bound to appreciate the swift and efficient post-processing method of Photoshop's gradient mapping.
Efficiency and ease of work are key for every digital artist and photographer. To conclude this article, we'd like to recommend TourBox, a creative controller that can significantly boost your productivity.

TourBox was designed as a keyboard alternative, offering more efficient operations that allow you to accomplish tasks with fewer actions than using a keyboard.

Moreover, its unparalleled tactile experience will leave you impressed. If you're tired of inefficiently using a keyboard during work and creation, give TourBox a try.