A Beginner's Guide to Adding and Inserting Images in Photoshop
Welcome to this beginner's guide on how to add images in Photoshop. This tutorial will walk you through a variety of methods to insert images into your Photoshop projects, along with some extra tips and tricks that will come in handy as you master this essential skill.
Without further ado, Let's get started!

In this article, you will learn:
- Method 1: Insert an Image in Photoshop Using 'Open'
- Method 2: Insert Images into Photoshop Via Drag and Drop
- Method 3: Insert Images into Photoshop Via "Place Embedded"
- Tips and Tricks for Adding Images in Photoshop
Method 1: Insert an Image in Photoshop Using 'Open'
Launch Photoshop and you'll arrive at the home page. On the left side of this page, you'll see two options: "Create new" and "Open". On the right side, you'll find a display of your previously accessed image files.
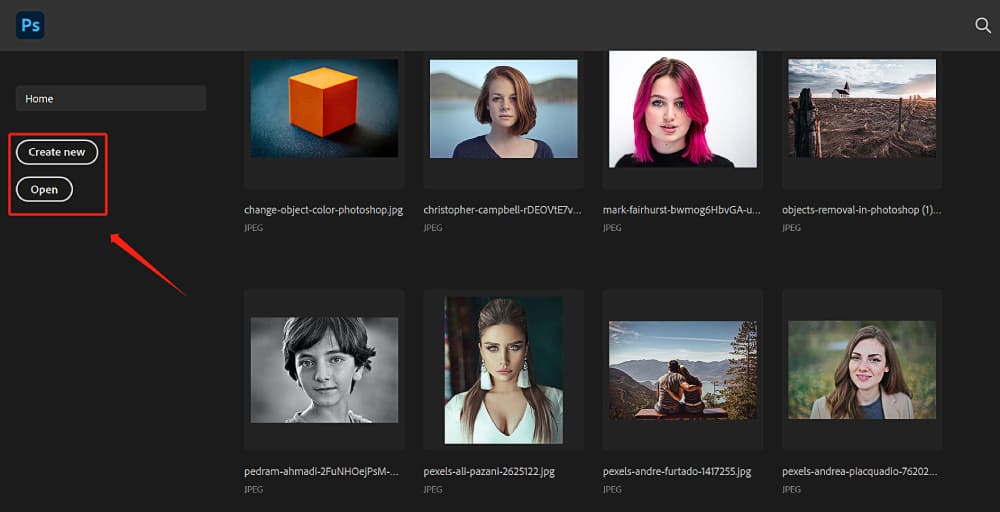
Here, you have two ways to add images into Photoshop. The first way is to simply click on the "Open" option. This will prompt a file explorer window to pop up. You can then navigate to your image file, select it, and click "Open". Photoshop will then open the image as a new document.
The second method involves creating a new document. To do this, click on the "Create new" button.
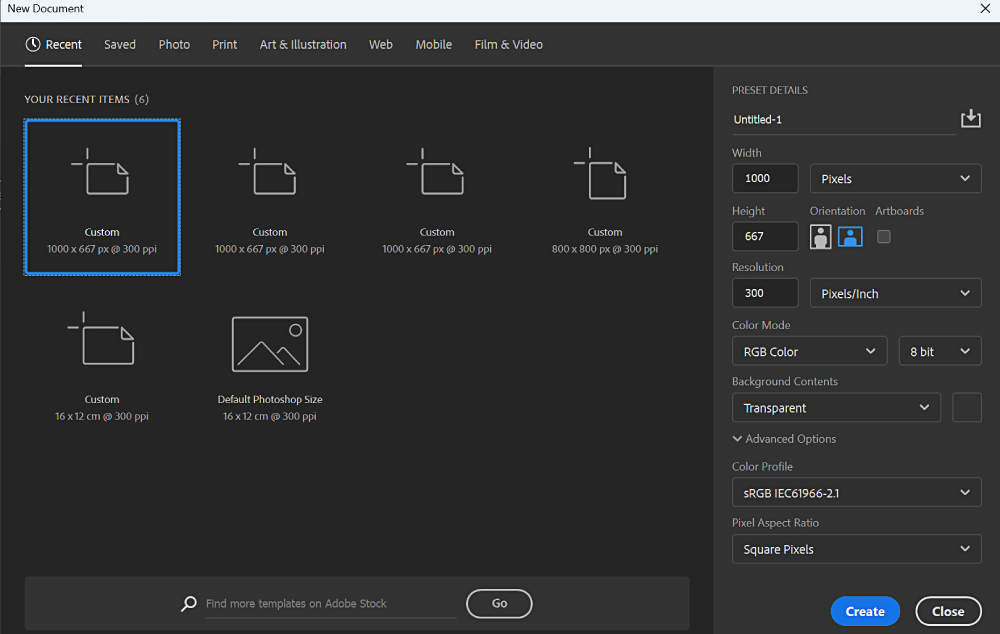
In the document setting window that appears, you can set the dimensions, color mode, and background contents of your new document according to your needs. After you've set your preferences, click "OK" to create the new document.
Once you've created a new document, you'll be taken to the main Photoshop workspace. This consists of a menu bar at the top, a toolbar on the left, and several panels on the right.
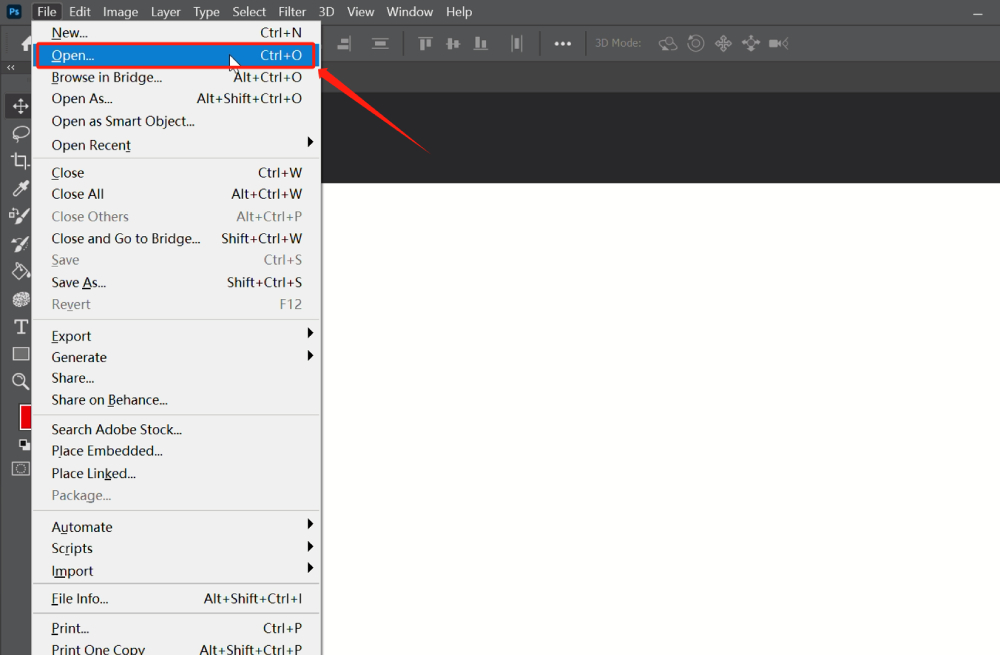
Next, navigate to the "File" option in the top left of the menu bar. This bar contains many of Photoshop's key functions. When you click on "File", a drop-down menu will appear.
In the "File" drop-down menu, click on the "Open" option. This will prompt a file explorer window to open. In the file explorer, navigate to your image file. Once you've found the file you want to open, click it to select it, then click the "Open" button in the lower-right corner of the window.
After clicking "Open", your image will appear in your new Photoshop document. From here, you can begin to edit and manipulate your image using the many tools and features provided by Photoshop.
Extra Tip:
When you use the "Open" function, Photoshop treats the entire image as a background. This means it's locked to prevent accidental movement or editing.
If you want to manipulate the image as a regular layer, you'll need to unlock it first. To do this, simply double-click on the layer in the "Layers" panel, then click "OK".
Method 2: Insert Images into Photoshop Via Drag and Drop
The second approach we're sharing is one of the quickest and easiest ways to add an image to your workspace in Photoshop. It's called the drag-and-drop feature. Let's walk through how to add and insert an image into Photoshop by dragging and dropping it from a file folder.
First, open your existing Photoshop document or choose to create a new one. Next, navigate to the folder that contains the image you want to import into Photoshop. You can do this using your operating system's file explorer (such as Finder for Mac or Explorer for Windows).
To perform a drag-and-drop operation, you'll need to have both Photoshop and your file folder visible on your screen simultaneously. You can accomplish this by adjusting the sizes of both windows or using the "tile windows" feature provided on most operating systems.
Now, click and hold the image file in your file explorer. While still holding the mouse button, drag the image over to the Photoshop window. Release the mouse button to drop the image into Photoshop.
Once the image has been dropped into Photoshop, it will open as a new layer in your document. You'll see this new layer framed with a blue border.
You can adjust the size of the image by dragging the edges of this border. When you're happy with the adjustment, you can confirm by releasing the cursor or hitting the enter key.
Extra Tip:
When you drag and drop an image into Photoshop, it automatically converts to a Smart Object. This preserves the original properties of the image and allows you to perform non-destructive editing.
If you wish to edit the image without the constraints of a Smart Object, you can easily convert it back to a regular layer. Simply right-click on the layer in the "Layers" panel and select "Rasterize Layer".

Method 3: Insert Images into Photoshop Via "Place Embedded"
The third method for inserting images into Adobe Photoshop is by using the "Place Embedded" function. This tool lets you import images as Smart Objects into your current Photoshop document.
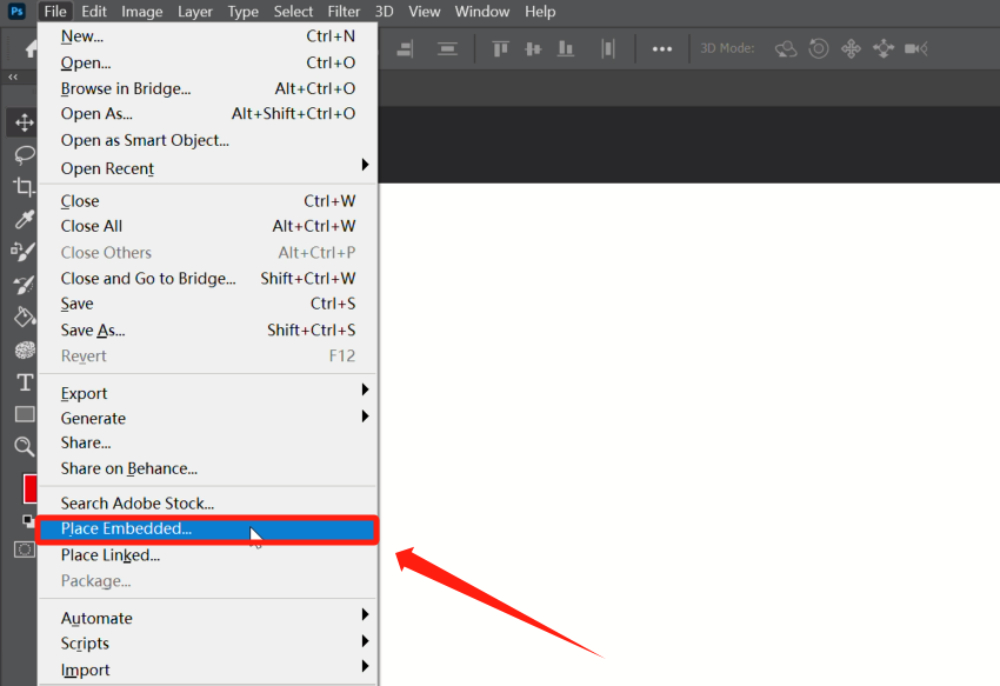
Start by opening the existing Photoshop document where you want to add the image or create a new one. Once you're in the Photoshop workspace, head over to the top menu bar. Click on "File", then select "Place Embedded" from the dropdown menu that appears.
After clicking "Place Embedded...", a file explorer window will pop up. Navigate through this window to locate the image file you want to insert into your Photoshop document. Click on it to select it, then click "Place" in the bottom right corner of the window.
Once the image has been placed, it will show up in your Photoshop document with a bounding box around it. You can use this bounding box to tweak the size and position of the image.
To adjust the image size, click and drag any of the eight handles located around the bounding box. The process from here is the same as our second method of dragging and dropping the image directly into Photoshop, so there's no need for additional explanation.
Tips and Tricks for Adding Images in Photoshop
Our tutorial on how to add an image in Photoshop has come to an end. In this guide, we've shared three methods for inserting an image into Photoshop. Additionally, we'd like to share some extra Photoshop tips.
- Image Quality: Always try to use images with the highest possible resolution. Photoshop has some limitations when it comes to enhancing the quality of low-resolution images.
- Smart Objects: To preserve the quality of layers, it's wise to convert them into Smart Objects. When turned into a Smart Object, the layer maintains its quality regardless of how much you scale it up or down.
- Resizing Images: When resizing images in Photoshop, remember to maintain the aspect ratio to avoid distorting the image. You can do this by making sure to select the "Maintain Aspect Ratio" link icon in the options bar when using the Free Transform tool (Ctrl/Cmd + T).
Product Recommendation:
Regardless of the method used, we may encounter some inconveniences during the operation. For instance, adjusting the size and position of the image might require multiple clicks and drags, which can seem tedious when fine-tuning is needed.
Furthermore, while quickly switching tools or executing menu commands, we often need to switch back and forth between the keyboard and the mouse, which can disrupt our workflow.
In such situations, we'd like to recommend a very practical tool—TourBox. This controller is specifically designed for image processing and video editing, and it can help us operate Photoshop more efficiently.

TourBox has a user-friendly design with a dial, a scroll wheel, and multiple custom buttons. The dial can be used for precise adjustments of the image size and position, and the scroll wheel for quick scrolling or zooming. The custom buttons can be set to common menu commands, such as undo, copy, and paste, etc.
This setup allows you to focus on creating, rather than being distracted by tedious operations. So, whether you're a professional designer or a Photoshop beginner, we strongly recommend giving TourBox a try.
Conclusion:
With the above methods and tips on how to add image in Photoshop, you should now be ready to experiment and create your own designs. We hope that this tutorial and TourBox will be helpful in your journey of learning and using Photoshop.