Mastering Adding Shadows in Photoshop: A Comprehensive Guide
Have you ever tried your hand at sketching? Sketching provides a method to understand and observe the representation of an object's shape, color, and texture.
The most crucial aspect of drawing objects in sketching is to capture the shadows. Shadows lend realism to the object being sketched.
Similarly, when we use Photoshop, we strive to create a sense of realism. In this tutorial, we'll explore how to add shadows in Photoshop to enhance the authenticity of your creations.

In this article, you will learn:
How to Add Shadow in Photoshop?
Before we dive into our tutorial, let's give a brief overview of the method to provide you with a preliminary understanding and impression.
In Photoshop, we'll create a duplicate of the object to which we want to add a shadow, adjust the position and size of this duplicate, paint it black, and then apply a Gaussian blur for refinement.
Sounds simple, right? That's because it really is. This technique is one of the most commonly used in Photoshop, and it can transform any object, no matter how unappealing it might look in a photo.
By following the steps outlined in the tutorial, you'll be able to give your images that professional, master photographer's touch.
Step 1: Import the Image and Remove the Background
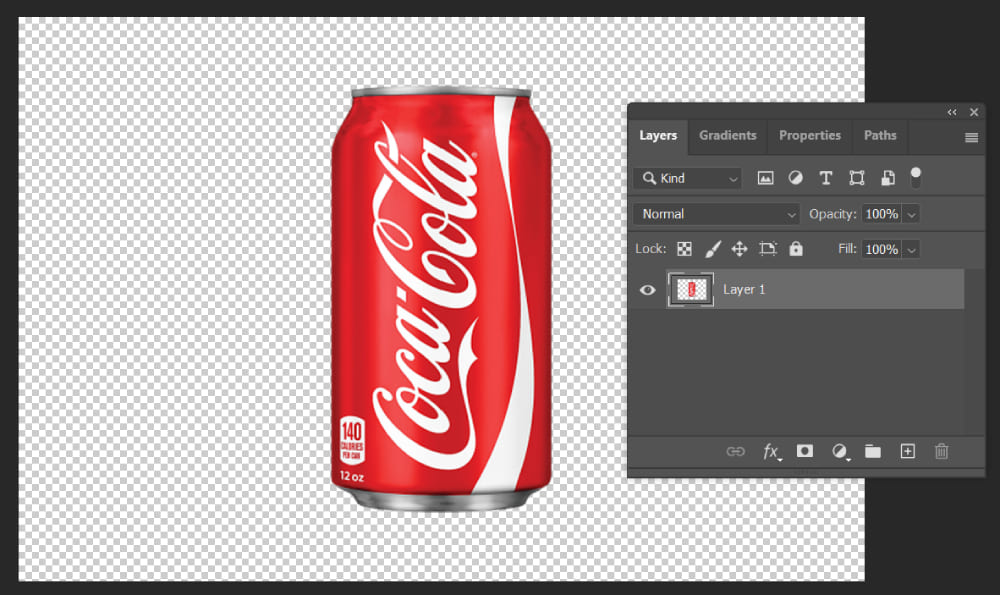
First, we'll import our image into Photoshop, convert it to a layer in the Layers panel, and remove the background.
If you'd like to learn more about how to remove a background in Photoshop, please refer to our dedicated tutorial: How to Remove Background in Photoshop
If the Layers panel shows that the imported image is a Smart Object, you can first rasterize it to convert it into a regular layer.
For this tutorial, we will be using an image of a Coca-Cola can as our sample material.
Step 2: Add a Background Image
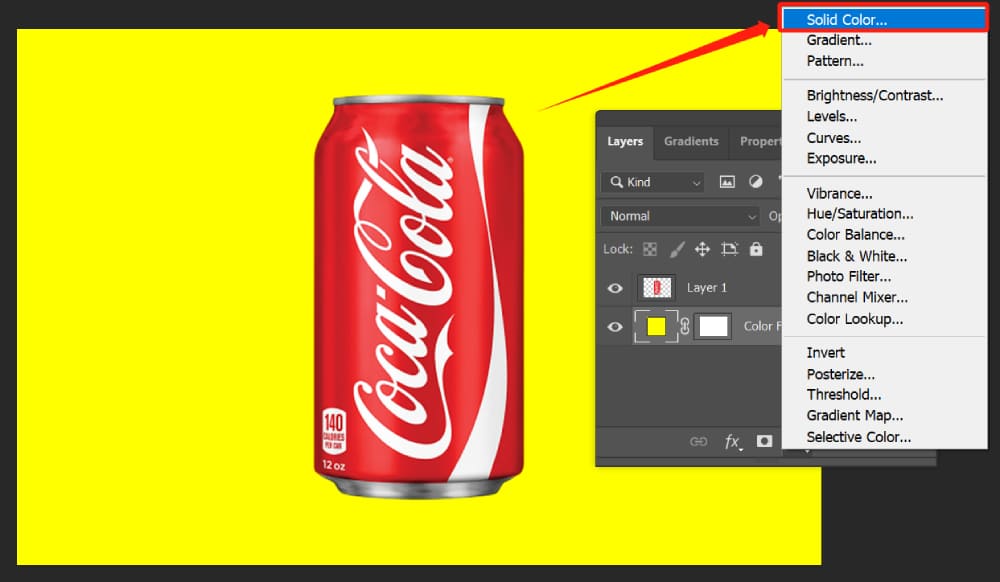
Next, we can add a layer for the background color. Depending on your vision, you can add a background image or a solid color background. For contrast, we'll add a yellow background layer beneath the Coca-Cola can layer (Layer 1).
Here, we can add a solid yellow layer by clicking on "Create new fill or adjustment layer" at the bottom of the Layers panel, and then selecting "Solid Color". We then adjust the layer order, moving the Coca-Cola can layer (Layer 1) above the solid yellow layer.
Step 3: Color Correction
Next, we need to apply color correction to the Coca-Cola can. Why is color correction necessary, you might ask? It ensures the can blends naturally with the background, creating an effect as if it was photographed in a professional studio.
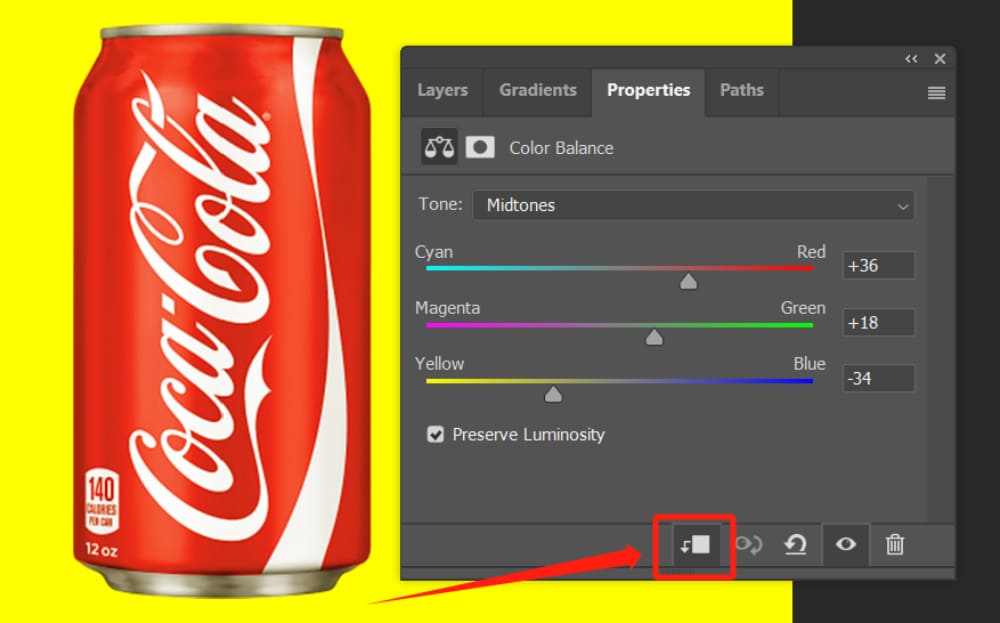
To achieve this, we'll add a Color Balance adjustment layer. Given our background is yellow, our color adjustment will lean towards yellow and red hues. However, you can modify this based on your specific needs.
Pay attention to the button located at the bottom of the Color Balance panel, as shown in the image below. Decide whether you want this adjustment layer to impact all the layers beneath it, based on your requirements.
Experience the before-and-after effects of color correction in Photoshop by watching the video below.
Step 4: Create Shadows
Now we're getting to the crux of this tutorial: how do we make shadows in Photoshop?
First, we'll create a duplicate of Layer 1. Then, we'll observe where the light is coming from on the Coca-Cola can. In our imported image, the light is coming from the left, so we'll need to set our shadow on the right side.
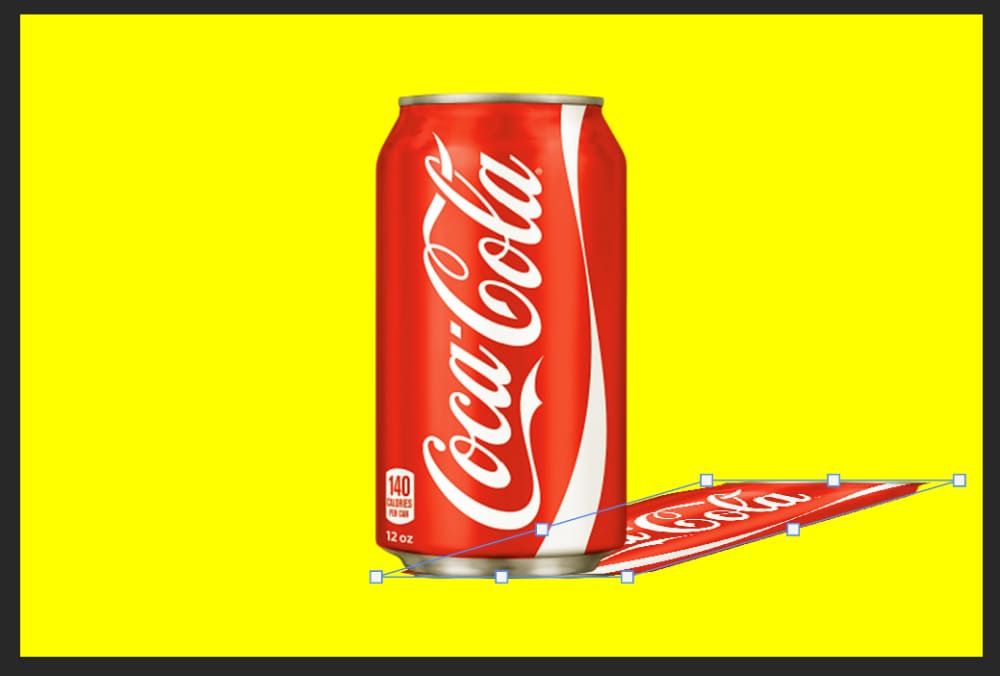
Let us drag the recently duplicated Coca-Cola layer (Layer 1 copy) underneath the original Layer 1. Then, we'll select the duplicated layer (Layer 1 copy), press Ctrl+T for free transform, and right-click to select Distort.
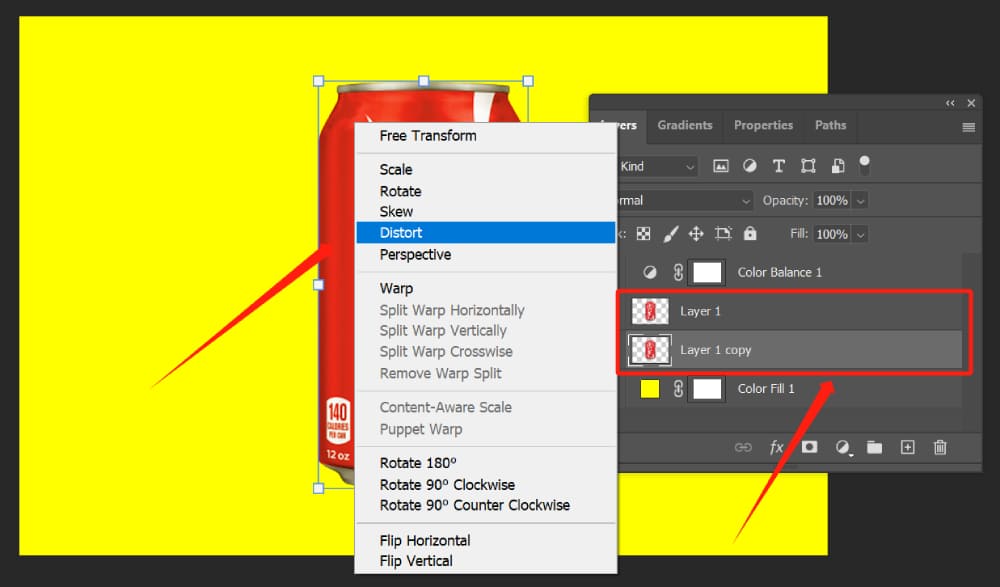
Next, we'll distort the duplicated layer (Layer 1 copy) by dragging it until it's horizontally aligned, as illustrated in the following image.
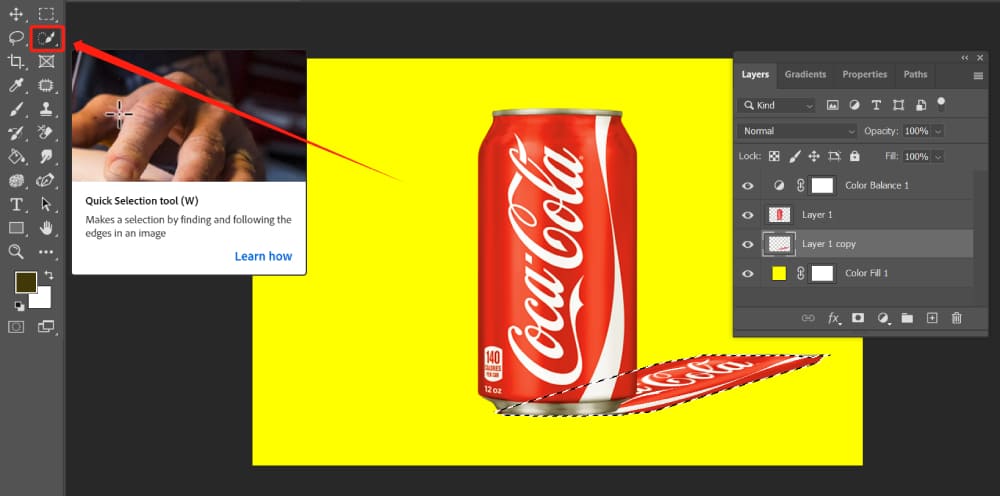
We will use the Quick Selection Tool to select the shadow of the cola can.
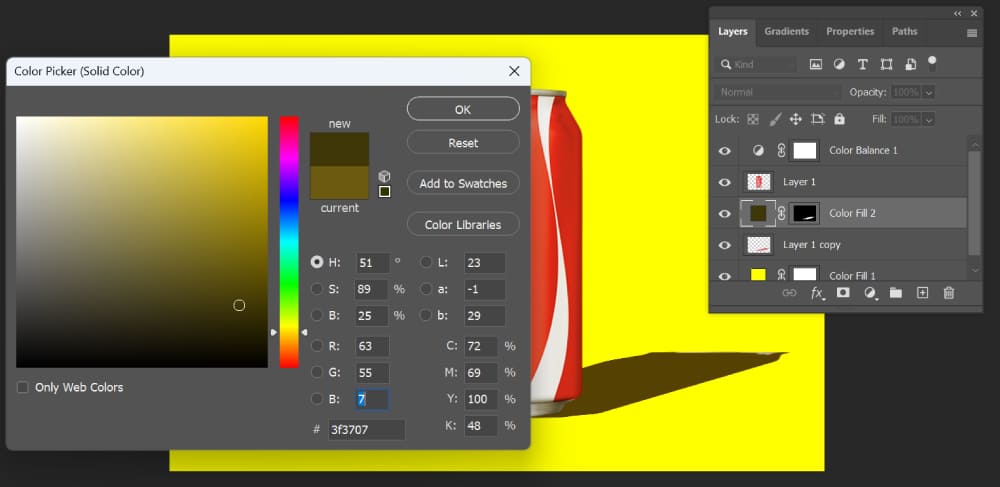
We'll then add a solid color adjustment layer to it (we're not choosing black here because shadows under yellow light won't be black, so we choose a color similar to yellow — a shade of brown).
Step 5: Blur the Shadow
Before blurring the shadow, we first need to merge the shadow layer (Layer 1 copy) with its associated solid color adjustment layer (Color Fill 2).
If you've ever sketched, you'll know that the further away an object is, the more blurred its shadow becomes. So, we need to select the Blur Tool from the left toolbar to blur the edges of the shadow.
Next, navigate to the top toolbar and sequentially select Filter > Blur > Gaussian Blur. You may not get the desired effect in one go and may need to try multiple times until you achieve a result that closely matches your vision.
If you find the shadow's placement is not quite right, you can also use the Transform Tool (Ctrl+T) to adjust it further.
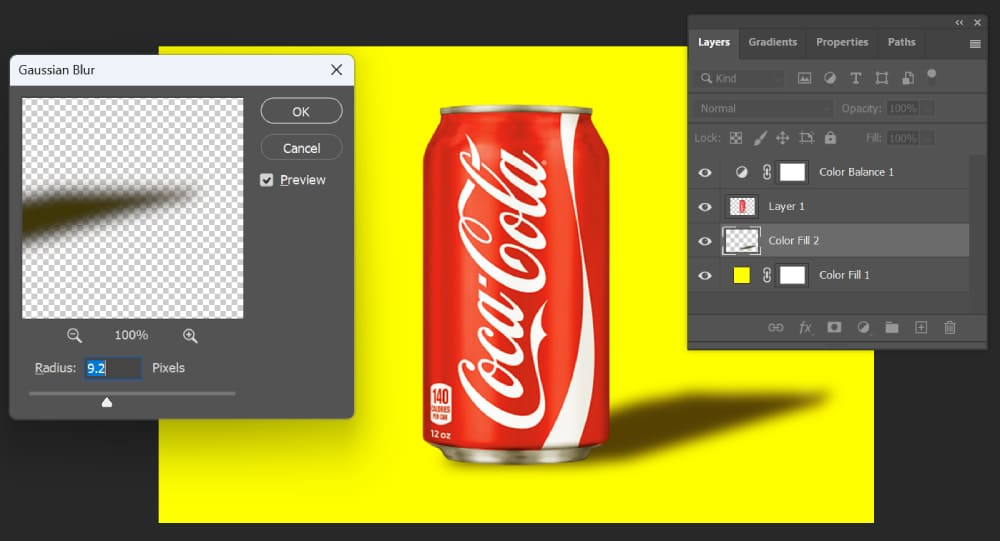
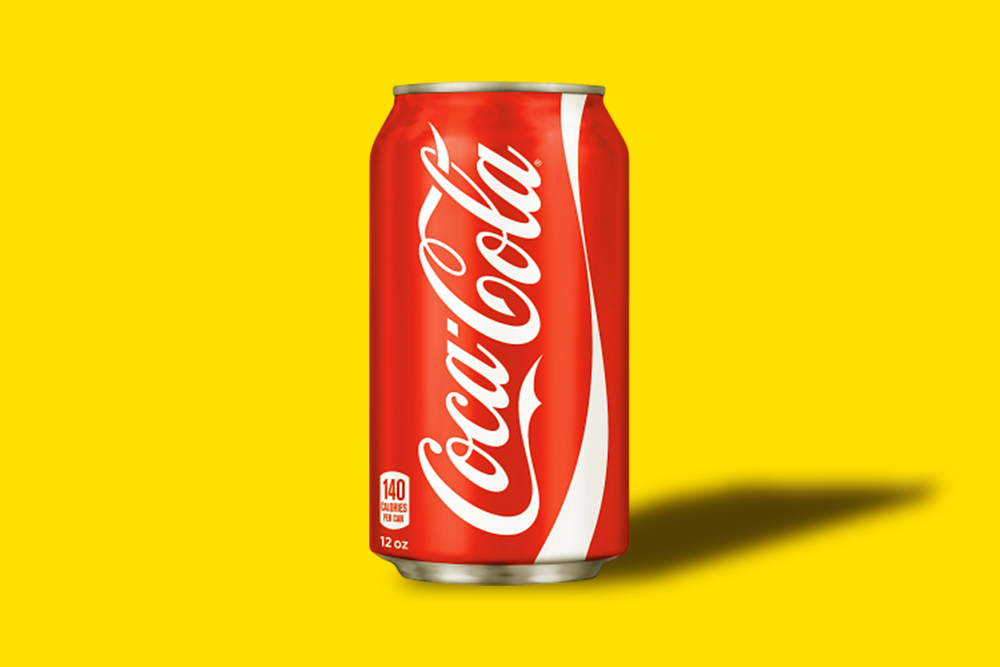
At this point, reviewing the image, we notice that the background color is too vibrant. To make the color more natural, We can adjust the background color from an RGB value of (255, 255, 0) to (255, 221, 0).
Let's see the effect after this adjustment.
Additional Tips for Adding Shadow in Photoshop
At this point, we've essentially completed the operation of adding shadows in Photoshop. To make the image look even more realistic, we could add a photo filter, although this step is optional.
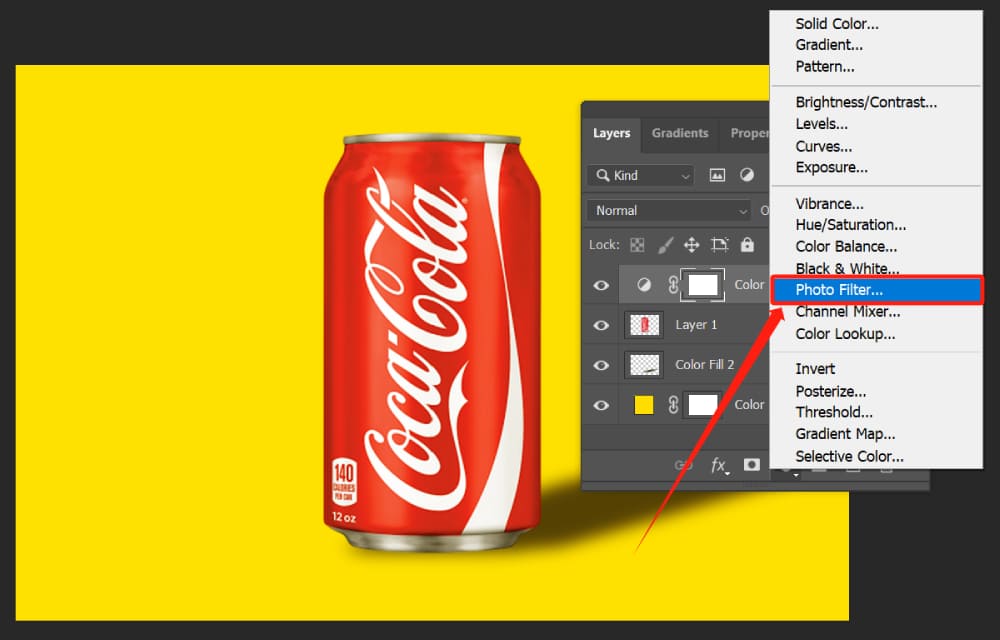
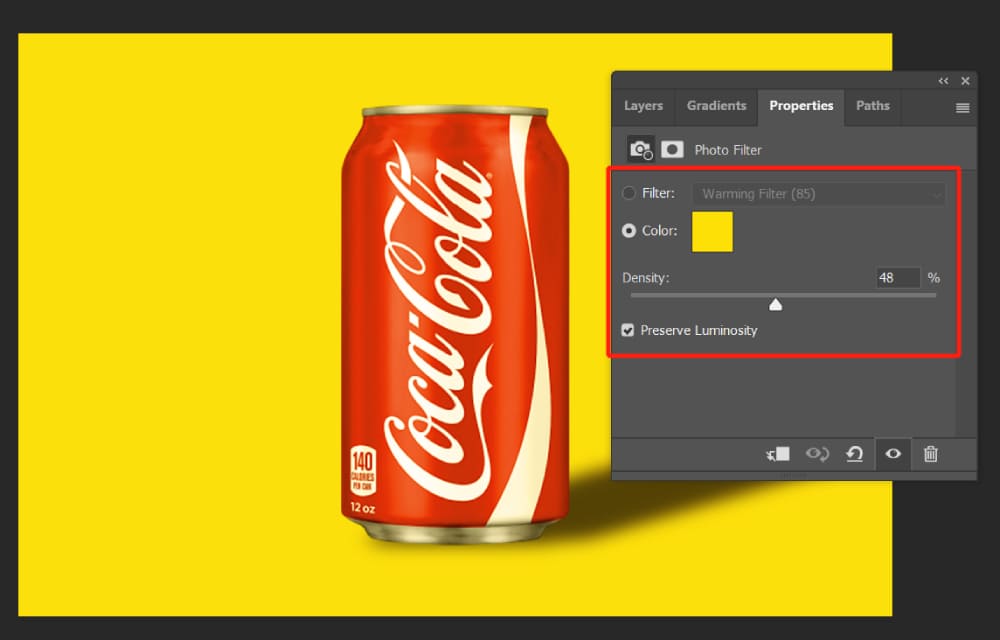
We can add a photo filter adjustment layer at the very top of all the layers, making the color tone warmer.
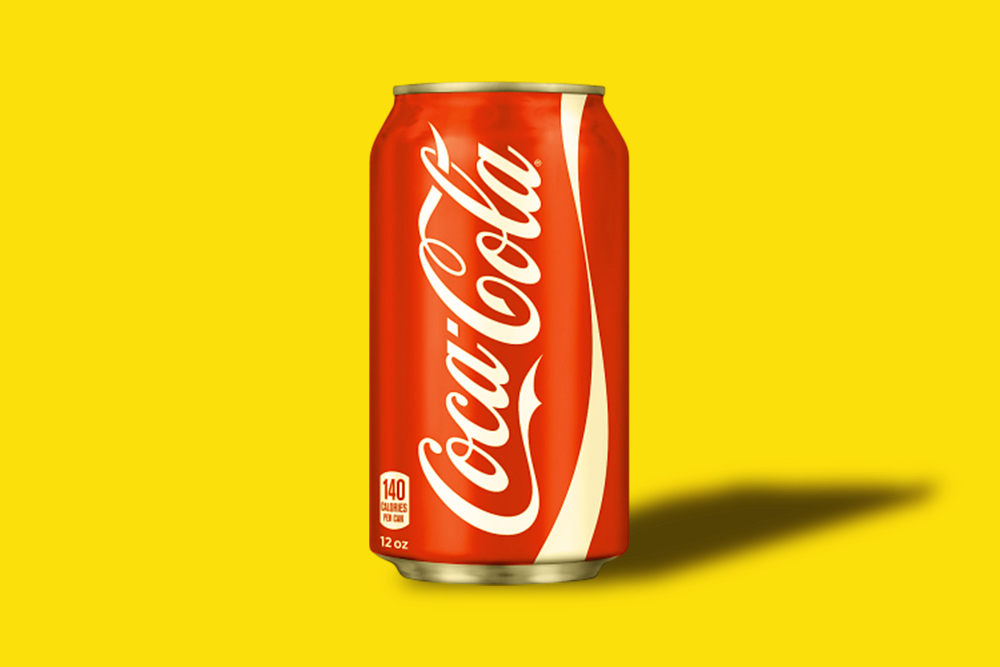
Let's take a look at the final effect of adding shadows in Photoshop.
As we're wrapping up this tutorial on how to add shadow in Photoshop, we would like to share a product that can enhance your editing workflow immensely. It's called the TourBox.

The TourBox is a game-changer for anyone looking to streamline their editing process. It's a console designed specifically for photo and video editing.
With its intuitive design, no longer will you need to spend precious time searching for the right command or tool.
Give the TourBox a try, and you'll see how it transforms your editing experience in Photoshop. You'll wonder how you ever managed without it.