Last Guide to Adding Text in Premiere You’ll Ever Need
Adobe Premiere Pro is a leading video editing software, and it offers a wide array of tools for users to create professional-grade videos.
One of these tools is the text or title feature, which is crucial for adding captions, subtitles, or credits to your videos.
Unlock the potential of this essential feature and take your video editing skills to new heights with our comprehensive guide on how to add text in Premiere Pro.

In this article, you will learn:
- The Power of Text in Adobe Premiere Pro
- How to Add Text in Premiere?
- Tips and Tricks for Adding Text in Premiere Pro
The Power of Text in Adobe Premiere Pro
In the universe of video creation, text isn't just a sideline player—it's a star that can profoundly impact the overall effectiveness of your content.
Let's explore why text matters and what it can achieve in Premiere Pro.
1. The Role of Text
Text in video serves multiple purposes. It can provide crucial context, emphasize important points, or guide your audience's understanding of the narrative.
Text overlays can be used to introduce new sections, display speaker names, or share important data.
With subtitles, you can make your content accessible to a wider audience, including non-native speakers and the hearing impaired.
2. The Impact of Effective Text
Effective text design enhances the video's impact and overall viewer engagement. It's not just about what the text says—it's also about how it looks and how it interacts with the video content.
With good design, text can be an integral part of your visual storytelling, setting the mood, reinforcing your brand's identity, and making complex concepts easier to understand.
3. The Potential of Adobe Premiere Pro
With Adobe Premiere Pro, you can tap into a vast range of text effects and customizations. From basic titles and subtitles to animated text and 3D text effects, the possibilities are nearly endless.
You can adjust font, size, color, alignment, and other properties, while also adding effects like shadows, glows, or strokes.
But the real magic lies in Premiere Pro's ability to animate text. You can make text appear, disappear, change, or move in sync with your video content, creating a dynamic viewing experience that's more than just a static overlay.
How to Add Text in Premiere?
In this section, we'll dive into the specifics of how to add and customize text in Premiere Pro.
Step 1: Import and Organize Your Clips
To get started, launch Adobe Premiere Pro and create a new project by going to "File" > "New" > "Project". This sets the foundation for your editing workspace.
Next, import your video clips into the project. You can do this by selecting "File" > "Import" or by directly dragging and dropping the files into the "Project" panel. This action adds your clips to the project's media library, making them accessible for editing.
Once imported, navigate to the "Project" panel and locate your newly added clips. To incorporate them into your video timeline, simply click and drag each clip from the "Project" panel and drop them onto the "Timeline" panel.

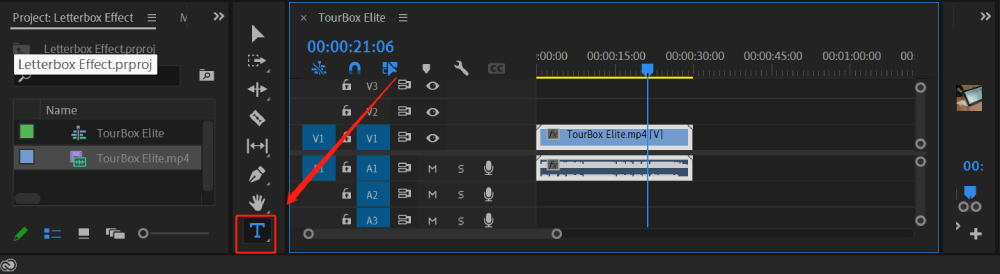
Step 2: Access the Type Tool
To begin adding text to your video, you'll need to use the "Type Tool." Follow these steps to access it:
- Locate the toolbar at the bottom of the screen in Adobe Premiere Pro.
- Look for the icon that resembles the letter "T." This is the Type Tool.
- Click on the Type Tool icon to select it for use.
- Alternatively, you can use the keyboard shortcut "T" to quickly access the Type Tool.
Step 3: Insert the Text
With the Type Tool activated, it's time to add text to your video. Follow these simple steps:
- Click on the desired location within the video where you want to place the text. This action will create a graphic layer, and a text box will materialize on your screen, ready for your input.
- Begin typing your desired text directly into the text box. You can enter captions, subtitles, titles, or any other textual information you wish to include in your video.
The text will appear on the screen as you type, allowing you to preview and make any necessary adjustments.
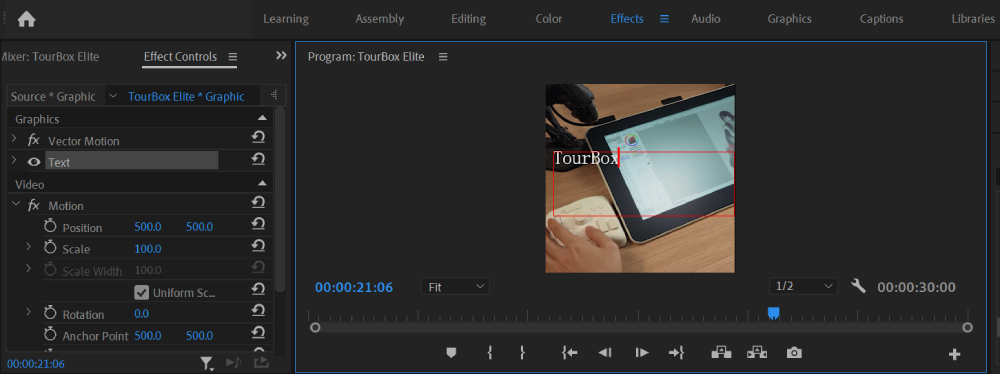
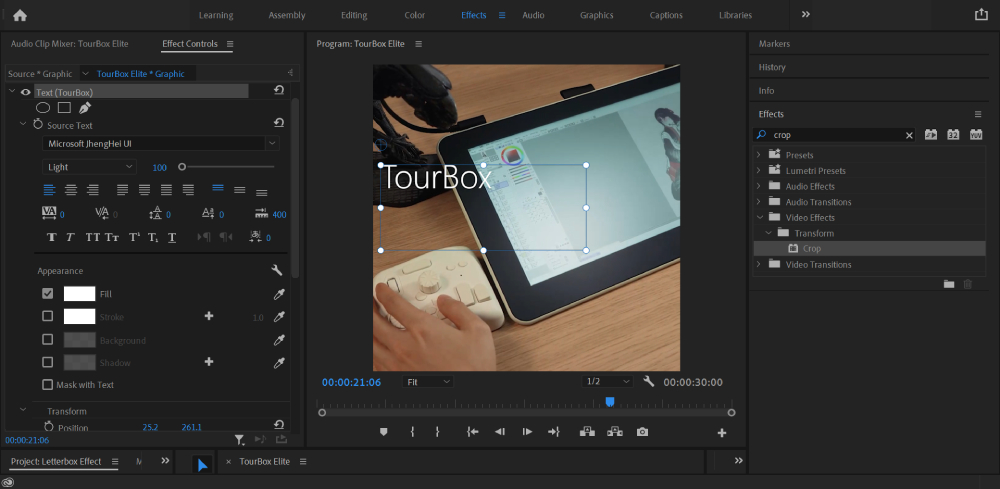
Step 4: Personalize Your Text
After adding text to your video, it's time to customize it to align with your vision. Follow these steps to make your text stand out:
- Click and drag your cursor over the text you've just added. This action will highlight the text and allow you to make specific changes.
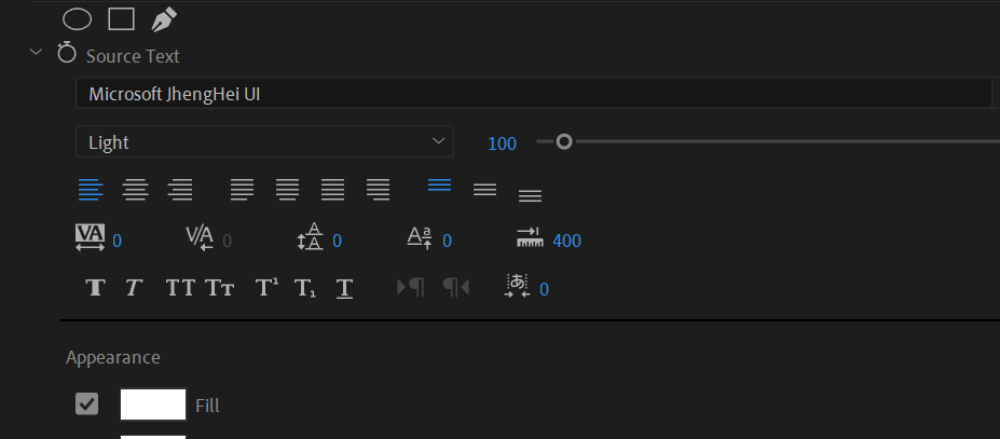
- Open the "Essential Graphics" panel by going to "Window" > "Essential Graphics". This will unveil the Essential Graphics panel, conveniently positioned on the left side of the screen.
Within the Essential Graphics panel, you'll find an array of customization options at your disposal. Take advantage of these settings to modify the font, size, color, style, alignment, and more.
Experiment with different combinations to achieve the desired look and feel for your text.
Additionally, you can add extra visual flair by incorporating a drop shadow or other effects to make your text visually distinct.
Step 5: Position and Scale Your Text
Using the "Selection Tool" (V), you can click on your text box and drag it to wherever you want it positioned in your video.
You can also use the corner handles of the box to scale your text up or down.
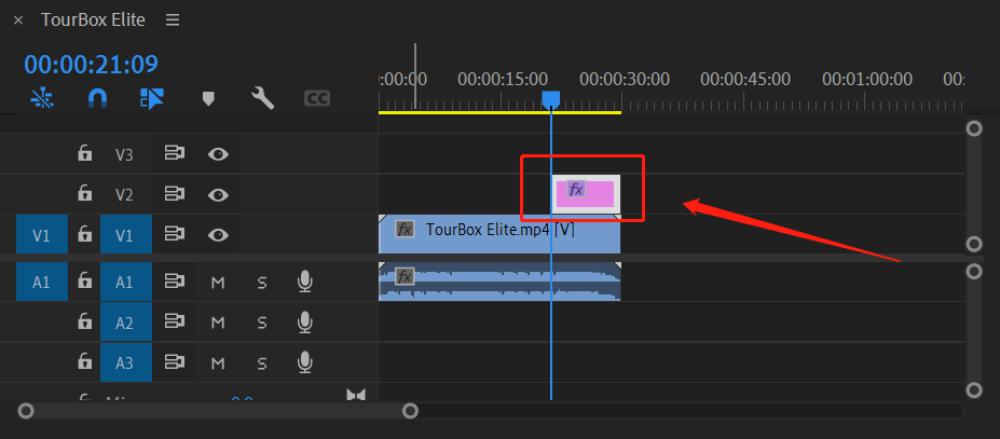
Step 6: Adjust the Timing of Your Text
In the timeline, you can click and drag the ends of the graphic layer to adjust when your text appears and disappears in your video.
And voila! Now you know how to add text in Adobe Premiere Pro. Practice these steps, and you'll be able to create dynamic and engaging video content in no time.
Tips and Tricks for Adding Text in Premiere Pro
To help you get the most out of this feature, here are a few additional tips and things to keep in mind.
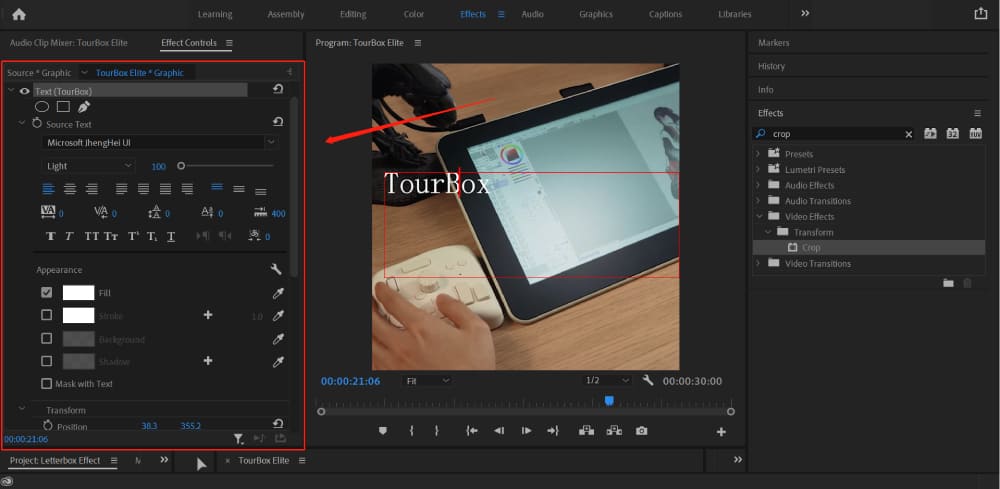
1. Embrace the Essential Graphics Panel
The Essential Graphics panel is your one-stop shop for text in Premiere Pro.
Here, you can create and customize your text, ranging from simple changes like font style and color to advanced adjustments like kerning, leading, and tracking.
Experiment with these settings to give your text a unique character and style.
2. Use Text Responsibly
While text can significantly enhance your video, remember that "less is more".
Avoid overloading your video with text. Instead, use it sparingly and strategically to complement your footage, not overshadow it.
3. Consistency is Key
Maintain a consistent style for your text throughout your video. This includes the font, color, size, and animation.
Consistency helps build a cohesive visual experience and reinforces your brand identity.
4. Save Your Styles
If you've created a text style that you love, save it as a preset within the Essential Graphics Panel.
This way, you can easily apply it to other parts of your video or future projects, ensuring consistency and saving you time.
5. Product Recommendation
We want to introduce a tool that can considerably ramp up your editing efficiency - the TourBox.

This console is designed specifically for creative software like Premiere Pro. With its customizable knobs, dials, and buttons, you can quickly access and control your most-used functions, including adding and adjusting text.
Imagine this: instead of navigating through menus or memorizing keyboard shortcuts, you can simply twist a dial or press a button on the TourBox to adjust your text size, scroll through fonts, or change the color.
The TourBox not only speeds up your workflow but also allows you to stay focused on the creative process.
In conclusion, adding text in Premiere Pro is a blend of art and technique. By mastering the tools available and maintaining a keen sense of design, you can create striking titles and text in your videos.
And with tools like TourBox, the process can become even more efficient and enjoyable.