How to Add Transitions in Premiere Pro: Step-By-Step Tutorial
Are you ready to take your video editing skills to the next level? In this tutorial, we will explore the fascinating world of how to add transitions in Premiere Pro.
Transitions are the secret ingredients that can effortlessly elevate the visual appeal and flow of your videos.
Whether you're a beginner or an experienced editor, mastering the art of seamless transitions will bring a professional touch to your projects.
Let's embark on this creative journey together and unlock the potential of Premiere Pro's transition effects!

In this article, you will learn:
- What Are Transitions in Premiere Pro?
- How to Add Transitions in Premiere Pro?
- How to Resolve the "Insufficient Media" Warning?
- Tips and Tricks for Adding Transitions in Premiere Pro
What Are Transitions in Premiere Pro?
Transitions in Premiere Pro are visual effects that seamlessly blend one video clip into another. They serve as smooth connectors between different scenes or shots, enhancing the visual flow and creating a polished and professional look in your videos.
Transitions can add a stylistic touch, create visual interest, or convey a specific mood or emotion.
With a wide range of transition options available in Premiere Pro, including cuts, dissolves, wipes, and more, you have the creative freedom to experiment and find the perfect transition effects that suit your project's needs.
These transitions enhance the overall viewing experience and help maintain the audience's engagement by smoothly guiding their focus from one scene to the next.
In the upcoming sections, we will dive into Premiere Pro's various techniques and tools to master the art of adding transitions and elevate the quality of your video edits.
Get ready to unlock a whole new level of visual storytelling!
How to Add Transitions in Premiere Pro?
Transitions can significantly enhance your video editing project in Adobe Premiere Pro by providing seamless movement between clips.
Additional Tips:
- Transitions are a common element in video editing, and there are various ways to achieve them. We can incorporate transitions during the shooting process or add them in post-production.
- During the shooting phase, we can utilize objects blocking the lens to create transitions. This type of transition requires the previous shot to end with a black frame, allowing for a seamless connection to the next segment.
Here's a step-by-step guide on how to insert transitions into your video project.
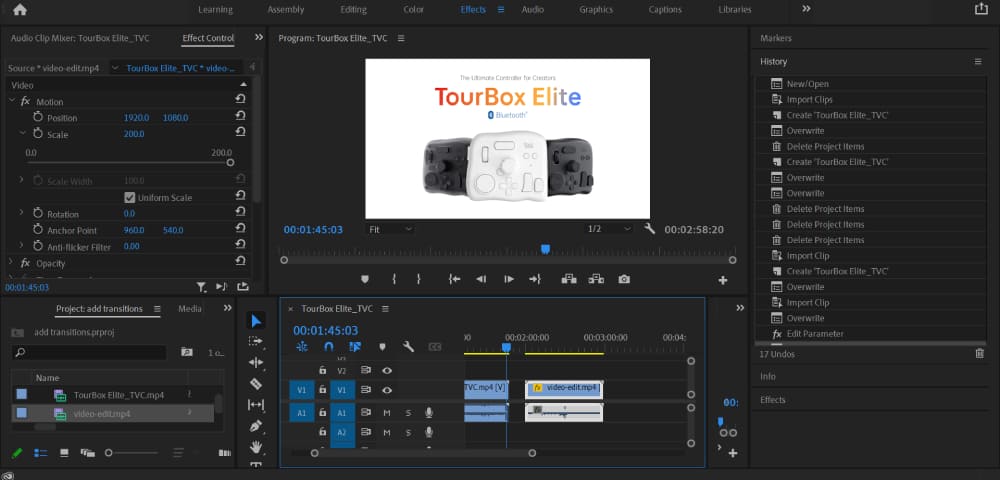
Step 1: Open Your Project
Launch Adobe Premiere Pro and open your existing project that you want to work on. If you're starting a new project, import your desired clips to create a sequence.
Here we simply import two video clips.
Step 2: Choose Transition Type
Navigate to the "Effects" panel on the right side. If you don't see this panel, go to "Window" > "Effects" to enable it.
In the "Effects" panel, either enter "Video Transitions" in the search bar or browse through the options in the panel. The last category in the panel is usually "Video Transitions."
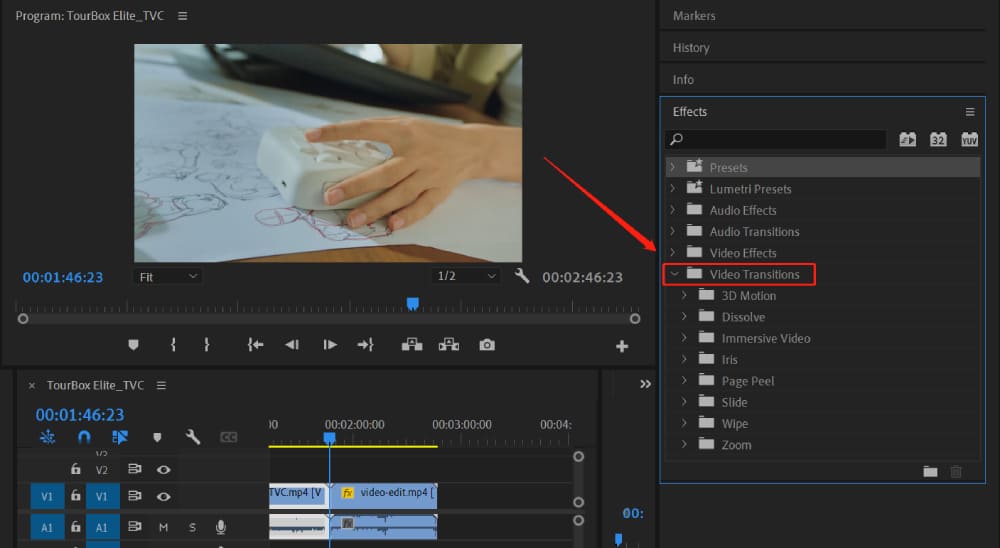
You'll find a variety of transitions under the "Video Transitions" tab. These include Dissolve, Iris, Motion, Wipe and more. Each category contains different types of transitions.
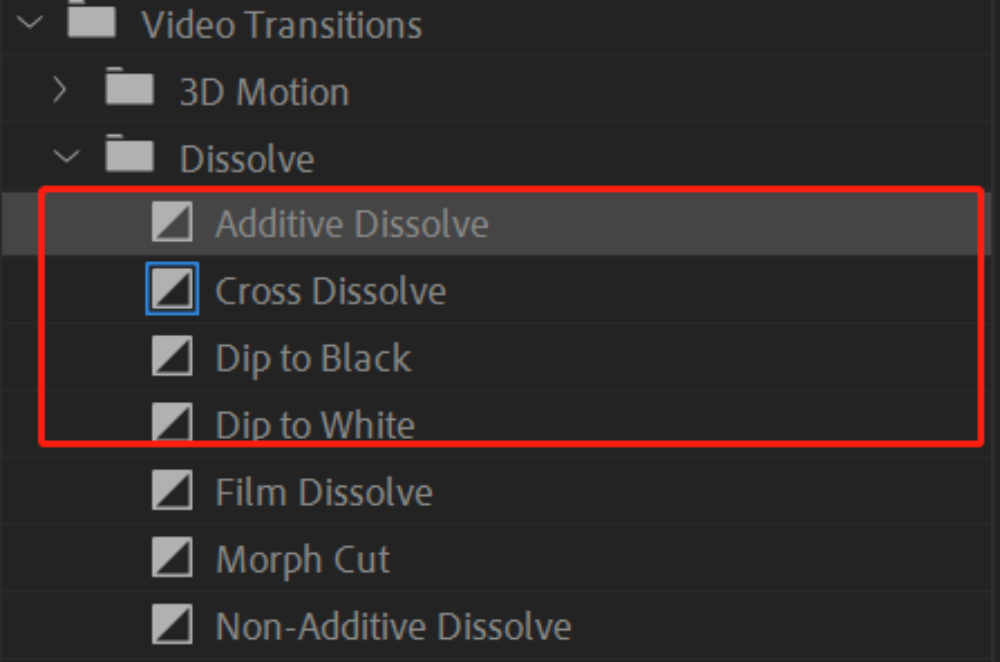
Some commonly used transitions include:
- Additive Dissolve: It combines the brightness of overlapping frames, creating a vibrant transition. It's great for dynamic and eye-catching transitions, adding energy and flair to your videos.
- Cross Dissolve: It gradually fades out the first clip while fading in the second clip, ensuring a smooth transition and maintaining narrative continuity in videos.
- Dip to Black: It is a video transition that gradually fades a clip to black, commonly used to indicate time passage or create dramatic pauses in storytelling.
- Dip to White: It is a video transition that gradually fades a clip to a bright white screen, commonly used for flashbacks, dream sequences, or to create a sense of brightness and lightness.
If you're working on relatively simple videos, we believe these four transitions are enough.
Step 3: Apply the Transition
To apply a transition, click and drag it to the edge of the clip you want it to impact. You can apply it at the start or end of the clip, or in between two clips.
A red line will show where the transition will be applied.
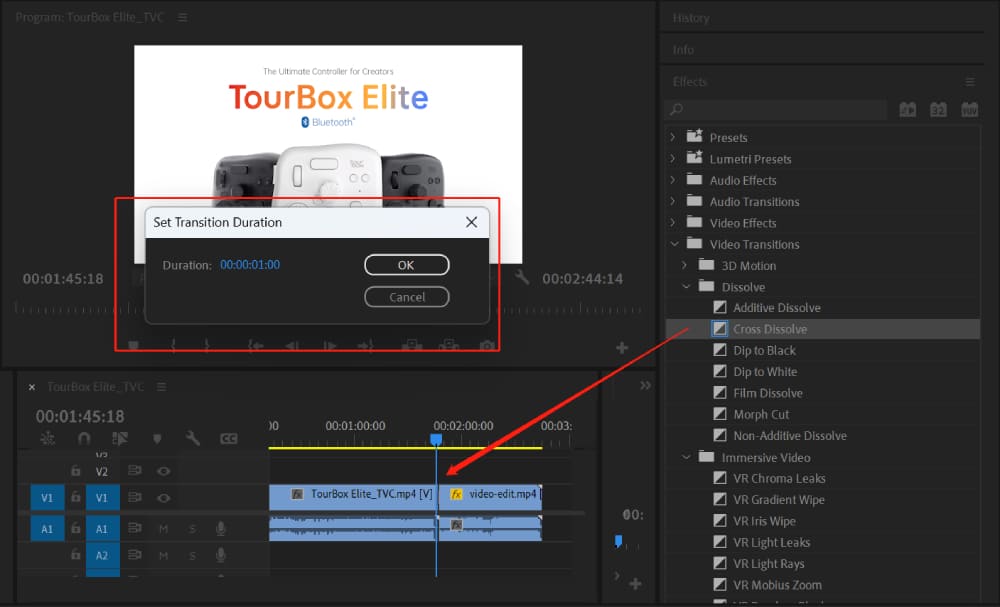
Step 4: Adjust the Transition
To adjust the duration of your transition, right-click on it, then select "Set Transition Duration." Input the desired time in seconds.
You can also adjust the transition's timing and speed by clicking and dragging the edge of the transition along your timeline.
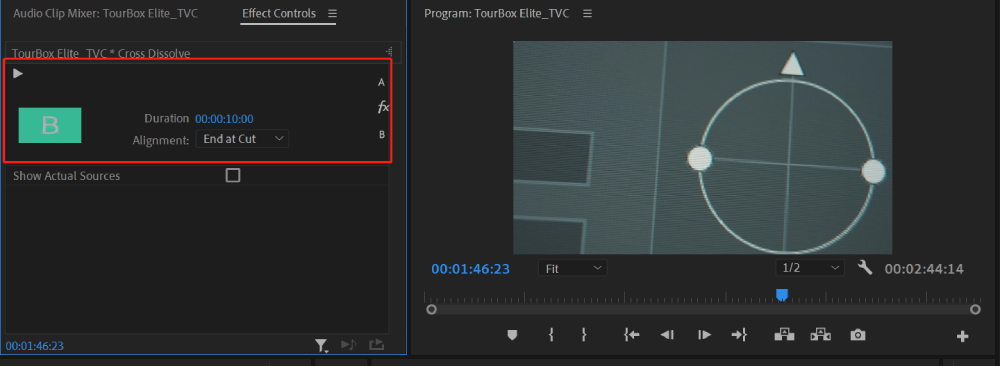
Step 5: Modify the Transition (Optional)
Double-clicking on the transition in the timeline will open the "Effect Controls" panel. Here, you can modify the transition, like changing the direction of a wipe transition.
Step 6: Preview the Transition
Finally, preview your transition by pressing the spacebar to play the sequence. If you're not happy with the result, you can always go back and tweak the transition until you're satisfied.
Let's take a quick three-minute YouTube video tutorial (made by Adobe in a Minute)to recap how to add transitions in Premiere Pro.
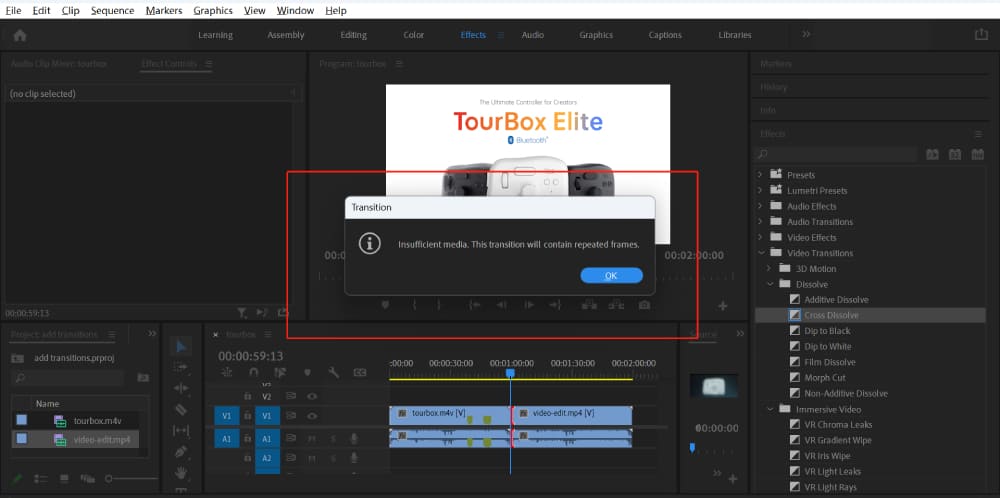
How to Resolve the "Insufficient Media" Warning?
While inserting transition effects, you may encounter a warning pop-up saying "Insufficient media. This transition contains repeated frames."
This problem in Premiere occurs when there is not enough unique media available to complete a transition.
It typically happens when the duration of the clips used for the transition is too short or when there are repeated frames within the selected media.
Premiere Pro detects this issue and displays a warning to alert you that the transition may not be smooth due to the lack of diverse frames.
Resolving this issue is straightforward; you simply need to trim at least 1 second of frames at the beginning and end of the clips used for the transition. This will ensure a smooth video transition.
Tips and Tricks for Adding Transitions in Premiere Pro
- Make sure to use transitions sparingly to avoid confusing your viewers. Too many transitions can make your video appear chaotic.
- For a more professional look, match the transition to the mood and tempo of your video. Fast-paced videos might work best with quick transitions, while slower videos can benefit from slower, more subtle transitions.
- Use keyboard shortcuts to speed up your editing process. For example, pressing "Command+D" (Mac) or "Control+D" (Windows) will apply the default transition.
Product Recommendation:
If you're serious about video editing and are looking for a tool to speed up your workflow, consider investing in the TourBox.

This console is designed for digital creators and allows you to easily control Premiere Pro (and other software) with a fully customizable layout. It's a game-changer that can save you time and make the editing process more enjoyable.

You can add commonly used transitions to TourMenu, access them with a single click, and select and apply them without the need for repeated searching.
In addition to seamlessly adding transitions in Premiere Pro, TourBox allows you to perform complex video editing operations with just one hand. This enables you to focus on creativity and content creation, freeing you from traditional keyboard and mouse operations and greatly enhancing your editing efficiency.