How to Add the Tyndall Effect to Photos: An Easy Tutorial
In photography, the Tyndall effect is often called "God rays" or "Jesus light." It refers to visible beams of light that look stunning but only appear under the right conditions, making them rare and special.
But if you didn't capture this effect, don't worry — you can easily create it in Photoshop to add atmosphere to your photos.
Keep reading, and you'll see that adding beautiful light rays to your pictures is surprisingly simple once you understand the basics.

In this article, you will learn:
- What Is the Tyndall Effect?
- What Are the Characteristics of the Tyndall Effect?
- How to Add Tyndall Effect to Photos?
- What If There Are No Highlight Areas in the Photo?
- Conclusion
What Is the Tyndall Effect?
The Tyndall Effect happens when light gets scattered as it passes through a substance that's not fully transparent. When light travels through tiny particles or liquids floating in the air, those particles scatter the light, making the path of the light visible to us.
A common example is when sunlight shines through a window, and you can see beams of light in the air, especially if there's dust or fog. That's the Tyndall Effect. Simply put, when light hits small particles, it scatters, creating visible beams of light.
This effect usually occurs with small, opaque particles like dust, smoke, fog, or certain liquid mixtures.
In photography, the Tyndall Effect is sometimes called "God rays." It's often seen in the early morning, at sunset, or after rain when the sky is full of mist or dust. When the sunlight shines through, it breaks into beams or sometimes covers a large area, creating a breathtaking view.
You might also see similar scenes in movies, where the effect looks stunning.

What Are the Characteristics of the Tyndall Effect?
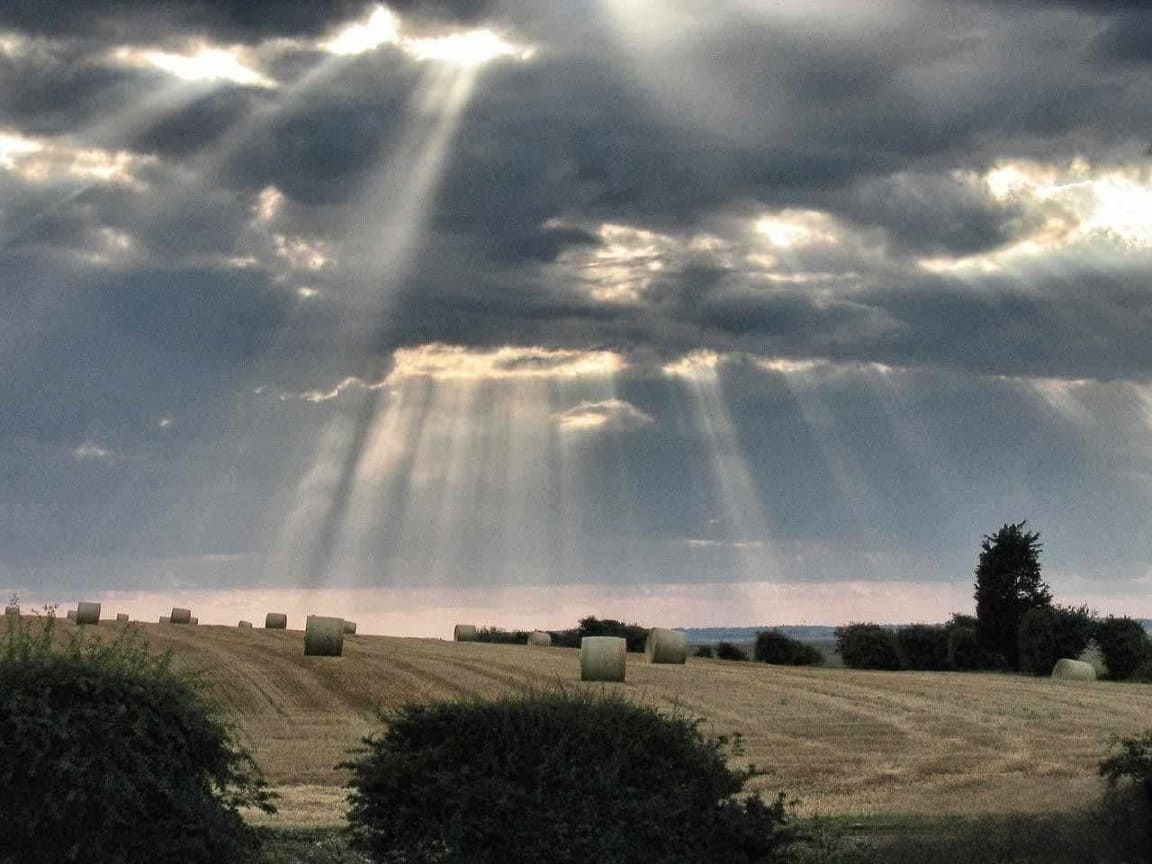
Before we start creating Tyndall rays, let's first take a look at their key features.

As you can see in the photo above, Tyndall rays are always spreading out. They move from the light source and fan out in all directions, and most of the time, they're white.
Another thing to notice is that the edges of the light beam are usually not sharp — they tend to be a bit blurry.
One more feature is that the light is strongest close to the light source, and the farther you go from it, the weaker the light becomes.
So, to create these rays, we need to focus on the brightest areas of the image, where the light is strongest, and make the rays spread out from there.
How to Add Tyndall Effect to Photos?
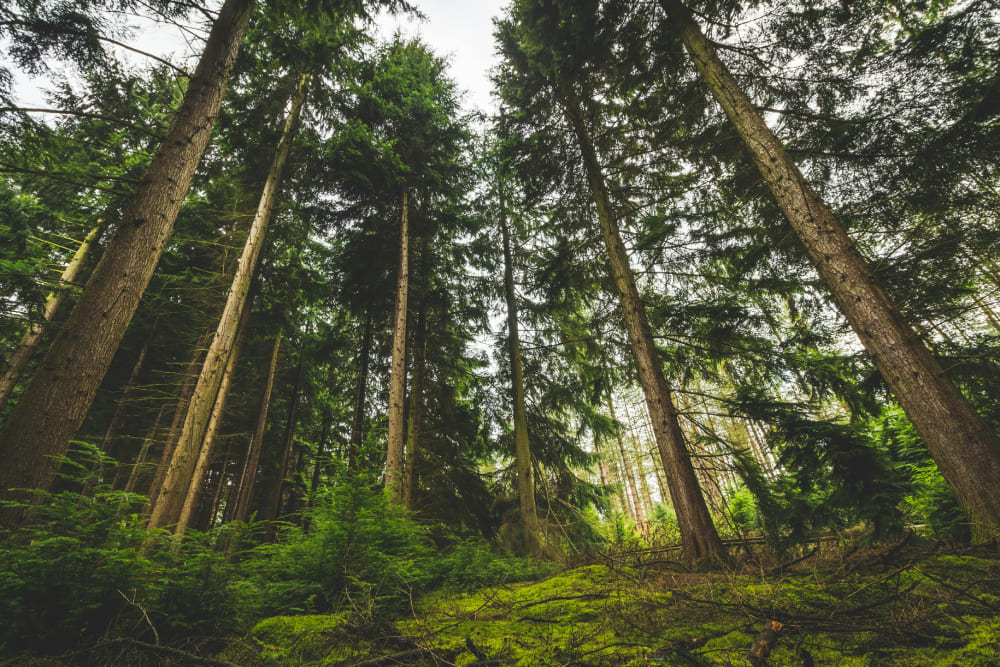
First, choose a suitable photo. Keep in mind that not all photos work well for adding light rays. When adding light, make sure it fits the lighting and shadow patterns in the scene.
For example, if the photo is taken in the rain and there's no clear light source or strong contrast between light and shadow, adding light rays would feel out of place.
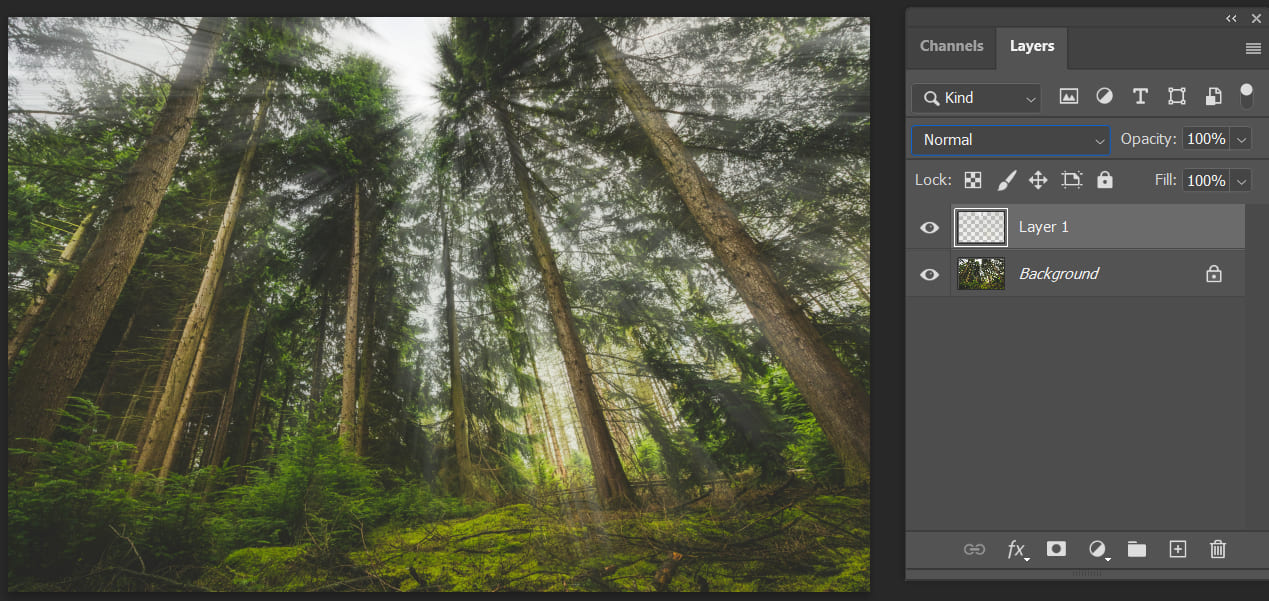
After importing the photo into Photoshop, the first thing we need to do is select the highlights in the image.
Go to the "Channels" panel and pick the channel with the most contrast. Then, hold down the Ctrl (or Command) key and click on that channel. This will select the highlight areas.
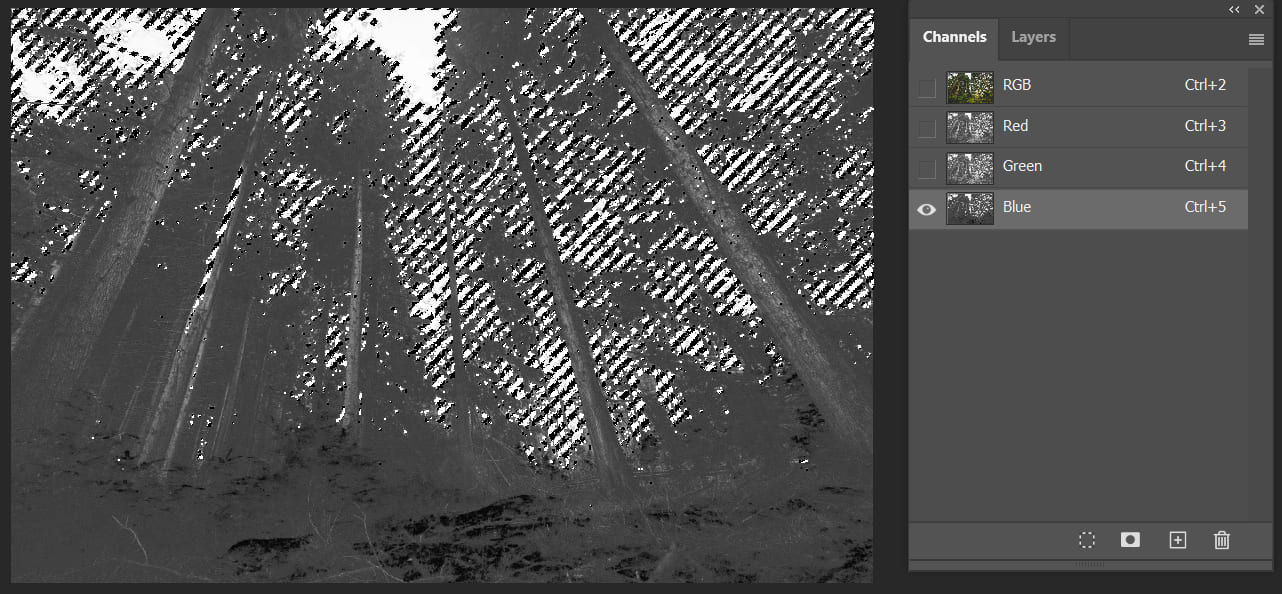
Next, let's click on the RGB channel and go back to the Layers panel. We need to copy the highlighted area we just selected and paste it onto a new layer.

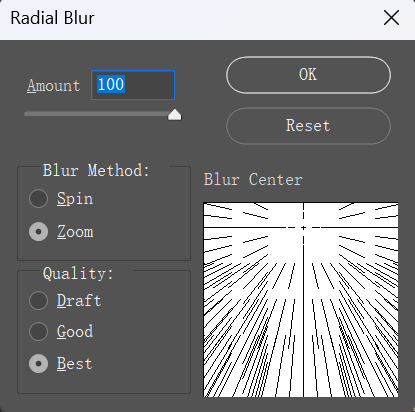
Then, we'll need to use the Radial Blur filter. In the top menu bar of Photoshop, locate Filter, choose Blur, and then Radial Blur.
Here, we select Zoom, set the Amount to the maximum, and the Quality to the best.
Note that the Center Blur on the right can be moved. Simply drag the crosshair to roughly match the position of the light source in the image.
After applying the Radial Blur filter, let's check the effect. It's looking pretty good now, as the photo has gained a set of Tyndall light rays.
If you find the effect not very noticeable after following the above steps, you can go back to the Tyndall Effect layer and change its blending mode to Hard Light.
To intensify the light, simply duplicate the Tyndall Effect layer we created several times until you're satisfied with the result.

Finally, considering the specific details of the image, you can enlarge the light we created, move it to the right spot, or use a layer mask to delete unwanted areas.
What If There Are No Highlight Areas in the Photo?
If the photo doesn't have clear highlights or the highlight effect isn't strong enough, we can use a brush to paint a large white area on a blank layer, and then apply the Radial Blur filter.
To make the light look more natural, use a splatter-type brush. This will create a more natural, organic shape for the light.
Conclusion
Actually, the key principle behind creating light effects (including the Tyndall Effect) is the "Radial Blur filter." Once you grasp this principle, you can easily produce various types of light effects and explore a wide range of lighting and shadow effects.
When it comes to post-processing photo editing, attention to detail and creativity is crucial. To help you efficiently control your creativity, we highly recommend trying out TourBox, the creative console for photo editing.

Designed to enhance editing efficiency and smooth operation, TourBox allows you to adjust lighting, colors, and various details with ease. If you aim for a more intuitive and efficient photo editing experience, TourBox is an indispensable tool.

Click the link to our photo editing page to discover more about the wonder of TourBox. If you prefer working on an iPad, you can also explore our TourBox Elite Plus for your editing needs.