How to Blur a Background in Lightroom Classic?
Lightroom Classic is a powerful photo editing software that allows photographers to enhance their photos in a variety of ways.
One of the most popular techniques is blurring the background of a photo to create a shallow depth of field effect. This effect can help to draw the viewer's eye to the subject of the photo and create a more professional and polished look.
In this article, we'll explore how to blur a background in Lightroom Classic, using the adjustment brush tool. We'll provide step-by-step instructions and some tips for achieving a natural-looking blur effect.

In this article, you will learn:
Step-by-Step Instructions for Blur Effect
Are you tired of taking photos with distracting backgrounds? Do you want to learn how to create stunning images with a beautifully blurred background? Look no further, because in this section, we will show you step-by-step how to blur a background in Lightroom Classic (LrC).
With these simple steps, you'll be able to create stunning images with a blurred background that will make your subject pop and capture the viewer's attention. Get ready to transform your photos with the power of LrC!
Step 1: Open the Photo
The first step is to open the photo you want to edit in LrC. Go to the Library module and select the photo you want to edit. Then, click on the Develop module to start editing.

Step 2: Three Blurring Tools in Lightroom Classic
In LrC, you can blur a background with one or more of the following tools:
- Brushes
- Radial Gradient
- Linear Gradient
Depending on the option you select, first click on the Masks icon in LrC's toolbar, directly below the histogram. Next, select whatever option you wish to use to blur the image.

Brush
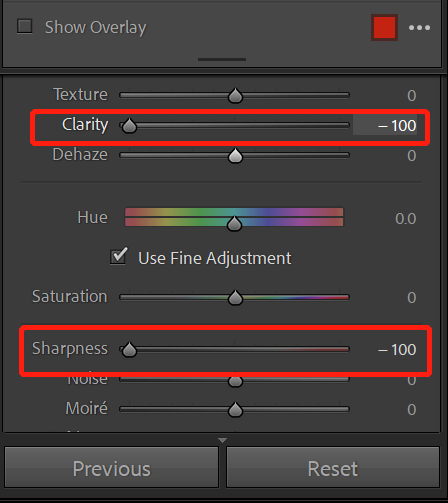
While the Brush tool doesn't have a specific "blur" effect, you can use it to create a similar effect by reducing the clarity and sharpness of the background. Here's how to do it:
1. Select the Brush tool in the toolbar on the right-hand side of the screen.
2. Click on "Effect" and select "Clarity" and "Sharpness."
3. Set both values to a negative value, such as -50 or -100.
4. Adjust the brush size, feather, and density to match the size of the area you want to blur.
5. Apply the brush to the background of the photo, being careful not to apply it to the subject.
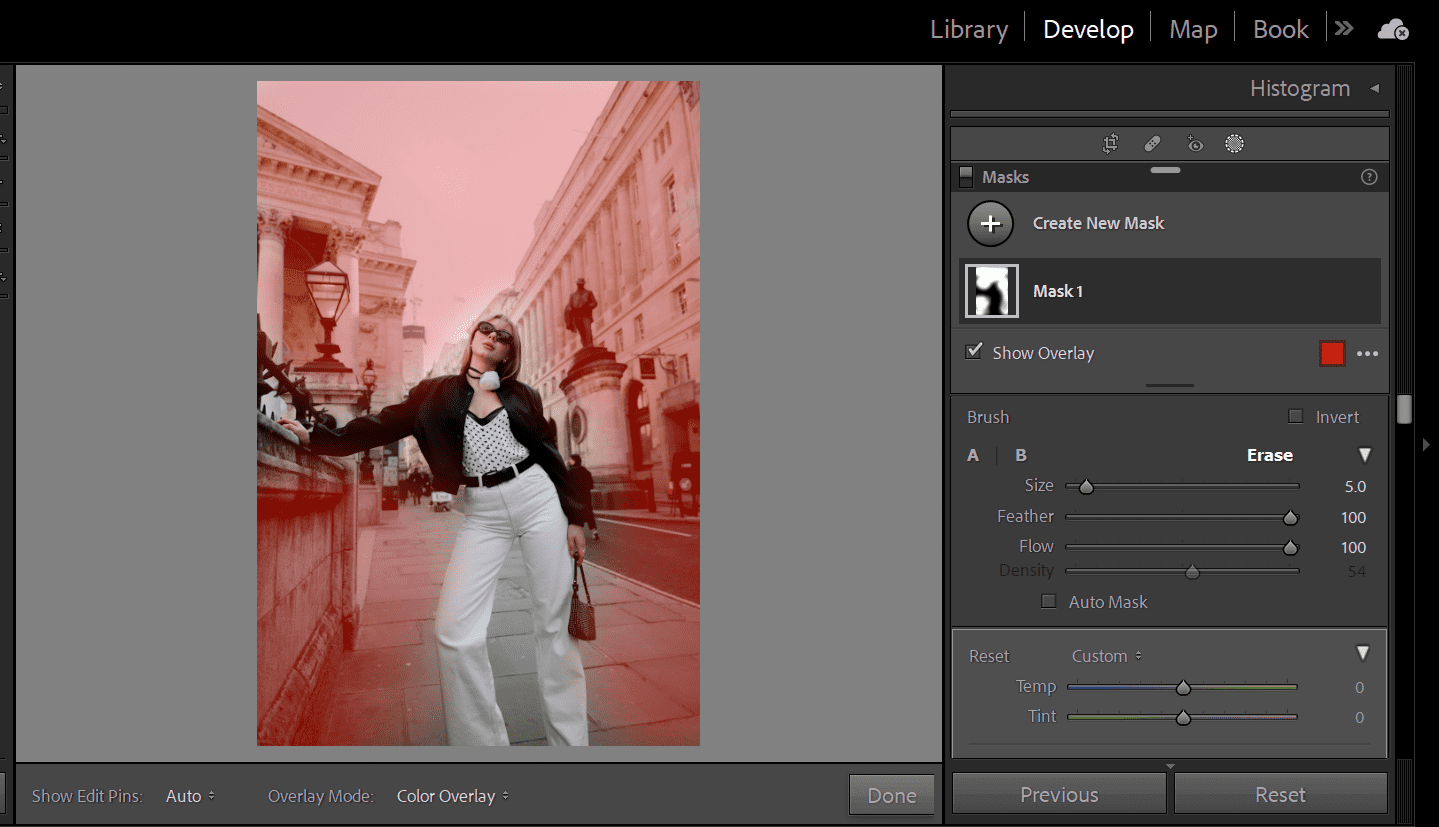
6. Adjust the settings as needed to achieve the desired level of blurriness.
.png)
Note that the Adjustment Brush tool can be a bit more time-consuming to use than the other two tools, as you'll need to carefully brush over the background of the photo to achieve the desired effect.
Radial Gradient
The Radial Gradient tool is best suited for photos where the subject is in the center of the frame, such as a portrait. Here's how to use it to blur the background:
- Select the Radial Gradient tool in the toolbar on the right-hand side of the screen.
- Click and drag to create a circle around the subject of the photo, making sure the circle covers the area you want to keep in focus.
- Adjust the size, feather, and position of the circle as needed.
- In the "Effects" panel, reduce the clarity and sharpness settings to a negative value, such as -50 or -100.
- Adjust the settings as needed to achieve the desired level of blurriness.
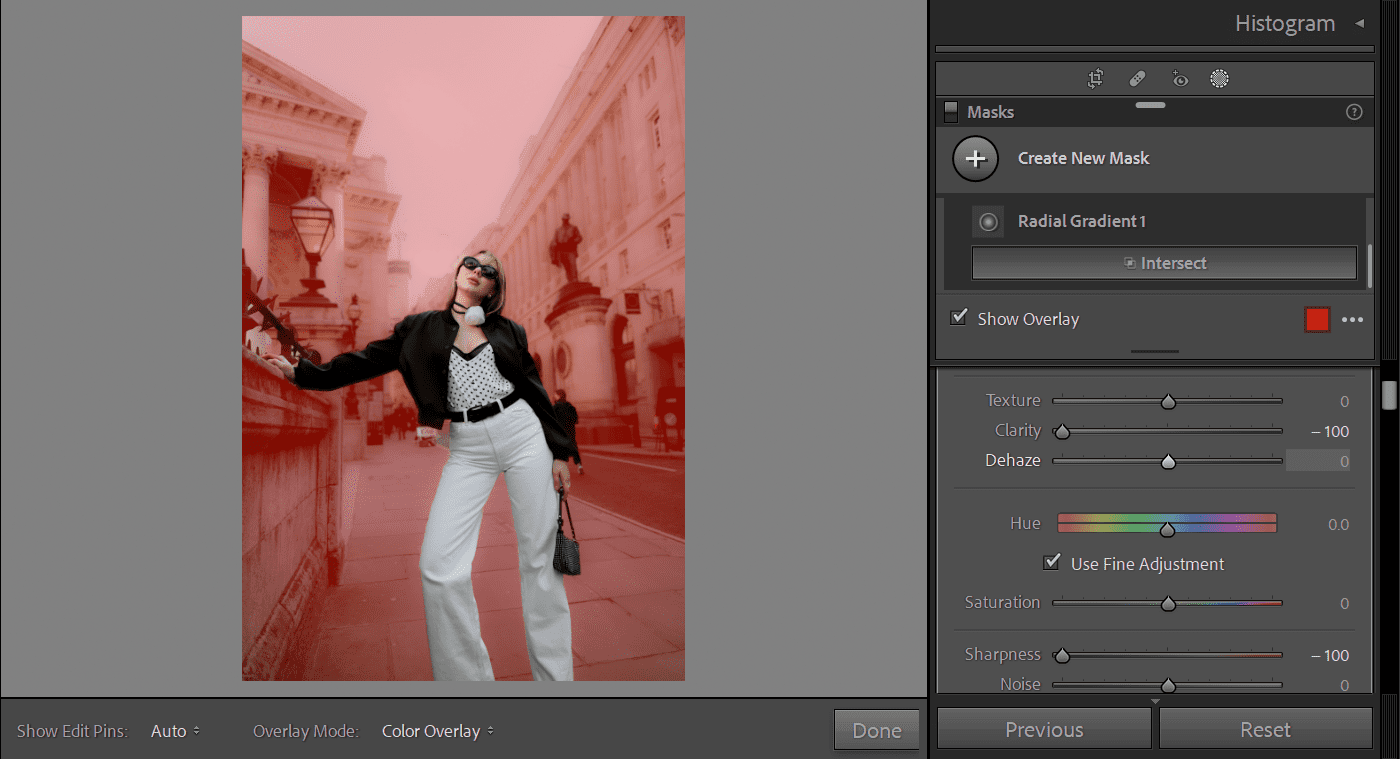
Note that you may need to create multiple Radial Gradient circles to cover the entire background of the photo.
Linear Gradient
The Linear Gradient tool is best suited for photos where the background is a horizontal plane, such as a landscape. Here's how to use it to blur the background:
- Select the Linear Gradient tool in the toolbar on the right-hand side of the screen.
- Click and drag to create a line across the photo, making sure it covers the area you want to blur.
- Adjust the size, feather, and position of the line as needed.
- In the "Effects" panel, reduce the clarity and sharpness settings to a negative value, such as -50 or -100.
- Adjust the settings as needed to achieve the desired level of blurriness.
Note that you may need to create multiple Linear Gradient lines to cover the entire background of the photo.
The recommended values for reducing the clarity and sharpness settings will depend on the specific photo and the desired level of blurriness. It's best to start with a negative value, such as -50 or -100, and then adjust the settings as needed to achieve the desired effect.
Additionally, it's important to use a low-opacity setting to avoid over blurring the background and creating an unnatural-looking effect.
More Tips on How to Blur Backgrounds in Lightroom Classic
By following the following tips and techniques, you can achieve a natural-looking blur effect in LrC that enhances the subject of your photo and creates a professional and polished look:
- Choose the Right Photo: To achieve a natural-looking blurred effect, it's important to choose a photo with a clear distinction between the subject and the background before you start blurring it in LrC.
- Adjust the Feather: Use the feather setting to control the softness of brush edges when creating a blur effect. Choose a low feather setting and gradually increase it for a natural-looking transition between blurred and unblurred areas.
- Adjust the Density: The density setting controls the opacity of the brush. For a natural-looking blur effect, it's important to use a low density setting. This will create a subtle blur effect that doesn't overblurr the background.
- Use the Auto Mask Feature: When blurring a photo's background in LrC, the auto mask feature can be useful. It detects the subject's edges and applies the adjustment only to the background. To use it, click the "Auto Mask" checkbox in the brush adjustment panel.
- Use Presets: Make a preset if you often blur photo backgrounds. This saves time, ensures consistency, and simplifies the process.
While blurring the background of a photo in LrC can be a powerful technique, it can also be time-consuming to adjust the various parameters to achieve the perfect look. That's where TourBox comes in. TourBox is a versatile and intuitive editing console that can improve the efficiency of parameter adjustment in Lightroom Classic, as well as other photo editing software.

With TourBox, you can assign custom functions to its buttons and dials, making it easy to adjust the brush size, feather, density, and other settings with just a few clicks. This can save you time and effort, allowing you to focus on the creative aspects of your editing process. Whether you're a professional photographer or a hobbyist, TourBox can help you achieve the perfect blur effect and take your photo editing to the next level.