How to Change Aspect Ratio in Premiere: An Essential Guide
Whether you're looking to adapt your content for different platforms, create cinematic effects, or experiment with unique storytelling techniques, understanding how to manipulate aspect ratios is a key skill every video editor should possess.
In this article, we'll unravel the secrets of how to change aspect ratio in Premiere Pro, empowering you to take your video editing to new heights.
Get ready to immerse yourself in a realm of limitless creativity and captivate your viewers from the very first frame. Let's dive in!

In this article, you will learn:
- What Is the Aspect Ratio in Video Editing?
- How to Change Aspect Ratio in Premiere?
- How to Add a Letterbox Effect in Premiere?
- Extra Tips About Changing Aspect Ratio in Premiere
What Is the Aspect Ratio in Video Editing?
Aspect ratio is a fundamental concept in video editing that determines the width and height proportions of a video frame.
It represents the relationship between the video's width and height, expressed as a ratio. The aspect ratio defines the shape and visual composition of the video, impacting how it appears on various screens and platforms.
Common aspect ratios include 16:9 (widescreen), 4:3 (standard), and 1:1 (square). Each aspect ratio has its own visual characteristics and is suitable for different purposes.
Understanding aspect ratios is crucial for video editors as it allows them to control the visual presentation of their videos.
By changing the aspect ratio, you can achieve different effects, adapt content for specific platforms, create a cinematic look, or experiment with creative storytelling techniques.
Let's watch this YouTube video to understand how aspect ratios play a role in the world of film and video.
How to Change Aspect Ratio in Premiere?
In this tutorial, we will explore how to change aspect ratios in Premiere, empowering you to enhance your videos' visual appeal and tailor them to your desired format.
Step 1: Open Your Project
Launch Adobe Premiere Pro and either open an existing project or create a new one. If you're starting from scratch, import your footage into the project.
Step 2: Create a New Sequence
Navigate to "File," then "New," and then "Sequence." You can also use the shortcut "Ctrl+N" (Windows) or "Command+N" (Mac).
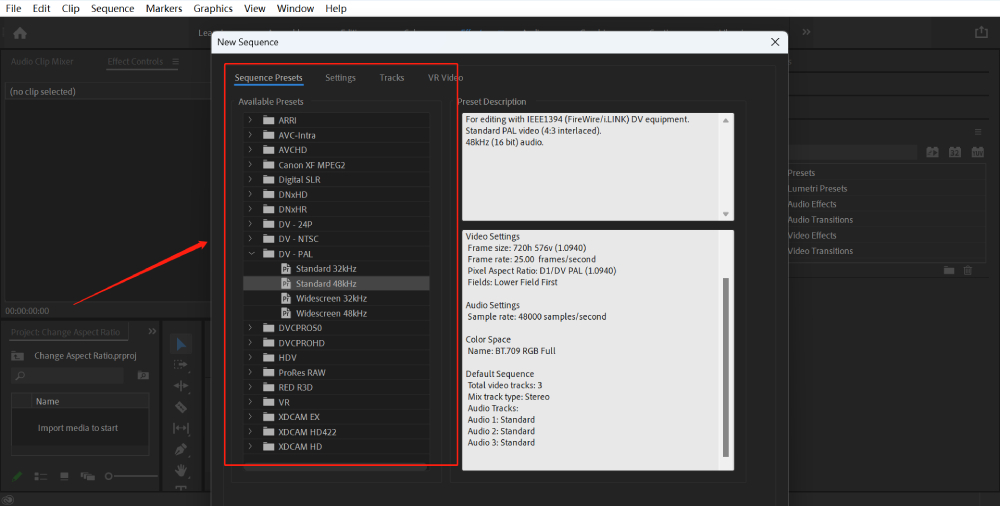
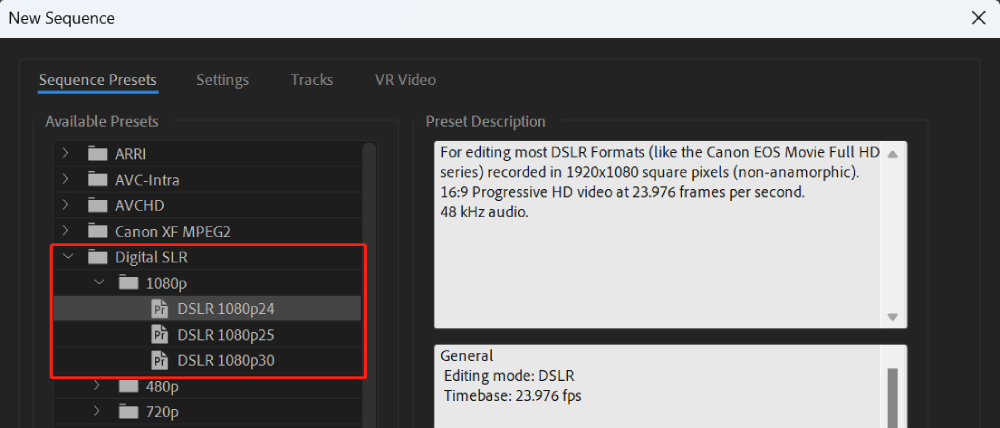
Step 3: Choose a Preset
In the new window, you'll see a list of presets based on popular aspect ratios. You can choose one that fits your needs.
For instance, if you're creating a video for YouTube, you might want to choose a preset under the "Digital SLR" > "1080p" folder for a 16:9 aspect ratio.
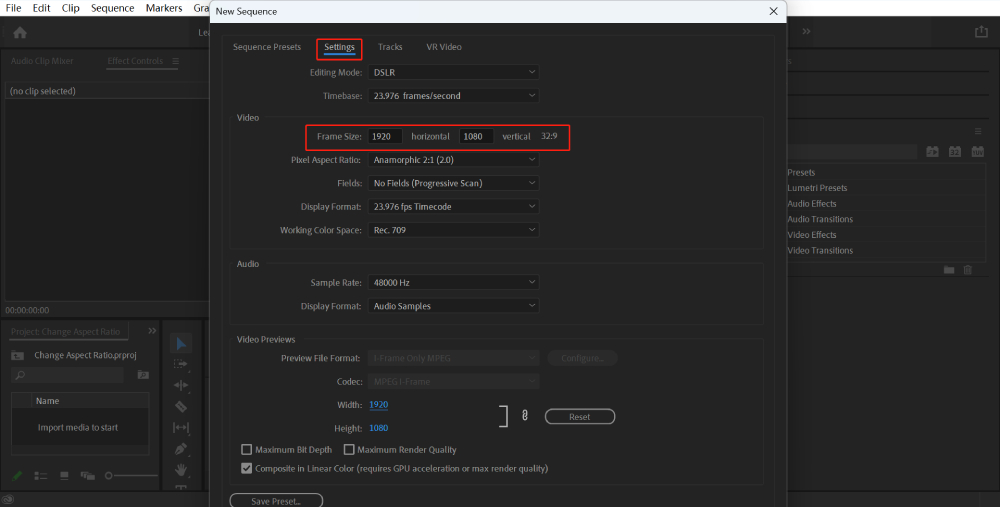
Step 4: Customize the Settings
If you want a specific aspect ratio that's not available as a preset, you can manually set it. Click on the "Settings" tab in the same window, then input your desired width and height under "Frame Size."
Step 5: Finish the Sequence Creation
Give your sequence a name and click "OK" to create it.
Step 6: Import Your Footage into the Sequence
Drag and drop your footage into the newly created sequence. If the clip doesn't match the sequence's settings, you'll get a prompt asking if you want to keep the existing settings or change them to match the clip. Choose "Keep existing settings."

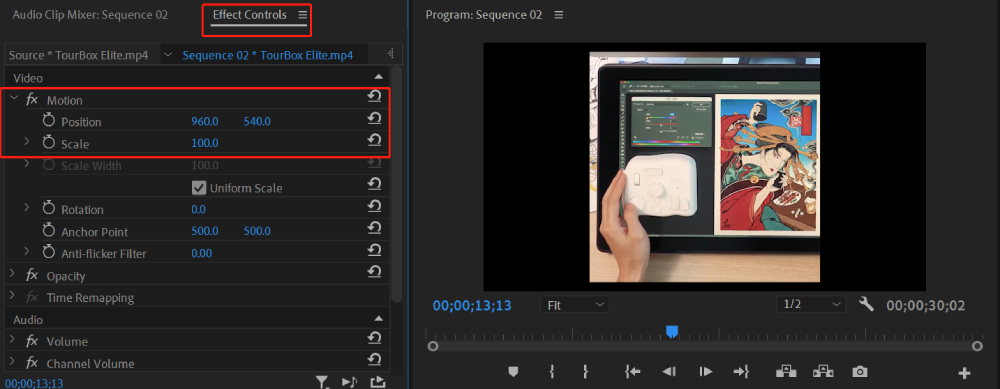
Step 7: Adjust Your Footage
If your footage doesn't perfectly fit the new aspect ratio, you can adjust it.
Click on the clip in the timeline to select it, then go to "Effect Controls." Under "Motion," you can adjust "Scale" to resize the clip and "Position" to move it around.
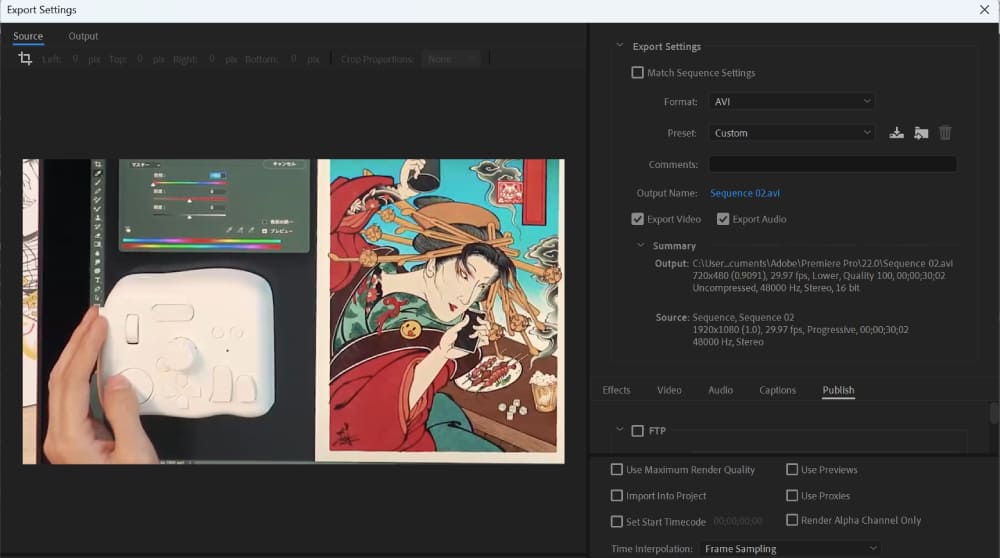
Step 8: Export Your Video
When you're happy with your video, go to "File," then "Export," and then "Media" to export your video with the new aspect ratio.
How to Add a Letterbox Effect in Premiere?
If you want to maintain the original aspect ratio of your clips but fit them into a different sequence, consider adding letterboxing (black bars on the top and bottom) or pillarboxing (black bars on the sides) to fill the remaining space.
Applying a letterbox effect can give your video a cinematic look, emulating the aspect ratio used in theaters.
Here's a step-by-step guide on how to add a letterbox effect to multiple clips in Premiere Pro:
Step 1: Import and Arrange Your Clips
Open Adobe Premiere Pro and create a new project (File > New > Project).
Import your video clips into the project (File > Import or simply drag and drop the files into the 'Project' panel).
Drag your imported video clips from the 'Project' panel onto the 'Timeline' panel. Arrange them in the order you want them to appear.
Step 2: Create a New Adjustment Layer
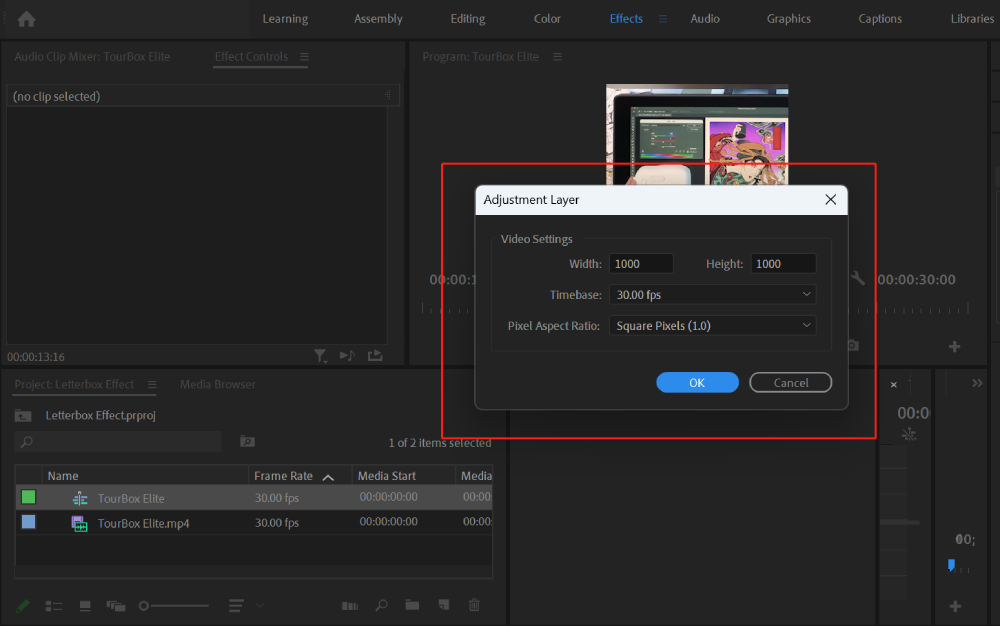
Go to the 'Project' panel and click on the 'New Item' button at the bottom right of the panel. It looks like a folded piece of paper.
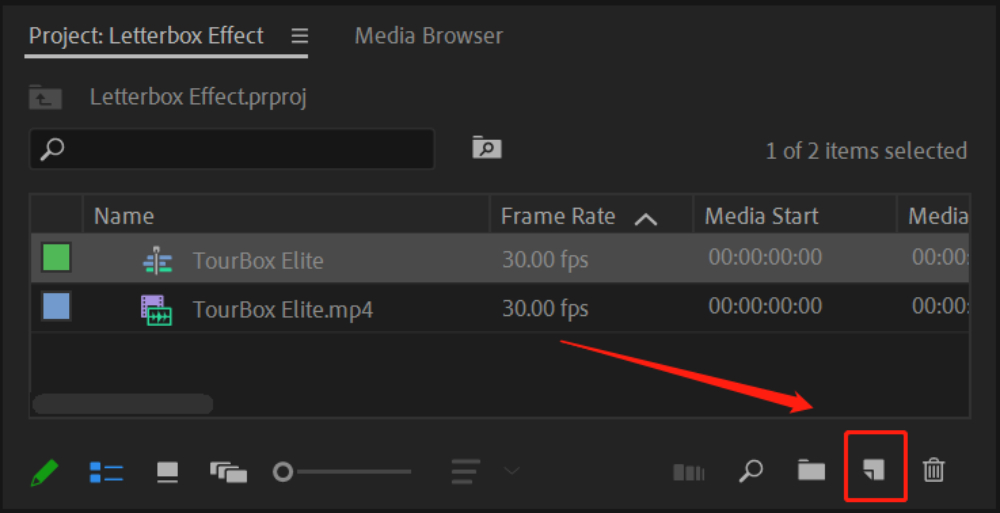
Select 'Adjustment Layer' from the dropdown menu.
In the dialog box that appears, make sure the video settings match those of your project and click 'OK'.
Step 3: Extend the Adjustment Layer
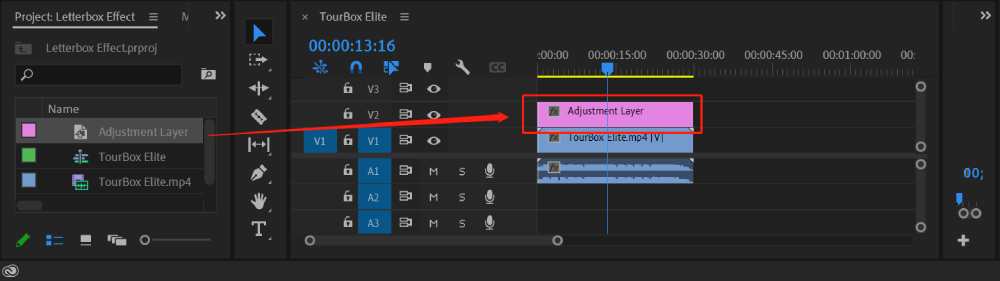
Drag the newly created adjustment layer from the 'Project' panel onto a new track above your video clips in the 'Timeline'.
Extend the adjustment layer across all the clips that you want to apply the letterbox effect to. To do this, select the adjustment layer in the timeline and drag its end until it covers all relevant clips.
Step 4: Apply the Crop Effect
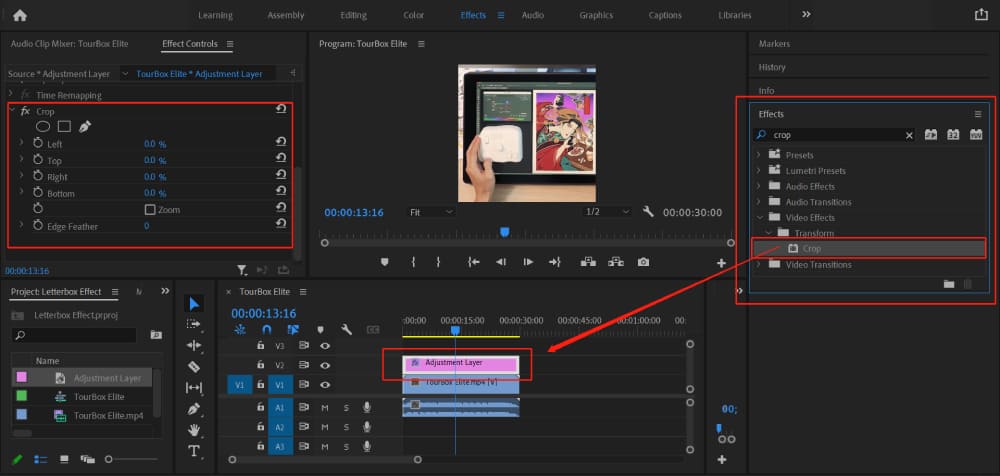
Go to the 'Effects' panel (if you can't see it, go to Window > Effects to enable it).
Type "Crop" into the search bar in the 'Effects' panel.
Drag the 'Crop' effect onto your adjustment layer in the timeline.
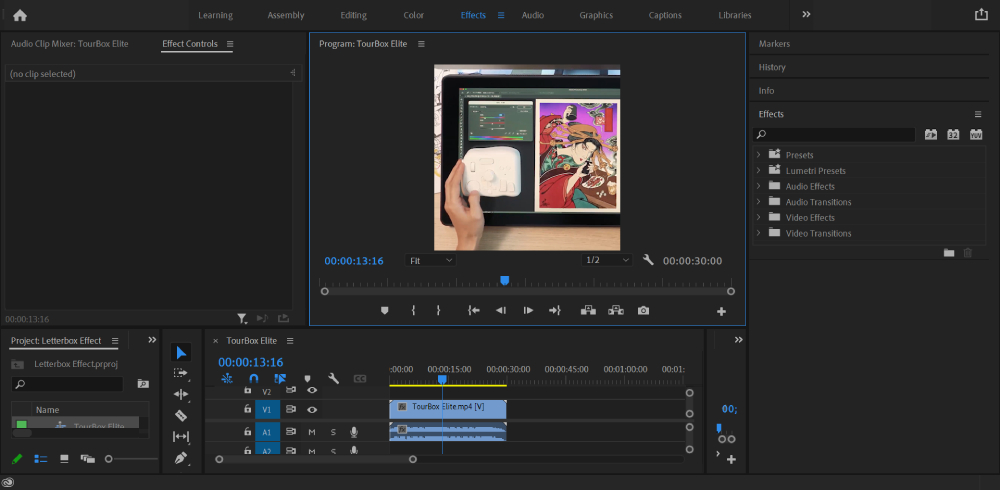
Step 5: Adjust the Crop Effect
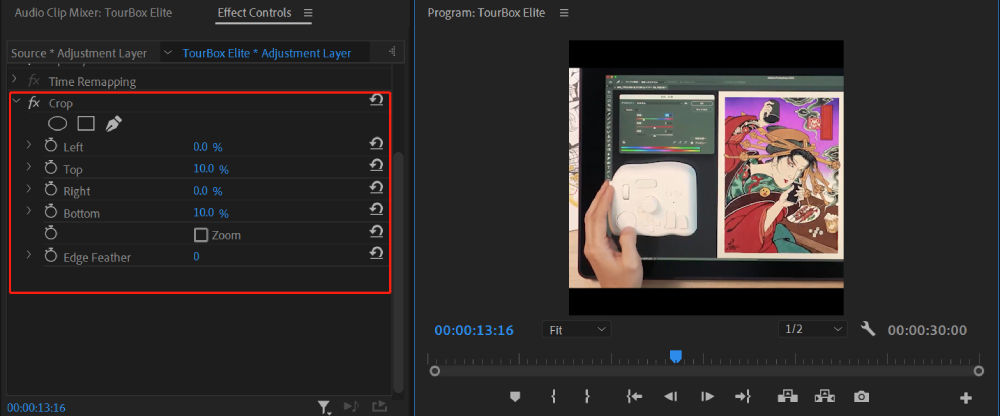
With the adjustment layer selected in the timeline, go to the 'Effect Controls' panel (if it's not visible, go to Window > Effect Controls).
Under 'Crop', adjust the 'Top' and 'Bottom' percentages to create your desired letterbox effect.
Typically, a setting of 10-15% for both 'Top' and 'Bottom' should give you a cinematic aspect ratio.
Step 6: Review and Export Your Video
Play your sequence to review the letterbox effect. If you're happy with the result, you're ready to export your video.
Go to File > Export > Media.
In the export settings dialog, choose your desired format and preset, name your file, select its destination, then click 'Export'.
Extra Tips About Changing Aspect Ratio in Premiere
Here are some helpful tips for changing aspect ratios in Premiere Pro:
- Before changing the aspect ratio, consider the purpose of your video. Different aspect ratios serve different needs. For example, Instagram prefers 1:1 or 4:5, while YouTube typically uses 16:9.
- Changing the aspect ratio might lead to black bars appearing on the sides or the top and bottom of your video. You can fill these in by scaling your footage, but be careful not to distort the clip.
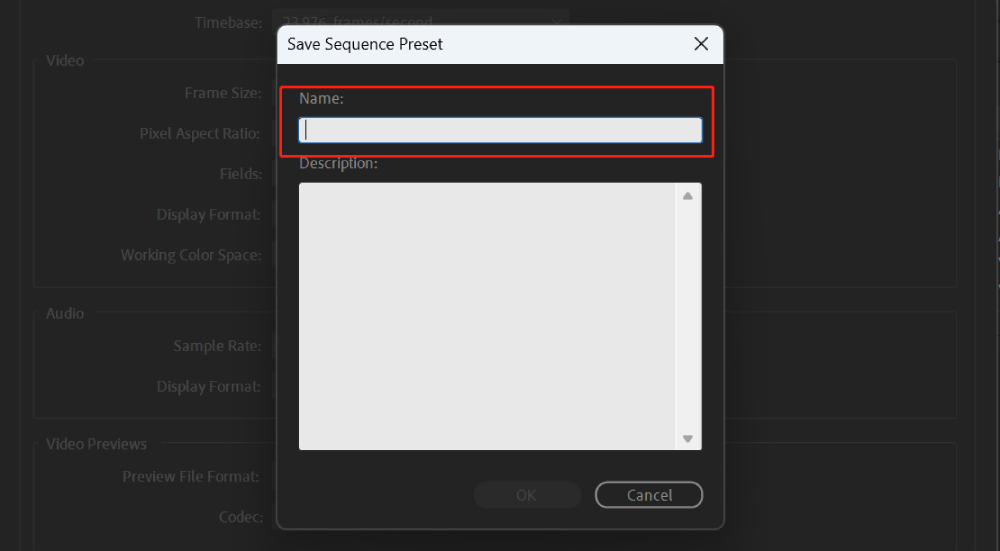
- If you frequently work with specific aspect ratios, save them as presets for quick access in future projects. This will save you time and ensure consistency across your videos.
Product Recommendation:
To further enhance your video editing workflow, check out TourBox.

It's a controller designed for digital creators, allowing for quicker and more intuitive control over Premiere Pro and other editing software. It's a fantastic tool to boost your productivity and streamline your editing process.