How to Change Canvas Size in Photoshop: A Beginner's Guide
Whether you're working on a design project, prepping images for the web, or just experimenting with your creative skills, knowing how to change canvas size in Photoshop is a key skill.
Ready to master the art of resizing your canvas in Photoshop? Let's get started.

In this article, you will learn:
- Method 1: Change Canvas Size Using the Menu Bar
- Method 2: Change Canvas Size Using the Crop Tool
- Common Questions About Canvas Size in Photoshop
Method 1: Change Canvas Size Using the Menu Bar
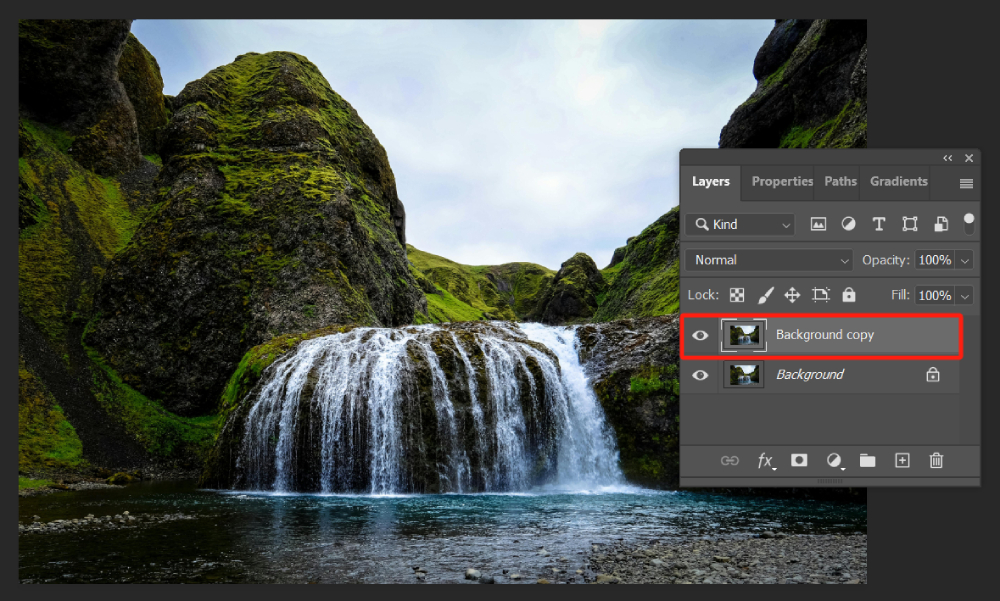
Get started by launching your Photoshop application, then select any image of your liking and drag it into Photoshop. This action will open your image in the Layers panel, locked as the background layer.
Right-click on the background layer in the Layers panel. From the pop-up menu, select "Duplicate Layer." A dialog box will appear. In this box, input a name you like and hit OK.
You have now successfully duplicated the background layer.
Additional Tip:
In Photoshop, a recommended best practice is to keep the original form of the image intact in the background layer, while creating a duplicate. All your edits should be applied to this duplicate layer. This way, you can always revert to the original image if any changes don't go as planned.
Now, make sure that you have the duplicate layer selected in the Layers panel. In the menu bar at the top of the Photoshop interface, click on "Image." This will open a dropdown menu for you.
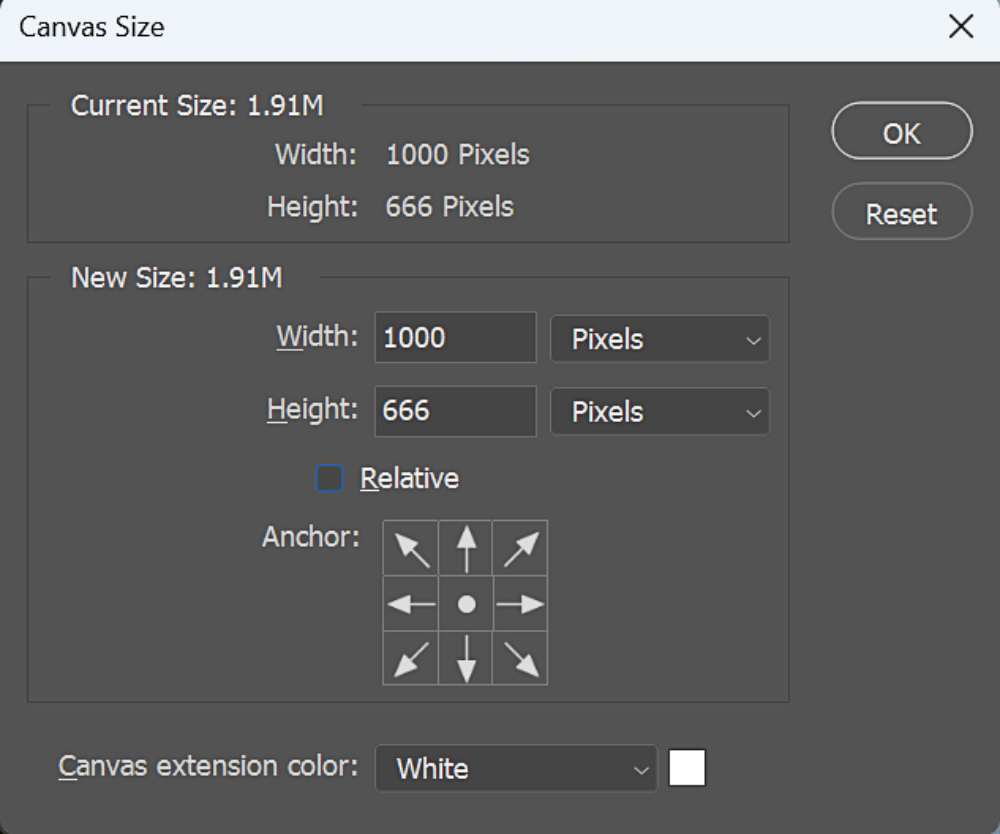
Select "Canvas Size." Alternatively, you can press "Alt + Ctrl + C" (Mac users can adjust the shortcut accordingly) to achieve the same result.
Adjust the height and width values in the Canvas Size dialog box as per your needs. Here, the two size values for the canvas operate independently. Adjusting one will not affect the other.
You also have the choice to use the "Relative" option to add relative values to the canvas. For instance, if you want to add 10px each to the left and right sides of the image, input 20px as the width value, and Photoshop will add 10px to both sides.
Additionally, you can use the Anchor to modify the direction of the canvas size changes. You can also choose your Canvas extension color based on your requirements.
If you have precise dimension requirements for your canvas, using the Canvas Size option in the menu bar to adjust the size is a very suitable method.
Method 2: Change Canvas Size Using the Crop Tool
The second method of changing the canvas size is by using the Crop tool in Photoshop. This method might not offer the precision of using Canvas Size, but it's more intuitive.
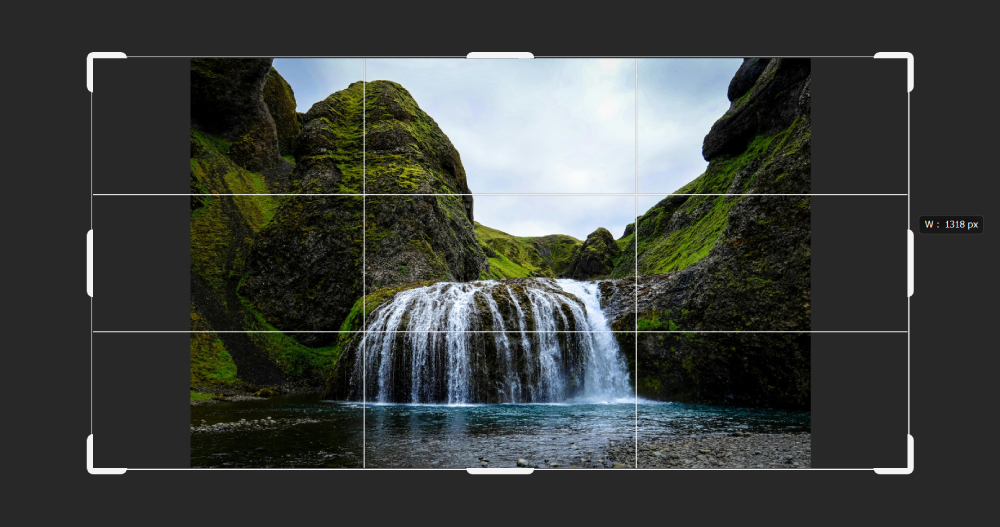
First, repeat the step of duplicating the background layer as described in Method 1. Then locate the Crop tool in the toolbar on the left side of the Photoshop workspace. (You can also quickly access the Crop tool by pressing the "C" key).
When you select the Crop tool, a default crop border appears around your image. This border has eight handles that you can use to adjust the size of the crop border, allowing you to add more space to your canvas.
To change the size of the canvas, simply click on any of the handles and drag them outwards. You can drag it until you reach the desired canvas size.
When you release the mouse, you will see extra space added to your Photoshop canvas.
Additional Tip:
When using the Crop tool, you can adjust the aspect ratio of the Crop tool via the toolbar above, or you can try working with the Content-Aware Fill feature for some surprising results.
Common Questions About Canvas Size in Photoshop
We believe that with the two methods we have shared above, you have mastered the skill of changing the canvas size in Photoshop.
In this section, we have compiled some frequently asked questions to address possible issues you may encounter when resizing the canvas in Photoshop.
1. Is the Canvas Size the Same As the Image Size in Photoshop?
No, the canvas size and image size in Photoshop are not necessarily the same.
Image Size refers to the dimensions of the actual image or drawing within the canvas. It includes the height and width of the image and also relates to the resolution of the image, which is typically measured in pixels.
Canvas Size, on the other hand, refers to the full editable area or workspace in which your image lies. You can think of it as the size of your 'artboard' in Photoshop.
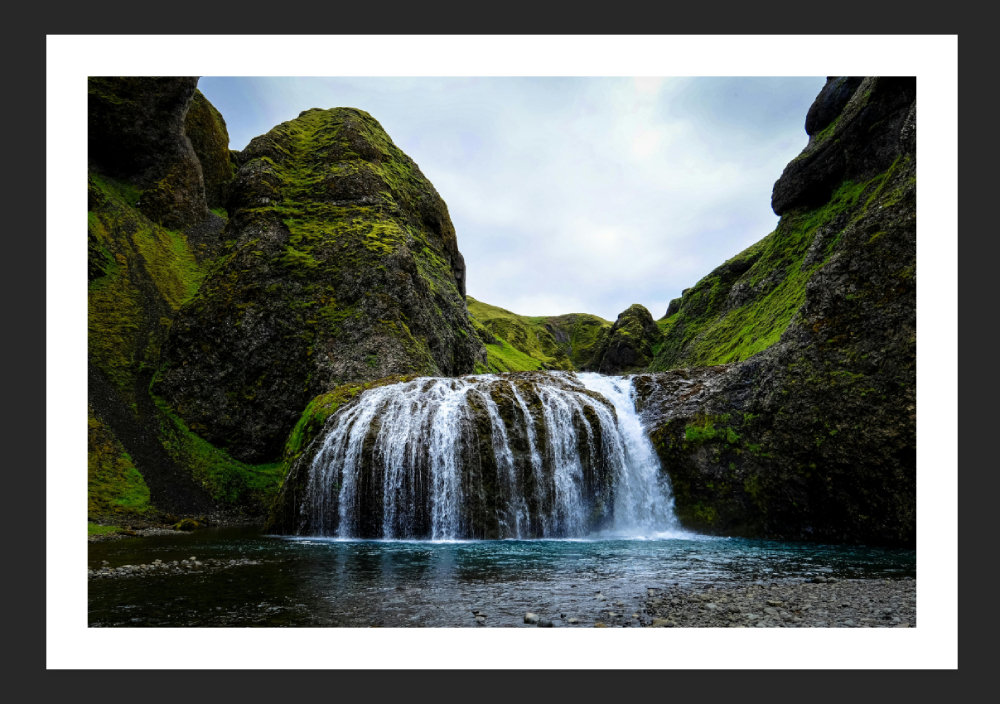
The canvas can be larger or smaller than the actual image size. If the canvas is larger, you'll see a border or space around your image. If it's smaller, parts of your image will be cut off or 'clipped' because they fall outside the canvas area.
2. How to Resize an Image in Photoshop?
We have shared the steps in this tutorial: How to Resize An Image in Photoshop?
3. How to Set the Canvas Size Before Opening an Image?
Once you open Photoshop, you'll be taken to its Home Page. At this point, instead of opening an existing image or dragging an image into Photoshop, choose the "Create New" option on the left side of the Home Page.
Next, a new page will pop up displaying various canvas sizes. Select any that suits your requirements and then click on "Create".
Additional Tip:
You also have the option to go to File > New Document after entering Photoshop. This gives you another opportunity to adjust the canvas size.
4. How to Improve Workflow Efficiency in Photoshop?
While Photoshop offers a variety of powerful tools and features, using them can sometimes feel a bit clunky. Let's take the Canvas Size function as an example. Its shortcut, "Alt + Ctrl + C", is not only hard to remember, but it can also be awkward to use.
As creatives working in Photoshop, we don't want these cumbersome operations to stifle our inspiration and creativity. We yearn for more intuitive and convenient ways to make our Photoshop use more efficient. And that's where TourBox comes in.

TourBox is an innovative tool specifically designed to streamline your editing process in Photoshop. It's a controller that offers a new level of functionality and ease of use, providing quick access to the tools and shortcuts you use most frequently.
With TourBox, you can easily adjust your canvas size, switch between tools, manipulate layers, and much more — all without having to remember complex keyboard shortcuts or navigate through menus.
By integrating TourBox into your Photoshop workflow, you'll spend less time fumbling with controls and more time bringing your creative visions to life.
And that concludes our tutorial on how to change the canvas size in Photoshop. We hope it's been helpful to all of you creators and innovators out there.