[DaVinci Resolve Tutorial] Everything About Changing Clip Speed
Welcome back to our DaVinci Resolve Tutorial series! Today, we're diving into a topic that's key to dynamic and engaging video editing: Speed Control.
Understanding how to manipulate the speed of your clips is a game-changer. It can transform a simple sequence into a dramatic time-lapse or slow-motion masterpiece.
From adjusting clip speeds to getting a grip on speed curves, we're covering all the bases in this comprehensive guide.
Let's not waste another moment and get right into the world of speed manipulation in DaVinci Resolve!

In this article, you will learn:
- How to Change Clip Speed in DaVinci Resolve?
- How to Use Retime Controls in DaVinci Resolve?
- How to Use Retime Curve in DaVinci Resolve?
- How to Solve Frame Skipping Caused by Speed Changes in DaVinci Resolve?
- Final Thoughts About Speed Changes in DaVinci Resolve
How to Change Clip Speed in DaVinci Resolve?
When you're new to video editing, it's easy to fall into the trap of thinking that outstanding transitions between clips require flashy effects and animations. However, that's not necessarily the case.
A truly seamless transition hinges on thoughtful camera movement during filming, identifying connections between clips in post-production, and then bringing it all together through speed alterations. In this context, speed manipulation is the core aspect.
Of course, overusing such techniques can lead to viewer fatigue, so we'd recommend that in addition to mastering technical skills in your video editing software, you also focus heavily on the narrative and creativity of your content.
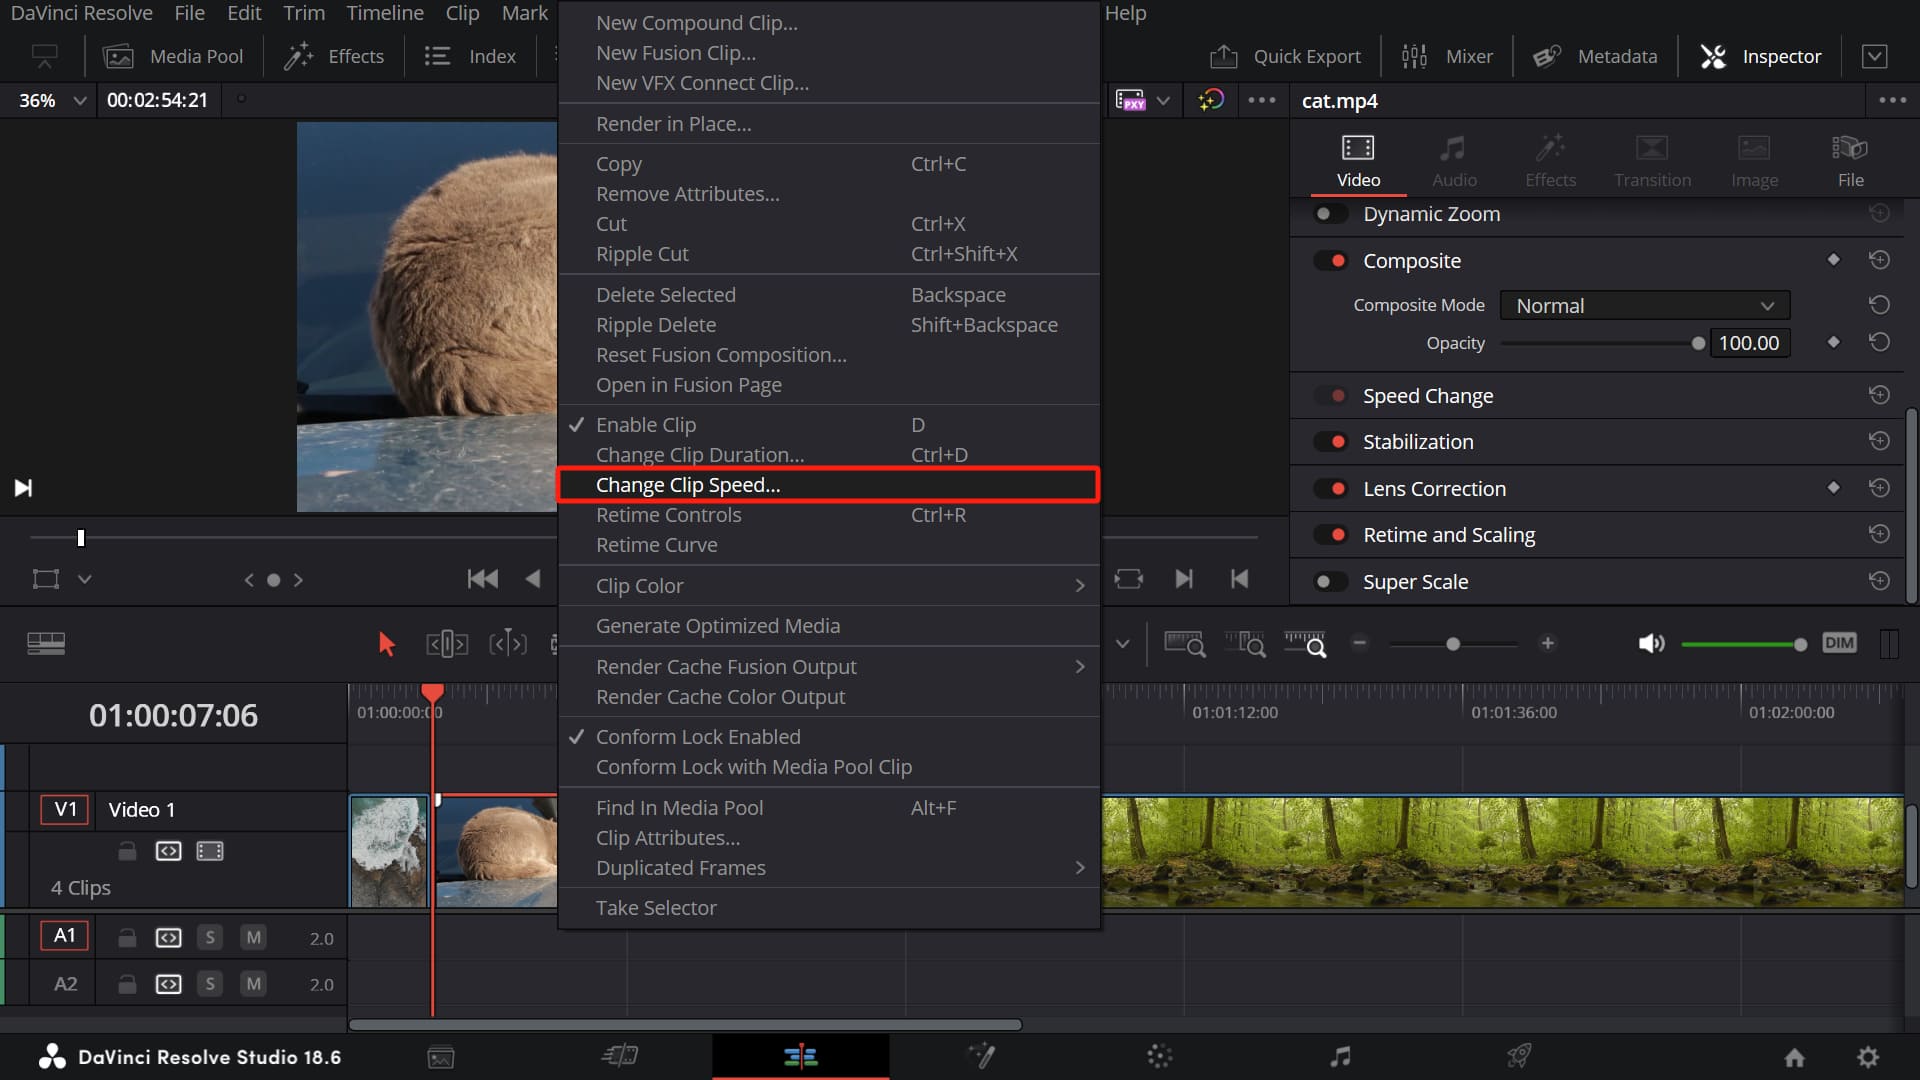
Now let's delve into how to change clip speed in DaVinci Resolve. Once we've placed our footage on the timeline, all we need to do is right-click on the clip, select "Change Clip Speed", and then a settings window will appear.
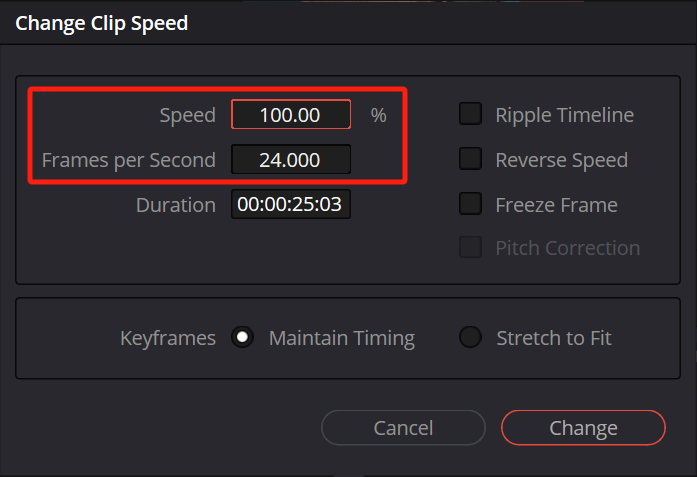
In the Change Clip Speed settings window, input the speed value you want to use, or you can choose a frames-per-second rate.
These two parameters are interconnected, so when you adjust one, the other changes accordingly. You can use the "Duration" shown below as a reference to understand how long the clip will be after applying the speed change.
Once you've made your adjustments, click OK, and voila! You've successfully altered the speed of the clip. This is the most basic form of speed change in DaVinci Resolve.
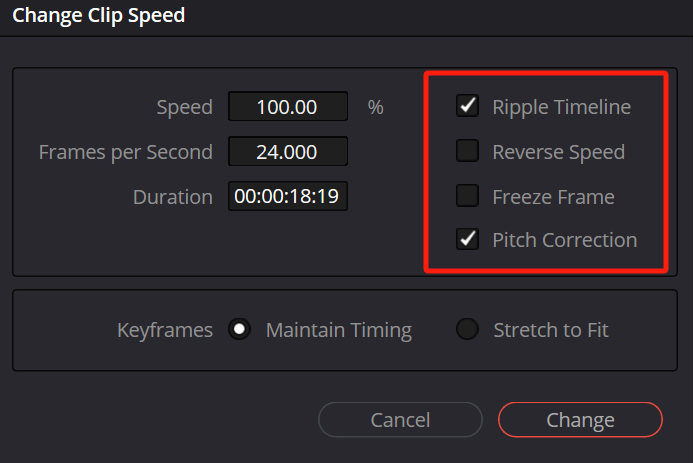
There are also some additional options you can adjust:
- Ripple Timeline: Once activated, any speed changes you make to a clip will cause subsequent clips to shift along the timeline accordingly. If you increase the speed of a clip and shorten it by 10 seconds, the clips following it will move 10 seconds to the left on the timeline.
- Reverse Speed: You can also activate "Reverse Speed" to reverse a clip. This feature may require some time to render.
- Freeze Frame: Another useful function is the "Freeze Frame". This option essentially takes a screenshot of the current frame, allowing you to extend that image indefinitely. It's a feature that's often used in humorous or parody content.
- Pitch Correction: When you adjust the speed of a clip, the pitch of the audio may change. This feature helps to mitigate those changes to some extent. However, if the speed changes are significant, some pitch discrepancies may still be noticeable.
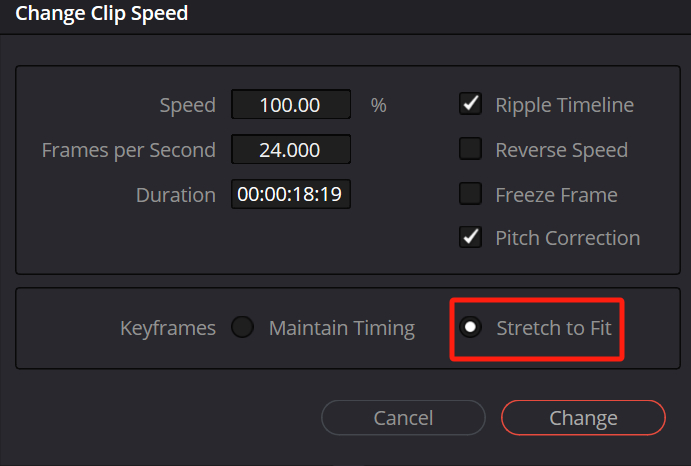
Let's now turn our attention to the keyframe settings in the Change Clip Speed function. If your clip has keyframes, clicking "Stretch to Fit" will prompt DaVinci Resolve to automatically adjust the duration of your keyframes.
However, we don't necessarily recommend this approach because sometimes your video editing might involve effects like fading in and out, and using this feature might lead to some glitches or bugs.
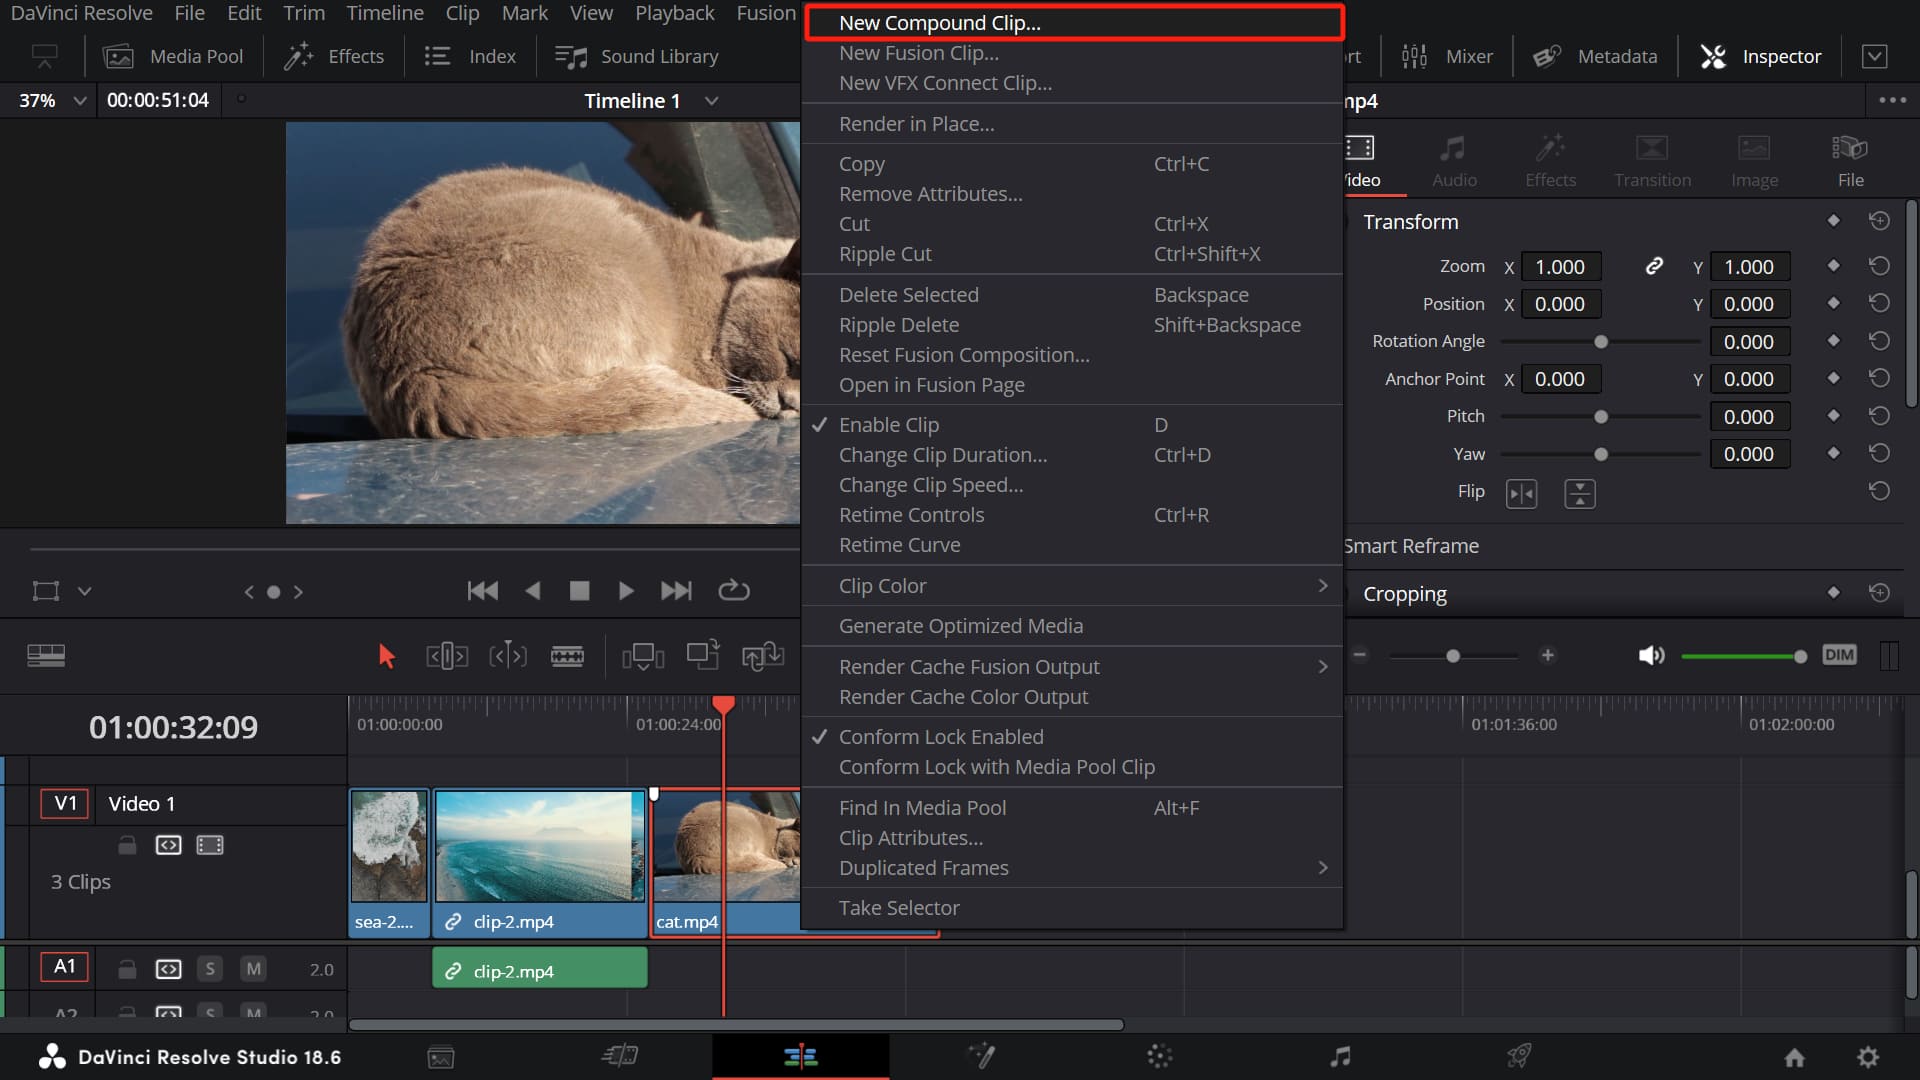
Although the "Change Clip Speed" settings panel allows you to keep your keyframes in place or move them along with the speed changes, we would recommend that before adjusting the speed, you right-click on the clip on the timeline and select "New Compound Clip".
Then proceed with changing the speed. This approach provides better control and prevents any potential issues with keyframes being misplaced or requiring reconfiguration after the speed change.
In this section, we covered the basics of speed changes in DaVinci Resolve. In the next section, we will delve deeper into speed controls in DaVinci Resolve.
How to Use Retime Controls in DaVinci Resolve?
In DaVinci Resolve, you can right-click on your footage and select "Retime Controls", or press the shortcut "Ctrl + R". You'll then see an arrow appear on your footage.
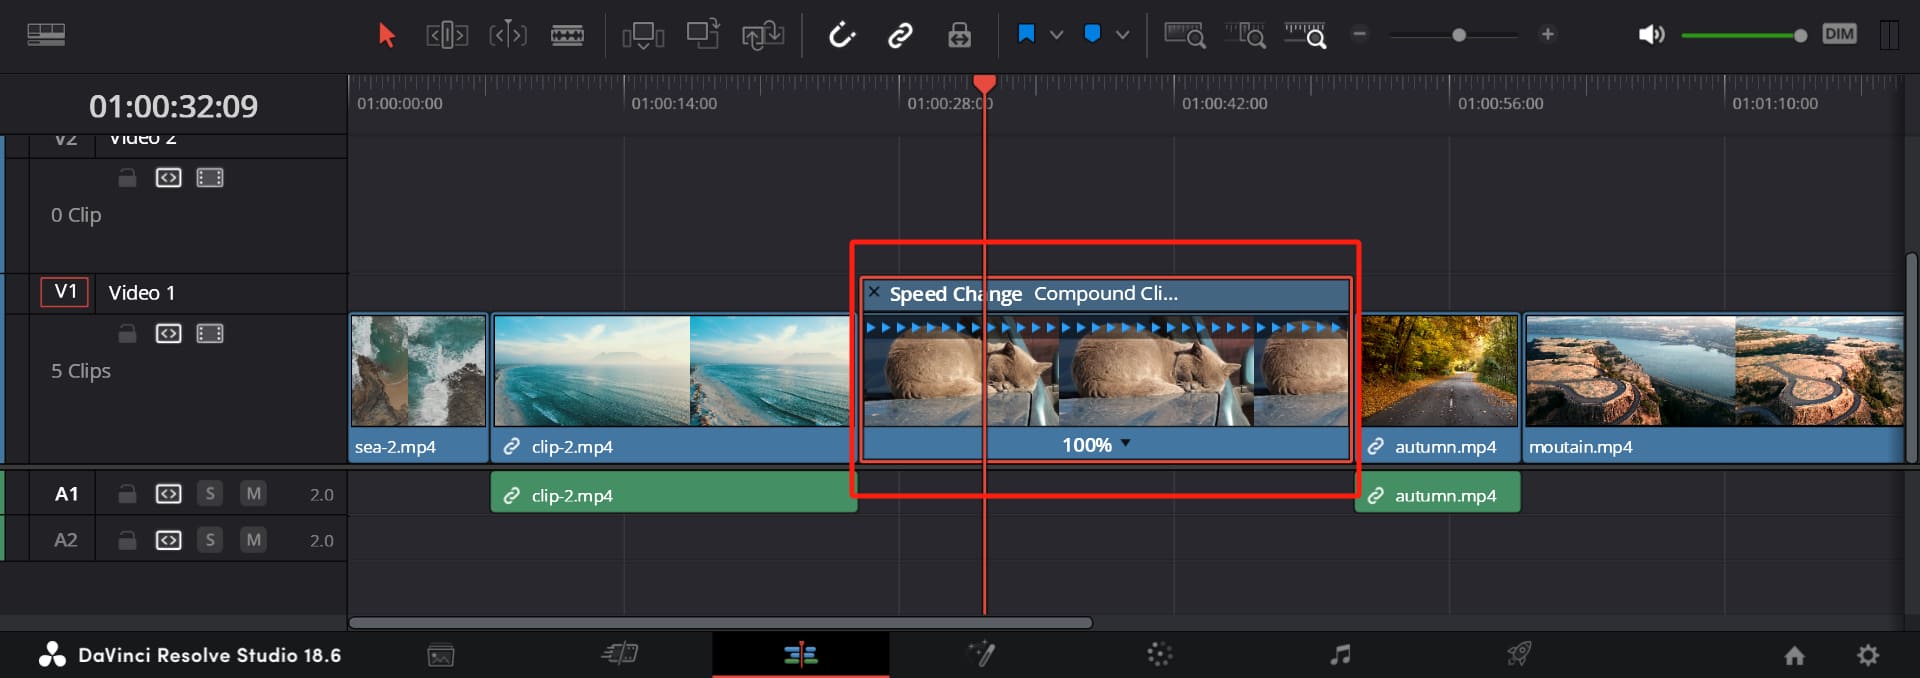
At this point, all you need to do is move the playhead on the timeline to the position where you want to adjust the speed.
Click on the arrow below and select "Add Speed Point". This will create a speed keyframe.
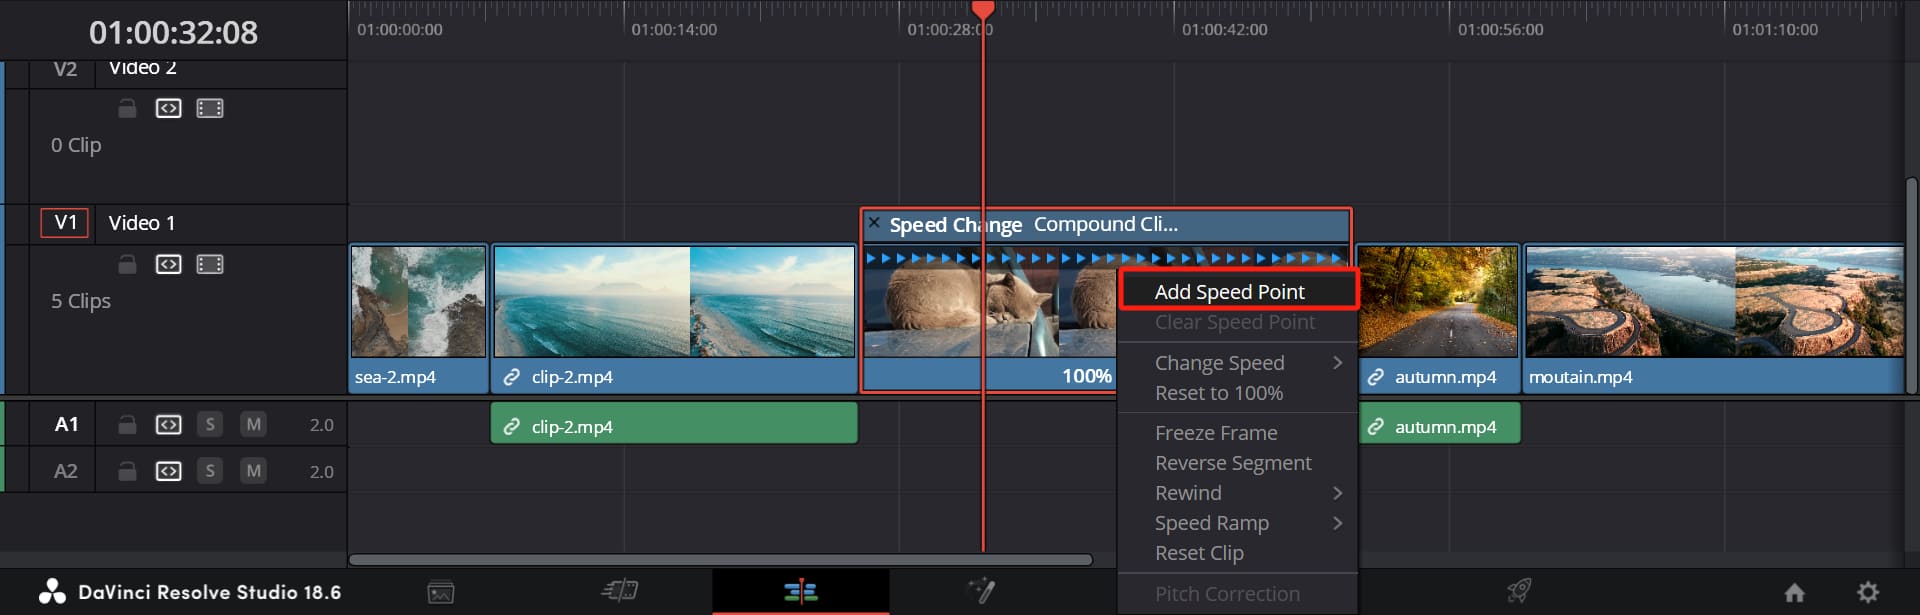
You can add multiple speed points to your timeline. But we strongly recommend that you carefully consider the role of each frame before adding keyframes because once a keyframe is placed, its position cannot be changed later on.
After adding speed points, you'll see that each point has an individual speed control beneath it. Clicking on it will bring up a dropdown menu.
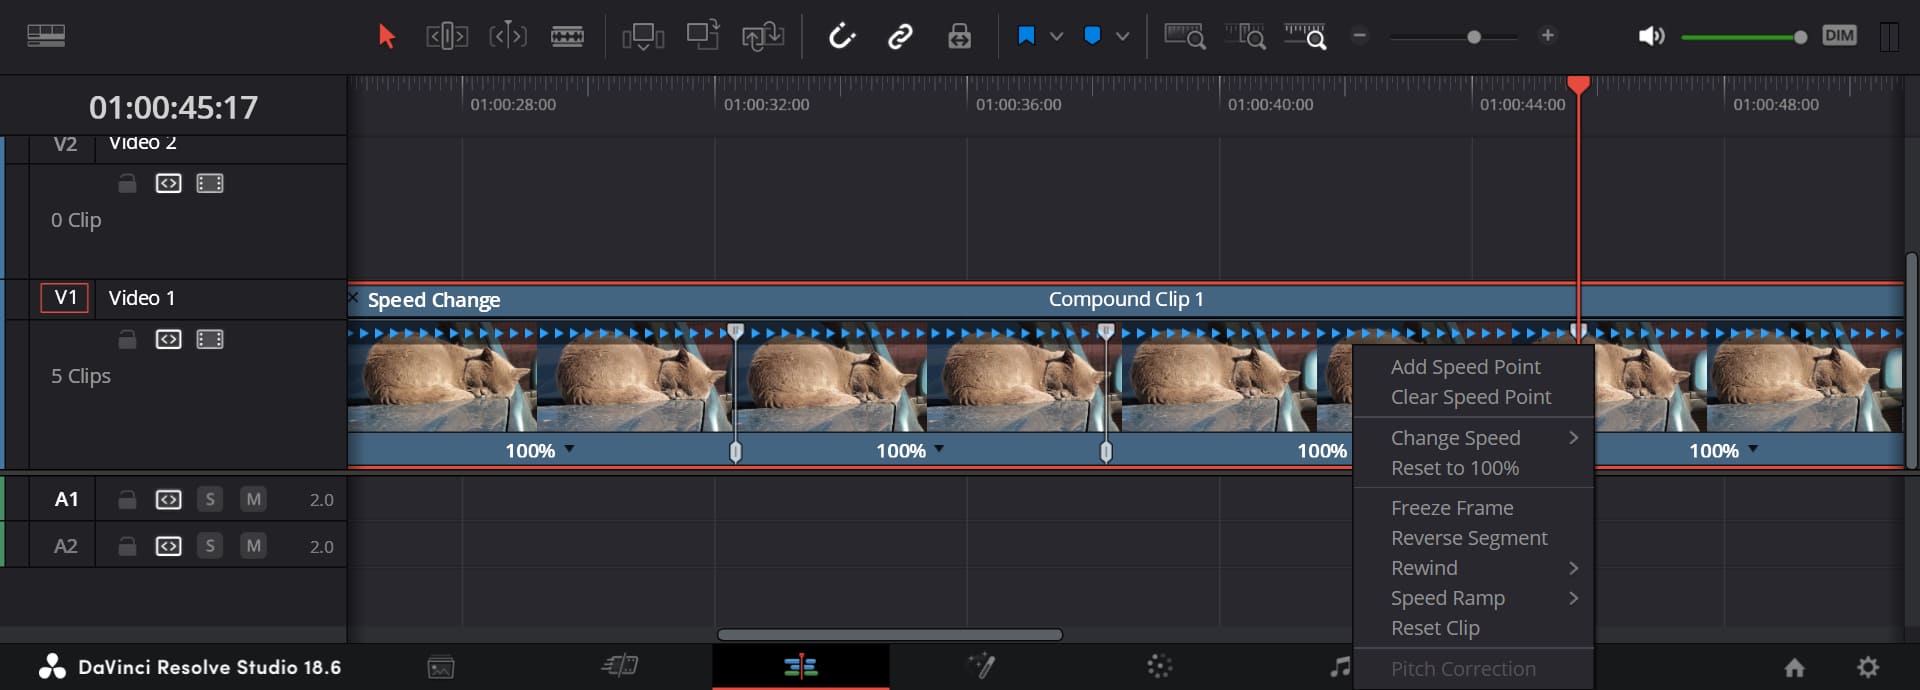
The primary control remains "Change Speed". You can choose from the presets provided by DaVinci Resolve to adjust speed.
If these presets don't meet your needs, you can directly drag the speed handle in the footage to adjust the clip's speed.
It's important to note that the speed handle actually has two sliders: the upper slider changes the speed of the clip, while the lower slider adjusts the range of the speed change, i.e., how much of the clip will be affected by this speed adjustment.
Using the speed handle, you can easily manage speed changes in your clip while maintaining precision.
However, a new issue arises: all our operations so far have been linear, but a gradual fade in or out creates a more pleasing aesthetic. Don't worry, in our next section, we will delve further into DaVinci Resolve's Retime Curve.

How to Use Retime Curve in DaVinci Resolve?
Similar to the operations we discussed earlier, right-click on your footage and select "Retime Curve". You're likely already familiar with manipulating keyframe curves.
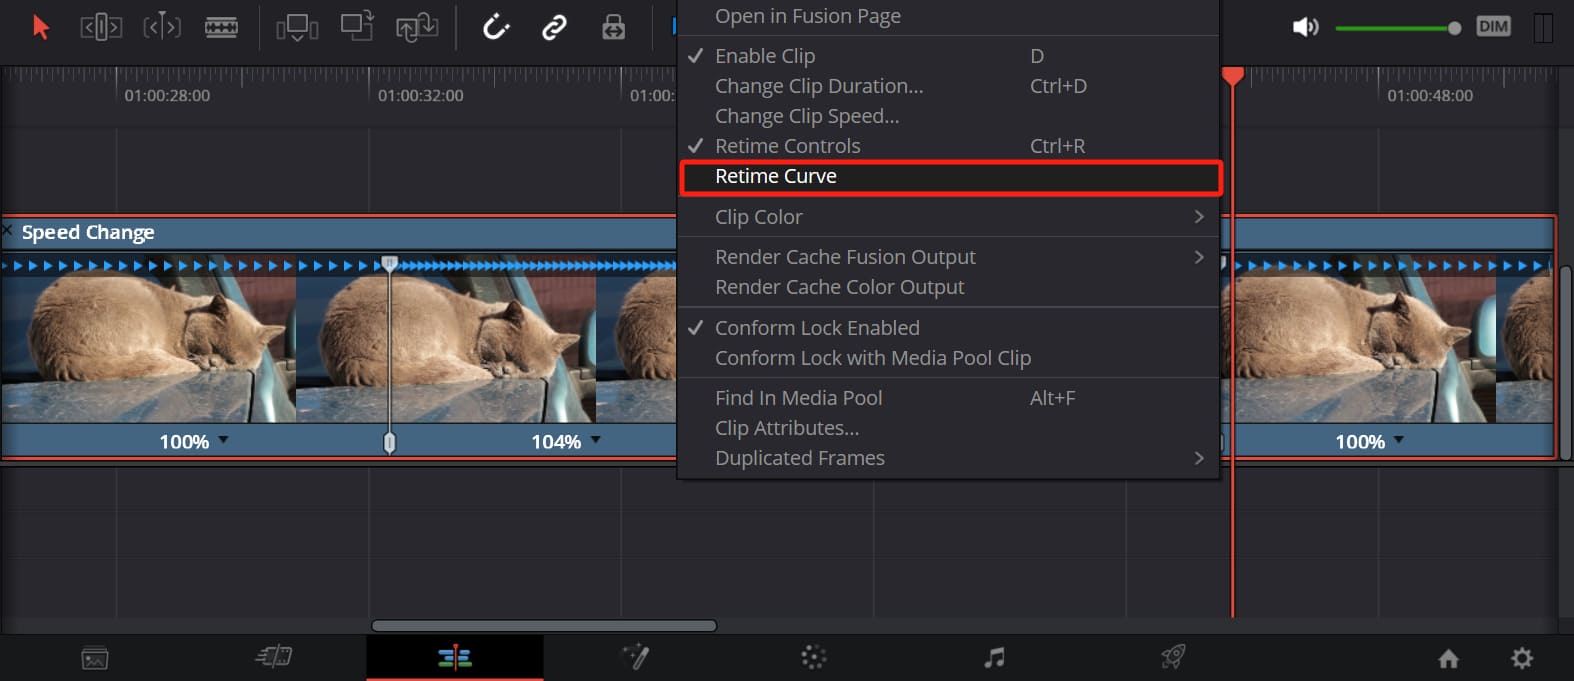
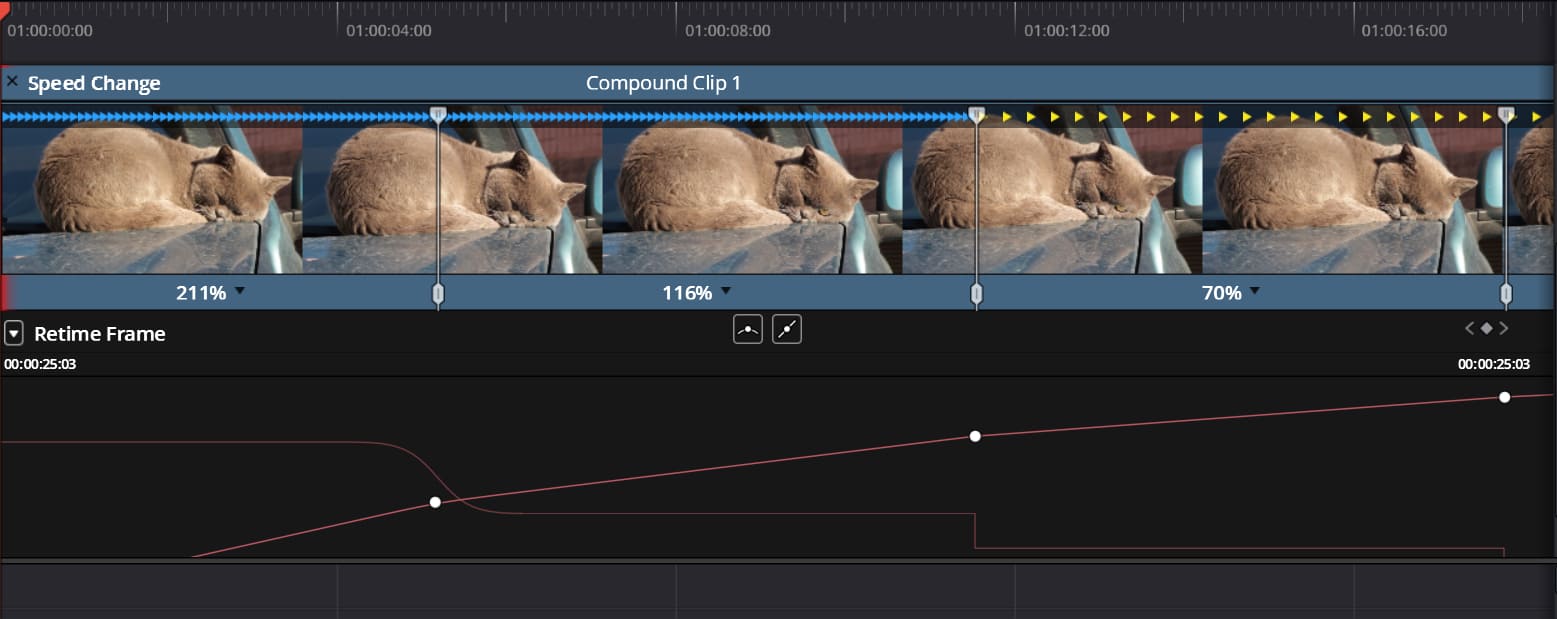
You can control the Bezier curve handles to give the speed change a gradual fade-in or fade-out effect.
You can watch the YouTube video below, produced by Team 2 Films, which introduces the use of the Retime Curve function in DaVinci Resolve.
How to Solve Frame Skipping Caused by Speed Changes in DaVinci Resolve?
In DaVinci Resolve, when we apply speed changes, it's practically impossible for all frames to evenly divide within each second. This can lead to issues like frame skipping and video stuttering.
To alleviate this, we can utilize DaVinci Resolve's Frame Interpolation to smooth out our footage.
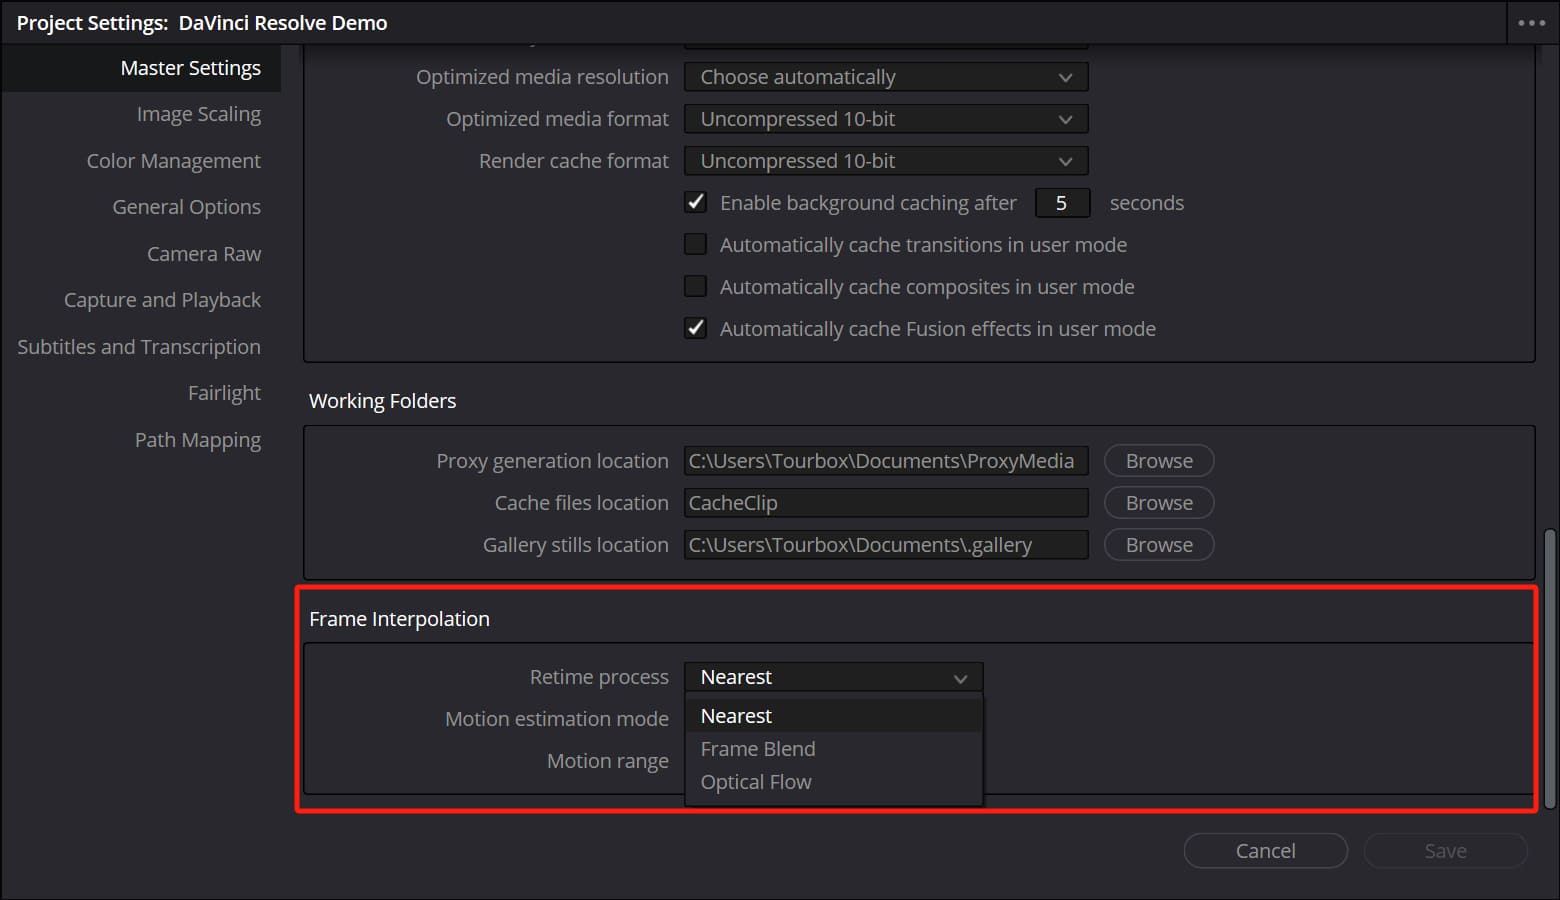
First, click on "File" > "Project Settings" in the top menu bar. Scroll down in the "Master Settings" until you find "Frame Interpolation". Here, you'll see a dropdown menu for "Retime Process".
The "Retime Process" feature offers three options: Nearest, Frame Blend, and Optical Flow:
- Nearest: This option uses the closest frame to fill in the gaps when your video is sped up or slowed down. It's the simplest method requiring the least processing power, but it may result in less smooth playback.
- Frame Blend: This option blends frames together to create new ones. It typically results in smoother playback than the 'Nearest' option, but it might create some ghosting effects.
- Optical Flow: This is the most complex method. It creates entirely new frames based on the motion and color analysis of surrounding frames. It can yield the smoothest results, especially for clips with significant speed changes, but it requires more processing power and might introduce some artifacts.
Choose the option that best suits your needs, keeping in mind that the more complex the method, the greater the processing power required.
Final Thoughts About Speed Changes in DaVinci Resolve
Having mastered speed adjustments in DaVinci Resolve, let's take a moment to consider how we can further streamline our video editing workflow.
Meet TourBox, a well-crafted tool designed to enhance your productivity and elevate your editing experience.

Something that would have taken several mouse movements and keystrokes can now be accomplished in a fraction of the time. This is more than just a tool - it's a game changer for content creators.
Visit our dedicated page on using TourBox for video editing to learn how TourBox simplifies every step of your video editing process.

That brings us to the end of our tutorial on how to adjust speed in DaVinci Resolve. Stay tuned for more tutorials in our DaVinci Resolve series.