How to Crop Video in Premiere: A Step-by-Step Tutorial
Imagine this scenario: You've captured a breathtaking scene, the lighting is perfect, and the composition is on point, but there's one small problem—there's unwanted clutter on the edges of your video frame.
It's frustrating, right? You want your viewers to be completely immersed in your visual creation, but those distractions pull their attention away from the main subject.
Well, worry no more! In this comprehensive tutorial, we will unravel the secrets of how to crop video in Premiere.
Prepare to unlock the potential to captivate your audience and deliver visually stunning videos that leave a lasting impact. So, grab your creative spirit, and let's dive into the world of video cropping with Adobe Premiere Pro.

In this article, you will learn:
- How to Crop a Video in Premiere?
- How to Resize a Video in Premiere?
- Best Practices for Cropping Videos in Premiere
How to Crop a Video in Premiere?
When you crop a video in Adobe Premiere Pro, it means you are trimming or removing parts of the video's frame.
Cropping allows you to adjust the visible area of the video, focusing on specific elements, removing unwanted sections, or changing the aspect ratio.
It is a fundamental editing technique that helps you refine the composition and enhance the visual storytelling of your video.
By cropping, you can create a tighter frame, highlight important details, or achieve specific visual effects to better convey your intended message to the audience.
Whether you're trying to remove unwanted areas, adjust the aspect ratio, or create a split-screen effect, this tutorial will guide you through the process step-by-step.
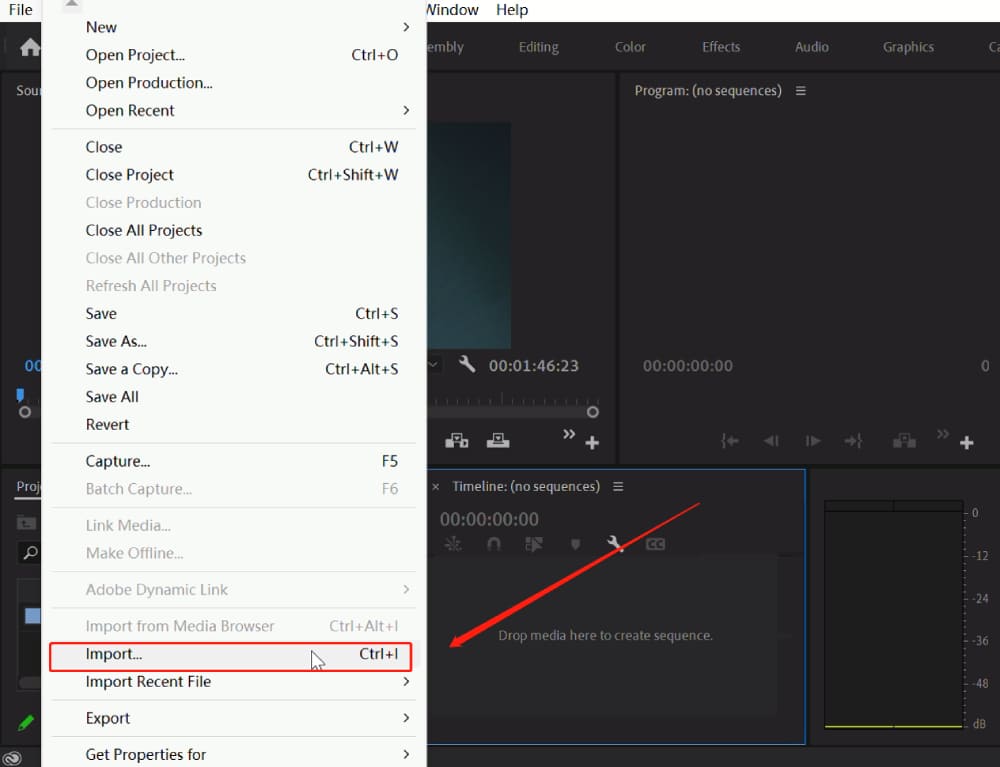
Step 1: Import Your Video
Open Adobe Premiere Pro and create a new project (File > New > Project).
Import your video file into the project (File > Import or drag and drop the video file into the 'Project' panel).
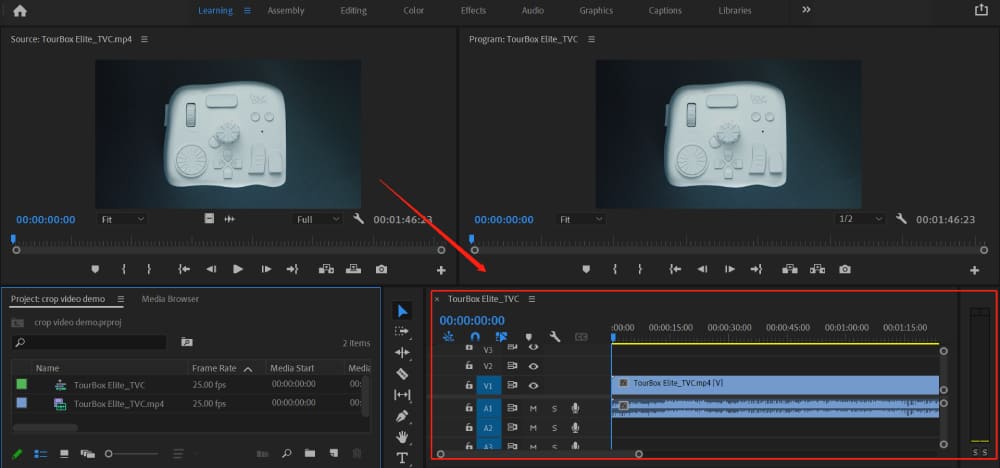
Step 2: Add Video to Timeline
Drag your imported video from the 'Project' panel onto the 'Timeline' panel at the bottom. This will create a new sequence with your video.
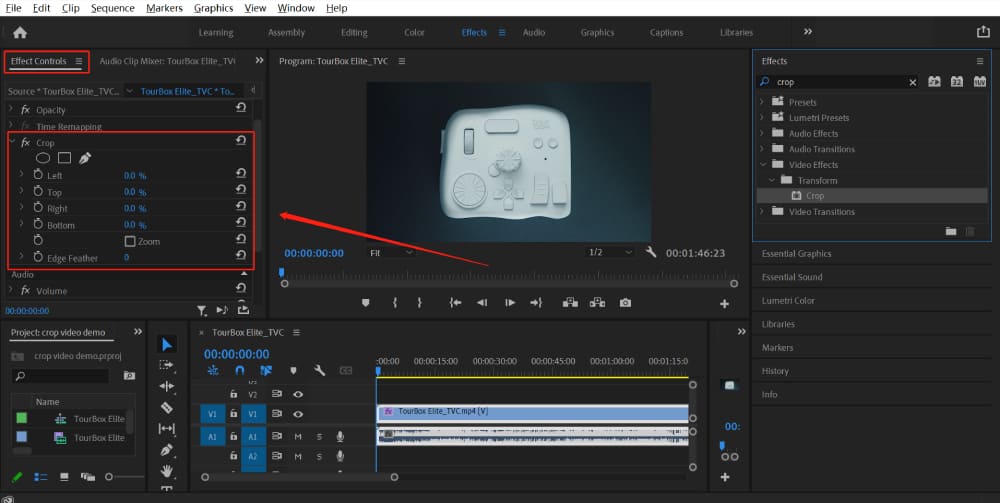
Step 3: Locate the Crop Effect
Go to the 'Effects' panel on the right. If you can't see this panel, go to Window > Effects to enable it.
In the 'Effects' panel, type "Crop" into the search bar or browse through 'Video Effects > Transform'.
You'll see an effect titled "Crop". Drag this effect onto your video clip in the timeline.

Step 4: Apply the Crop Effect
With your video clip selected in the timeline, go to the 'Effect Controls' panel. If it's not visible, enable it through Window > Effect Controls.
Under 'Crop', you'll see options for 'Left', 'Top', 'Right', and 'Bottom'. These percentages represent the amount of cropping. For example, setting 'Top' to 10% will remove 10% from the top of your video.
Adjust these percentages to crop your video as desired. You can either click and type in a specific percentage or click and drag the number to adjust it.
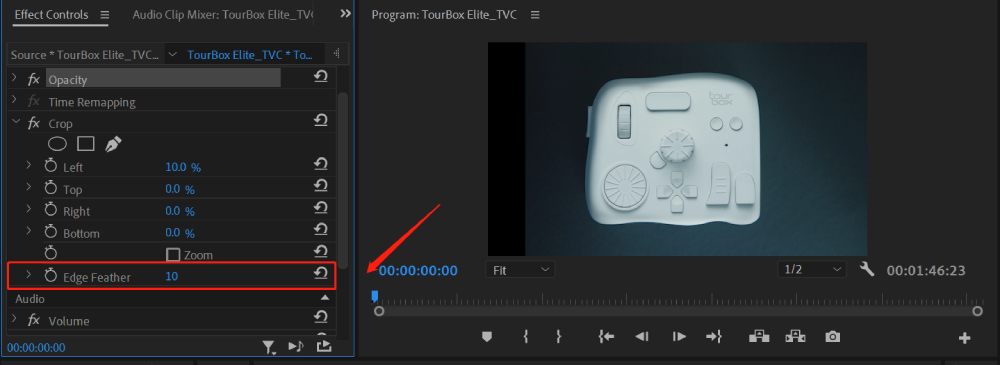
Step 5: Refine Your Crop
If you want to create a feathered edge on your crop, increase the 'Edge Feather' percentage. This will soften the edges of your crop, creating a gradient effect rather than a hard line.
You can also keyframe the crop effect to change over time. Move the playhead to where you want the effect to start, adjust your crop percentages, and click the stopwatch icon next to 'Crop' to create the first keyframe.
Move the playhead to where you want the effect to end, adjust the crop percentages again, and a new keyframe will be created automatically.

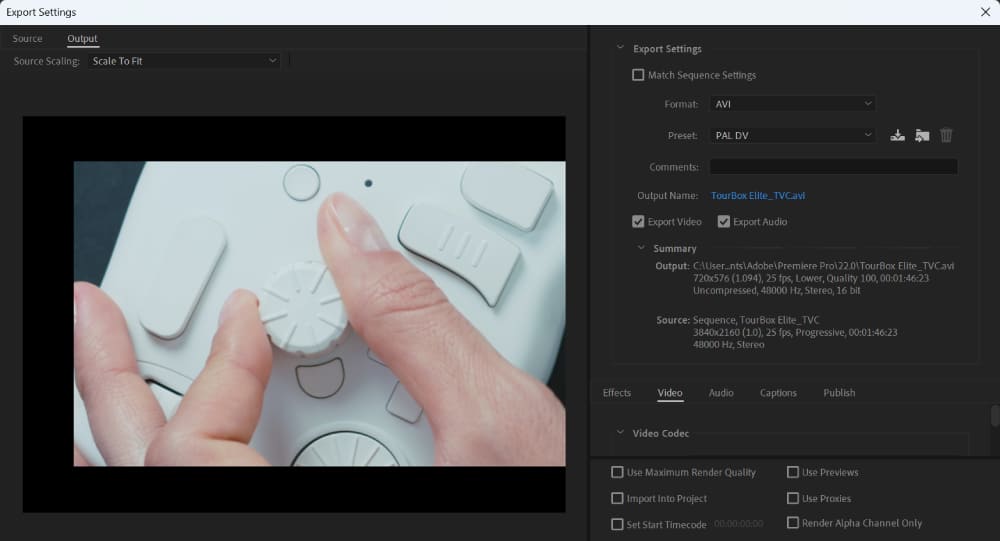
Step 6: Export Your Video
When you're happy with the crop, go to File > Export > Media.
In the export settings, choose your desired format and preset, then click on 'Output Name' to choose where to save your video and what to name it.
Click 'Export' to begin rendering your cropped video.
How to Resize a Video in Premiere?
Resizing videos in Adobe Premiere Pro is just as straightforward as cropping. Let's delve into the steps:
- Import Your Video: Start Premiere Pro and click on File > Import to choose your video.
- Create a New Sequence: Click File > New > Sequence to create a new sequence, or you can drag and drop your video onto the New Item button at the bottom of the Project Panel.
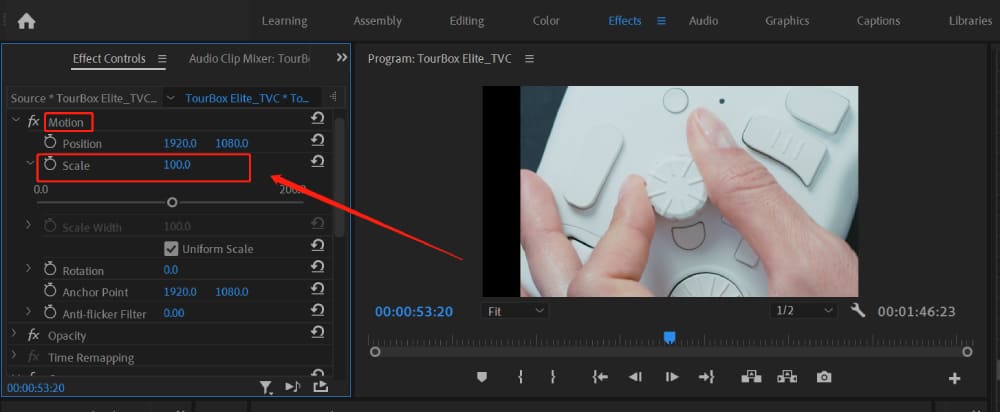
- Open the Effect Controls Panel: Click on the Effect Controls tab in the top left of the screen. If it's not visible, you can find it under Window > Effect Controls.
- Adjust the Scale: Under Video Effects, you'll see Motion. Click on it to expand the options. Here, you can adjust the Scale to resize your video.
Remember, it's important to maintain the aspect ratio of your video to prevent distortion.
Best Practices for Cropping Videos in Premiere
Cropping is more than just making your video fit a certain frame. It's a creative tool that, when used effectively, can enhance the viewer's experience. Here are some best practices for cropping in Premiere Pro:
- Align with the Rule of Thirds: This classic principle of visual composition suggests that an image should be divided into nine equal parts, and that points of interest should be placed along these lines or their intersections.
- Preserve Quality: Don't scale your videos too much. Extreme upscaling may degrade the quality.
- Maintain Aspect Ratios: Keep your video's aspect ratio consistent to avoid distortion. If you need to change it, do so with care and consideration for the final output.
Furthermore, if you're a content creator who needs to edit videos, it's crucial to consider the preferred video dimensions for the platforms on which you'll be publishing.
Here are the recommended video sizes for several major platforms, provided for your reference:
- YouTube: 16:9 aspect ratio, with a resolution of 1920x1080 pixels (1080p) or higher.
- Instagram: Square videos with a resolution of 1080x1080 pixels (1:1 aspect ratio) or vertical videos with a resolution of 1080x1920 pixels (9:16 aspect ratio).
- Facebook: Recommended aspect ratios include 16:9, 1:1, and 9:16, with resolutions varying between 720p and 1080p.
- Twitter: Landscape videos with an aspect ratio of 16:9 and a resolution of 1280x720 pixels (720p) or higher.
- TikTok: Vertical videos with an aspect ratio of 9:16 and a resolution of 1080x1920 pixels.
These are just the preferred video dimensions for reference, and it's always a good idea to check the specific requirements and guidelines of each platform to ensure the best viewing experience for your audience.
In addition, mastering the art of how to crop video in Premiere requires not only skill but also the right tools to enhance your workflow.

If you're looking to take your video editing experience in Adobe Premiere Pro to the next level, consider incorporating TourBox into your toolkit.
TourBox is a powerful and intuitive controller designed specifically for creative professionals like you.
By integrating TourBox into your editing workflow, you can enhance your productivity and achieve even more precise and efficient video cropping in Adobe Premiere Pro.
Explore the possibilities and elevate your editing skills with TourBox today.