How to Draw Dark Skin in Digital Art?
Many beginner artists find painting dark skin feels especially off and looks very unrealistic. So, how do you actually paint dark skin? Today, we'll tackle it by focusing on three key features of dark skin.

In this article, you will learn:
- Feature 1: Color Choice
- Feature 2: Influence of Surrounding Colors
- Feature 3: Light–Dark Contrast
- How to Draw Dark Skin in Digital Art?
Feature 1: Color Choice
When we paint people with yellow or light skin, we usually pick colors that lean orange-yellow. So should we do the same for dark-skinned people?
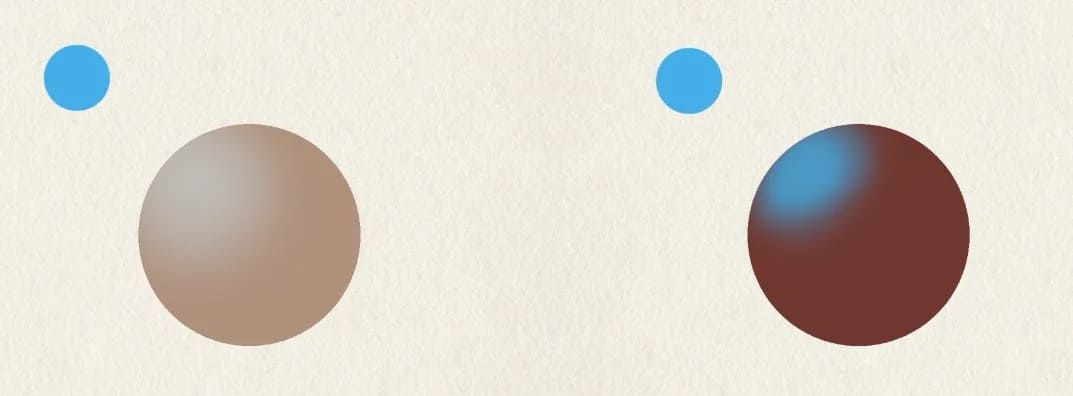
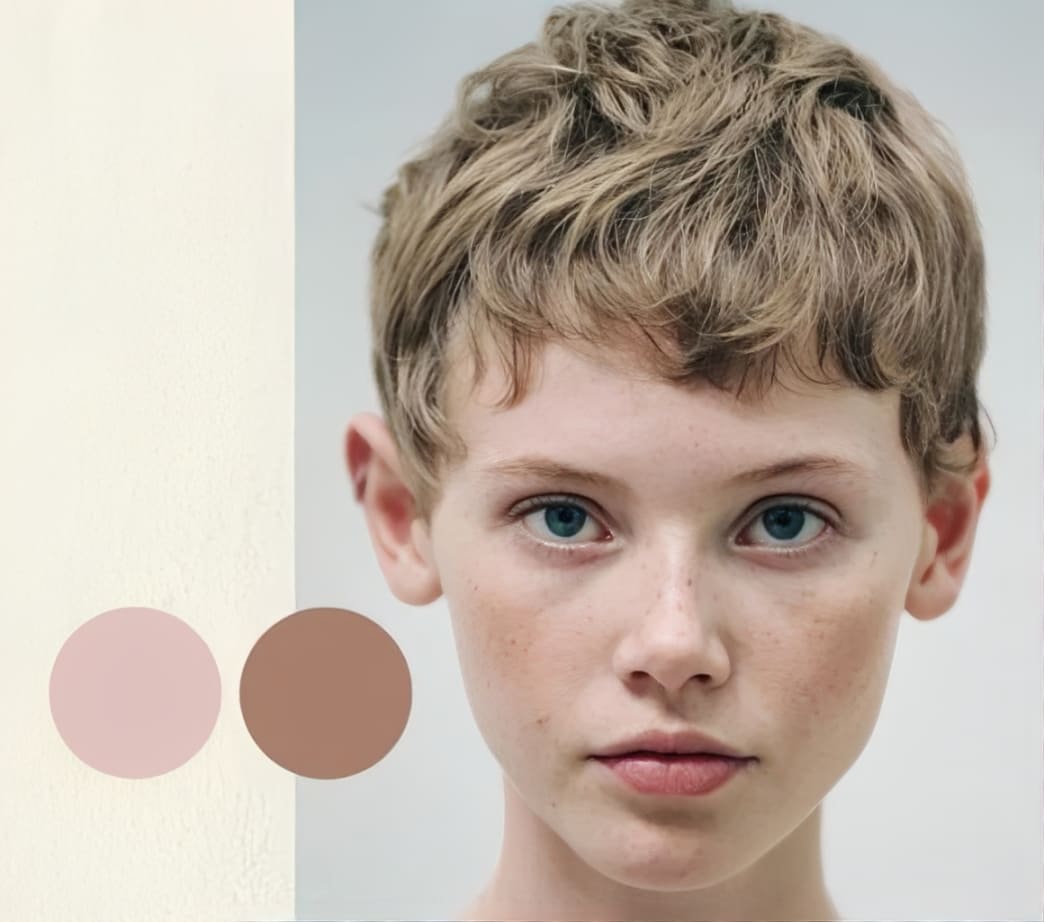
If we try to apply the light-skin color mindset to dark skin and use a lower-brightness brown, you'll find the skin shifts toward green, and the person looks very unhealthy. For example, with the three browns below, you can clearly see that the middle one (the second brown) is not a suitable choice for a skin tone.

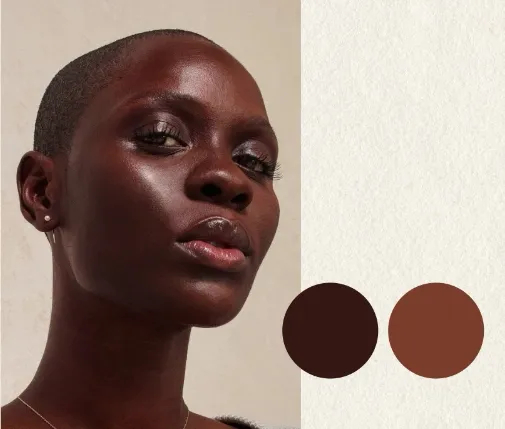
Actually, if we look at the skin tones of dark-skinned people, they usually show more red or purple undertones. So when painting dark skin, not every dark shade will work.
Feature 2: Influence of Surrounding Colors
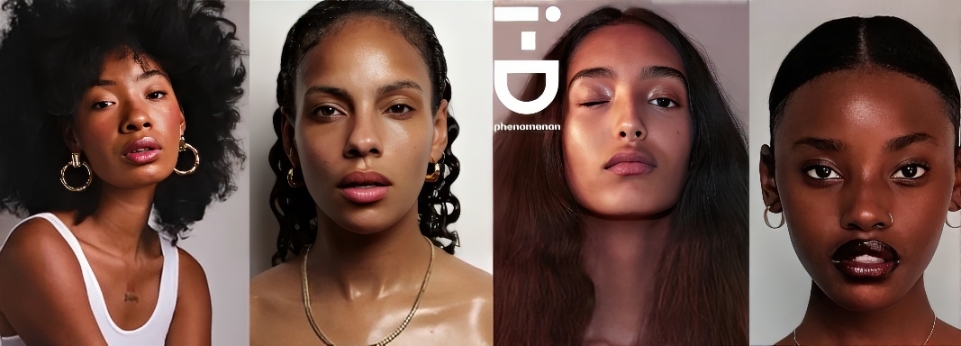
Compared to lighter skin, dark skin actually puts more emphasis on how light looks.
Especially the effects of ambient light and reflected light — they show up more clearly on dark skin. In photos like the one below, you can really notice the purple and blue tones reflected on the face.
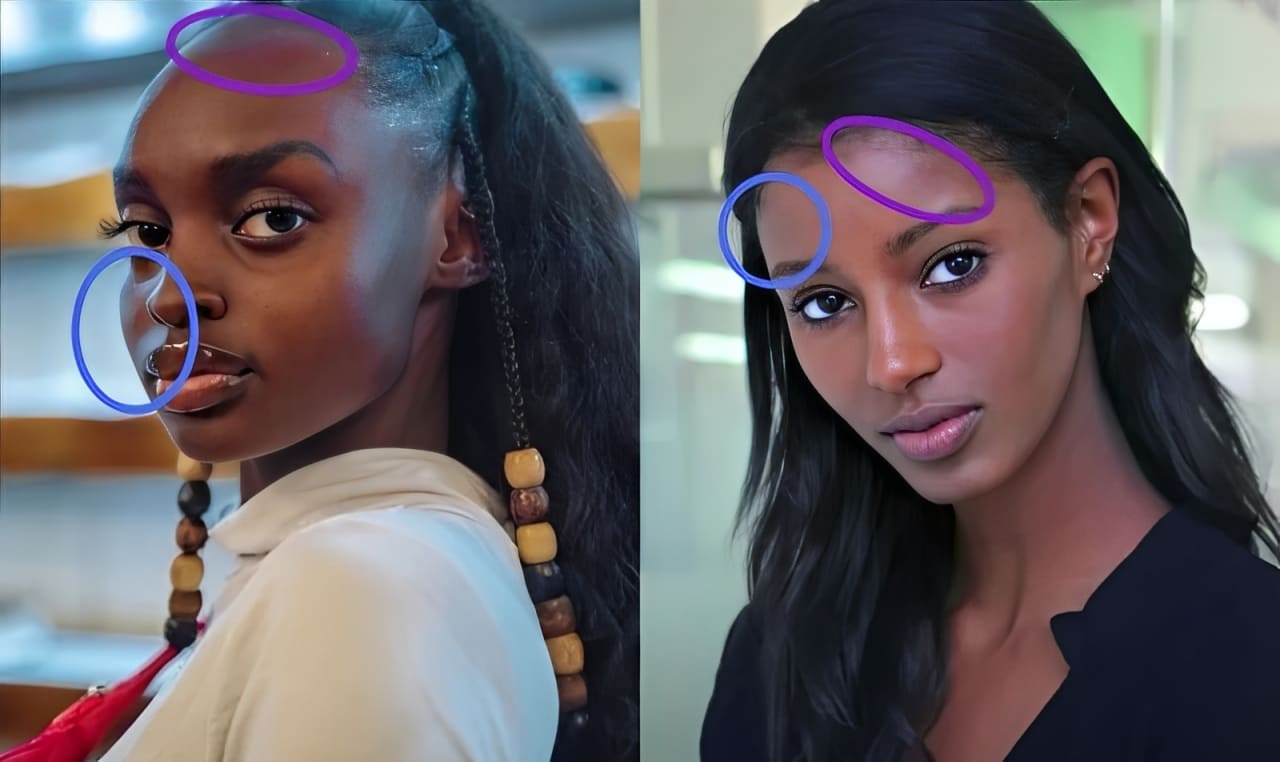
So when you paint dark skin, try to use brushstrokes to emphasize how the surrounding light colors appear on the skin, rather than just changing the value of the base color.

Feature 3: Light–Dark Contrast
Next, let's compare the feel of light skin and dark skin. Which do you think has higher contrast?
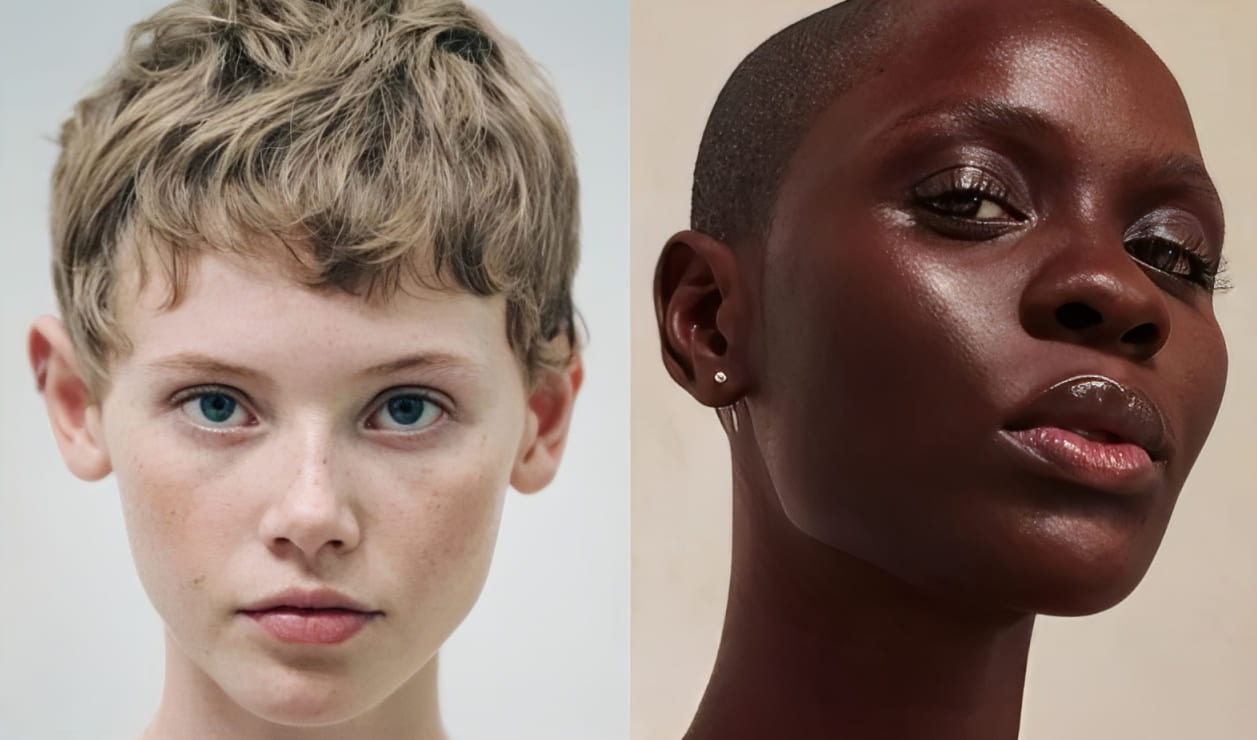
Light skin is softer and more matte than dark skin. Its highlights are usually subtle, and the overall contrast is low.
But the side-to-side brightness contrast on light skin can be quite strong.
Dark skin is the opposite. It looks shinier than light skin. Many highlight shapes, and the edges of bright areas are shown more clearly.
Because of the base skin tone, the light–dark contrast on the sides of dark skin tends to look weaker.
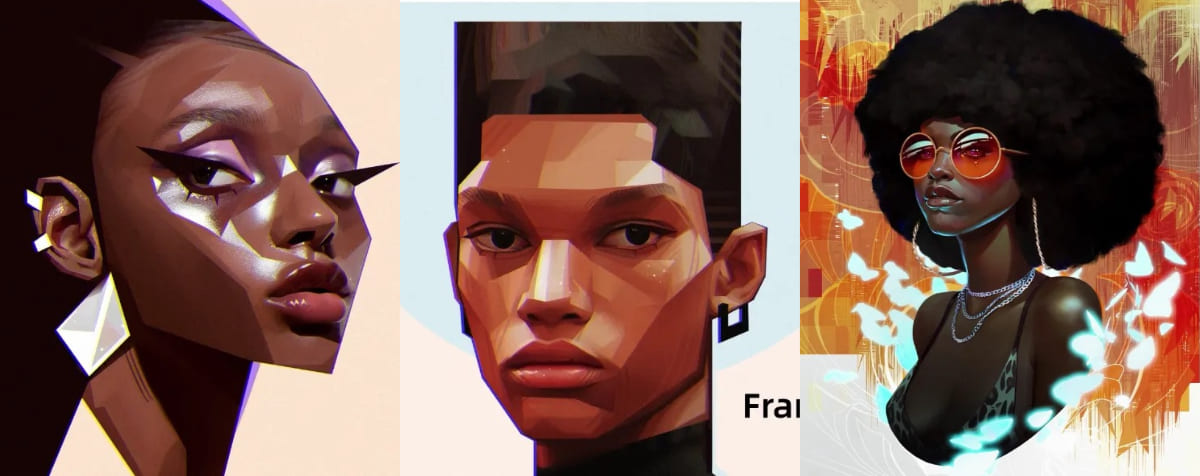
Look at the dark skin in the work of well-known digital artists — almost all of them capture this trait.
How to Draw Dark Skin in Digital Art?
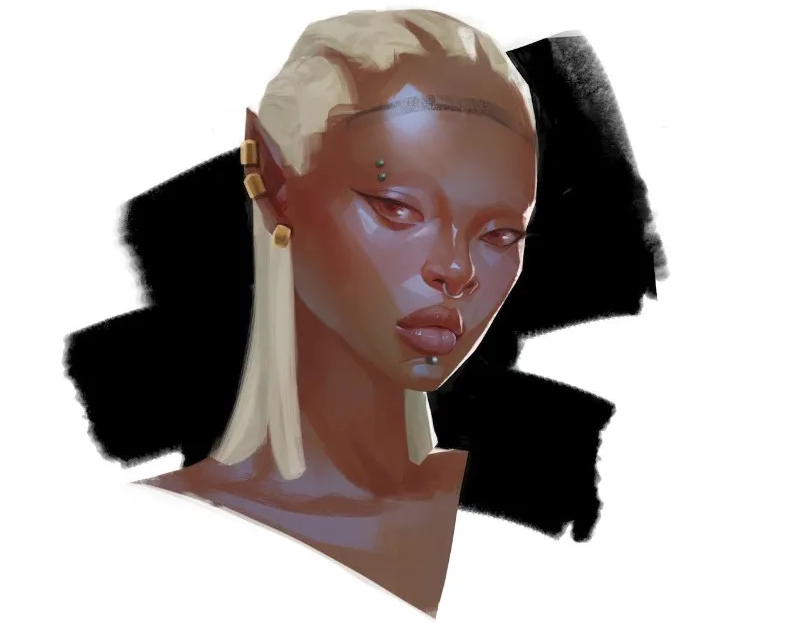
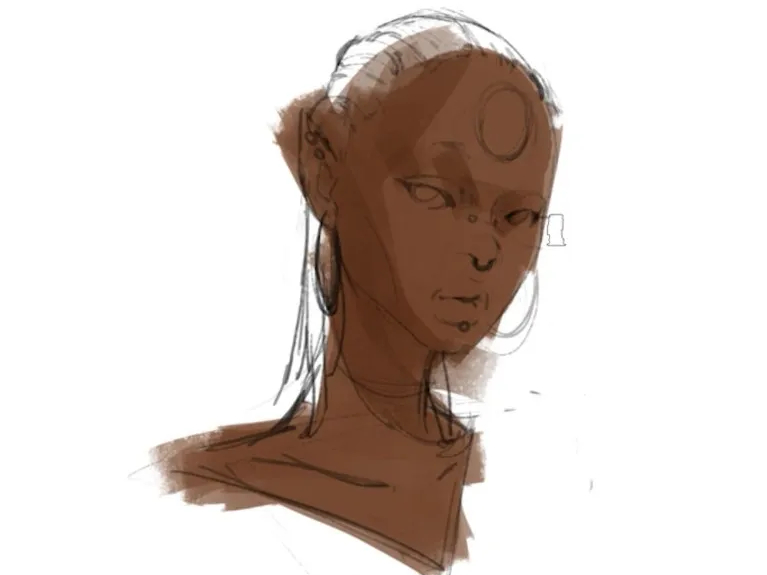
Based on the three features above, let's try painting a dark-skinned character in digital art.
First, pick a reddish brown and paint the base color. We recommend using a square brush. It helps add texture and detail and makes it easier to control brush edges.
Quick ad break. If you often find switching brushes, changing layers, and rotating the canvas tedious, and it interrupts your creative flow, a TourBox might give you a more efficient and smoother workflow.

You can map common tools and shortcuts from your creative software to TourBox's physical buttons and dials. TourBox also includes many built-in features to help you create better. If you work on a tablet, consider our Elite Plus model.

For more info on using TourBox in digital art, please visit our Digital Painting page to learn more.
Next, follow the face's skin color temperature and paint using the Overlay mode. It's okay to paint a bit heavier. You can always adjust the skin layer's opacity later.
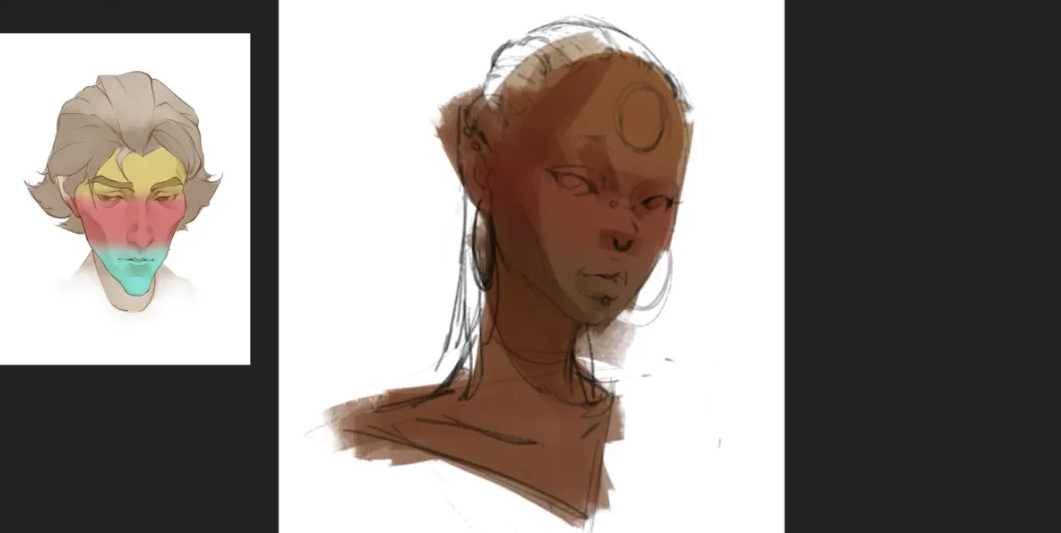
For the rules about face skin color temperature, please check our other blog post on how to paint skin. It explains this in detail.
Further Reading:
Then set the main light to a cool color. This both enriches the image and shows the reflected light on dark skin. Be bold and paint the colors openly!
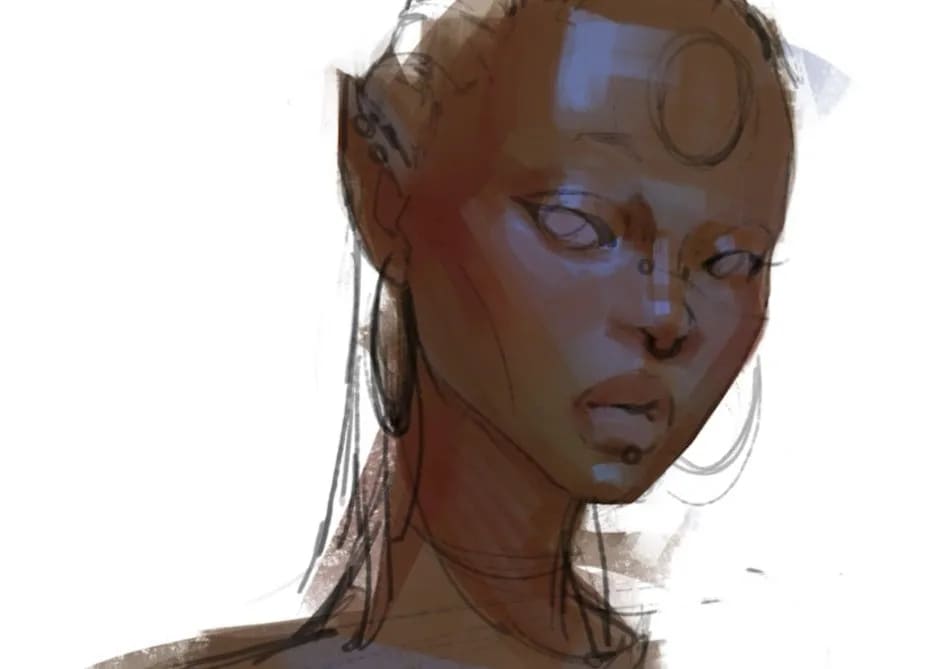
After that, keep adjusting the face shapes and the shapes of the highlights. Make the details a bit more specific. At least one or two highlight edges should be clear. You can softly blend the rest.
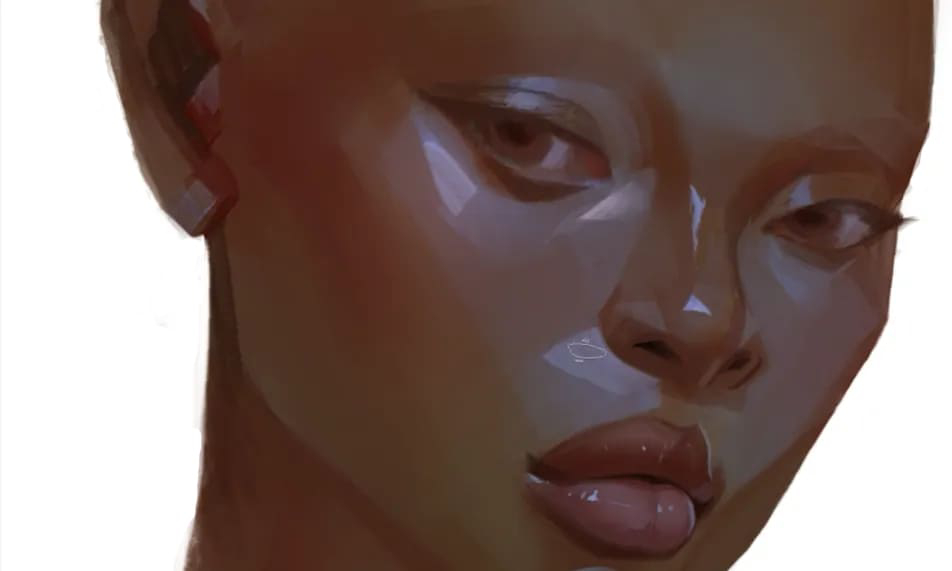
Finally, make final tweaks and add some facial decorations, and you're almost done! Let's look at the final image!