A Comprehensive Tutorial for Fading Out Audio in Premiere Pro
Have you ever experienced the frustration of audio abruptly cutting off at the end of your videos?
Don't worry, you're not alone. Seamless audio fading is a vital technique in video editing that adds that professional touch to your projects.
Whether you're creating a captivating narrative, a dynamic vlog, or a polished commercial, knowing how to fade out audio smoothly can make all the difference.
In this comprehensive tutorial, we'll guide you through the step-by-step process of how to fade out audio in Premiere.
Say goodbye to jarring audio endings and hello to smooth transitions that keep your viewers engaged.

In this article, you will learn:
- What Is the "Fade Out Audio" Effect?
- How to Fade Out Audio in Premiere?
- Pro Tips for Fading Out Audio in Premiere
- Final Thoughts About Fading Out Audio in Premiere Pro
What Is the "Fade Out Audio" Effect?
In the realm of video editing, the "fade out audio" effect is a technique that gradually decreases the volume of an audio clip, creating a smooth and seamless transition from audible sound to silence.
The primary function of a fade-out audio effect is to provide a natural and pleasing conclusion to your videos. By gradually reducing the volume, it avoids abrupt audio endings that can disrupt the overall viewing experience.
This effect helps to create a sense of closure, allowing your video to conclude gracefully without jarring interruptions.
The fade-out audio effect finds its application in various video editing scenarios. Here are some examples:
- In narrative storytelling, it can be used to signal the end of a scene or chapter, smoothly transitioning to the next segment.
- In music videos, it adds a polished touch to the final moments of a song, creating a satisfying conclusion.
- In documentaries or interviews, a fade-out audio effect can be employed to subtly fade out background music or ambient sounds, focusing the viewer's attention on the dialogue or narration.
By harnessing the power of the fade-out audio effect, you can elevate the overall quality of your video projects, ensuring a seamless and professional viewing experience.
So, whether you're a beginner or an experienced video editor, mastering this technique is essential for creating captivating content that leaves a lasting impact on your audience.

How to Fade Out Audio in Premiere?
In this section, we will guide you step by step on how to fade out audio in Adobe Premiere Pro.
Further Reading:
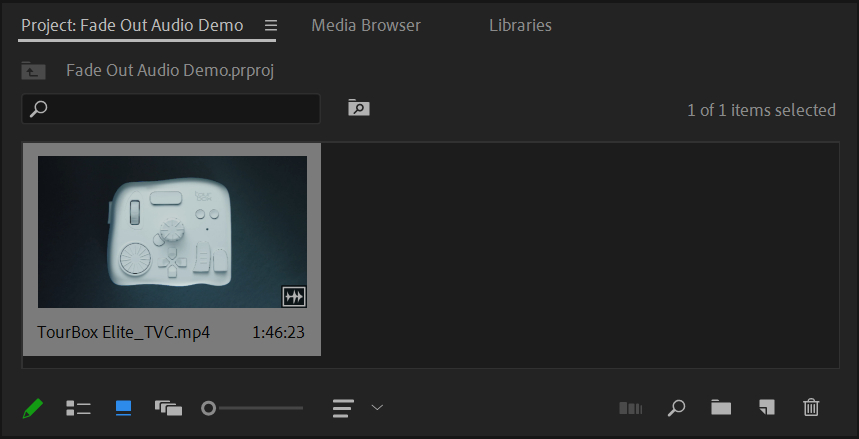
Step 1: Import Your Clip
To start, launch Adobe Premiere Pro on your computer and create a new project.
Click on File > New > Project from the top menu. Name your project, choose the location, and click OK.
To import your clip:
- Click on File > Import.
- Navigate to the location of your video clip, select it, and click Open.
- Your video file will now appear in the Project panel.
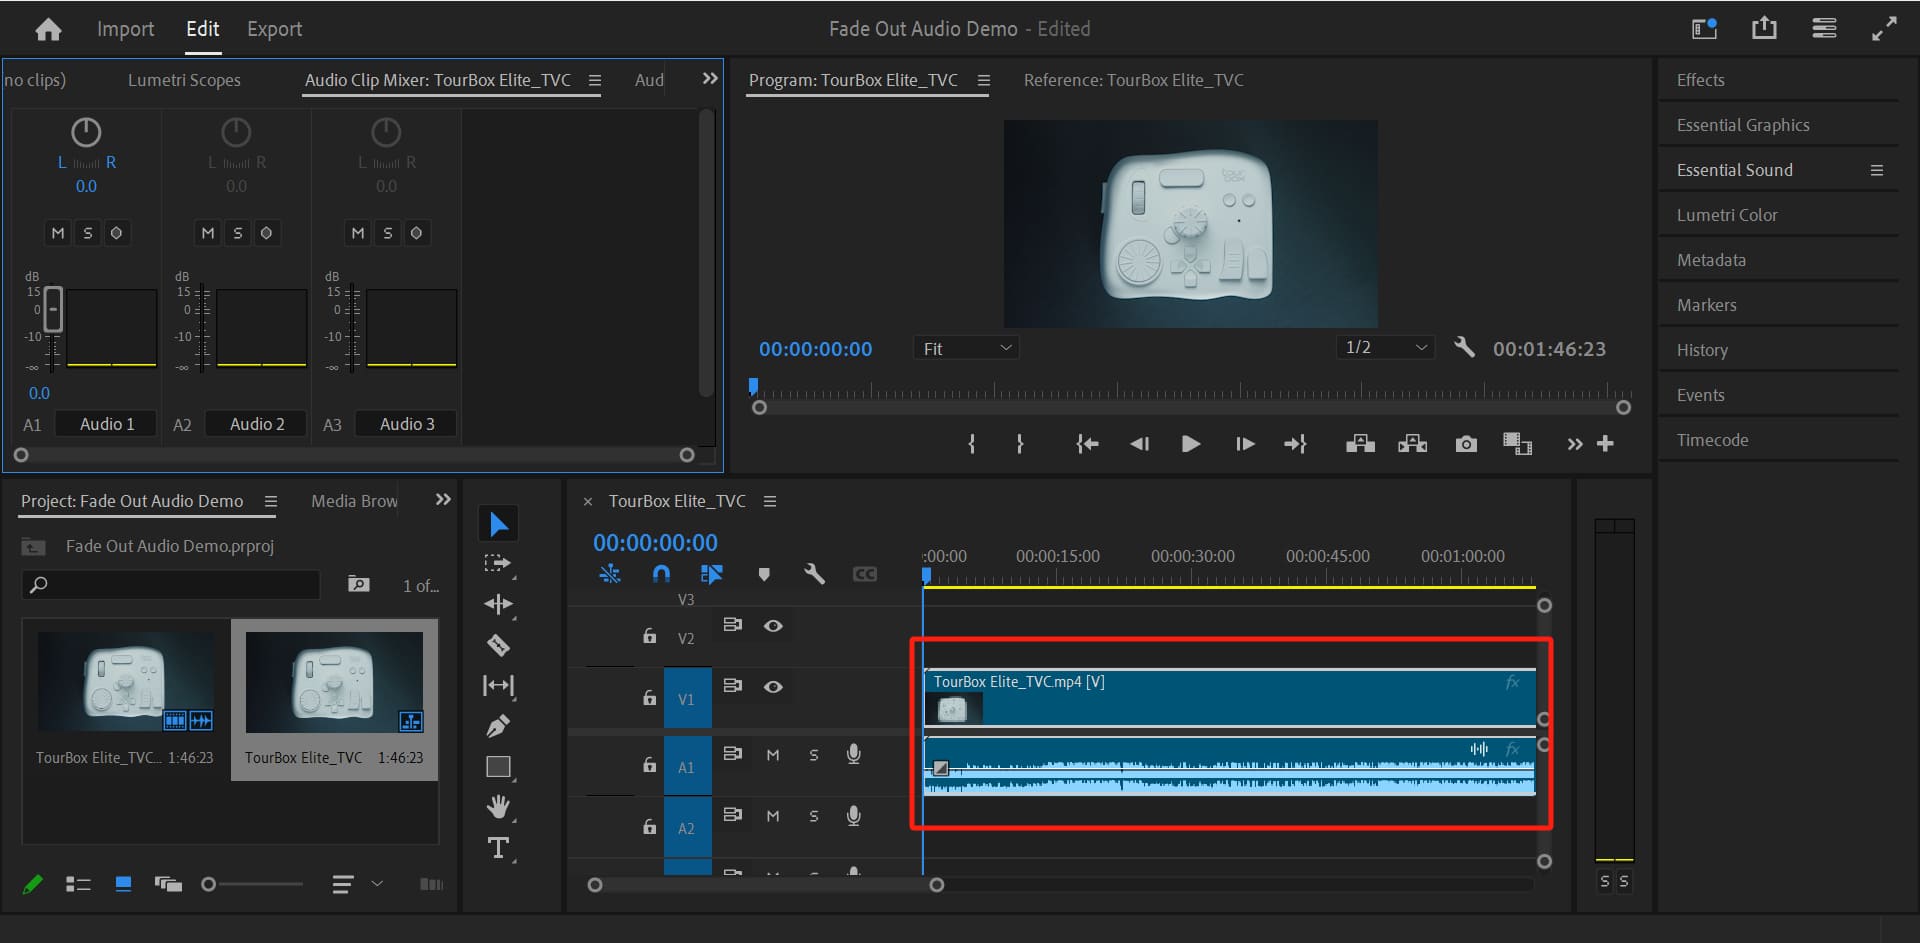
Step 2: Add Your Video Clip to the Timeline
Now that you have imported your video clip, it's time to add it to the timeline.
Click and drag the video file from the Project panel to the Timeline panel.
Further Reading:
Step 3: Fade Out Audio
Here, we will explore two methods to achieve a fade-out effect for video volume:
- Volume Keyframe
- Custom Fade on the Audio Track
- Crossfade Effect
Method 1: Volume Keyframe
Keyframes are points where you specify changes in your clip volume. We will use two keyframes to create a fade-out effect.
In the Effect Controls panel, click on the triangle next to the Volume to expand the volume controls.
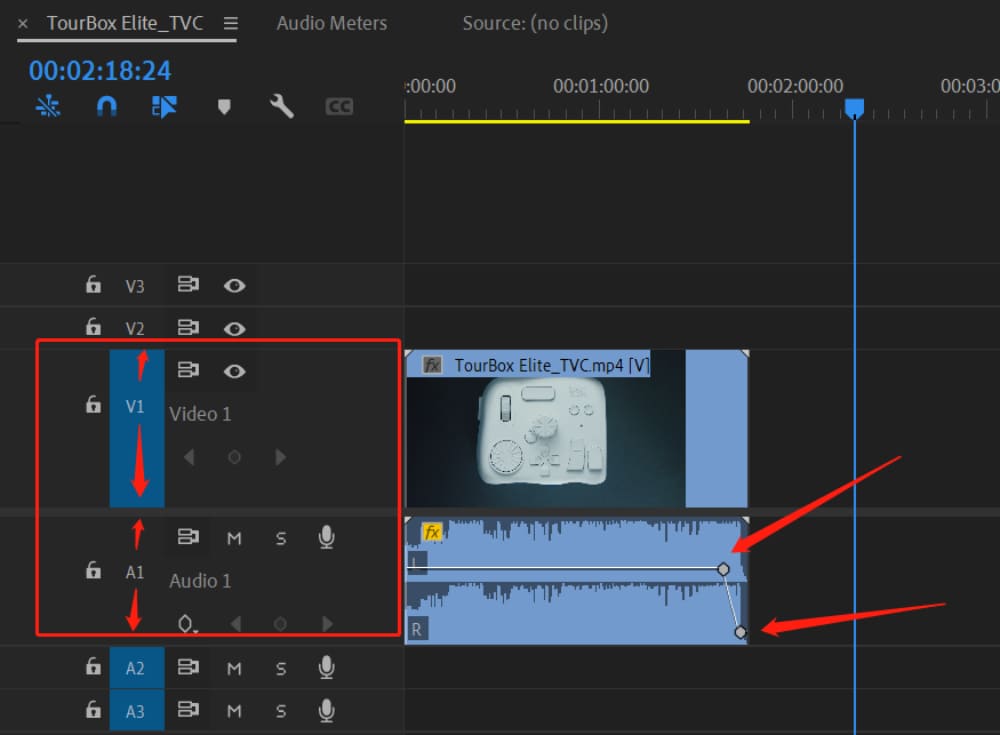
Select the Clip on your timeline. Position the playhead at the point where you want the fade-out to start.
Click on the stopwatch icon to the left of "Level" (Toggle Animation), and you'll notice an "Add/Remove Keyframe" icon appearing on the right side of Level. This is where you can create your first keyframe, which marks the starting point for decreasing the audio volume.
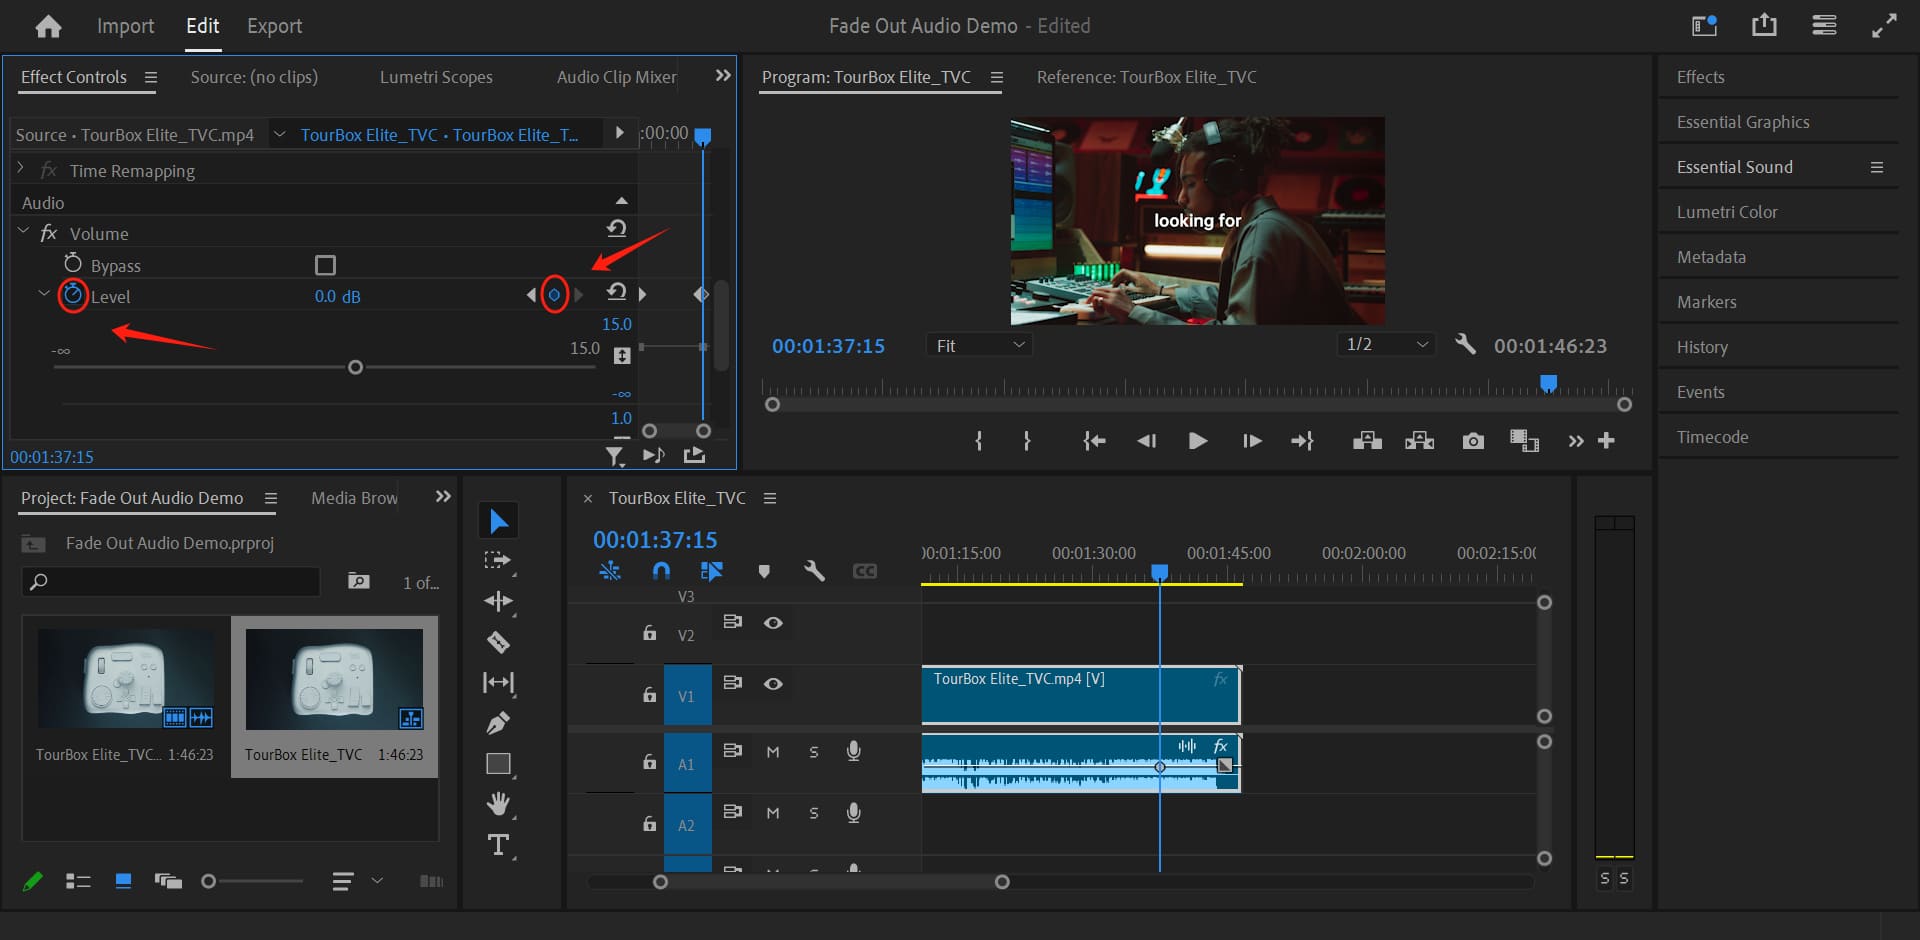
Move the playhead to where you want the fade out to end (usually the end of the clip).
With the playhead in the desired position, lower the Level (dB) to your preferred final volume, typically this would be -∞ for a complete fade out. As you do this, a second keyframe will be automatically created.
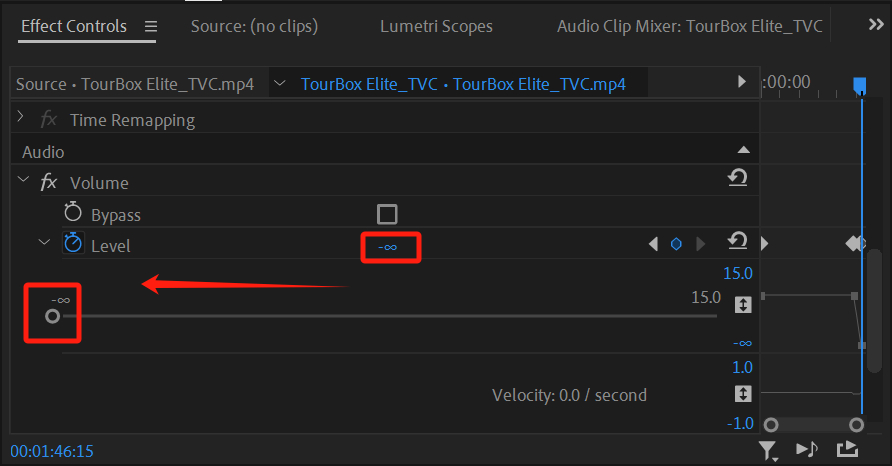
When we zoom in on the timeline, we can observe two keyframes on the audio track along with a curve depicting the volume changes.
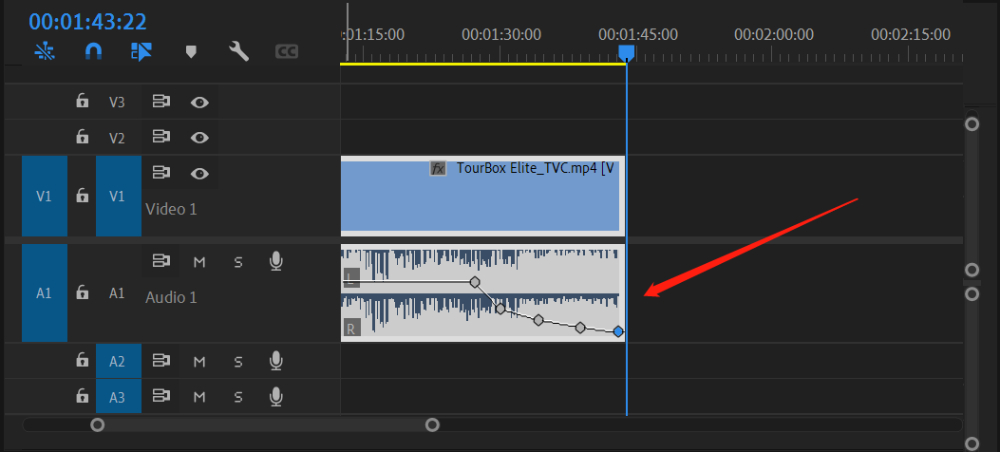
You can adjust the fade-out effect to suit your preferences.
To adjust the length of the fade out, click and drag the second keyframe towards or away from the first keyframe. To adjust the volume at any point, click on the keyframe and drag it up or down.
Furthermore, we can take it a step further by inserting multiple keyframes on the audio track using the aforementioned method.
By adjusting the position of these keyframes, we can modify the curve of the volume changes. Refer to the illustration below:
Method 2: Custom Fade on the Audio Track
Shift your attention to the audio track on the timeline. You'll notice small square handles at the beginning and end of the audio track.
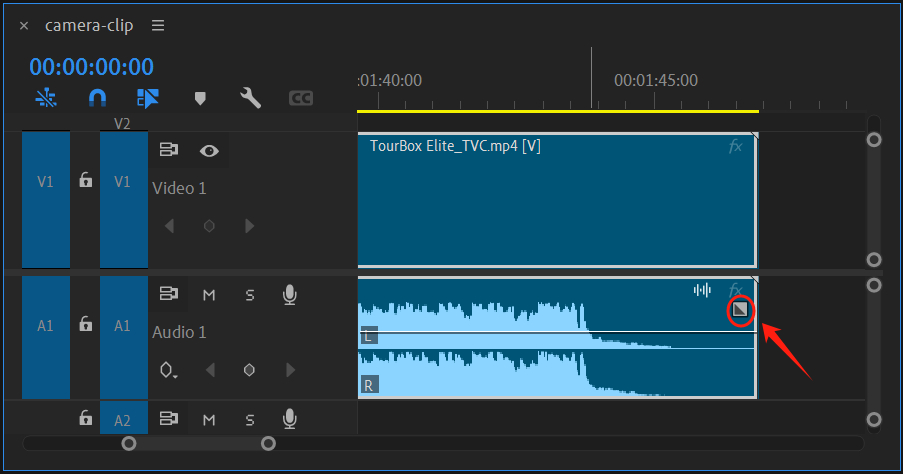
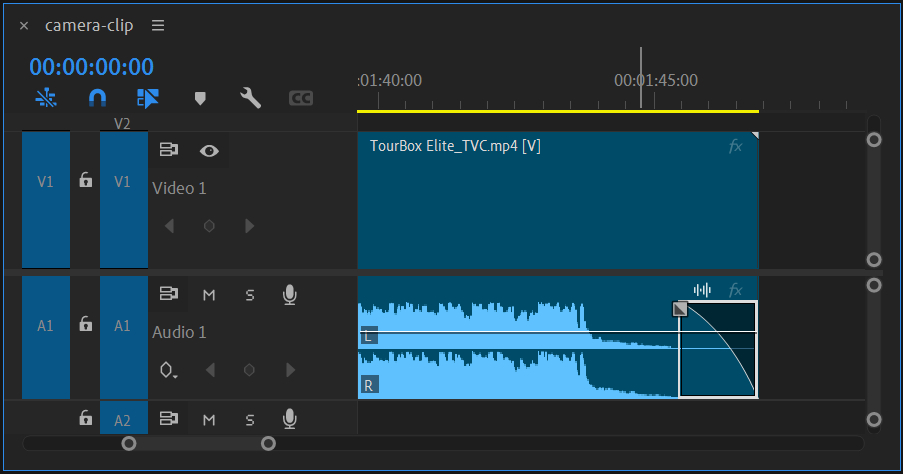
You can achieve custom fade-in and fade-out effects by clicking and dragging these two handles.
To make it even better, while doing so, you can hold down the Alt/Option key to fix either the duration or the shape of the fade. Give it a try, and you'll discover that this method of fading out audio is both convenient and straightforward.
Method 3: Crossfade Effect
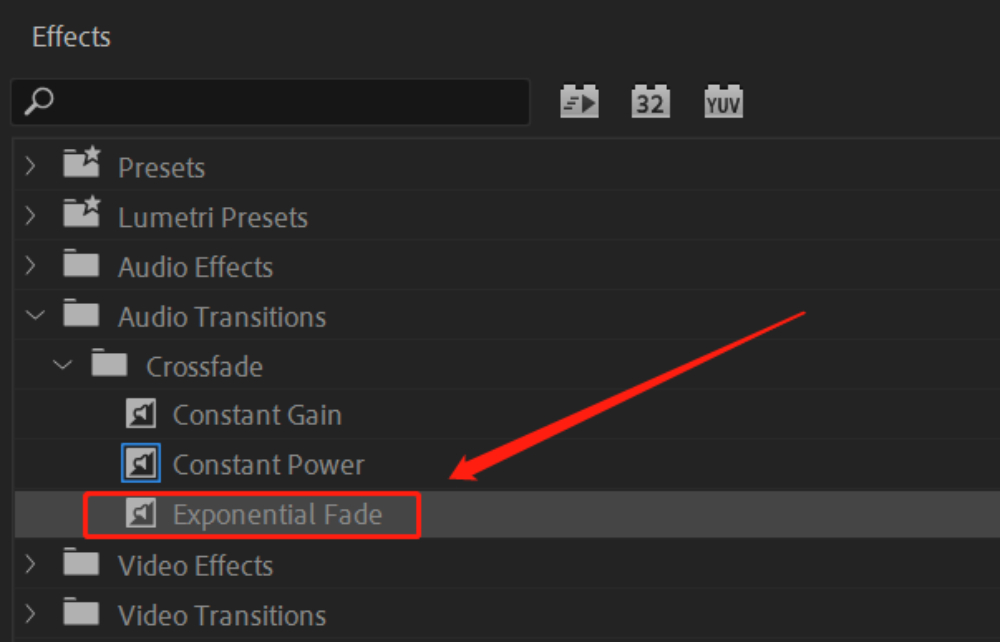
In Adobe Premiere Pro, you can also add audio fade-in and fade-out transitions using the Crossfade effect in the Effects panel. Look for Crossfade in the Effects panel, and you'll see three options in its dropdown list:
- Constant Gain: It changes the audio at a constant rate when transitioning between clips. If you use Constant Gain for fading out audio, it may sound abrupt.
- Constant Power: It creates a smooth, gradual transition, similar to a Dissolve transition between video clips.
- Exponential Fade: It fades out the first clip and fades in the second clip using a smooth logarithmic curve.
Extra Tip:
Constant Gain is not a great choice. If you want the transition to be as smooth as possible, we recommend using Constant Power. If you need a more dramatic effect, you can try Exponential Fade.
Let's take Exponential Fade as an example. Exponential Fade is commonly used to achieve a fade-in or fade-out effect for audio or music. Here are the steps to fade out the volume of a video using this effect:
Navigate to the "Effects" panel on the right-hand side. If you don't see this panel, go to "Window" > "Effects" to enable it.
In the "Effects" panel, either type "Exponential Fade" in the search bar or browse through "Audio Transitions > Crossfade > Exponential Fade".
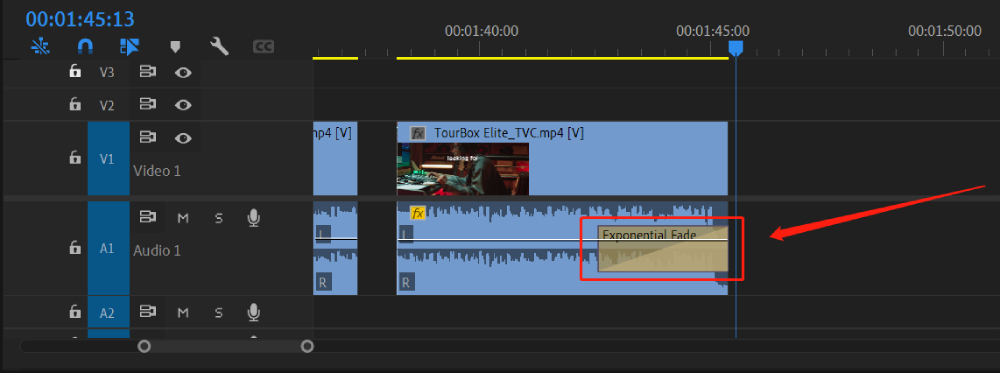
Once you find it, drag and drop Exponential Fade onto the audio track. Keep in mind that Exponential Fade can only be placed at the beginning and end of the audio section.
Therefore, if you're editing a complete video but only want to apply the audio fade-out effect to specific segments, you may need to use the Razor Tool to split the clips beforehand.
If you place Exponential Fade at the beginning of the audio track, it will create a fade-in effect. Placing it at the end of the audio track will result in a fade-out effect.
Here, we'll drag the Exponential Fade effect to the end of the clip. Zooming in on the audio track, you'll see that Exponential Fade has been added.
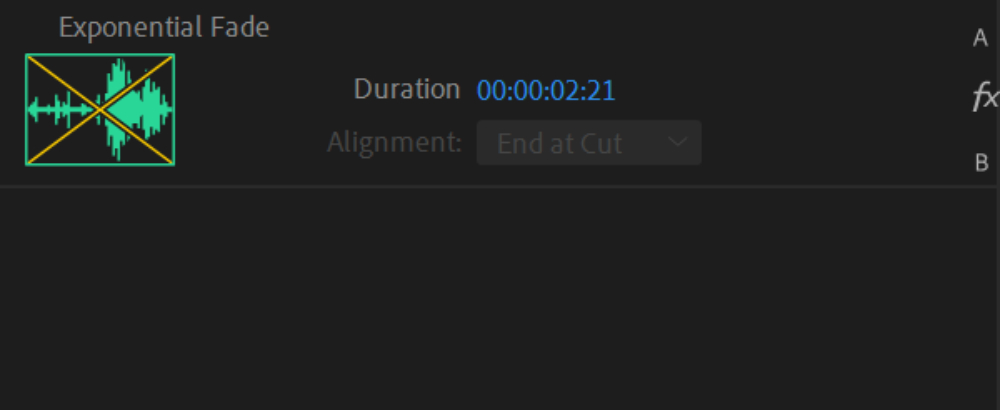
To adjust the duration of the fade-out, click and drag the edges of the transition. You can also click on the gradient icon and modify the fade duration in the effect controls located in the top-left corner.
And there you have it! You've successfully created a fade-out effect on your audio clip in Adobe Premiere Pro.
Pro Tips for Fading Out Audio in Premiere
Now that we've covered the basics of how to fade out audio in Premiere, let's delve into a few expert tips that can make your audio transitions even more seamless:
- While keyframes are crucial for customizing your fade out, remember that less is more. Too many keyframes can make your fade out sound choppy or unnatural.
- Consider trying Constant Power or Exponential Fade for different sonic effects. These can often provide a more natural-sounding fade-out, especially for music tracks.
- Always listen to your fade out in the context of your entire video. Sometimes, a fade-out that sounds perfect on its own might be too slow or too fast when paired with your visuals. Don't be afraid to tweak your fade out until it feels just right.
In addition to the mentioned techniques, we'd also like to recommend a creative tool designed specifically for digital content creators and editing enthusiasts: TourBox.

By combining the powerful features of Premiere Pro with the efficiency of TourBox, you can streamline your workflow, allowing more time to focus on the creative aspects of your projects.
With simple setup, you can easily press the buttons on TourBox to quickly apply audio Crossfade transitions. Scaling the audio timeline is also a breeze. Most importantly, you can accomplish all of these tasks with just one hand controlling TourBox.
Visit our video editing page to learn how TourBox simplifies every step of the video editing process.
Final Thoughts About Fading Out Audio in Premiere Pro
In this tutorial, we've covered how to fade out audio in Premiere Pro. We shared three methods, and you can choose one based on your preferences and workflow to add an interesting fade-out audio effect to your videos.

If you're interested in TourBox, consider our cost-effective option, TourBox Lite. You'll definitely love the operational experience it brings.
As you continue with your video editing journey, consider adding TourBox to your toolkit. After all, your goal is not just to edit faster but to edit smarter.