How to Freeze Frame in DaVinci Resolve?
Freeze frames can add drama and impact to your video projects. DaVinci Resolve makes creating freeze frames easy.
In this step-by-step tutorial, you will learn how to freeze frame in DaVinci Resolve. By the end, you’ll have the skills to enhance your video projects effortlessly. Let's dive in!
Prerequisites
- Download and install DaVinci Resolve on your computer. You can find the latest version of the software on the official website.
- Import the video clip you want to edit into DaVinci Resolve by dragging and dropping it on the Media Pool.

In this article, you will learn:
How to Freeze Frame in DaVinci Resolve?
Creating a freeze frame is a powerful technique that can help you add impact to your video projects. Whether creating a music video, a promotional video, or a short film, a freeze frame can be a great way to grab your audience's attention.
In this section, we'll teach you how to freeze frame in DaVinci Resolve so that you can add this essential technique to your video editing toolkit.
Further Reading:
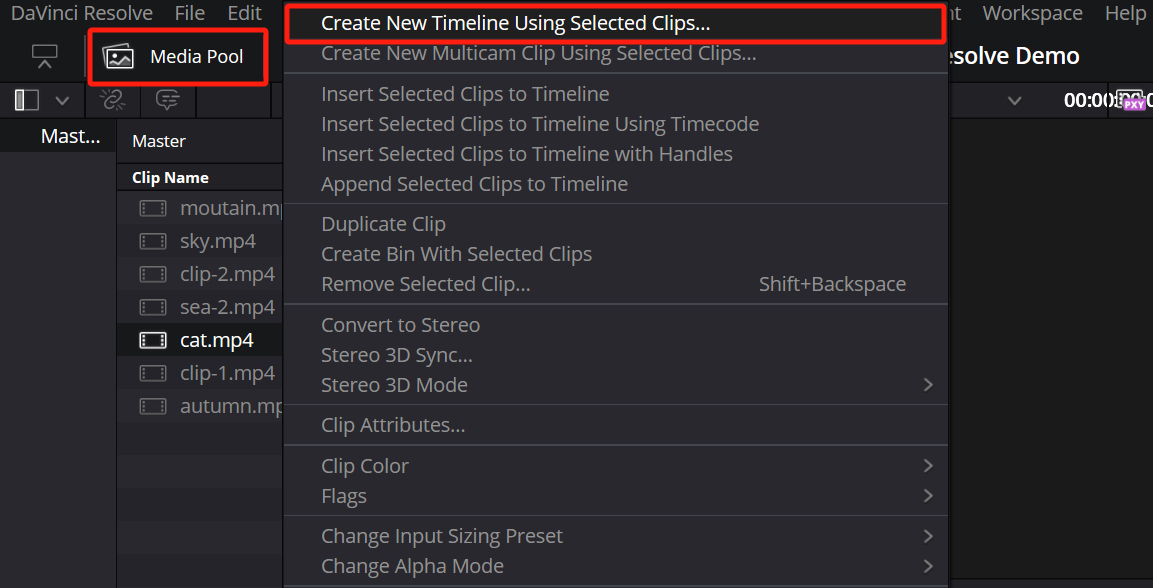
Step 1: Create a New Timeline
- Open DaVinci Resolve, and go to the Edit page by clicking on the "Edit" button at the bottom of the screen.
- In the Media Pool, right-click on your video clip and select "Create New Timeline Using Selected Clip".
- This will automatically create a new timeline with the video clip, ready for editing.
Step 2: Locate the Frame to Freeze
- Use the Playback Controls under the Timeline Viewer to play your video and find the exact frame you want to freeze.
- Once you've found the desired frame, pause the playback and use the Previous Frame and Next Frame buttons to fine-tune your selection.
- Note the exact timecode of the frame you want to freeze, which is displayed in the Timeline Viewer. We will use this timecode later.
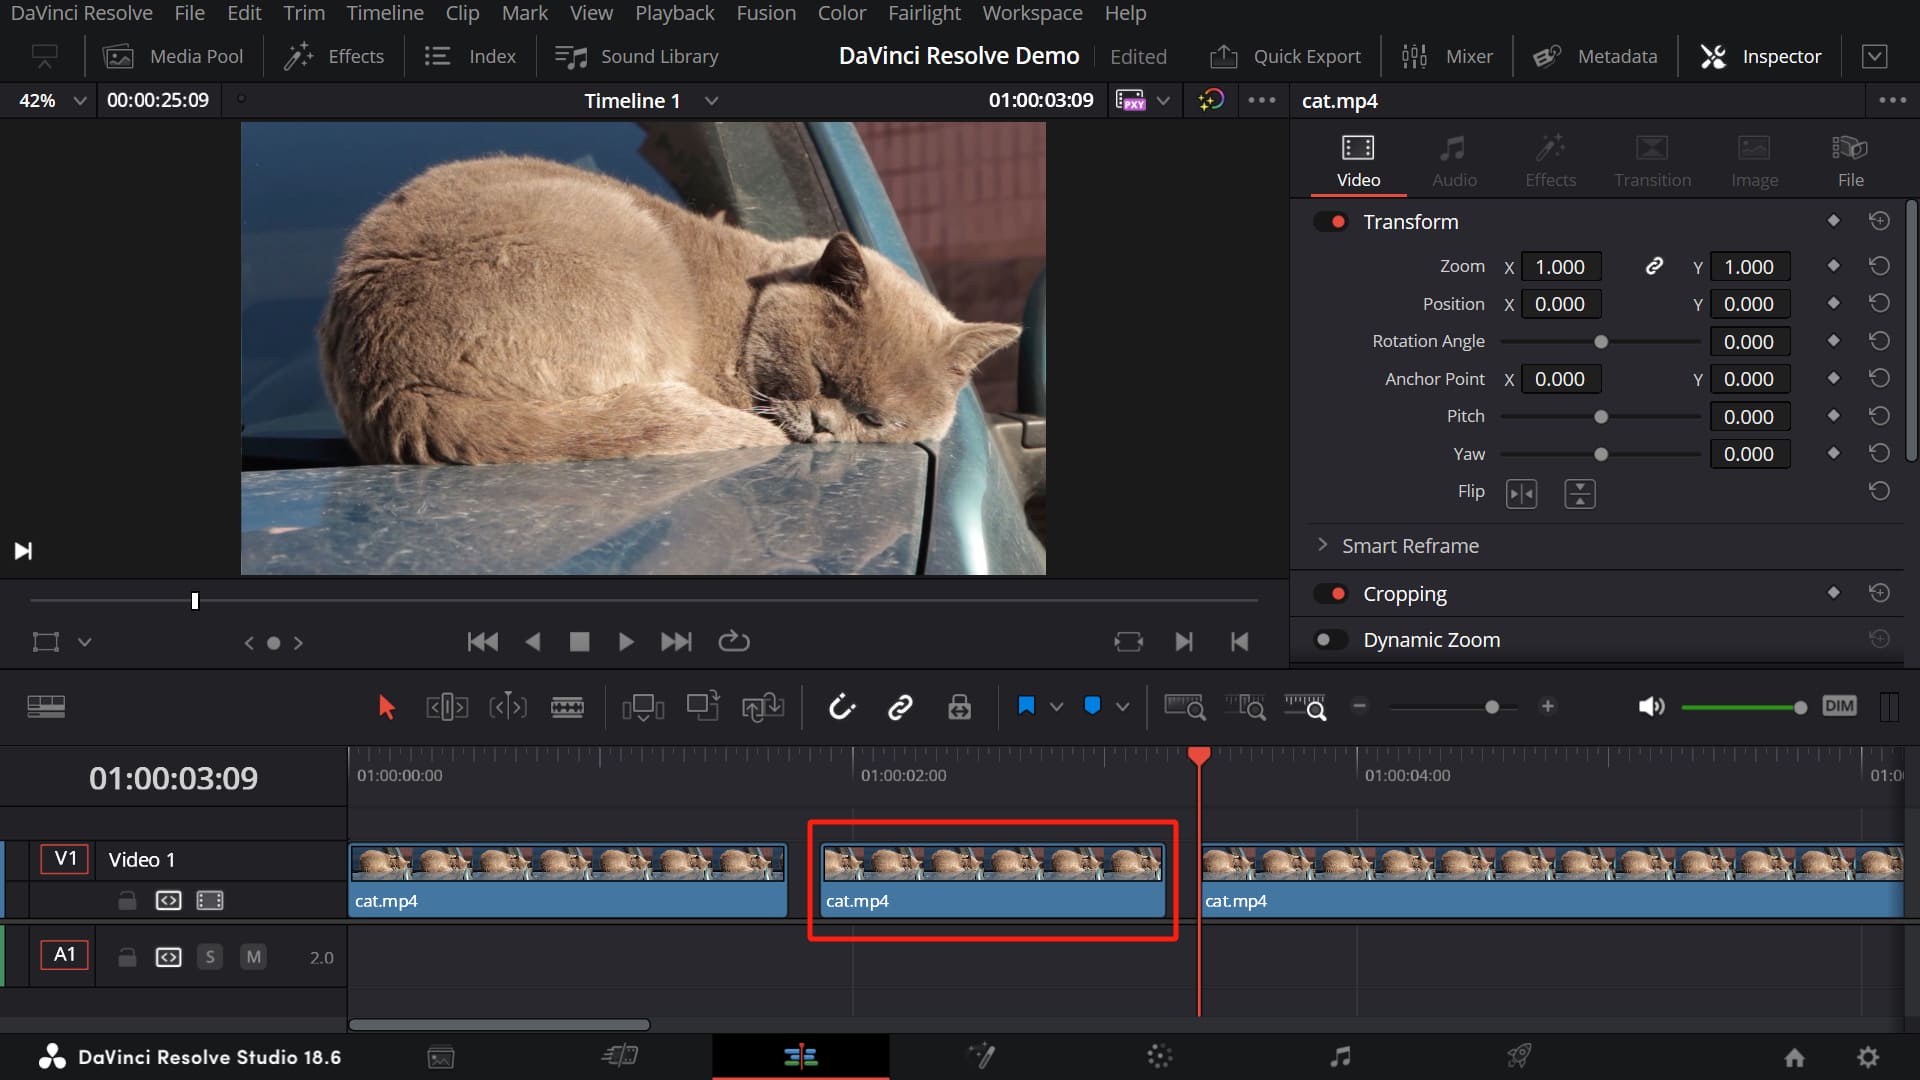
Step 3: Split the Video Clip at the Freeze Frame
- Move the "playhead" (the vertical red line) to the exact timecode of the frame you want to freeze.
- Select the video clip in the timeline by clicking on it.
- Press "Ctrl"+"B" (Windows) or "Cmd"+"B" (Mac) to split the clip at the playhead's position.
- You should now have two separate clips in the timeline, with the desired freeze frame at the beginning of the second clip.
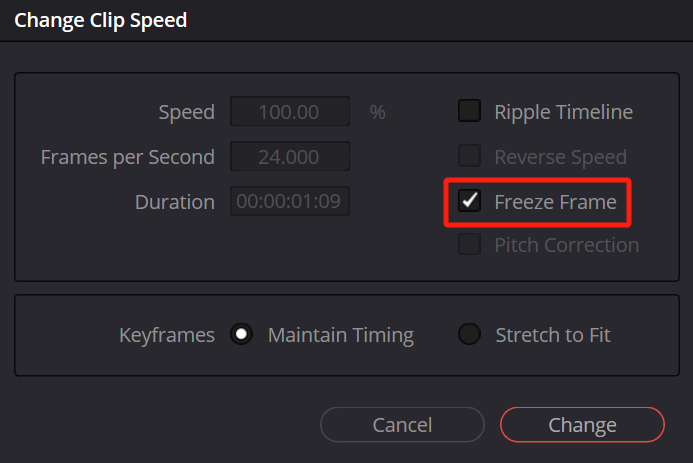
Step 4: Add the Freeze Frame
- Right-click on the second clip in the timeline and select "Change Clip Speed" from the context menu.
- In the Change Clip Speed window, check the Freeze Frame checkbox.
- Click Change to apply the freeze-frame effect.
- This will create a still image from the first frame of the second clip, effectively freezing the frame.
Step 5: Adjust the Duration of the Freeze Frame
By default, the freeze frame will have the same duration as the original video clip. To change the duration, click and drag the edge of the freeze frame clip in the timeline. You can extend or shorten the duration as needed.
Step 6: Export Your Video
- Once you're happy with your freeze frame, go to the Deliver page by clicking on the "Deliver" button at the bottom of the screen.
- Choose your desired export settings, such as format, resolution, and file name.
- Click on "Add to Render Queue" and then "Render All" to export your edited video with the freeze frame effect.
Let's take a quick look at how to freeze frames in DaVinci Resolve by watching the following YouTube video (made by Nomadic George).
Tips for Using DaVinci Resolve
If you're new to video editing, the sheer number of tools and features in DaVinci Resolve can be overwhelming. However, with the right approach, you can quickly become a pro and produce stunning videos that capture your audience's attention.
In this section, we'll cover some tips and tricks to help you get the most out of DaVinci Resolve and take your editing skills to the next level. So let's explore some of the best tips for using DaVinci Resolve!
- Master the Keyboard Shortcuts: Keyboard shortcuts can significantly speed up your editing workflow. Take the time to learn and master the most commonly used shortcuts.
- Stay Organized with Timelines, Bins, and Labels: Keeping your project organized is essential for efficient editing. Use multiple timelines for different sections or versions of your project.
- Try TourBox: TourBox is a controller that helps you work more efficiently in DaVinci Resolve. It has customizable buttons, dials, and wheels that you can program to do different tasks, which can save you time and help you focus on your creativity.

Congratulations! You've now learned how to freeze frame in DaVinci Resolve. This simple yet powerful technique can add impact and creativity to your videos, and by following the steps outlined in this article, you can easily integrate freeze frames into your video editing workflow.
But that's just the beginning. As you continue to explore DaVinci Resolve, you'll discover a wealth of features and tools that can help you take your videos to the next level. From color grading to audio effects, there's always something new to discover and learn.
So keep experimenting, keep practicing, and never stop learning. With dedication, passion, and a bit of creativity, you can create stunning videos that captivate your audience and leave a lasting impression.