How to Import Brush Set to Clip Studio Paint?
Most beginners just starting with digital art quickly learn about brushes, a tool that enables artists to efficiently and effortlessly create artwork.
However, if you've recently started using digital art software, you might not yet know how to import brushes.
This tutorial will cover how to import a brush into Clip Studio Paint, helping you dive into digital art more swiftly!

In this article, you will learn:
- How to Import Brushes into Clip Studio Paint?
- How to Import Brushset to Clip Studio Paint?
- FAQ About Importing Brushes into Clip Studio Paint
How to Import Brushes into Clip Studio Paint?
Two easy methods exist to import and install brushes in Clip Studio Paint. Here, we will walk you through each of these methods in detail.
Method 1: Drag and Drop into the Brush Panel
One of the easiest ways to import brush sets into Clip Studio Paint is by dragging and dropping.
The process is straightforward: first, open Clip Studio Paint and select the brush option in the toolbar on the left.
Next, navigate to the local folder containing the brush files you wish to import. Simply drag and drop them into the brush panel to successfully import the brushes.
If you're importing a compressed file containing multiple brush sets, you'll need to unzip the file first to get the brush files (Clip Studio Paint brushes are in .sut format). Select these brushes and then proceed with the import.
This method is the simplest and most direct approach, but be aware that on a Windows system, you'll need administrator privileges to drag and drop successfully.
Method 2: Loading Brushes Via the Menu
The process of importing brushes through the menu in Clip Studio Paint is similar to how it's done in Photoshop.
Further Reading:
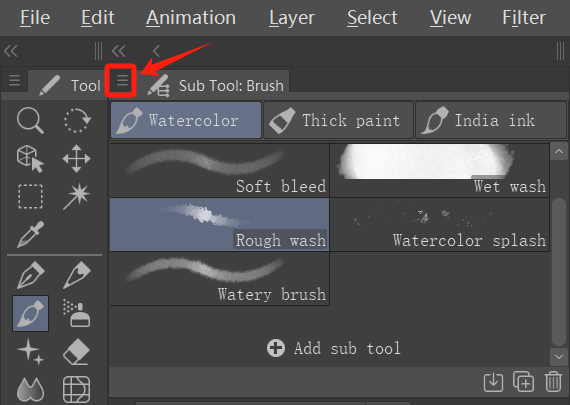
To start, open Clip Studio Paint and select the brush tool. Then, click on the hamburger menu icon located at the top left of the brush panel, as shown in the image below.
In the dropdown menu, locate and click on "Import sub tool."
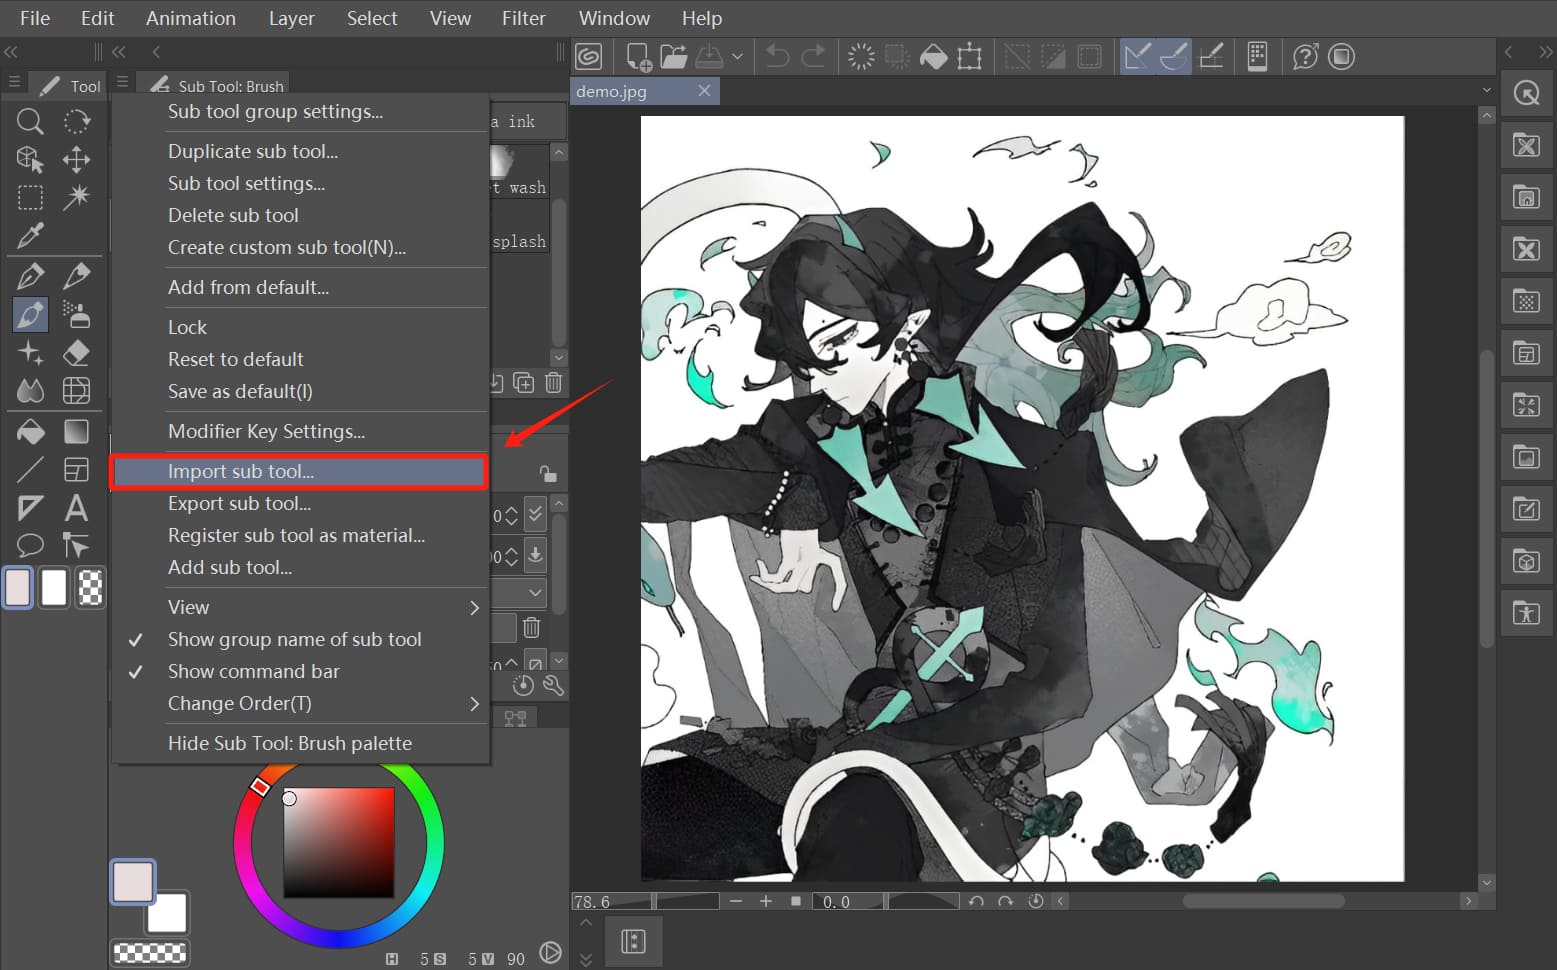
Navigate to the brush file you wish to import in your local folder, select it, click "OK," and voila! Your new brush is now imported and ready for use.
When creating digital art in Clip Studio Paint or other digital art software, you'll definitely want a more streamlined and efficient way to control your brushes. After all, nobody wants to constantly interrupt their artistic flow by spending a lot of time tweaking brush settings.
This is where TourBox, a favorite among digital artists and creators, comes into play.

TourBox offers a plethora of built-in presets tailored for digital art software. Imagine being able to effortlessly adjust brush properties, canvas rotation, and sub tools switching with just one hand on TourBox.
Like second nature, like part of your hand, TourBox provides an unparalleled operating experience. The best part is that TourBox significantly enhances your productivity without causing fatigue even after extended use
Check out our digital painting page for more information and elevate your digital art creation experience with TourBox.
How to Import Brushset to Clip Studio Paint?
Different digital art software supports various brush formats. For instance, .abr is the original brush format for Photoshop, .brushset is for Procreate, and .sut is for Clip Studio Paint.
Due to the excellence of Procreate and Clip Studio Paint in digital art, a common question arises: how to import Procreate's .brushset brushes into Clip Studio Paint?
The answer is, unfortunately, you can't. Brushset brushes cannot be directly imported into CSP as they are exclusive to Procreate.
Is there a way to convert .brushset brushes to Clip Studio Paint's .sut format?
No, conversion is not possible. You'll need to recreate the brushes anew. Each digital art software has its unique performance characteristics, requiring brushes to be tailored specifically to each platform.
This situation extends beyond Procreate's .brushset brushes to include Photoshop's .abr brushes as well.
While many digital art software claim compatibility with importing Photoshop's .abr brushes, this is often a marketing ploy leveraging Photoshop's large user base. Upon import, you may find that the feel and results differ from Photoshop.
For instance, importing .abr brushes in compatibility mode to Clip Studio Paint may result in a final display ranging from 50% to 90%, with varying levels of pressure sensitivity on digital pens.
In essence, even if digital art software claims (now or in the future) to be compatible with certain formats, for optimal brush performance, it's recommended to prioritize using the brushes in their original formats specific to the software.
FAQ About Importing Brushes into Clip Studio Paint
Question: How to Export Brushes in Clip Studio Paint?
To export brushes, select the brush in the brush panel, right-click the mouse, or click the hamburger menu at the top left of the brush panel and choose "Export sub tool."
Question: What Are the Advantages of Original Brush Files?
Original brush files in digital art software enable the full functionality of brush properties. While painting, you can adjust brush values at any time. If adjustments go awry, you can easily revert back to the initial brush properties.
Question: What to Do If Clip Studio Paint Brushes Cannot Be Imported?
- Check if your brush files are already uncompressed.
- Ensure that your brush file has the .sut extension.
- If your Clip Studio Paint version is outdated and does not support brushes created in newer versions, consider updating to the latest version of Clip Studio Paint.
Product Recommendation:
If you're interested in TourBox, why not start with TourBox Lite? TourBox Lite is the compact version of TourBox, offering great value for money, and is perfect for digital artists who are new to TourBox. You're sure to love it.

That wraps up our tutorial on how to import brushes in Clip Studio Paint. We hope it's been helpful for your artistic journey.