A Step-by-Step Tutorial: How to Make a GIF in Photoshop?
It's hard to resist the allure of an amusing or captivating GIF while navigating the vast expanse of the internet or engaging in online communities. These delightful little animations have a way of stealing our attention and enriching our online interactions.
Have you ever paused to admire these mesmerizing creations and found yourself curious about the secrets behind their making? Have you ever pondered the intricate processes that bring these pixelated performances to life?
Well, fear not! Today, we're pulling back the curtain on the fascinating world of GIF creation. Armed with nothing more than your inquisitive spirit and the trusty companion of Photoshop, we're about to embark on a journey to master the art of making GIFs.
So, let's dive right in and unravel the mysteries of how to make a GIF in Photoshop!

In this article, you will learn:
What Is a GIF?
GIF, short for Graphics Interchange Format, is a bitmap compression file originally designed to reduce the time it takes to transmit images over the internet. GIFs have the ability to include multiple frames, gradually evolving into the dynamic image format we are familiar with today.
GIFs have the following four main characteristics:
- Excellent compression performance, allowing for a balance between image quality and file size reduction.
- Due to its limitation of handling only 8-bit compression, GIFs can only display a maximum of 256 colors, making it less suitable for complex color images.
- GIFs can include multiple frames, making it possible to create simple animation effects.
- Transparency can be set, allowing objects to appear floating on the background (similar to a 3D effect).
How to Make a GIF in Photoshop?
Most of us associate Photoshop with tasks like editing images or applying graphic effects, but few people realize that it can also be used to create animated GIFs.
The feature for making GIFs is called "Timeline" in Photoshop, and the process is incredibly simple. Once you get the hang of it, you can complete it in less than a minute. Let's dive into the detailed steps for creating animations using Photoshop!
Prerequisites:
- Adobe Photoshop
- Basic understanding of Photoshop environment and tools
Step 1: Prepare Your GIF Assets
Gather all the images or frames you intend to use in your GIF. If you're looking to create an animation, sketch out your plan or storyboard beforehand.
Launch Adobe Photoshop on your computer. Click File in the top menu and then select "New..." to create a new file. Specify the width and height you want your GIF to be, typically measured in pixels.
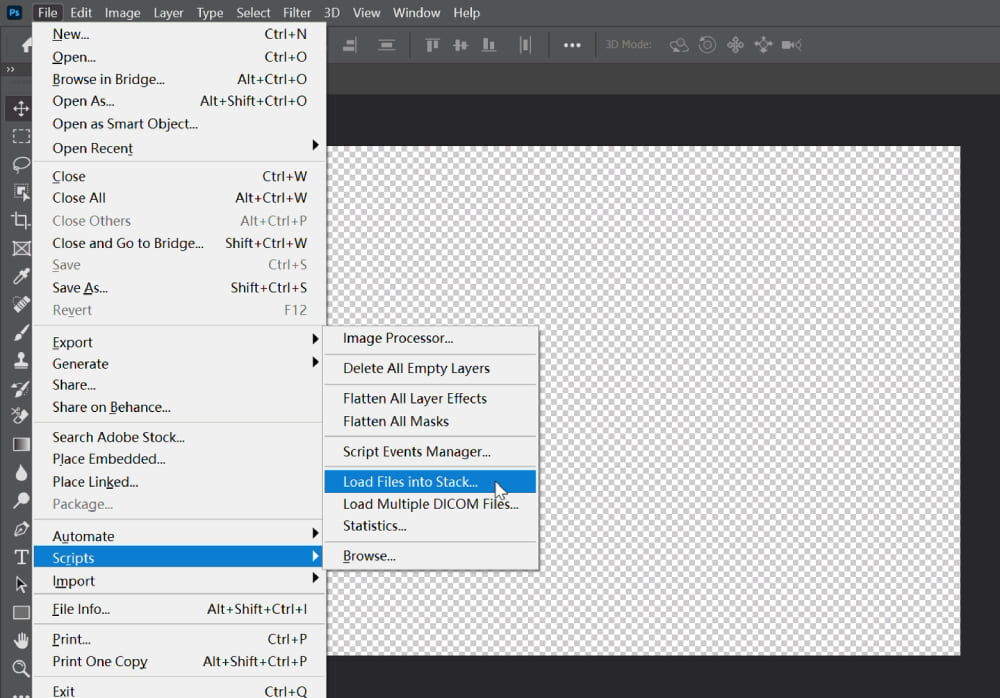
Navigate to "File" > "Scripts" > "Load Files into Stack...". A dialog box will appear. Click "Browse..." and select all the images you want to include in your GIF, and then click OK.
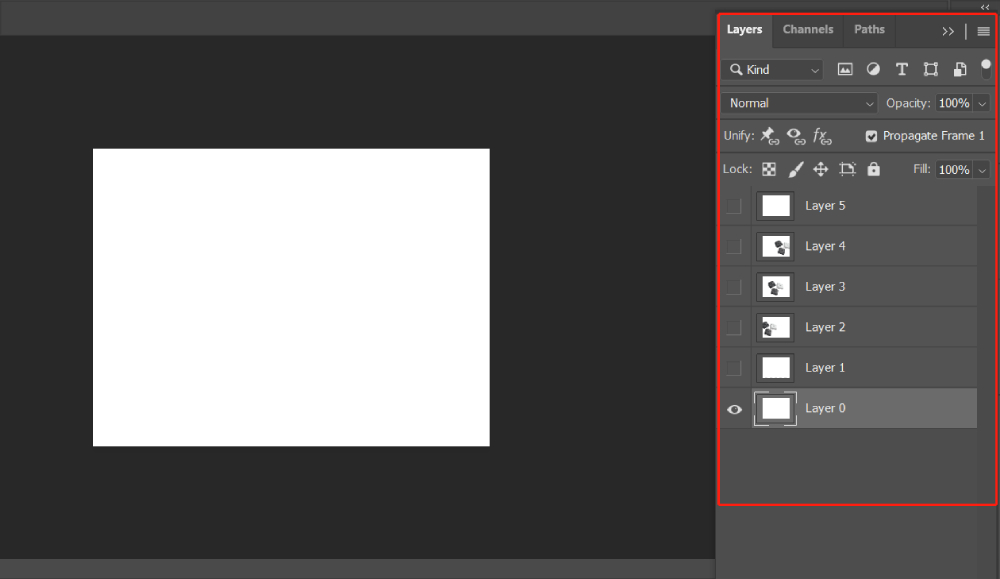
Step 2: Arrange the Layer Order
Arrange the images you want to display in the layers in the correct sequence (Note: Make sure to arrange them in the right order to avoid any strange-looking animations).
Please note that you don't need to ensure that every GIF layer is visible (the eye symbol on the left side of the layer indicates layer visibility). We will explain the reason for this later.
Just make sure that the order of the images is correct (the first frame of the GIF should be placed at the bottom of the layer stack, and so on).
Step 3: Create Frames
To turn your images into frames for your GIF, go to "Window" > "Timeline". The Timeline window will open at the bottom of your screen.
From there, click "Create Frame Animation". If it says "Create Video Timeline" instead, click the dropdown arrow to switch it to "Create Frame Animation".

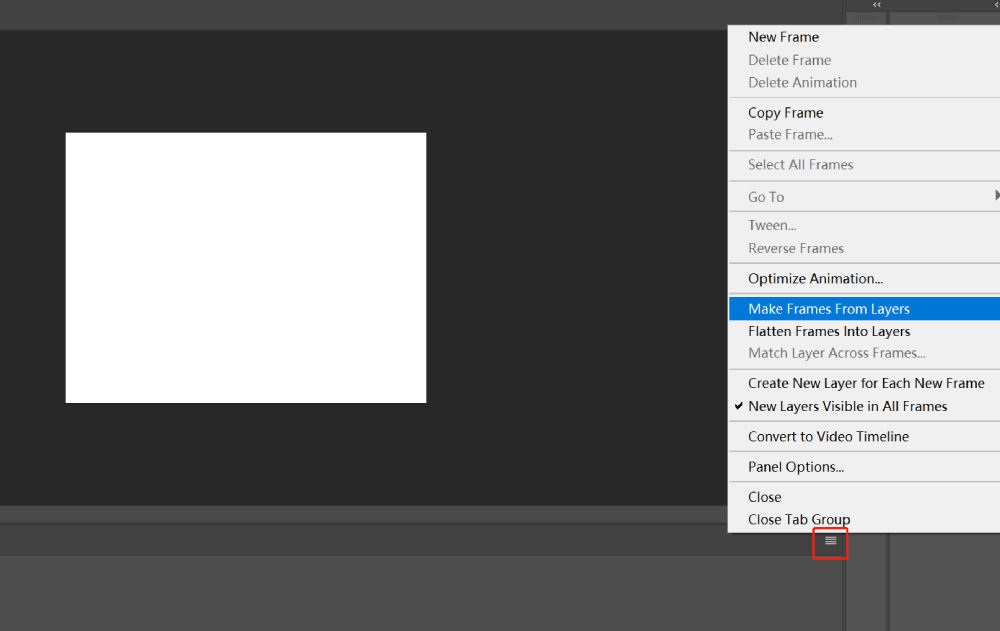
Step 4: Make Frames from Layers
In the timeline panel, select the dropdown arrow beside the settings icon, and choose "Make Frames From Layers". This will convert all the layers in your Layers panel into individual frames in your GIF.
The "Make Frames from Layers" feature on the timeline allows Photoshop to automatically recognize and intelligently assign each frame to its corresponding layer.
Photoshop's assignment is based on the layer order, which is why the visibility of the layers is not as important as the layer order, as mentioned earlier.
Of course, manual adjustments are also possible, but the process can be more complex, especially for GIFs with a large number of frames. Here are the steps for manually setting up the timeline:
- Copy the selected frame on the timeline. The number of frames is based on your specific needs.
- Place the corresponding image in the order of how you want the animation to appear (only the layers that need to be visible should be enabled, while the rest remain closed) for each frame you work on.
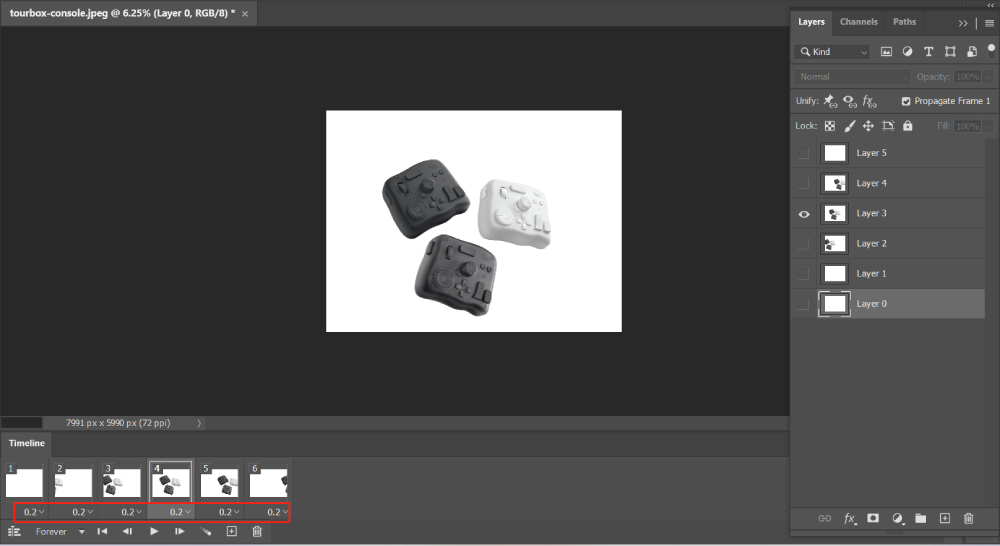
Step 5: Set Frame Delay Time
Each frame has a delay time, which determines how long it will display before switching to the next frame. You can adjust this for each frame individually by clicking the time below the frame (it defaults to 0 sec.).
If you want all frames to display for the same amount of time, select all frames by pressing Shift and clicking on each, then click the time below any frame, and set your desired delay time.
Step 6: Set Looping Options
At the bottom of the Timeline panel, you'll see a dropdown menu that says "Forever" or "Once". This is your looping option.
Click it and change it to Forever if you want your GIF to loop continuously or to Once if you want your GIF to loop just once.
If you want it to loop a certain number of times, select "Other..." and specify the number.
Step 7: Preview and Save Your GIF
To see how your GIF will look, click the Play button in the Timeline panel.
Once you're satisfied with your GIF, go to "File" > "Export" > "Save for Web (Legacy)...".
In the dialog that appears, set the file type to GIF, adjust any other settings as needed, and click "Save...". Choose where you want to save the file and give it a name, then click Save again.
Let's revisit the process of how to make a GIF in Photoshop by watching this interesting YouTube video from Elmin Graphics.
Final Thoughts About Making a GIF In Photoshop
Isn't the tutorial on how to make a GIF in Photoshop incredibly user-friendly? It turns out that creating a GIF is much simpler than you might have imagined, requiring just a few straightforward steps!
Of course, besides Photoshop, there are many other software options available for creating simple GIF animations. However, using Photoshop remains the best choice for beginners.
During the process of using and practicing Photoshop, creators often encounter frequent operations within the software, which can distract them from focusing on the design and creative aspects. That's where TourBox comes in as a great solution to this problem.

With TourBox, you can streamline your workflow and overcome the hurdles of repetitive tasks in Photoshop. It allows you to concentrate on your design and unleash your creativity without any distractions.