How to Remove Background in Illustrator?
When it comes to removing backgrounds, you might immediately think of using Photoshop for editing. However, you can achieve the same effect with Adobe's Illustrator from the same family.
While Illustrator may not have the same powerful background removal features as Photoshop, it can still effectively remove backgrounds for basic or simple scenes.
So, how do you remove a background in Illustrator? This article will provide you with the answer.

In this article, you will learn:
- Have You Enabled the Transparency Grid?
- How to Remove Background in Illustrator?
- What Is The Best Way to Remove Backgrounds in Illustrator?
Have You Enabled the Transparency Grid?
Have you ever imported an image or material with a transparent background into Illustrator, only to find it displayed with a white background instead of the familiar checkered transparency grid seen in Photoshop?
By default, Illustrator's artboard has a white background. To switch this to the recognizable transparent background view, simply enable Illustrator's "Show Transparency Grid" feature.
Before diving into background removal tasks, toggling the transparency grid helps you distinguish transparent elements effectively. Please check out our tutorials to learn how to utilize the transparency grid feature.
Further Reading:
How to Remove Background in Illustrator?
There are two methods to remove backgrounds in Illustrator, primarily based on whether the image you want to edit has a white background. Let's dive into it.
1. How to Remove a White Background in Illustrator?
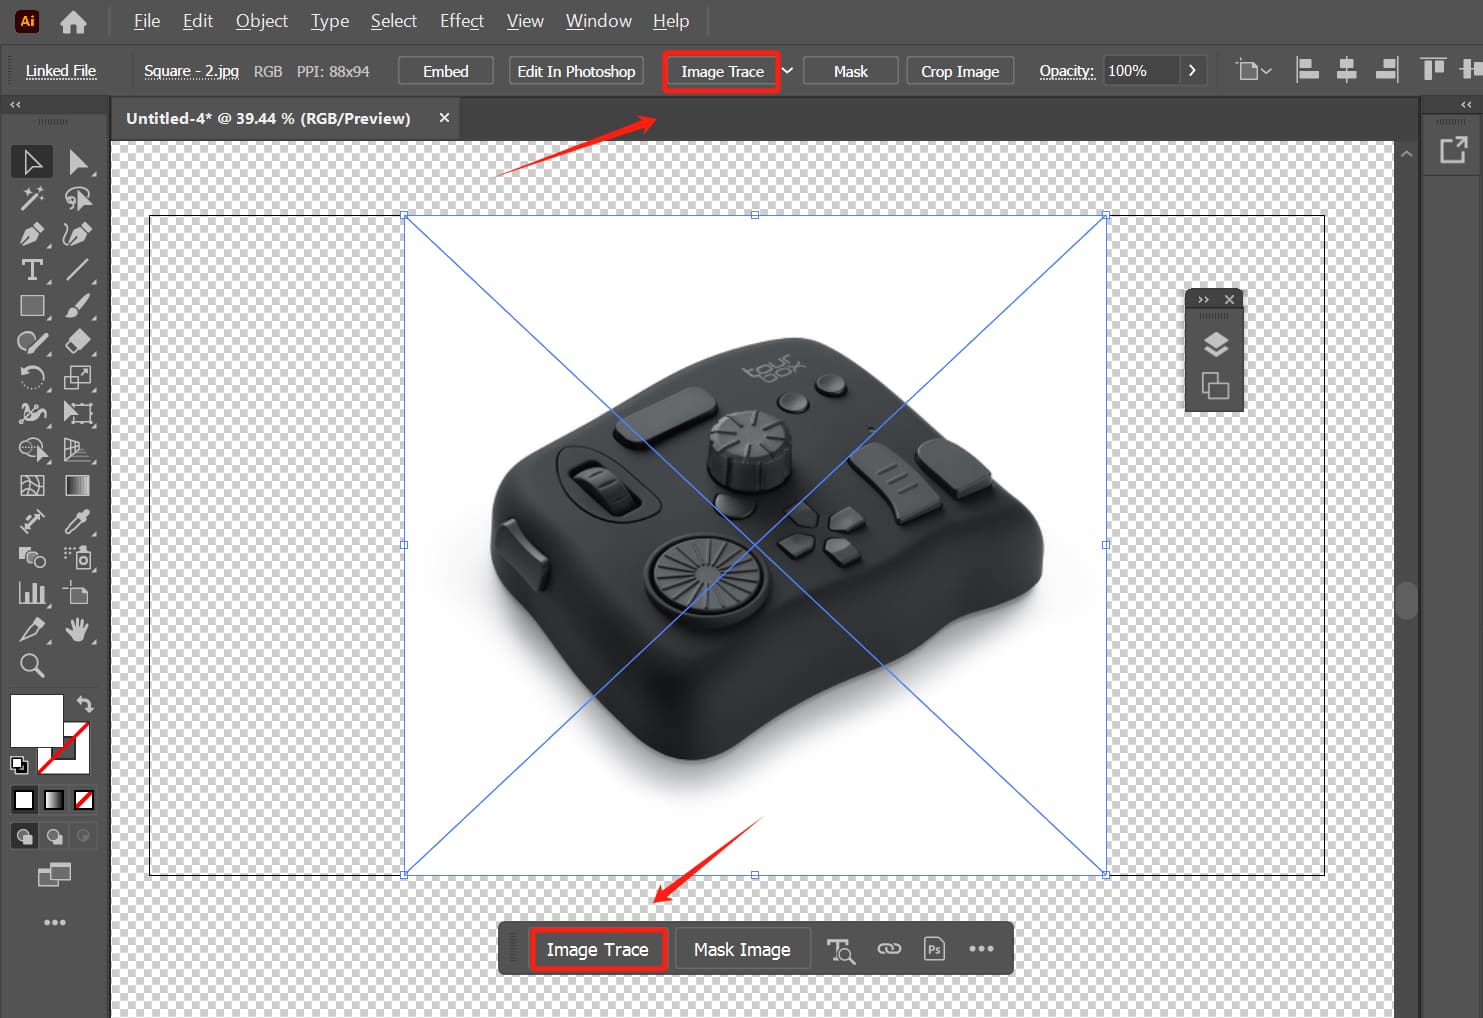
Import an image with a white background into your Illustrator project. Don't forget to first enable the "Show Transparency Grid" command for easier observation.
Click on the imported image with the Selection Tool. You'll see a simple toolbar in the page. Click on the "Image Trace" button in this toolbar.
You can also find the "Image Trace" button in the toolbar at the top of the page, or access the "Image Trace" settings panel under the Window dropdown menu in the top navigation bar.
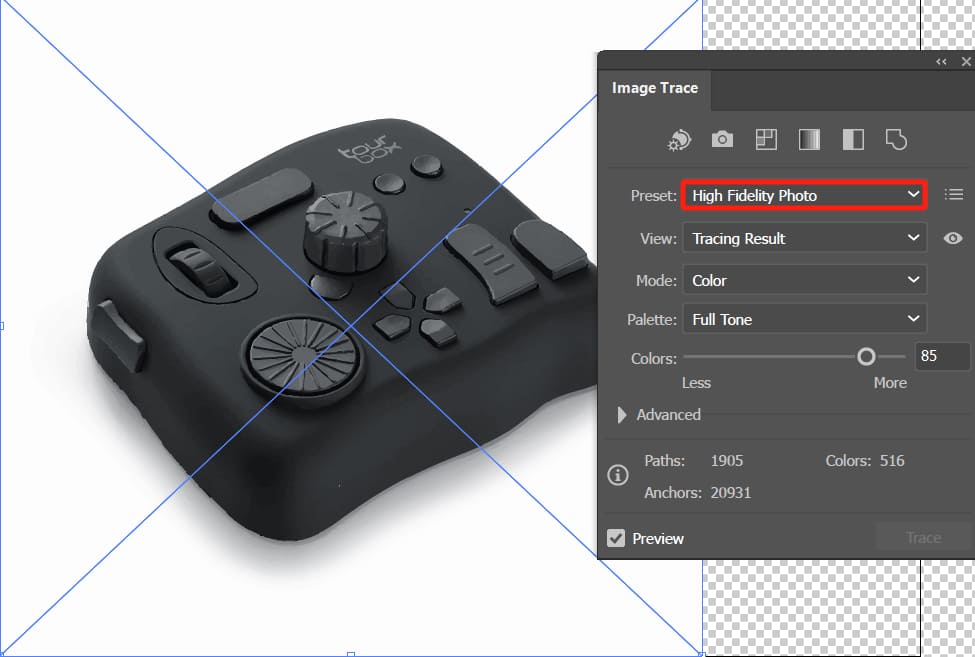
Regardless of how you access the "Image Trace" panel, choose "High Fidelity Photo" from the preset dropdown options. Illustrator will take some time to process, so be patient.
Once Illustrator finishes processing, the next step is to click on "Object" in the top navigation bar, choose "Expand" from the dropdown options, and confirm.
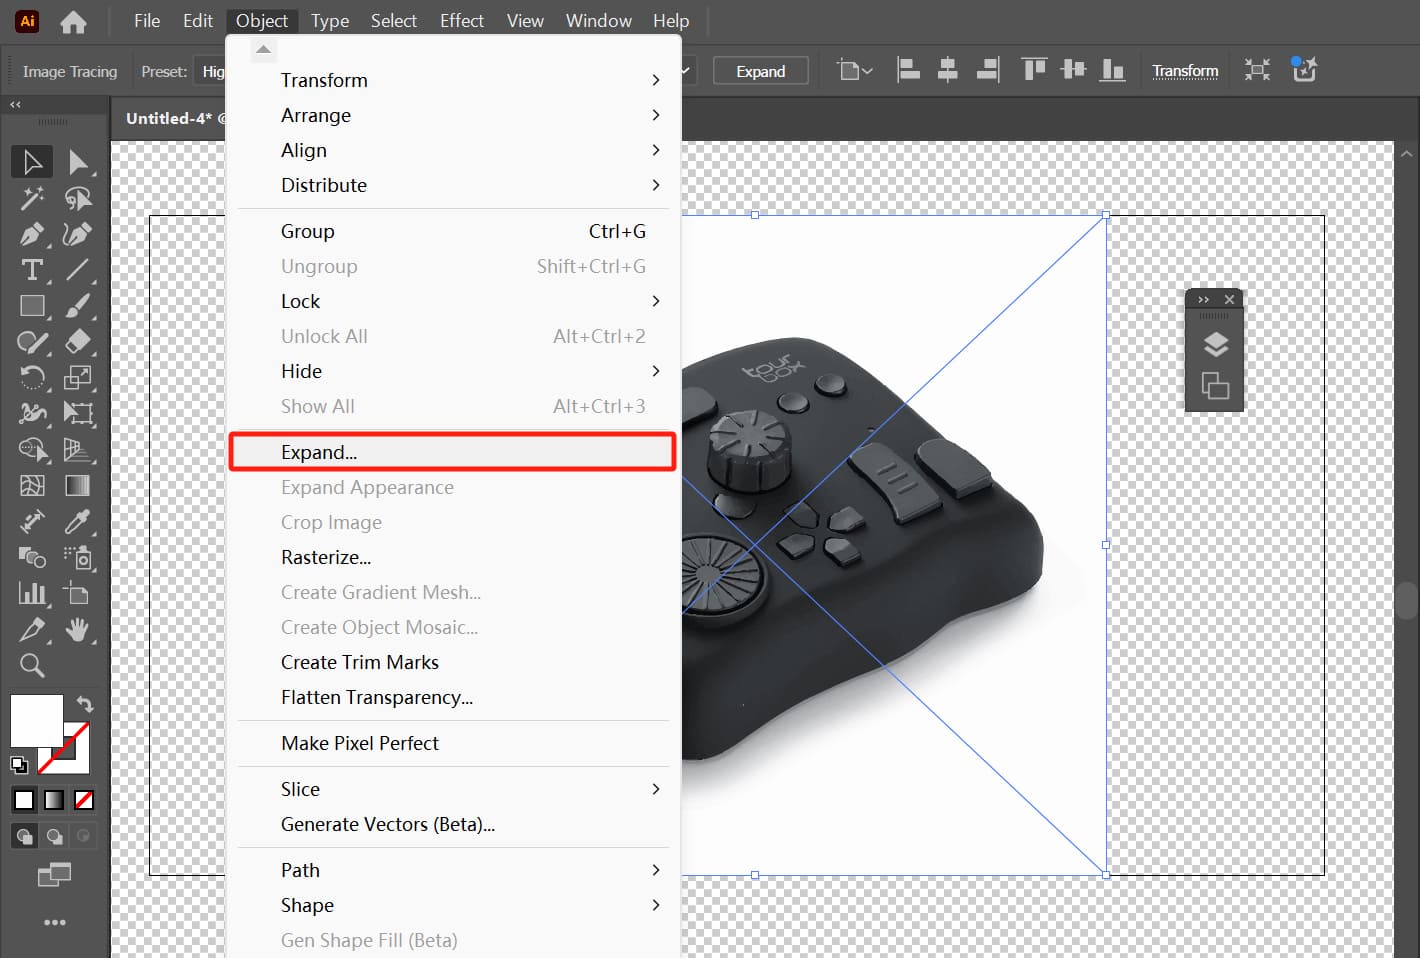
The Expand function converts strokes, outlines, or text into editable paths or regions. You'll notice your image now consists of blue paths.
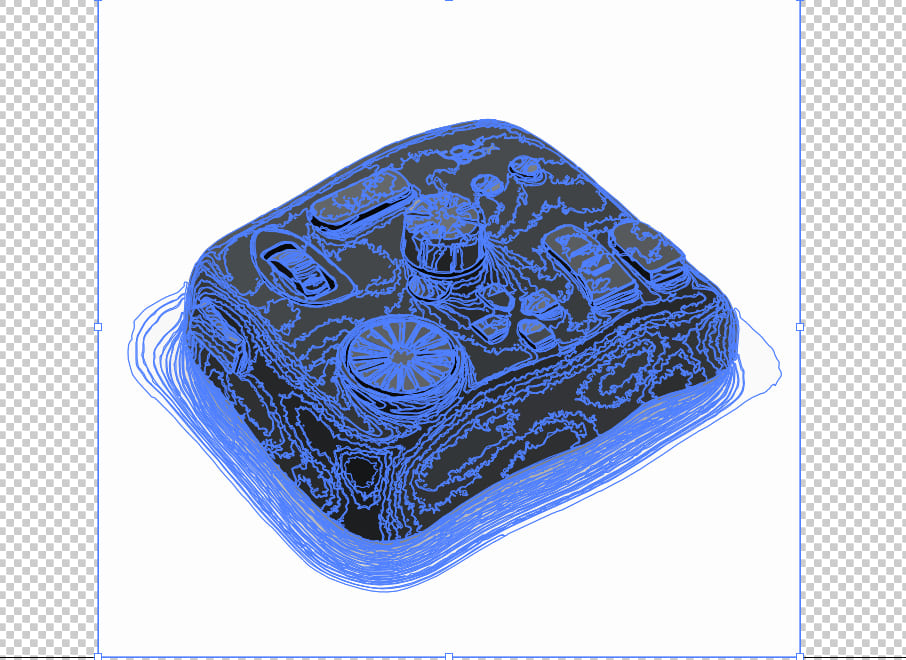
At this point, click anywhere outside the image, then use the Direct Selection tool to click on the image again, and press the Delete key on your keyboard.
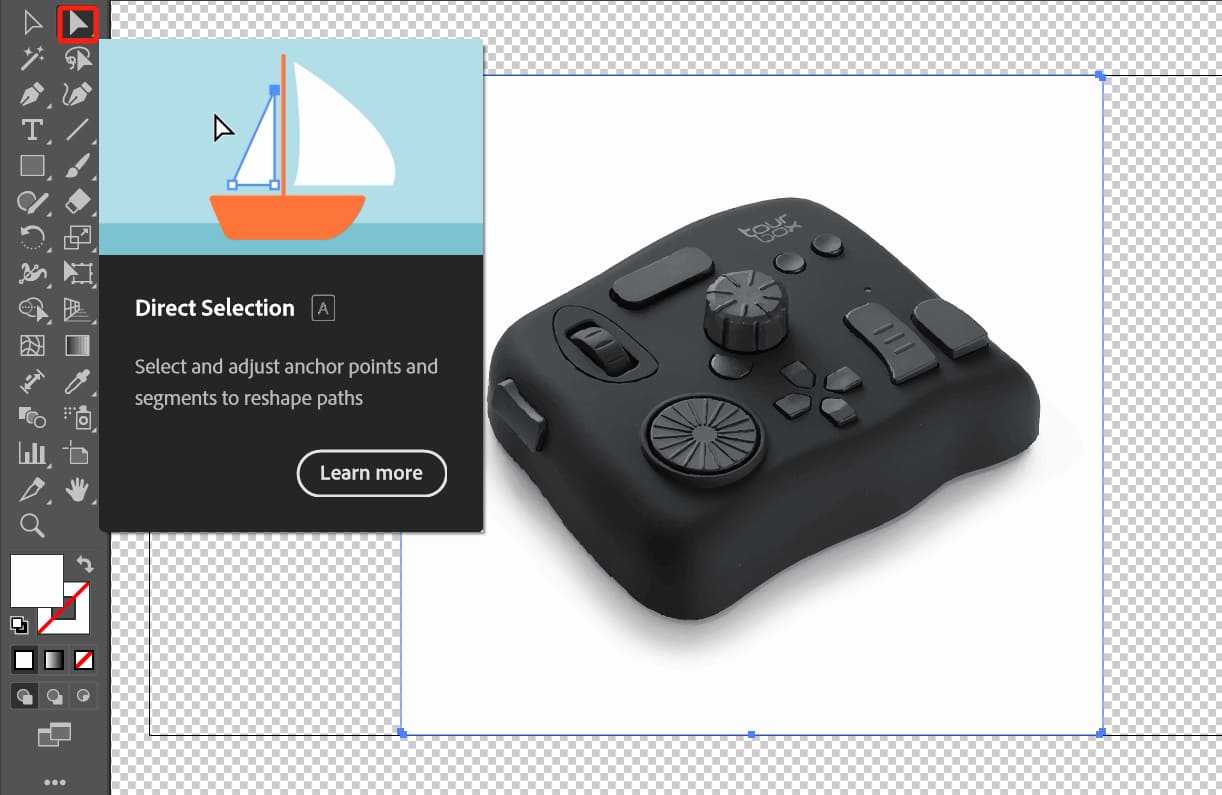
Voila! The task is complete, and the results look decent.
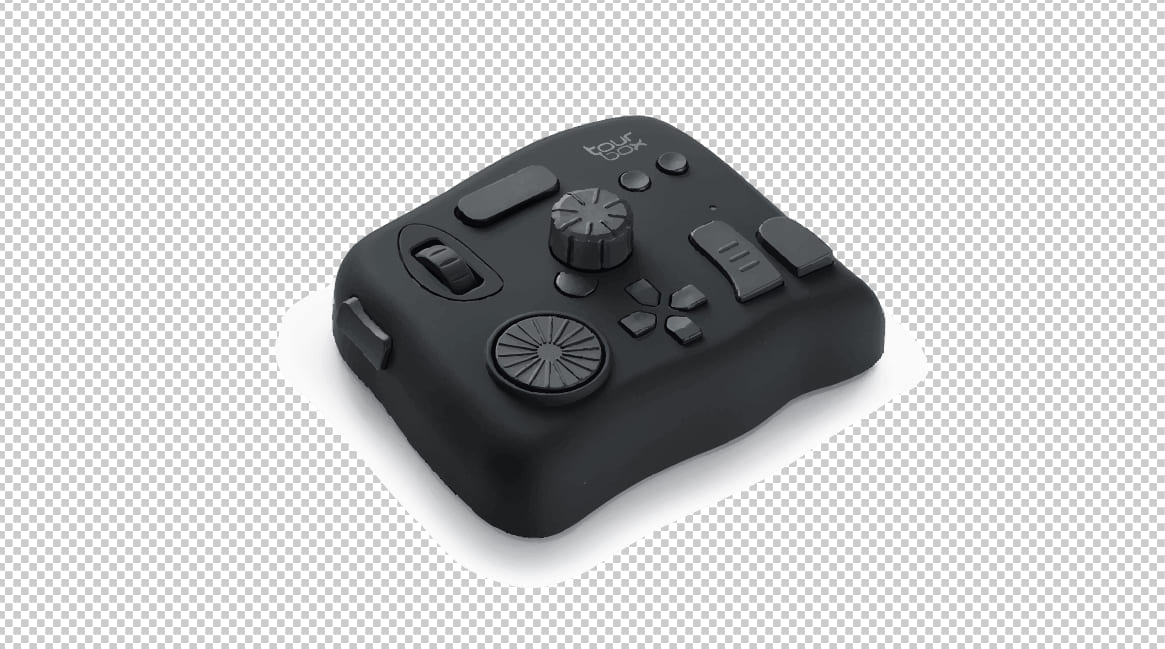
However, this method is only suitable for simple images with white backgrounds. If you try it with slightly more complex backgrounds, you'll notice that the background removal results are quite terrible.
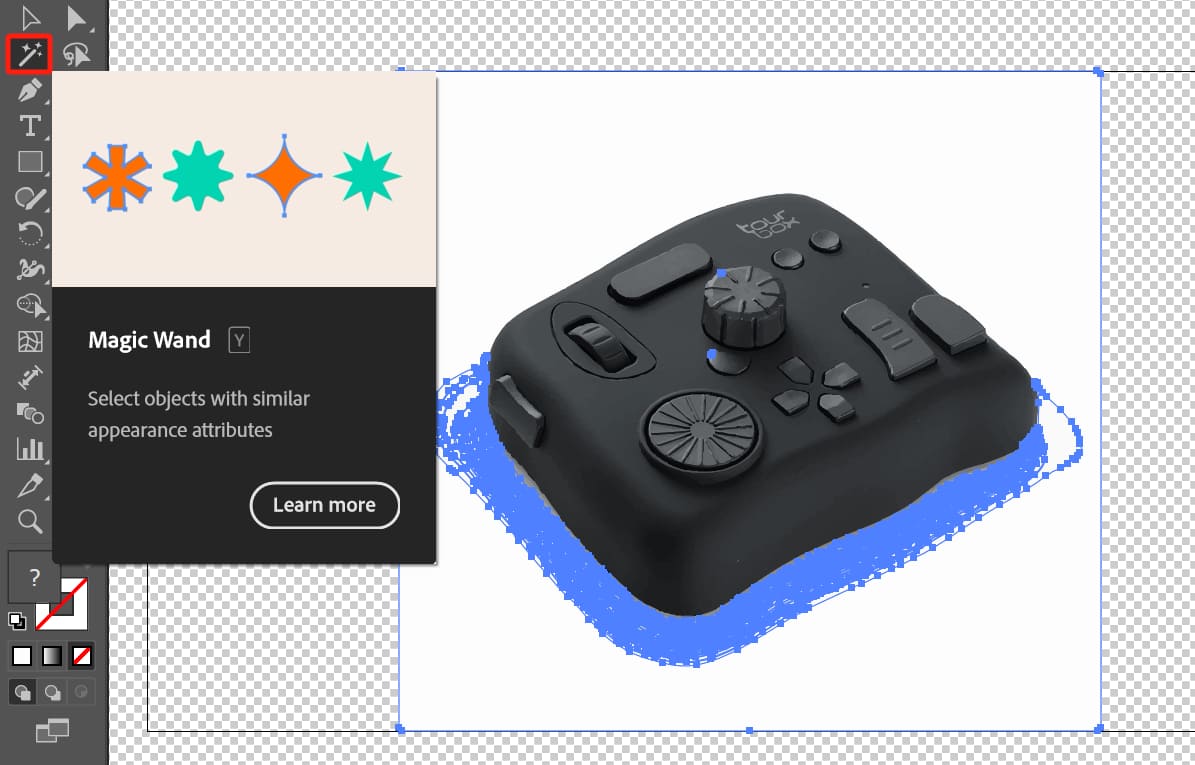
If unsatisfied with the result, you can further refine it using the Magic Wand tool. The method is quite simple: after selecting the Magic Wand tool, click on the background area you want to remove, then press the Delete key to erase it.
The prerequisite for this is that you have already converted the bitmap into a vector graphic.
2. How to Remove a Non-White Background in Illustrator?
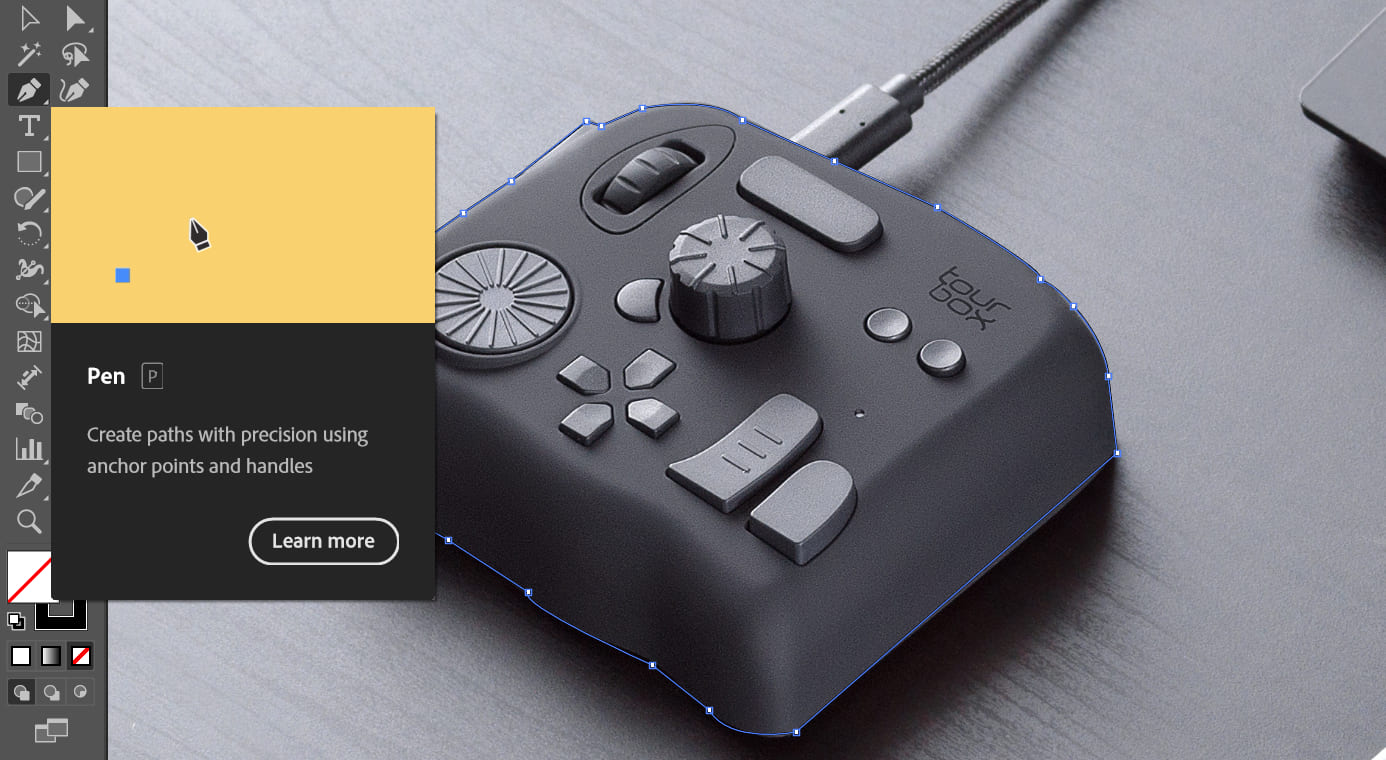
When dealing with complex backgrounds that are not white, the most common method in Illustrator for background removal is using the Pen tool.
Using the Pen tool is also the most recommended method for removing backgrounds in Illustrator, assuming you are familiar with how to use the Pen tool.
The specific approach involves importing the image into Illustrator and using the Pen tool to trace along the desired area, as shown in the image below.
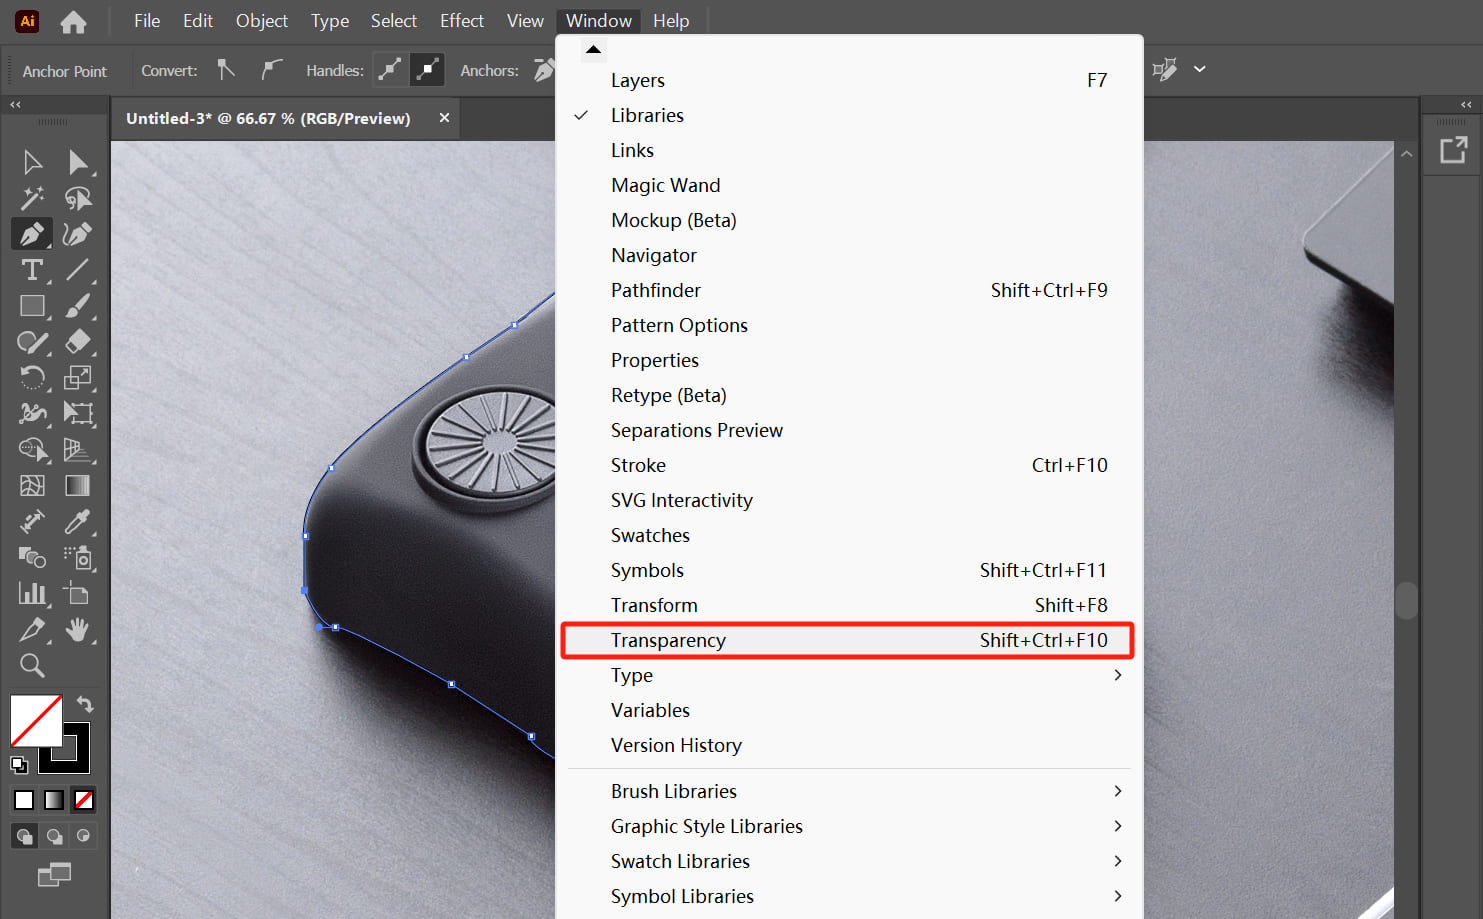
Next, click on "Window" in the top navigation bar and select "Transparency" from the dropdown options to bring up the Transparency panel.
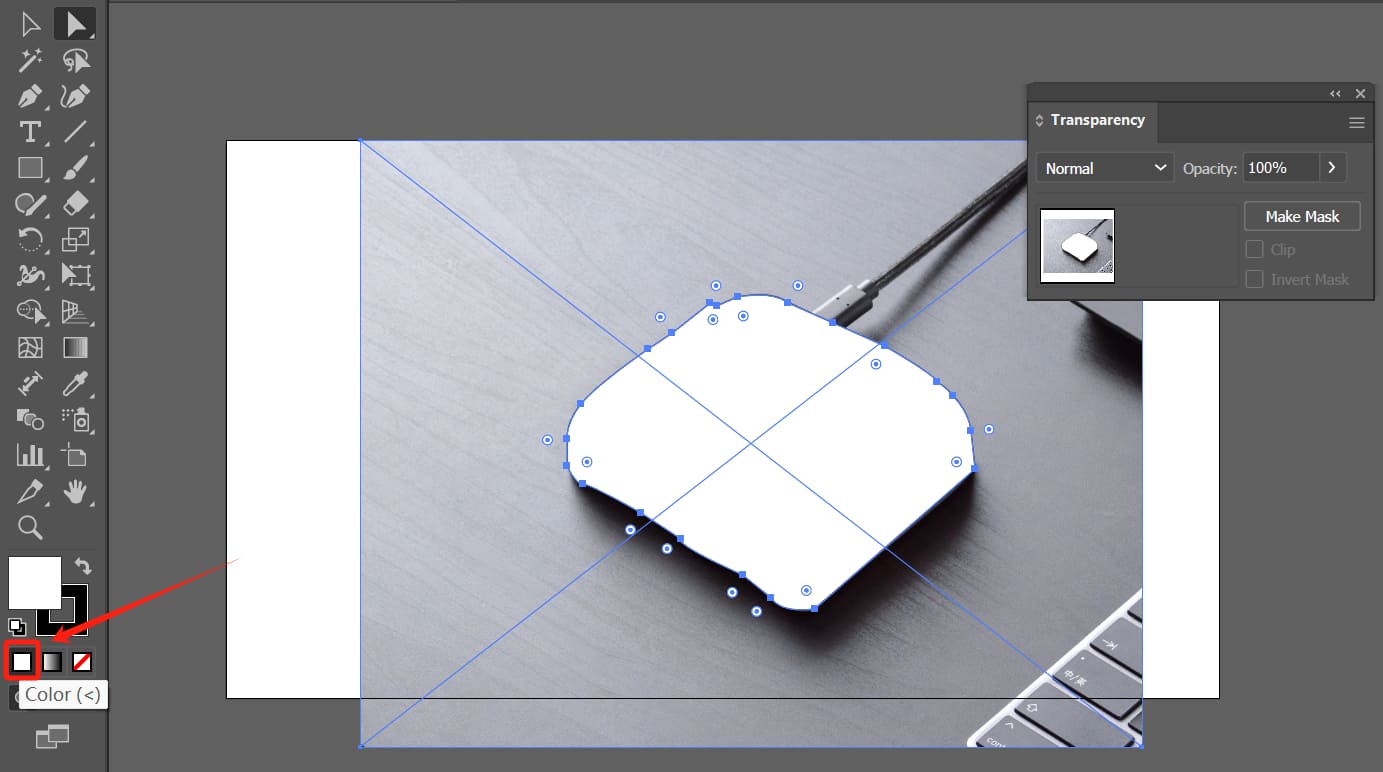
Here come the most crucial steps. You need to use the Direct Selection tool to simultaneously select the original image and the area outlined with the Pen tool (the path).

Next, make sure to fill the selection with white. Of course, you can also use other colors or gradients, which can give your selection a different look and feel—feel free to experiment.
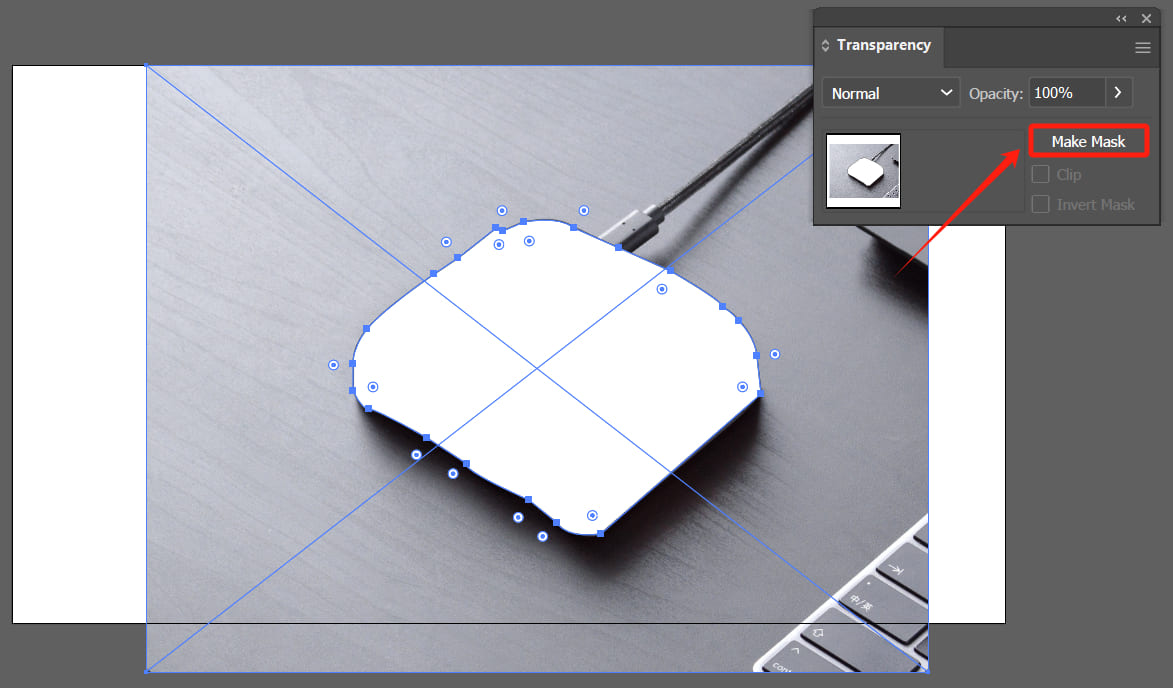
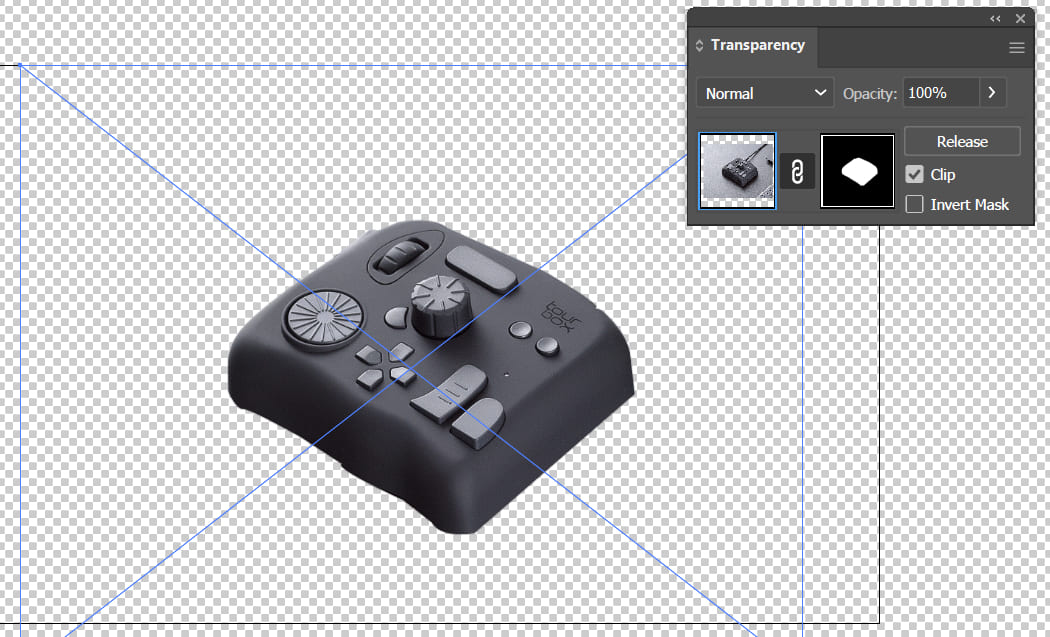
Finally, click the "Make Mask" button in the Transparency panel to successfully remove the background in Illustrator.
This process is somewhat akin to the principle of layer masking in Photoshop, where you mask one image with the shape of another, revealing the desired portions and achieving a background removal or cropping effect.
However, this method is not always the best approach. When dealing with intricate details (such as a person's hair), even if you have excellent Pen tool skills, you might still face challenges.
So, what is the best way to remove backgrounds in Illustrator?
What Is The Best Way to Remove Backgrounds in Illustrator?
The best method to remove backgrounds in Illustrator is actually to avoid doing it in Illustrator altogether.
After all, Illustrator is primarily designed for working with vector graphics, while removing backgrounds is better suited for pixel-based software like Photoshop.
You can simply edit the image/element needing background removal in Photoshop before importing it into Illustrator. Alternatively, for an easier approach, you can search for online tools dedicated to background removal and swiftly process your images with them.
Further Reading:
So, the bottom line is, if your background removal needs are basic or straightforward and you prefer not to switch between Photoshop and Illustrator, then go ahead and use Illustrator. But it's still best to stick with Photoshop 100% for intricate details like people and hair
Product Recommendation:
If you find using the keyboard cumbersome in your creative work, you might enjoy TourBox, a creative controller highly favored by digital artists and designers.

TourBox can significantly streamline your workflow. Not only can you map commonly used shortcuts to the buttons on TourBox, but you can also utilize advanced settings like macros to achieve your desired actions with fewer movements.

Similar to handling a gaming controller, TourBox offers you an excellent operational experience. Explore our photo editing and digital painting pages to learn more about TourBox.