How to Remove Objects in Photoshop?
Are you tired of unwanted objects ruining your perfect photos? Don't fret! In this tutorial, we're going to unveil the secrets of how to remove objects in Photoshop, empowering you to turn flawed images into flawless masterpieces.
Whether it's a distracting photobomber or an unsightly element cluttering your composition, we've got you covered with a range of powerful techniques and tools.
Get ready to unlock the magic of Photoshop and take your photo editing skills to new heights. Let's dive in and make those unwanted objects disappear before your eyes!

In this article, you will learn:
- Five Effective Methods of Object Removal in Photoshop
- Final Thoughts About Removing Objects in Photoshop
Five Effective Methods of Object Removal in Photoshop
Adobe Photoshop offers a variety of tools to help you remove unwanted objects from your images. In this tutorial, we will explore five methods in Photoshop for removing objects:
- Healing Brush Tool
- Clone Stamp Tool
- Spot Healing Brush
- Patch Tool
- Content-Aware Fill
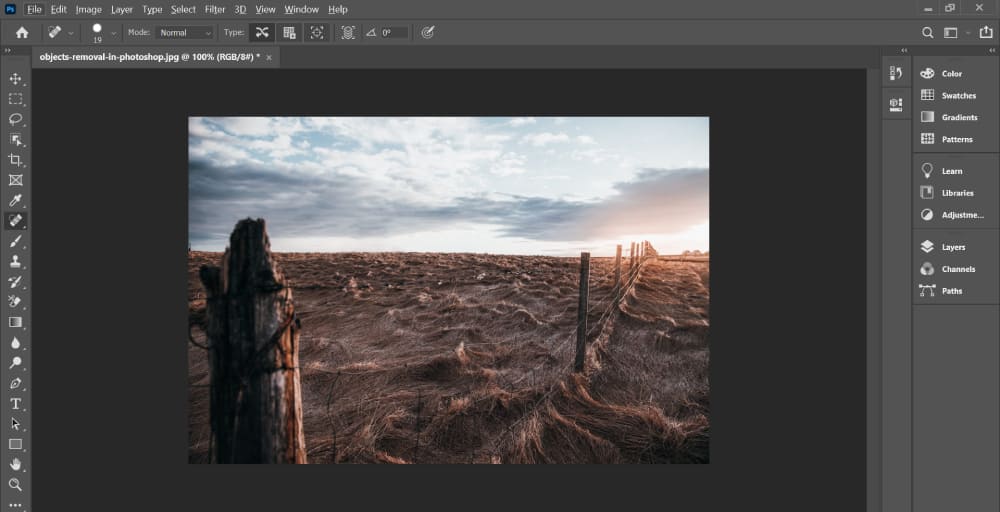
For this tutorial, we will use the following image as a case study. Our goal is to remove the small house on the horizon using each of the five methods mentioned above.
Join us as we embark on this journey to learn how to effectively remove objects in Photoshop.

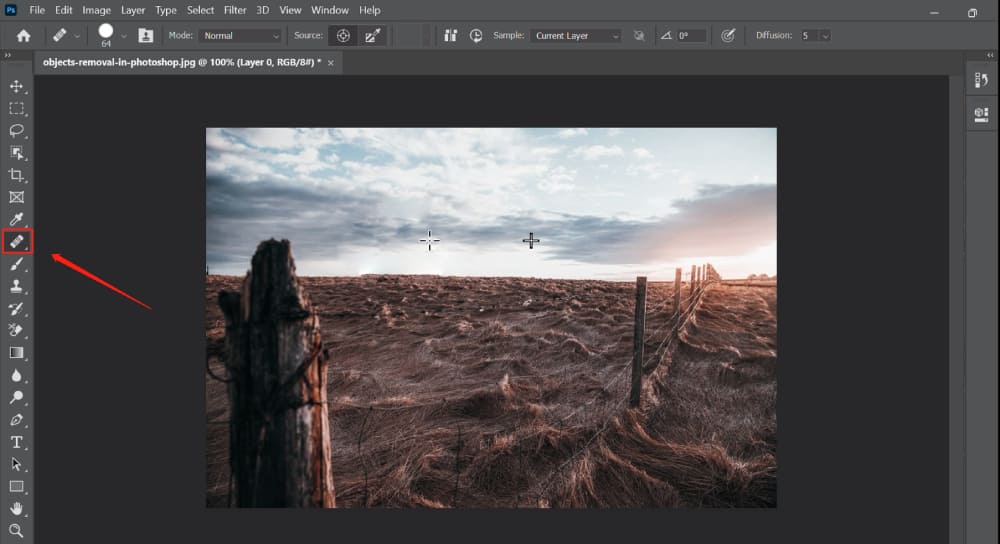
Method 1: Use the Healing Brush Tool
The Healing Brush Tool is similar to the Clone Stamp Tool, but it possesses an additional capability—it matches the texture, lighting, and shading of the sampled area to the selected area, resulting in a more seamless blend.
Here is how to use the Healing Brush Tool to remove objects in Photoshop:
- Select the "Healing Brush Tool" from the toolbar in Photoshop.
- Hold down the Alt key (Option key on Mac) and click on the area from which you want to clone or sample. This sets the source point or sample point for the tool.
- Release the Alt key and start painting over the object you want to remove. As you paint, Photoshop intelligently analyzes the surrounding texture, lighting, and shading, seamlessly blending the sampled area with the selected area.
The Healing Brush Tool is an excellent choice for removing unwanted objects while maintaining a natural appearance in terms of texture, lighting, and shading. It provides a convenient and efficient way to retouch and enhance images.
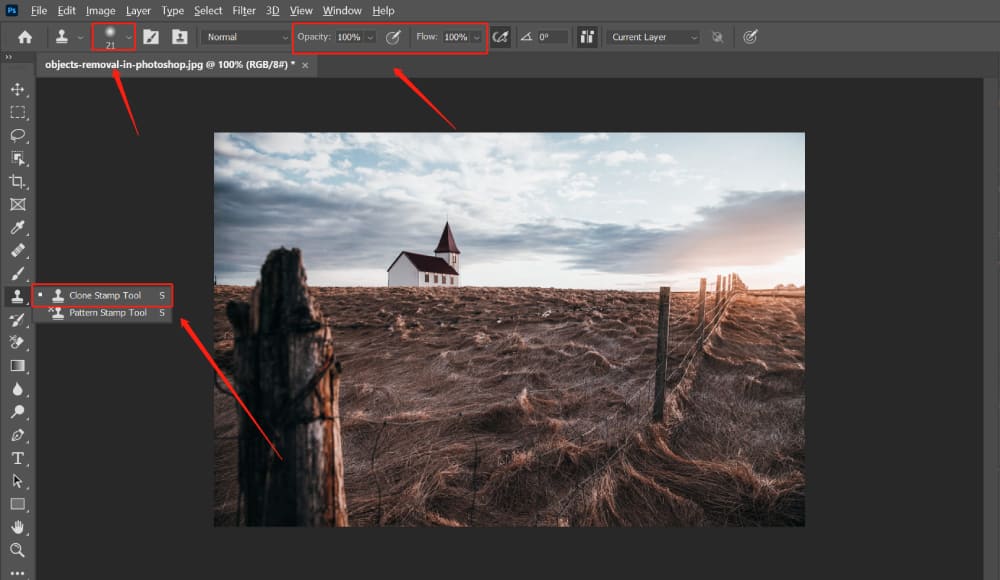
Method 2: Use the Clone Stamp Tool
To effectively remove objects from images that have complex backgrounds, you can employ the Clone Stamp Tool in Photoshop. There are two concepts we need to understand:
- Sample Point: In Photoshop's Clone Stamp Tool, a sample point refers to the source area you choose. By holding down the Alt key (Option key on Mac) and clicking on a specific area in the image, you set the sample point. This area is then cloned or copied to be used in replacing, repairing, or modifying the target object.
- Clone Point: In Photoshop's Clone Stamp Tool, a clone point refers to the reference point used by the tool during the painting process. It retrieves data from the sample point and overlays or copies it onto the area that requires fixing, removing, or modifying, aiming to achieve a restoration or reconstruction effect.
The usage of the Clone Stamp Tool is similar to the Healing Brush Tool, and the results are also comparable.
However, there are some differences: The Healing Brush Tool performs a color calculation based on the surrounding colors during the restoration process, blending better with the surrounding area.
As a result, the colors of the new area using the Healing Brush Tool, may differ slightly from the original image. On the other hand, the cloned image created using the Clone Stamp Tool maintains an exact color match with the original image.
Now, let's take a look at the image. Before using the Clone Stamp Tool, you can adjust the brush size and configure various properties such as mode, opacity, and flow in the options bar located at the top of the Photoshop interface.
As shown in the image below, we have selected a neighboring area as the sample point where we want to remove the element.
By holding down the Alt key (Option key on Mac) and clicking on the area that we want to clone, we set the sample point for the tool.
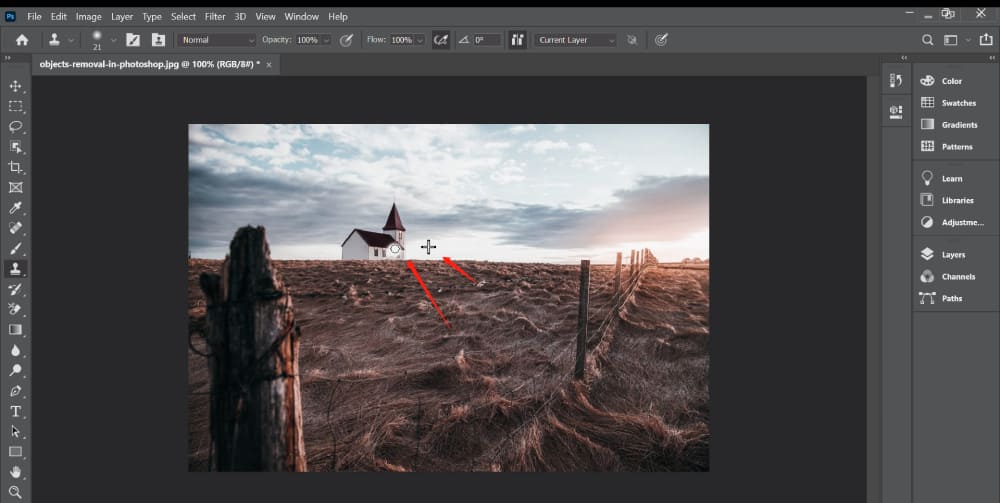
As we continuously brush over the clone point, you will notice that while the mouse moves, a plus sign (+) representing the sample point moves along with it, indicating that a new image is being cloned.
It's important to note that the sample point serves as the starting point for cloning. Choosing different brush diameters will affect the range of your strokes, and varying brush hardness will impact the blending effect at the edges of the painted area.
Here's a detailed step-by-step guide:
- Open the image you wish to edit in Photoshop. Locate and select the "Clone Stamp Tool" from the toolbar. It typically resembles a stamp or rubber icon.
- Press and hold the Alt key (Option key on Mac) and click on the area in the image that you want to clone from. This action sets the "sample point" or the reference point from which the tool will mimic.
- Release the Alt key and carefully paint over the object you intend to remove. As you paint, the Clone Stamp Tool will replace the object with the content from the sampled area, effectively removing it from the image.
Let's take a quick look at the effectiveness of the Clone Stamp Tool through the image below.

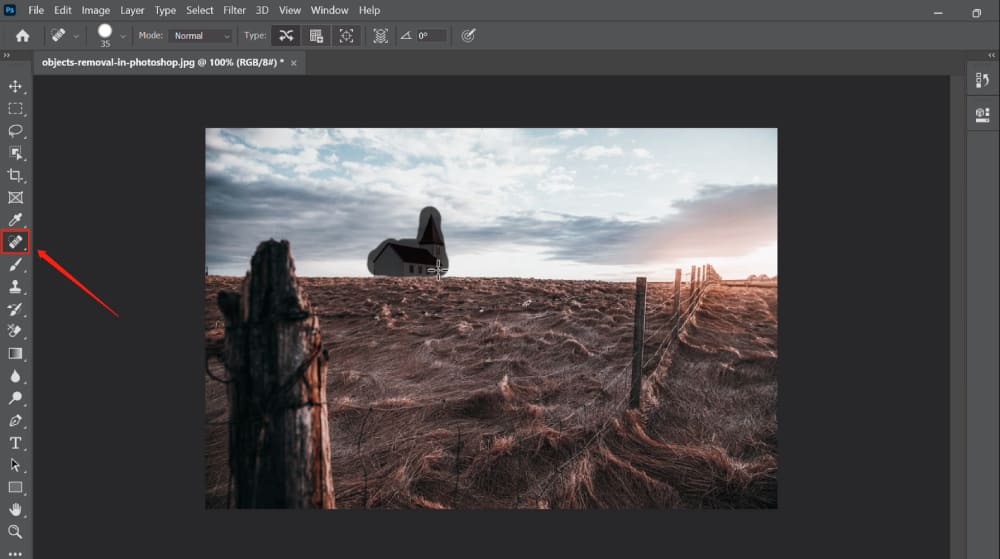
Method 3: Use the Spot Healing Brush
The Spot Healing Brush is an excellent tool for removing small objects from uniform backgrounds with ease. Here's a detailed step-by-step guide:
- To begin, select the "Spot Healing Brush Tool" from the toolbar in Photoshop.
- Next, adjust the brush size according to the object you want to remove. Make sure the brush covers the entire area of the object.
- Simply click or paint over the object, and watch the magic happen. Photoshop's intelligent algorithms will automatically analyze the surrounding area and seamlessly replace the object with a texture that blends naturally.
The Spot Healing Brush simplifies the removal process by eliminating the need for precise cloning or sampling. It's a fast and efficient way to get rid of unwanted elements in your images, especially those on uniform backgrounds.
As shown in the image above, all we need to do is use the Spot Healing Brush to brush over the unwanted object, and Photoshop will automatically replace it with the texture from the surrounding area.
The results achieved with this tool are truly remarkable.
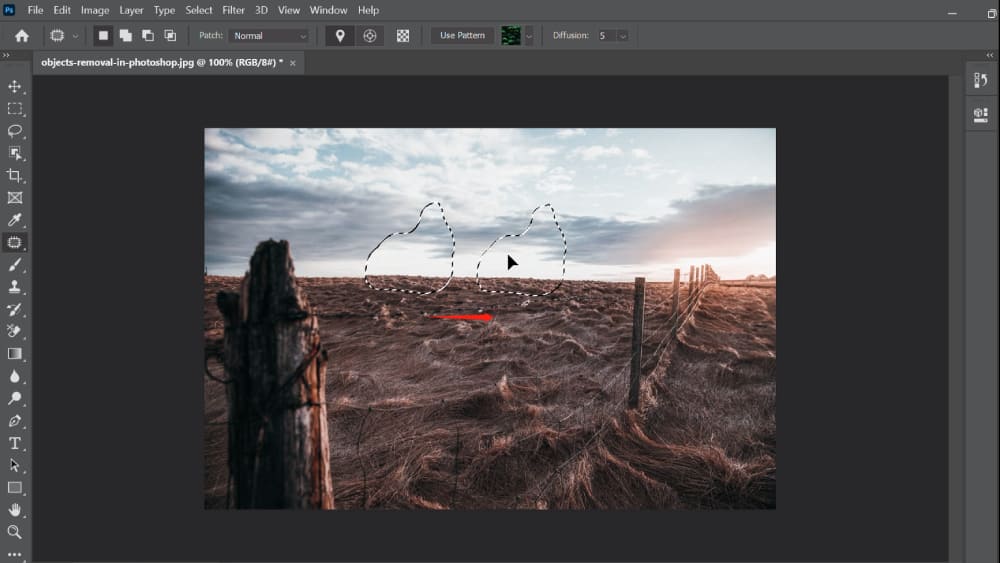
Method 4: Use the Patch Tool
The Patch Tool is a powerful tool specifically designed for removing larger objects from images. Here's a detailed step-by-step guide:
- Select the "Patch Tool" from the toolbar in Photoshop.
- Draw a selection around the object you want to remove. This selection should encompass the entire object.
- Once the selection is made, click and drag the selection to an area in the image that you want to use as a patch. This area should contain the desired texture or content that can seamlessly replace the removed object.
- As you release the mouse button, Photoshop will work its magic by automatically blending the patch with the surrounding area. The Patch Tool intelligently analyzes the texture, color, and lighting of the selected patch and seamlessly merges it with the rest of the image.
The Patch Tool is an excellent choice for removing larger objects as it offers a convenient way to replace them with a suitable patch from within the same image. Its ability to blend and match the surrounding areas ensures a natural and seamless result.
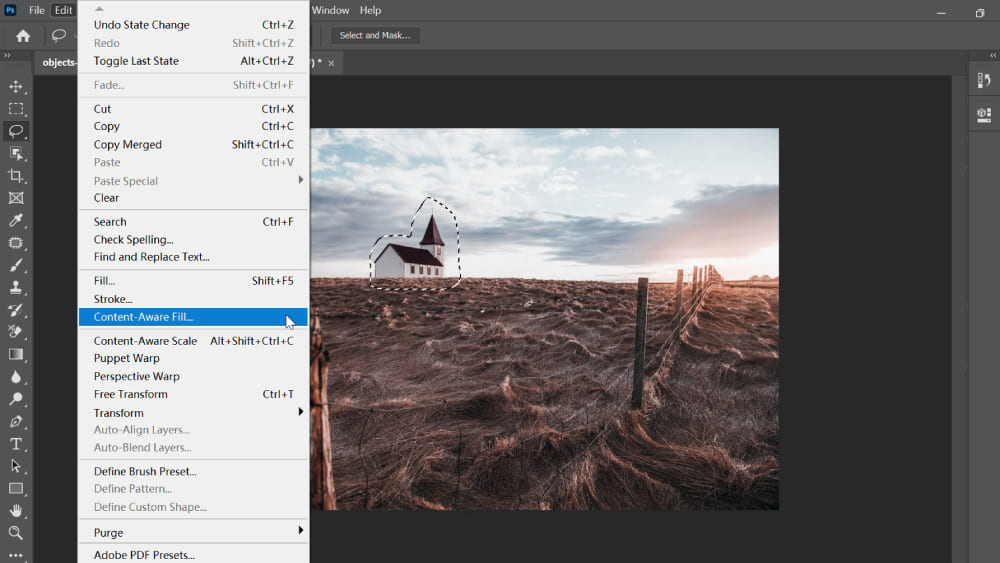
Method 5: Use the Content-Aware Fill
Content-Aware Fill is a powerful feature in Photoshop that can automatically fill in an area with textures and colors based on its surrounding content.
To begin, use any selection tool to roughly select the object you want to remove. There's no need to make a precise outline. Just ensure that the selection encompasses the entire object.
Next, navigate to the top menu and select Edit > Fill. A dialog box will appear, presenting you with different options for filling out the selection.
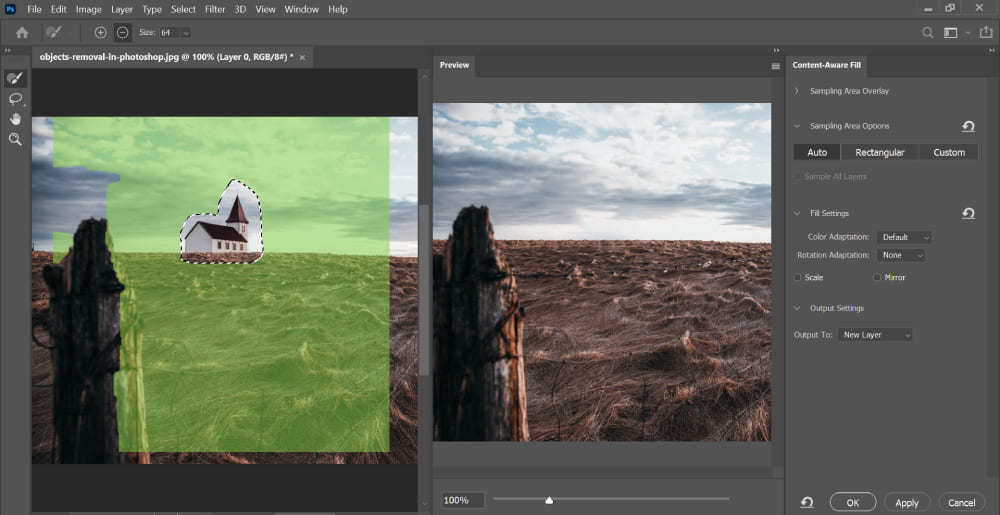
Within the dialog box, there are parameters available for adjusting Content-Aware Fill, but in most cases, the default settings are sufficient.
Photoshop will utilize its advanced algorithms to analyze the surrounding textures, colors, and patterns. It will automatically generate a replacement for the selected object, seamlessly blending it with the rest of the image.
Content-Aware Fill is an outstanding tool that simplifies the process of removing unwanted objects. It automatically generates realistic replacements, saving you time and effort. It is an invaluable feature for professional retouching and editing tasks.
Final Thoughts About Removing Objects in Photoshop
While the previous sections have equipped you with various methods to remove unwanted objects in Photoshop, mastering these techniques is only part of the journey toward becoming adept in Photoshop.
To make your photos or images look more natural, you may need to further adjust the colors and fine-tune the editing effects.
However, dealing with complex operations and constant adjustments can sometimes detract from the creative process. It can be a tiresome task to navigate through the numerous toolbars and menus, especially when your focus should be on the image itself.
This is where TourBox comes into play.

TourBox's unique layout of dials, buttons, and scroll wheels allows for faster access to Photoshop's functions. You can easily customize these controls to perform various tasks like layer management, brush resizing, and color adjustments.
TourBox integrates perfectly with Photoshop, offering an intuitive and seamless experience. With TourBox, you can stay focused on your canvas and not on the numerous menus and toolbars.
Mastering the art of how to remove objects in Photoshop is a valuable skill, but the right tools can elevate your editing process to a whole new level.
Incorporating TourBox into your Photoshop workflow not only simplifies complex tasks but also lets you focus more on your creativity. It's an investment in efficiency, precision, and most importantly, your artistry.