How to Remove White Background in Photoshop?
Discover the art of how to remove white background in Photoshop with our comprehensive tutorial. Unlock a variety of techniques as we delve into multiple methods, carefully weighing their unique advantages and considerations.
Get ready to elevate your editing skills as we embark on this exciting journey together!

In this article, you will learn:
- Four Effective Methods to Remove White Background in Photoshop
- Final Thoughts About Removing White Background in Photoshop
Four Effective Methods to Remove White Background in Photoshop
In this section, we will explore four simple and efficient methods in Photoshop to remove the white background from your images. These methods include:
- Magic Wand Tool
- Quick Selection Tool
- Select and Mask
- Layer Masks
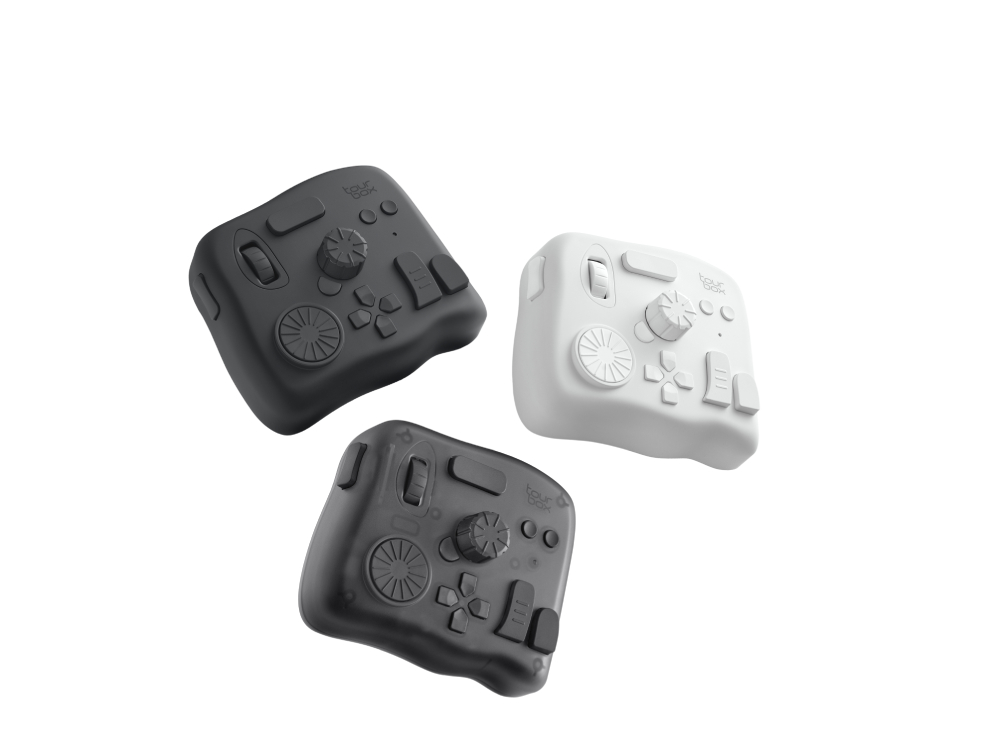
We will use the following image as an example to illustrate how to remove a white background in Photoshop.
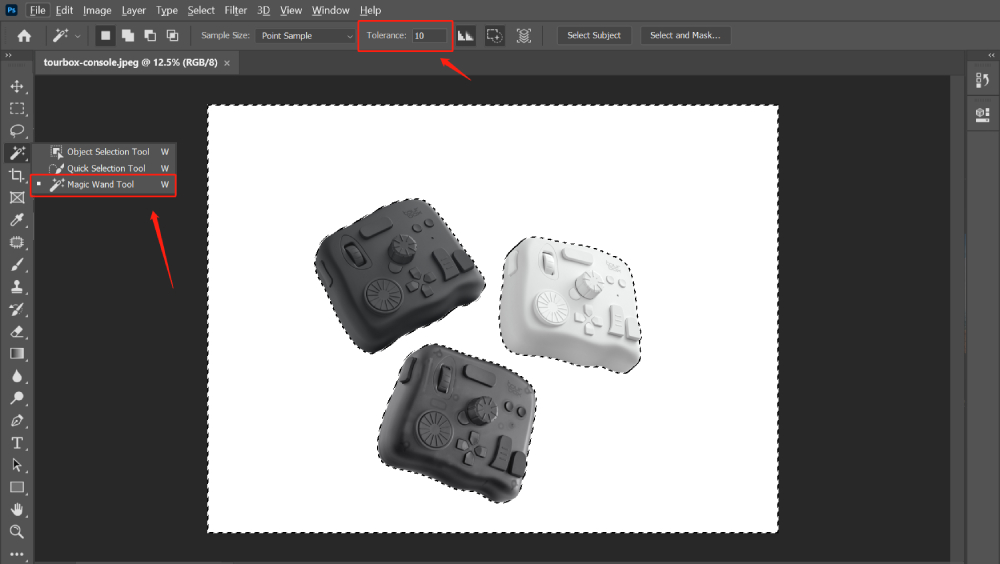
Method 1: Magic Wand Tool
The Magic Wand is a quick and easy tool for selecting a specific color range, like a white background.
- Open your image in Photoshop.
- In the Tools panel, select the Magic Wand Tool. You can quickly access it by pressing W on your keyboard.
- In the options bar at the top, adjust the 'Tolerance' setting. A lower value selects colors very similar to the color you click on, while a higher value selects a broader range of colors. For a white background, a lower tolerance (around 10-20) should work well.
- Click anywhere on the white background. The Magic Wand Tool will select all the white areas.
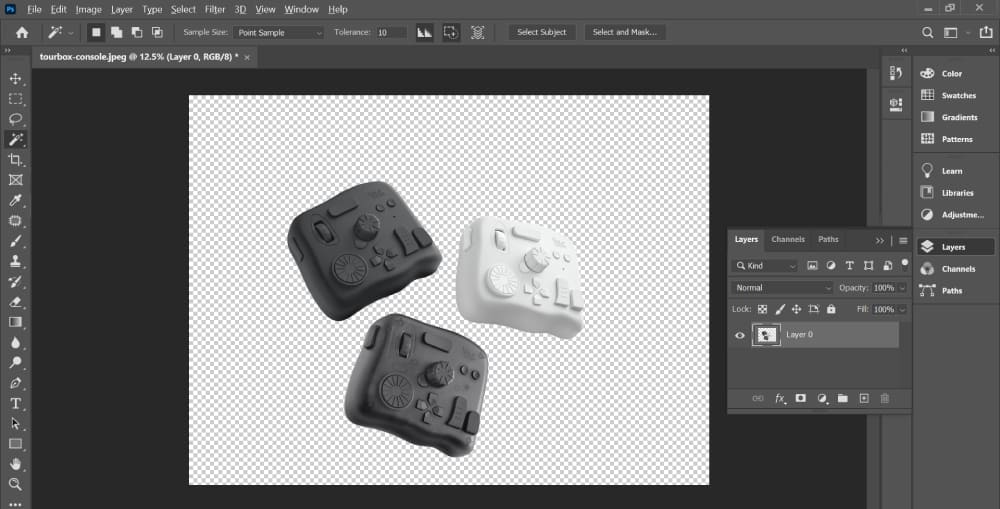
- Press Delete to remove the selected areas, leaving a transparent background.
- Go to File > Save As and save the image in a format that supports transparency, like PNG.
Let's take a look at the result image, and you'll be amazed at how stunning the effect is when using the Magic Wand Tool to remove the white background. Additionally, the process itself is incredibly straightforward and user-friendly.
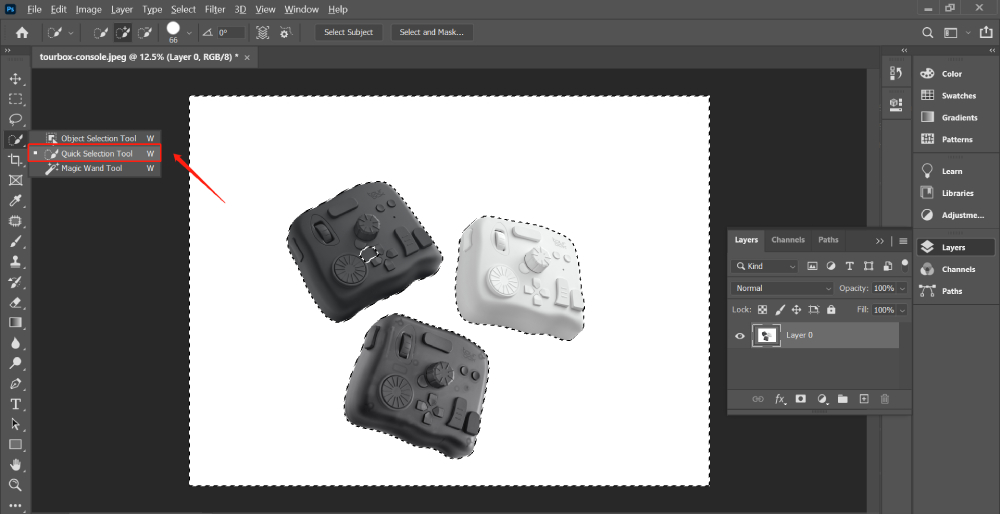
Method 2: Quick Selection Tool
The Quick Selection Tool is great for more complex images where the Magic Wand Tool struggles.
- Open your image in Photoshop.
- Select the Quick Selection Tool from the Tools panel or press W.
- Click and drag your mouse over the white background. The tool will create a selection that adheres to the detected edges of your image.
- Once you've selected the entire background, press Delete to remove it.
- Save your image as a PNG to maintain transparency.
Method 3: Select and Mask
For images with complex edges or detailed elements (like hair or fine lines), the Select and Mask tool can be very effective.
- Open your image in Photoshop.
- Choose the Quick Selection Tool and make a rough selection of the white background.
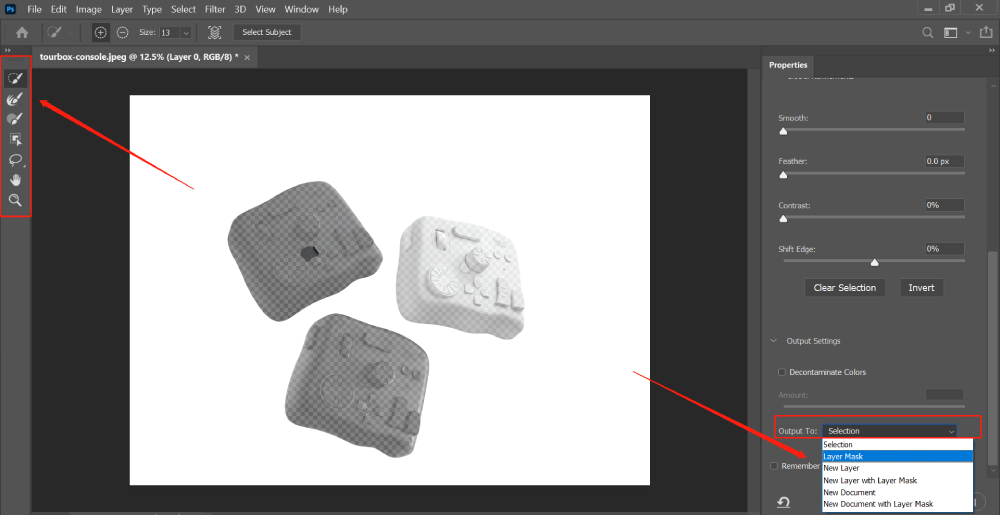
- Click on the 'Select and Mask' button in the options bar at the top.
- In the Select and Mask workspace, you can refine your selection using various tools and sliders. For instance, the 'Refine Edge Brush Tool' can be used to paint over any complex edges in your image.
- Once you're happy with the selection, set the 'Output To' option to 'Layer Mask' and click OK.
- The white background will now be replaced with a transparent one. Don't forget to save your image in a format that supports transparency.
Method 4: Layer Masks
Layer masks allow you to non-destructively remove the white background, meaning you can always undo your changes.
- Open your image in Photoshop.
- Select the Magic Wand Tool or Quick Selection Tool and create a selection of the white background.
- With the selection still active, go to the "Select" menu at the top of the screen.
- From the dropdown menu, choose "Inverse" (or you can use the shortcut key Shift+Ctrl+I on Windows or Shift+Command+I on Mac).
- The selection will now be inverted, meaning the previously unselected areas will be selected, and the previously selected areas will be deselected.
- Go to the Layers panel and click on the 'Add Layer Mask' button.
- This will create a mask that hides the white background. If you need to refine the mask, you can paint on it using the Brush Tool: black hides and white reveals.
- Save your image as a PNG or TIFF to maintain the transparency and the layer mask.

Each method has its strengths and weaknesses, and the best one to use depends on your specific image and needs. With practice, you'll quickly improve your skills and become adept at choosing the right tool for each task.
Final Thoughts About Removing White Background in Photoshop
After exploring the four different methods for removing white backgrounds in Photoshop, we have truly experienced the power of Photoshop in image editing.
However, its complexity can sometimes slow down our workflow. But what if there was a way to enhance our efficiency and make the editing process in Photoshop even smoother? Let's take a closer look at TourBox.

TourBox is designed with creators in mind, offering a faster, more intuitive way of navigating and controlling Photoshop.
With its customizable knobs, wheels, and buttons, you can create shortcuts for virtually any tool or command in Photoshop. Imagine having all your favorite functions—like select, erase, and brush—right at your fingertips!
Whether you're a seasoned Photoshop pro or a budding enthusiast, TourBox is an investment that will transform your digital editing process.
By making operations faster and more intuitive, it allows you to focus more on the creative aspects of your work.
So why not add this game-changing device to your digital toolkit today? Get ready to experience Photoshop like never before with TourBox.