How to Render in Premiere Pro?
When you've finished editing in Premiere Pro and added all your effects, rendering is the key step that turns your project into a playable video. The right render settings not only keep your picture and sound looking great but also speed up export time and help avoid encoding errors.
Next, let's dive into how to render in Premiere Pro so you can easily and efficiently output professional-quality videos.

In this article, you will learn:
- What Is Video Rendering?
- Why Do You Need to Render?
- How to Render in Premiere Pro?
- What Affects Rendering Speed and Quality?
- Common Rendering Errors and Troubleshooting Tips
- Conclusion
What Is Video Rendering?
"Rendering" comes from computer graphics. It's the process of using calculations to turn a virtual scene or raw assets into a final image.
In video editing, rendering is how software like Premiere Pro takes everything on your timeline — clips, effects, color corrections — and computes it all into one complete video file.
For example, a sequence with multiple video tracks, transitions, and color grading must be rendered before you get a playable clip.
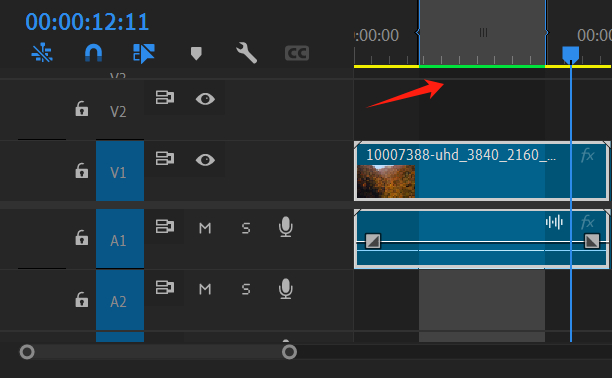
During editing, Premiere Pro also offers a preview-render feature. After you mark your in and out points on the timeline, you can choose Render In to Out.

Premiere Pro then creates preview files (you'll see a green bar on the timeline), so playback is smooth and free of stutters.
But whether or not you render previews, you still need to export (render) the final video to get a full, playable file.
Why Do You Need to Render?
Rendering is how you get a final, playable video out of your project. Without it, your timeline edits stay locked inside the project file and can't be played or uploaded.
When you render, Premiere Pro (and other editing software) "combines" all your video tracks, audio, captions, transitions, and effects into one finished file. Think of this step like packaging your work for release. It ensures viewers see exactly the images and effects you designed.
Rendering also affects video quality and playback smoothness. The clarity and smoothness of your output depend on several settings — resolution, frame rate, interlacing (fields vs. progressive), codec, and bitrate.
For example, at the same resolution, higher bitrates give you sharper images. Too low a bitrate, and your video can look blurry.
That's why choosing the right settings (like the proper resolution and a good bitrate) directly affects how professional your final video looks and how much your audience enjoys it.
In real projects, we often pick settings based on where the video will play. YouTube, for instance, commonly uses 1080p or 4K with H.264 encoding to balance great quality with wide compatibility.
How to Render in Premiere Pro?
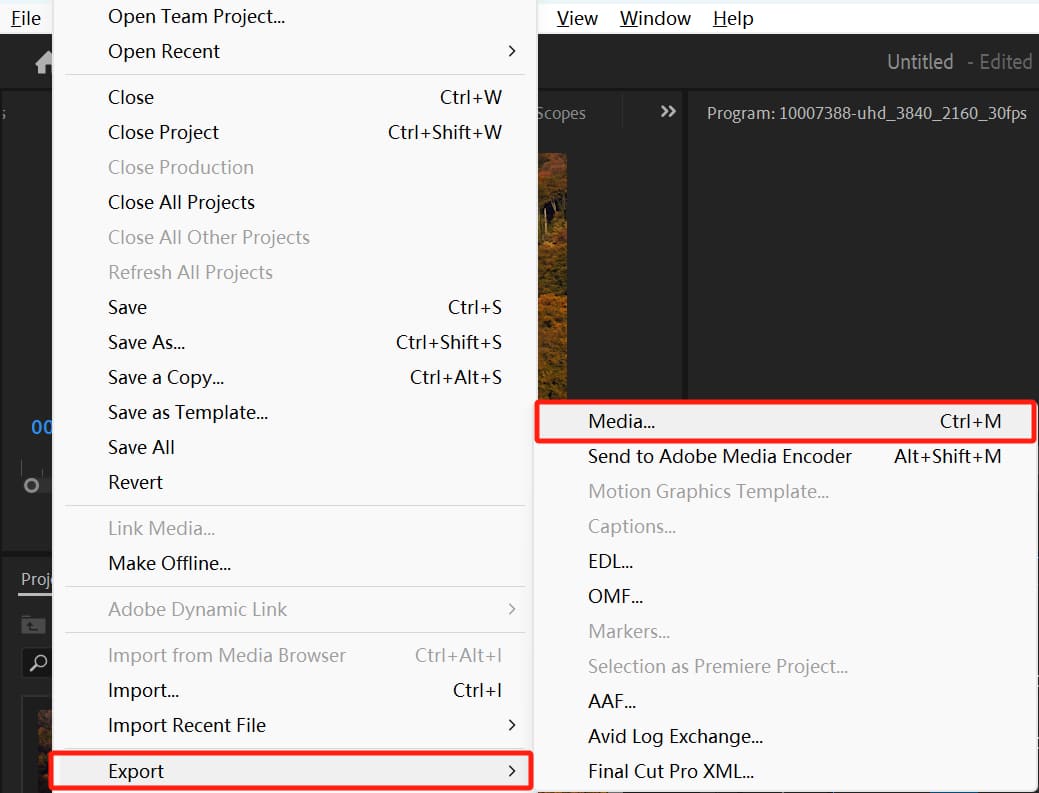
In Premiere Pro, the main way to render your final video is with the Export Media feature. First, select the sequence you want to export in the Project panel or the Timeline panel. Then go to File > Export > Media (or press Ctrl/Cmd + M).
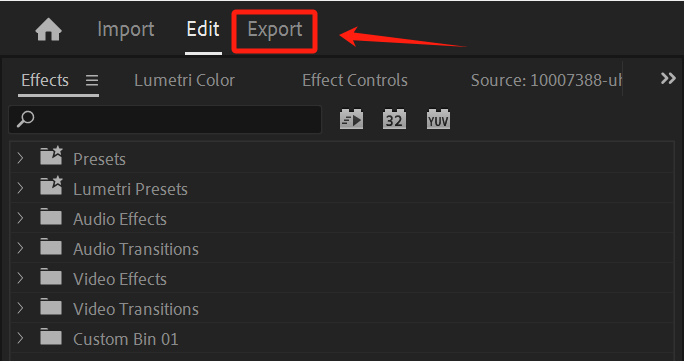
You can also click the Export tab in the upper‑left corner to open the export settings.
On the export settings page, look in the center panel and choose your output format: H.264 (for an MP4 file) is the most common. H.264 balances quality and file size, making it ideal for web videos.
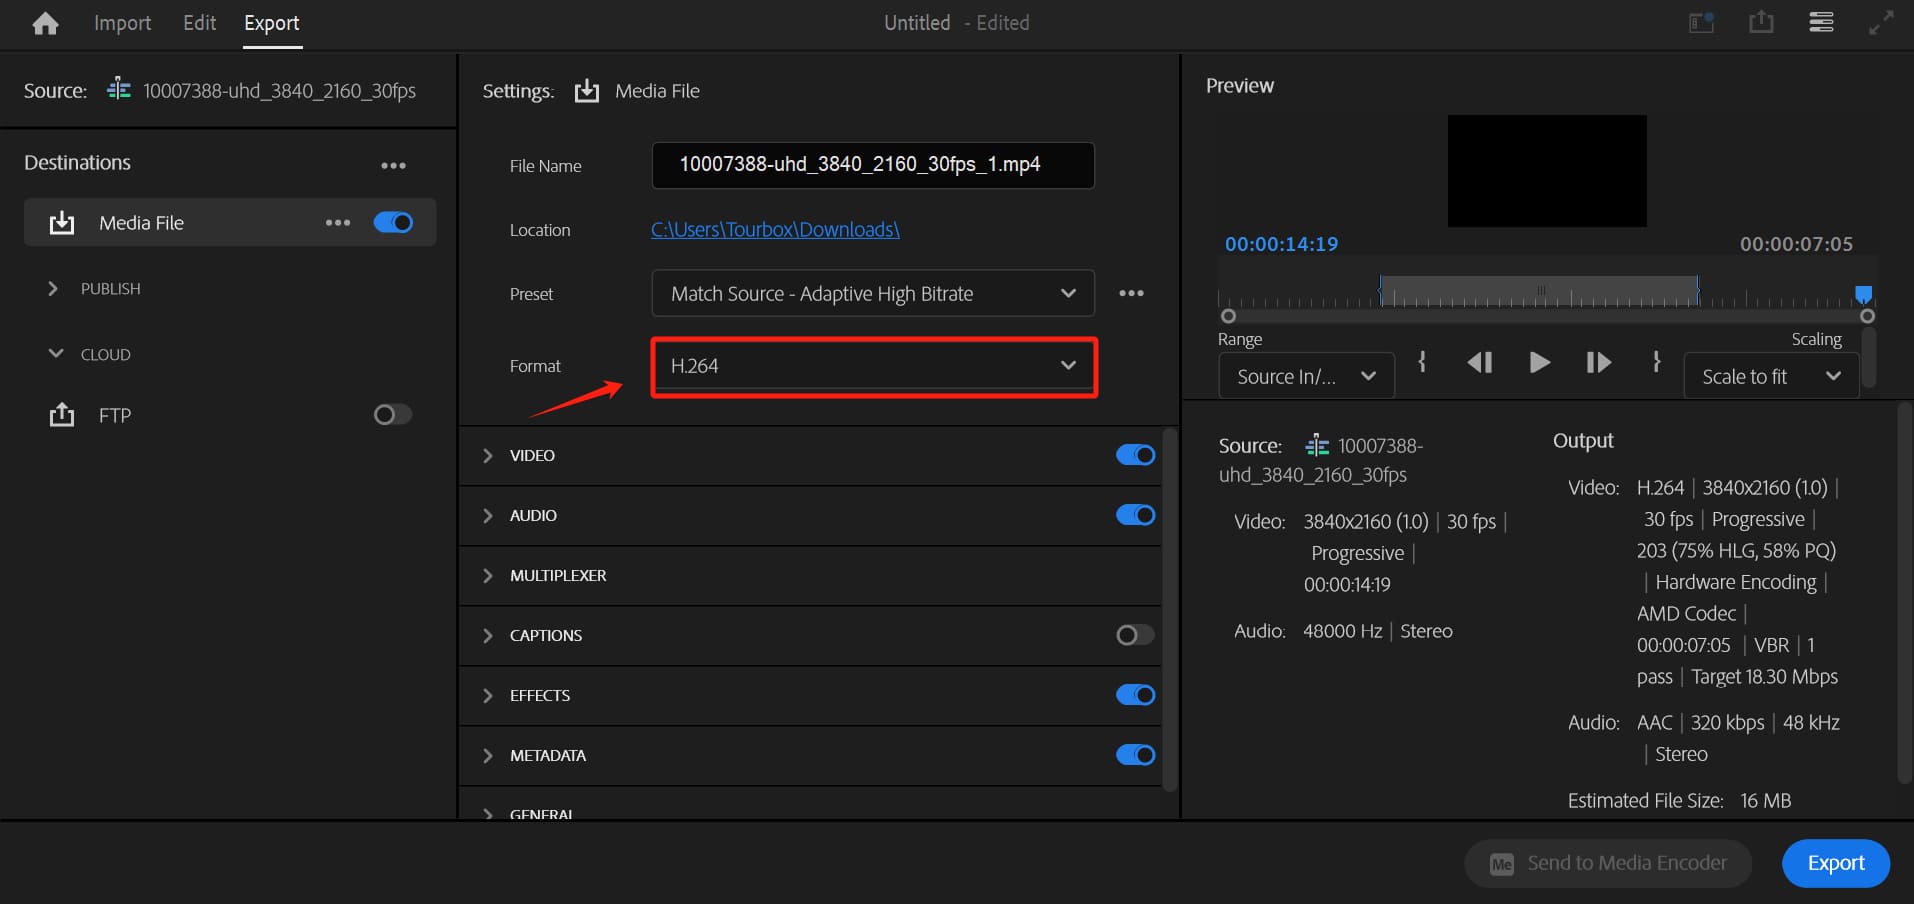
After picking your format, open the Preset menu and choose a built‑in option. Premiere Pro includes "Match Source" presets, like Match Source – Adaptive High Bitrate.
These presets automatically match your export parameters (resolution, frame rate, etc.) to your source sequence and adjust bitrate to give you high quality without a huge file or long export times.
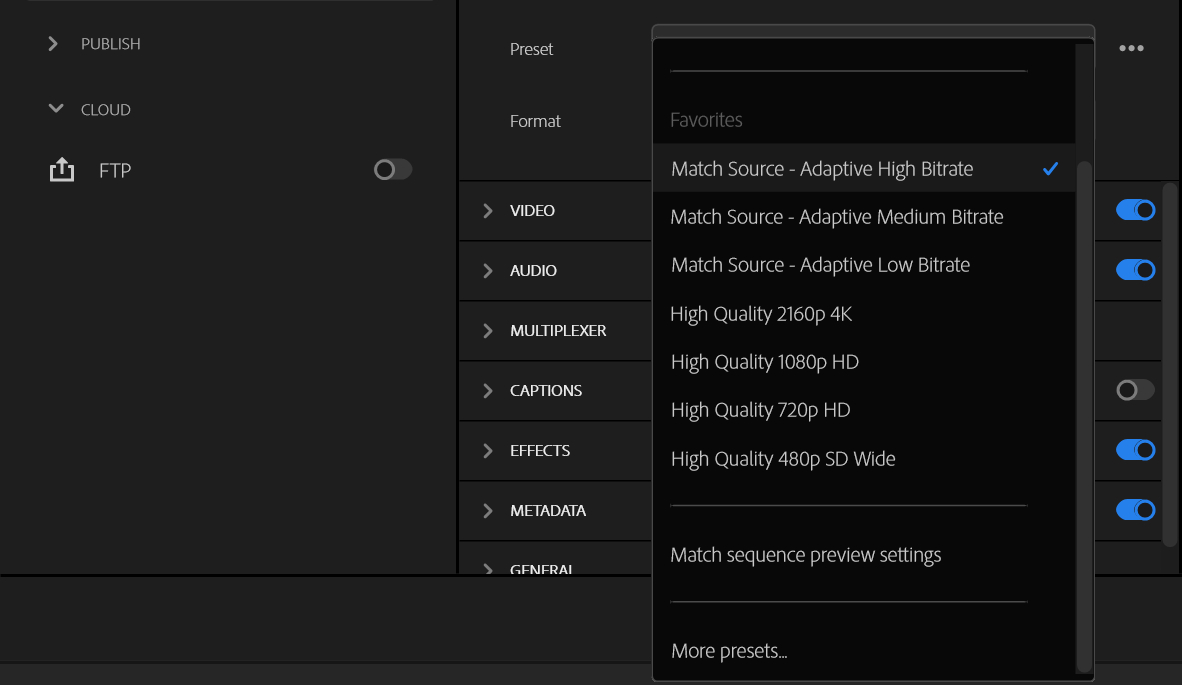
If you're new to editing, just pick Match Source – Adaptive High Bitrate. It saves you from manual settings and still delivers good clarity.
If you need top‑tier quality or work on professional projects, you can choose a lossless format like QuickTime/ProRes, but keep in mind the file size will be much larger.
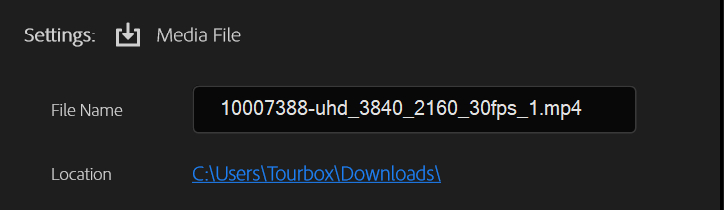
In the Output Name field, click the file path to set your file name and choose where to save it.
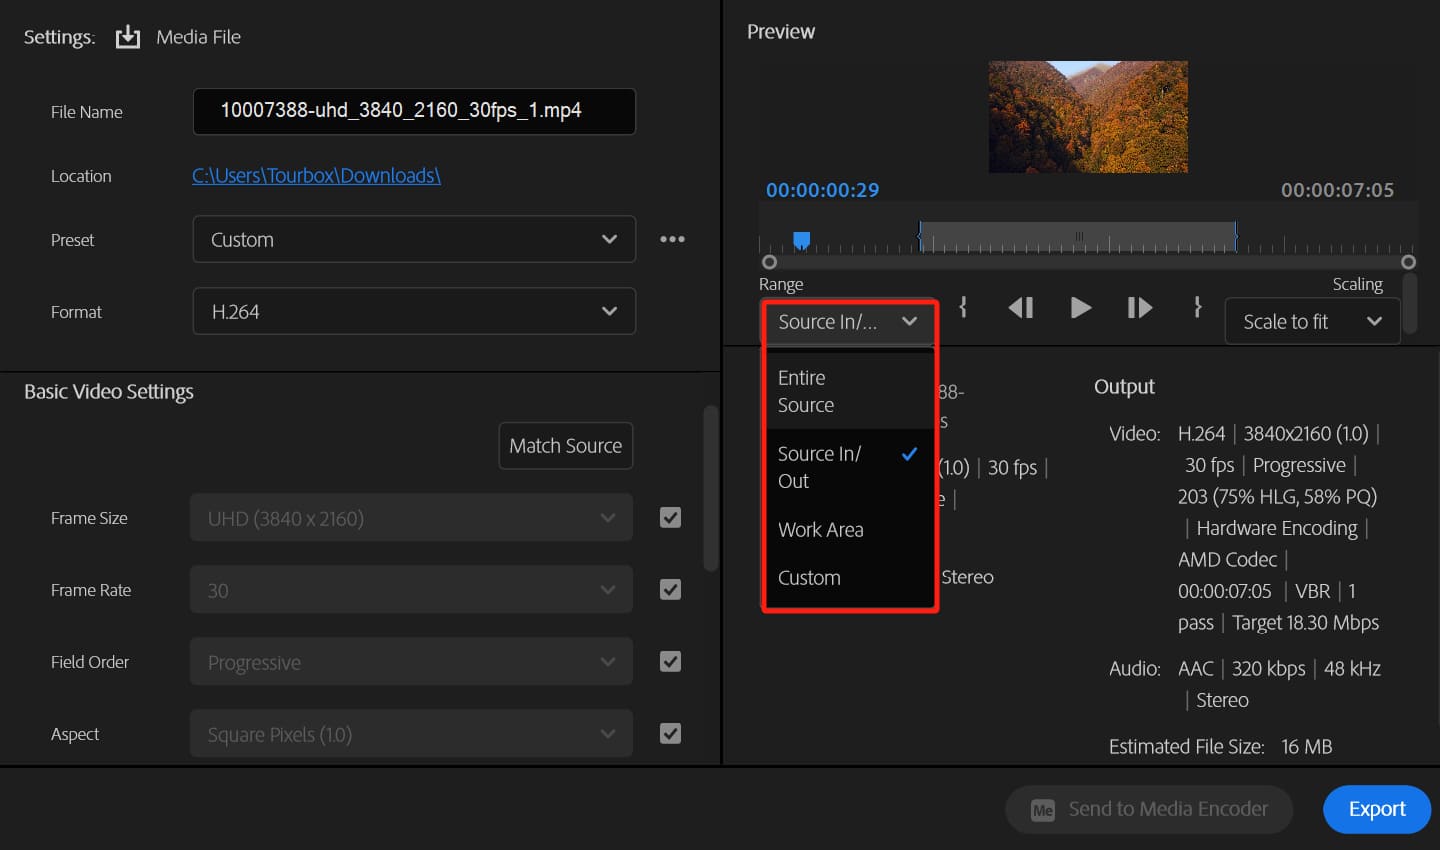
Usually, choosing Match Source in the presets will automatically pick the right output size and prevent distortion. Then switch to the Video tab below to see your basic settings (resolution, frame rate, and field order), which by default match your sequence.

If you need a different resolution (for example, downsampling from 1080p to 720p), you can change it here. Once you've set these parameters, click the Preview panel on the right to check how it looks.
In the Preview panel, you can also use the Range option to pick exactly what part to export: Entire Source, Source In/Out, or a custom time span. This lets you export just a clip or the whole video — super flexible.
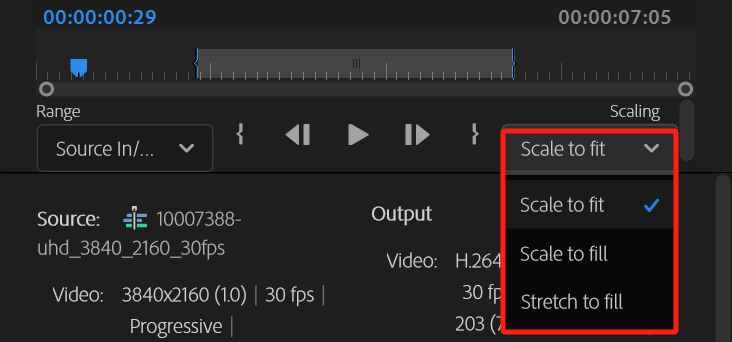
Next to that, the Scaling options decide how the image fills the frame when you change resolution. Scale to Fit keeps your aspect ratio and adds black bars, Scale to Fill crops the image, and Stretch to Fill may distort it.
Finally, click Export to start rendering. This export process is essentially Premiere Pro "baking" your project into the final video file.
What Affects Rendering Speed and Quality?
For beginners in Premiere Pro or creators who aren't picky about settings, the basic render steps above are enough. But if you care about how fast Premiere Pro renders and how your final video looks, read on for some advanced tips.
Rendering speed and video quality depend on several factors.
First is your hardware. Rendering uses a lot of resources. A fast, multi‑core CPU, a dedicated GPU, and plenty of RAM all help speed things up.
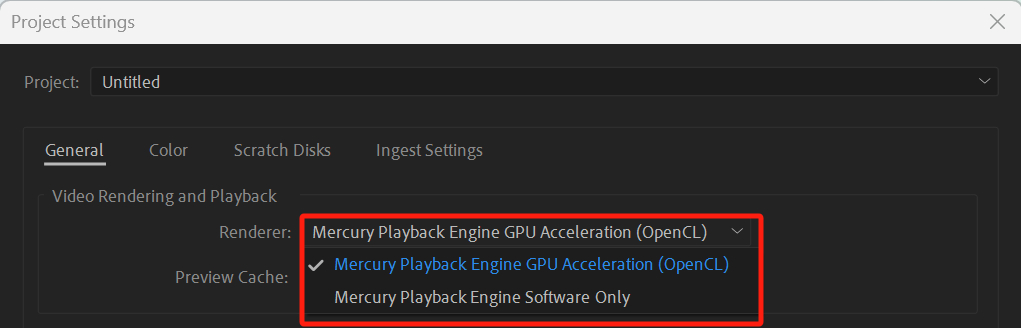
In Project Settings, turning on Mercury Playback Engine GPU Acceleration lets Premiere Pro use your graphics card to process effects and encode video faster. This only works if your system and drivers support it.
If your GPU isn't compatible or causes issues, you can switch to Software Rendering. It's more stable but slower.
Your export settings are also key. Higher resolutions and frame rates mean more data to process, so render times go up. At the same resolution, a higher bitrate gives you a sharper image, but files get bigger and renders slow down.
In short, if you're on a tight deadline or your hardware is average, you can speed up rendering by lowering your output resolution or bitrate. If you want the highest quality, be ready to wait longer or upgrade your hardware.
You can also improve your editing experience by pre‑rendering your timeline. Premiere Pro creates preview files (you'll see a green bar on the timeline), making playback smoother.
Finally, your drive's speed matters. Exporting to an SSD instead of a mechanical hard drive will noticeably speed up encoding and file writing.
Common Rendering Errors and Troubleshooting Tips
Rendering failures or export crashes are pretty common. You can troubleshoot them in these ways:
- Keep Your Software and System Updated: Make sure you're on the latest Premiere Pro version and that your GPU drivers are up to date and compatible.
- Check File Names and Paths: Avoid spaces or special characters in your project name, media file names, or export path.
- Verify Disk Space and Permissions: Ensure your target drive has enough free space and no permission issues. Sometimes exports fail because the disk can't write files.
- Disable Hardware‑Accelerated Decoding: If you see errors related to H.264 or HEVC encoding, go to Preferences > Media and turn off H264/HEVC hardware accelerated decoding. This forces software decoding and can bypass hardware‑related export errors.
- Switch GPU Acceleration to Software Mode: In Project Settings, switch Mercury Playback Engine GPU Acceleration to Software Only. It's slower but more stable when you hit codec issues.
- Use Media Encoder: If direct exports still fail, send your sequence to Adobe Media Encoder. It often handles exports more forgivingly.
- Check for Corrupt Media or Conflicting Plugins: Remove damaged clips or third‑party plugins that might clash. Clear your render cache (Edit > Delete > Media Cache Files), regenerate previews, or render in small sections to isolate the problem.
By ruling out issues one by one using these steps, you'll usually find and fix the cause of your render failures.
Conclusion
Before you start a full render in Premiere Pro, try exporting a few short test clips with different settings. This helps you find the right balance between quality and render time. Once you're comfortable with formats, bitrates, GPU acceleration, and preview renders, you can tweak the export process to suit your needs.
Master these steps, and your Premiere Pro renders will run smoothly.
Product Recommendation:
Using the right tools during editing and export can really boost your efficiency. For example, TourBox is a compact yet powerful creative console that speeds up editing, color grading, and timeline navigation.

TourBox has customizable knobs, dials, and buttons that replace complex keyboard shortcuts, perfect for editors who tweak settings often. It also offers advanced features: you can set up a macro to apply your render settings in Premiere Pro and execute it with a single button press.

We hope this guide helps you understand how to render in Premiere Pro. If you're interested in TourBox, check out our video editing page to see how it can enhance your workflow!