Four Methods: How to Save Photoshop as JPEG
Navigating the labyrinth of file formats in Adobe Photoshop can feel like a daunting task, especially when you're fresh on the digital art scene. But fear not, because today, we're going to demystify one of the most common and versatile file formats out there - the JPEG.
Whether you're looking to share your latest work on social media, send a draft to a client, or simply save a high-quality version of your design for personal use, knowing how to correctly save your Photoshop creations as JPEGs is an invaluable skill.
In this tutorial, we'll guide you through the process step-by-step, ensuring you understand not only how, but also why you might want to save your work in this particular format. By the end, you will have all the know-how to save Photoshop as JPEG.

In this article, you will learn:
- The Why and the How of JPEG Image Format
- How to Save Photoshop As JPEG?
- Additional Tips for Saving Photoshop As JPEG
The Why and the How of JPEG Image Format
So, why would you want to save your images as JPEGs? It all boils down to a balance between quality and file size.
JPEG, standing for Joint Photographic Experts Group, is a widely used format that employs a method of lossy compression to keep file sizes manageable without drastically compromising image quality.
The power of JPEG lies in its versatility. It's supported by almost every image viewer and operating system, making it a great choice for sharing your work broadly, whether that's on your personal blog, social media, or with clients via email.
But it's not all sunshine and rainbows. One downside of JPEG is the lossy compression we just talked about. While this makes for smaller file sizes, it also means that some data is lost every time you save the image.
This can lead to a decrease in image quality if a file is repeatedly edited and saved as a JPEG. To avoid this, it's a good practice to keep your original file in Photoshop's native PSD format and save copies as JPEGs for sharing or web use.
JPEG is a powerful tool in the designer's toolkit, striking a good balance between image quality and file size. Let's check out landscape photographer Mike Smith's educational content on JPEG on his YouTube channel.
How to Save Photoshop As JPEG?
It's time to get hands-on with Photoshop, exploring the different avenues to saving your files as JPEGs. Each method has its own advantages, so let's dive in!
Method 1: The 'Save As' Technique
Arguably the most straightforward way to save your work as a JPEG is using the 'Save As' feature. Here's how:
Once you've opened your file in Photoshop, navigate to the top menu and select 'File', followed by 'Save As'.
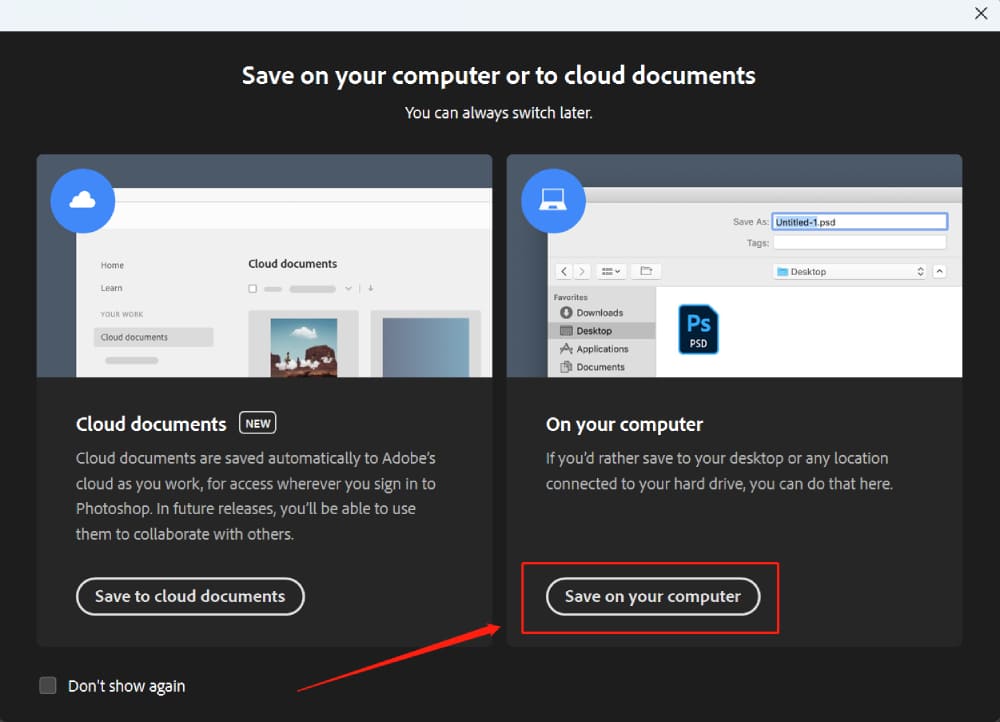
Next, a pop-up panel will appear. Photoshop will ask if you want to save the file in Cloud Documents or 'On Your Computer'.
Since our goal here is to save the Photoshop file as a JPEG, we'll opt for the 'Save on Your Computer' button located at the lower right of the panel.
This will prompt a dialog box to appear. Here, under 'Format', select 'JPEG'. Give your file a name, choose a location for it, and then hit 'Save'.
After clicking 'Save', you'll encounter a pop-up box titled 'JPEG Options'.
Here, you'll encounter several options: 'Matte', 'Image Options', 'Format Options', and 'Preview'. Let's navigate through what each of these means.

Matte
This option becomes relevant when you're working with images that contain transparency.
Since JPEG doesn't support transparency, Photoshop provides the 'Matte' option to allow you to fill the transparent areas with a specific color of your choice when saving your file.
Image Options
This section allows you to adjust the quality and format of your JPEG image. The 'Quality' slider ranges from 0 to 12, with 12 providing the highest quality but also the largest file size.
You'll also see an estimate of the output file size based on the settings you choose. Note, however, that higher quality means larger file sizes. If you're aiming for a smaller file, you might want to compromise a bit on quality.
Format Options
Here, you can choose between three formatting types: 'Baseline ("Standard")', 'Baseline Optimized', and 'Progressive':
- 'Baseline ("Standard")' is the most compatible across devices and platforms.
- 'Baseline Optimized' provides a smaller file size with the same image quality.
- 'Progressive' JPEGs load in successive layers of detail, which is useful for displaying large images on web pages.
Preview
The 'Preview' checkbox allows you to see the changes made in the 'JPEG Options' dialog box in real-time in your Photoshop workspace.
This can be helpful to gauge the impact of your settings before you finalize the save process.
Adjust and set the parameters as per your specific needs. Once you're satisfied, click the 'OK' button to strike the perfect balance between image quality and file size.
Method 2: The 'Export As' Option
The 'Export As' feature gives you more control over your output and is especially useful for web graphics. Here's the rundown:
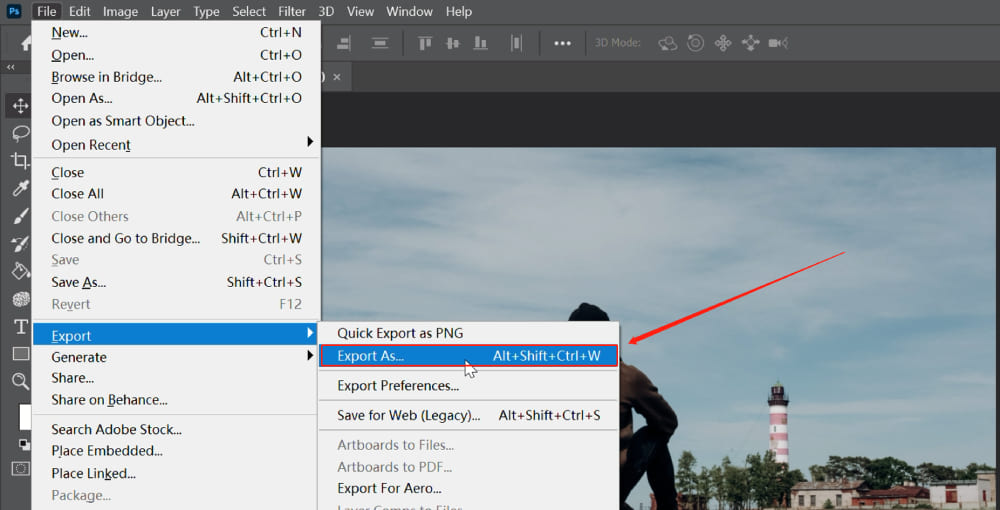
Go to 'File' then 'Export' and choose 'Export As'.
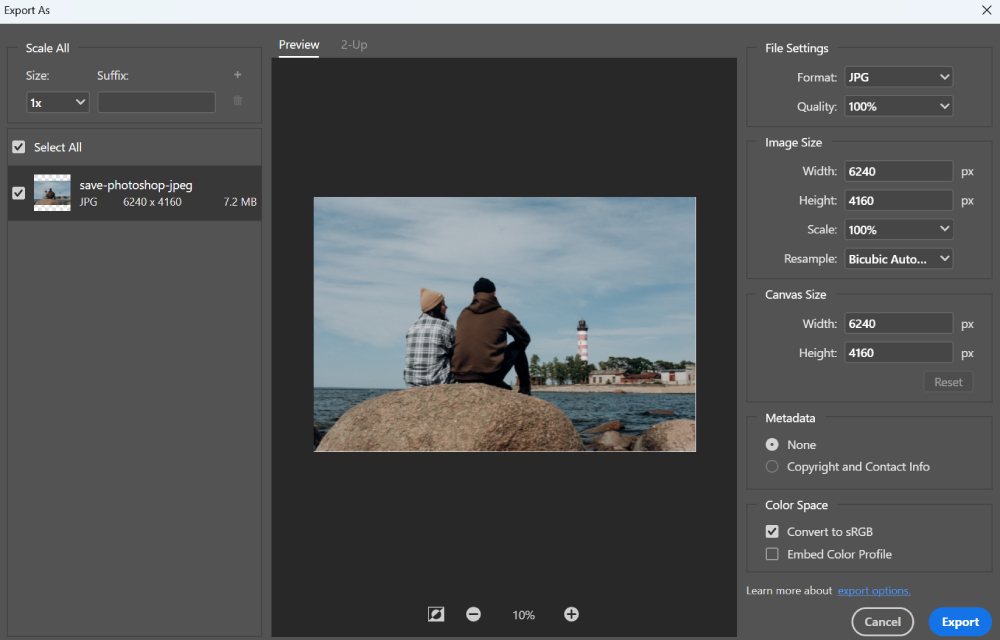
In the dialog box, select 'JPEG' as the format.
You'll see several options to tweak. 'Quality' works like in the 'Save As' method. 'Width' and 'Height' let you resize your image. 'Canvas Size' is useful if you want to add some space around your image.
The 'Convert to sRGB' option should generally be checked if your image is going to be viewed on the web or mobile devices.
Method 3: The 'Save for Web (Legacy)' Method
While this is an older feature in Photoshop, it's still a favorite among many due to its control over image optimization:
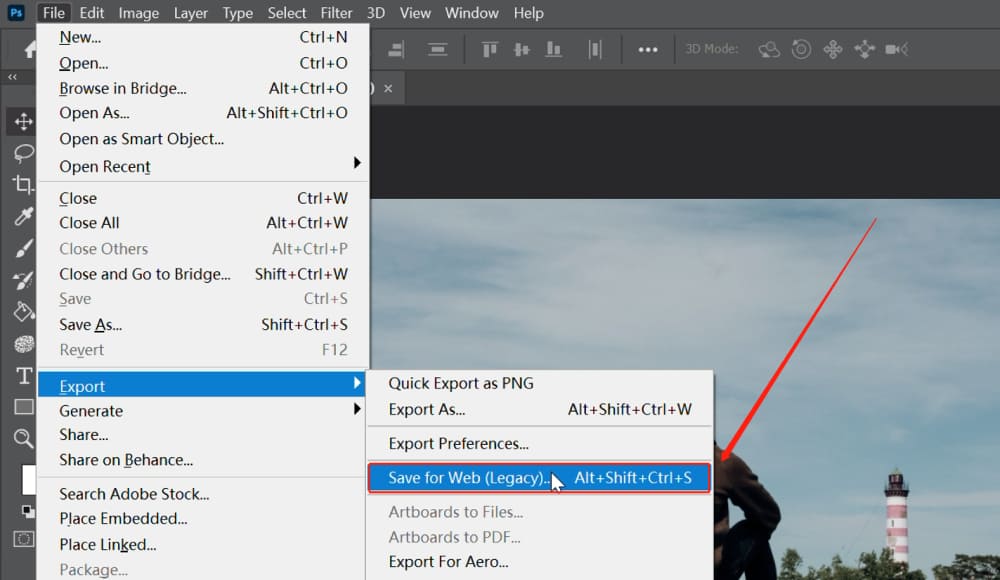
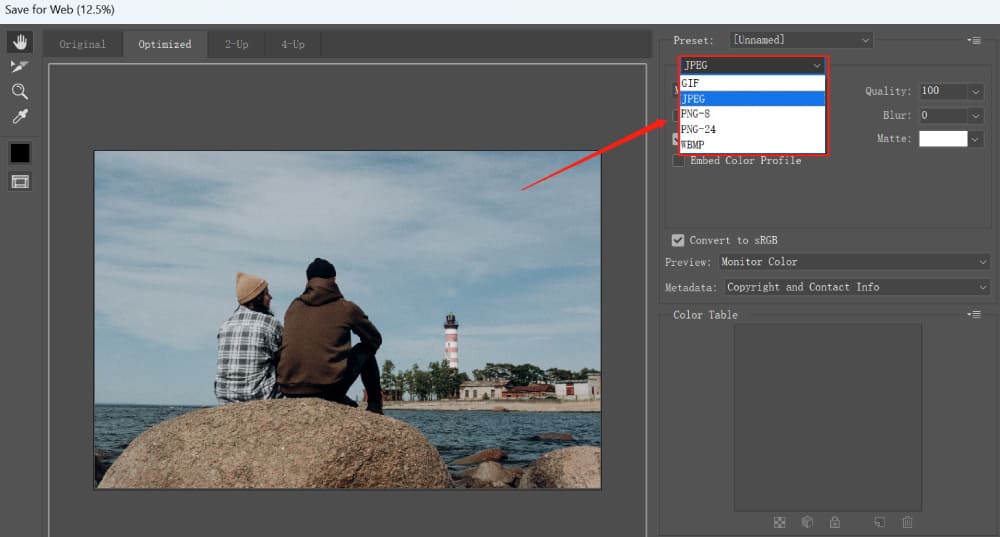
Select 'File', then 'Export', and finally 'Save for Web (Legacy)'.
Choose 'JPEG' as your file format from the right side of the dialog box.
You'll see a host of parameters here:
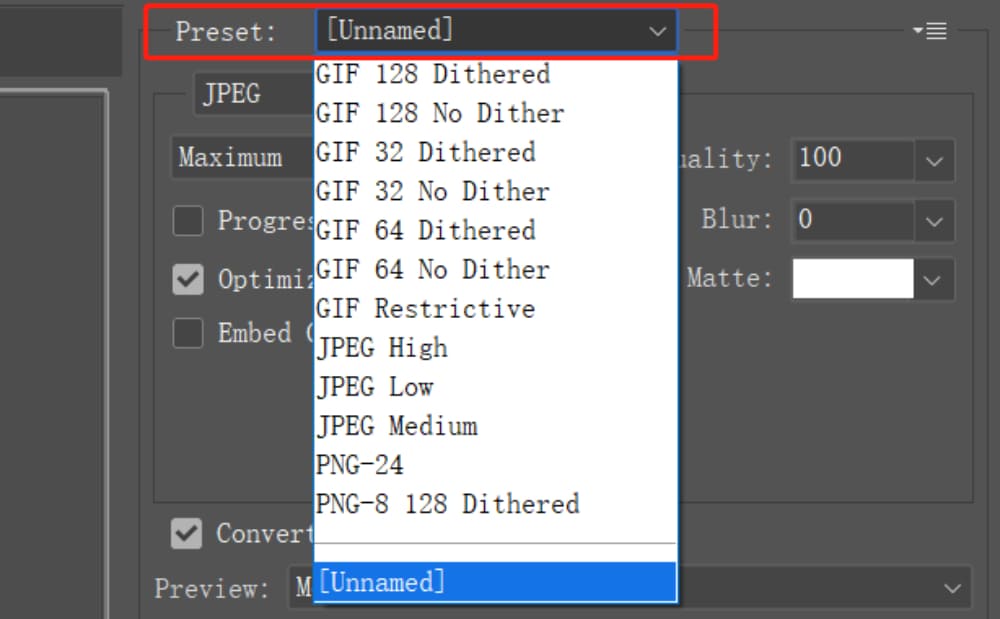
Preset: This dropdown allows you to select from a variety of predefined settings, which can be a real timesaver. You can also save your own settings as a new preset for future use.
JPEG Quality: Here, you can adjust the quality of your JPEG image. The scale goes from 0 (Lowest quality, smallest file size) to 100 (Highest quality, largest file size).
Optimized: Checking this box will enable a more optimized form of JPEG that results in smaller file sizes without significant loss in quality.
Progressive: A Progressive JPEG will load in stages when viewed in a web browser. First, a low-quality version of the full image will appear, and then it will gradually increase in quality.
Embed Color Profile: If checked, this option includes the color profile of your image in the file. This can help ensure colors look correct on devices that support color management.
Blur: This option applies a small amount of blur to your image, which can reduce file size but may also affect sharpness.
Convert to sRGB: If checked, this will convert your image to the sRGB color space, which is the most widely used color space for displaying images and videos on digital devices.

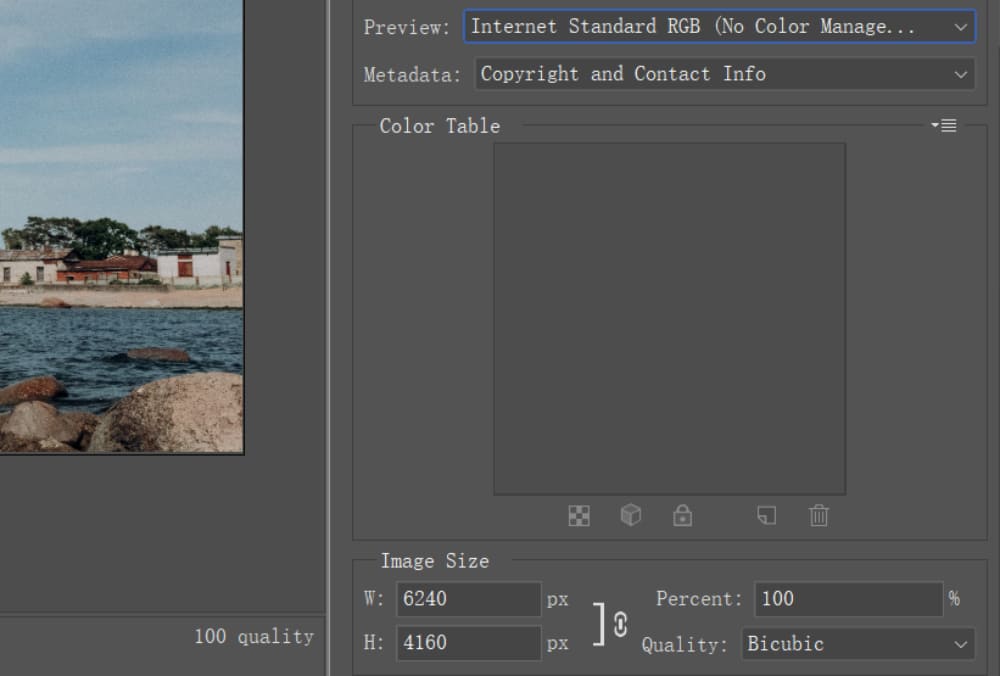
Preview: Here you can choose how you want to preview your image. 'Internet Standard RGB (No Color Management)' is a good general setting to use.
Metadata: This dropdown lets you choose how much of your image's metadata to include in the file. Including all metadata will increase the file size.
Image Size: Here, you can adjust the dimensions of your image. Be careful not to enlarge your image here, as it can result in a loss of quality.
Percent: Here you can adjust the zoom level of your image preview.
Additionally, within the 'Image Size' section, there's a 'Quality' parameter with some somewhat puzzling settings.
If you're intrigued by these options and interested in learning how to compress images in Photoshop, do check out this article: How to Compress an Image in Photoshop: A Comprehensive Guide
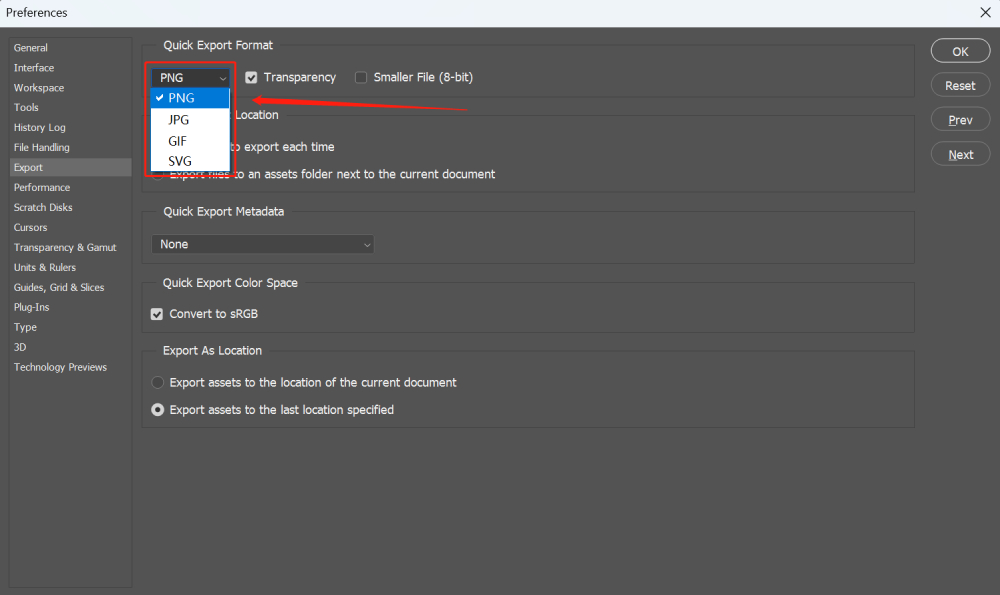
Method 4: Quick Export as JPEG
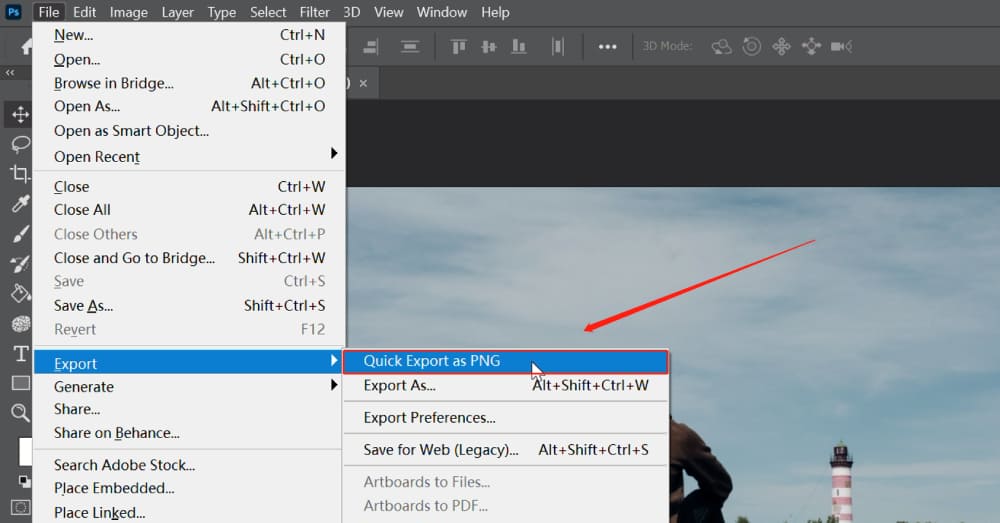
Photoshop also supports a quick one-click option to export file formats. This can be achieved by navigating through 'File' > 'Export' > 'Quick Export as XXX'.
However, the system's default file format is PNG. If you prefer to use JPEG, all it takes is a simple adjustment in the settings to make that change.
To make this adjustment, click on 'Edit' > 'Preferences' > 'Export'. In the panel that pops up, set the 'Quick Export Format' to JPEG.
Additional Tips for Saving Photoshop As JPEG
In this tutorial, we've walked through various methods of saving JPEG in Photoshop. While these steps may seem straightforward, they involve numerous parameters.
Furthermore, when dealing with bulk file exports, the process can become quite cumbersome and time-consuming.
Enter TourBox - a device that promises infinite possibilities for creators. This handy gadget, paired with its accompanying software, TourBox Console, could be an ideal solution for streamlining your workflow.

With TourBox, you can create macro commands that automate repetitive tasks. Imagine consolidating the multitude of steps involved in exporting Photoshop files into JPEGs with a single button click.
Or better yet, consider the convenience of applying color grading to multiple files at once with just one command.
By automating these routine tasks, TourBox allows creators to focus on what truly matters - the creative process itself. It shifts the emphasis from getting bogged down in the minutiae of operations to spending more time exploring, experimenting, and expressing your creativity.
So if you're looking to enhance your creative workflow in Photoshop, consider giving TourBox a try. With its ability to simplify and automate tasks, it could be the tool that takes your creativity to the next level.
And there you have it - a comprehensive guide on how to save as a JPEG in Photoshop. We've explored different methods, dissected their parameters, and hopefully, provided you with a clearer understanding of the process.
Whether you're optimizing for the web, preparing for print, or simply sharing your creative work, knowing how to properly save your files is essential.
Remember, the options offered by Photoshop are tools at your disposal. Don't be afraid to experiment with different settings to find what works best for your specific needs.