How to Sharpen an Image: 7 Practical Methods for Natural Results
Sharpening might seem like a small step, but it can change the way a photo looks. It makes details clearer, helps the subject stand out, and preserves image texture when you zoom in.
In this article, we'll show some common sharpening techniques. After reading, you'll be able to pick the most natural and fitting sharpening method for your photo-editing needs.

In this article, you will learn:
- Method 1: Basic Sharpening
- Method 2: Clarity Sharpening
- Method 3: Dehaze
- Method 4: High Pass Sharpening
- Method 5: Smart Sharpen and Unsharp Mask
- Method 6: Output Sharpening (Double-Resize Method)
- Method 7: Other Sharpening Options
- Conclusion
Method 1: Basic Sharpening
By "basic sharpening," here we mean sharpening RAW files in Lightroom or Camera Raw. The goal is to bring out more detail without any destructive edits and to give you a cleaner starting point for work in Photoshop.
Using Lightroom Classic (LrC) as an example, open the Develop module and find the Detail panel on the right.
You'll notice Lightroom applies a basic amount of sharpening to RAW files by default. A common approach is to set Radius to the smallest value (0.5), set Detail to the maximum (100), and then adjust Amount based on the photo. You can also keep Lightroom's default Amount if it already looks right.
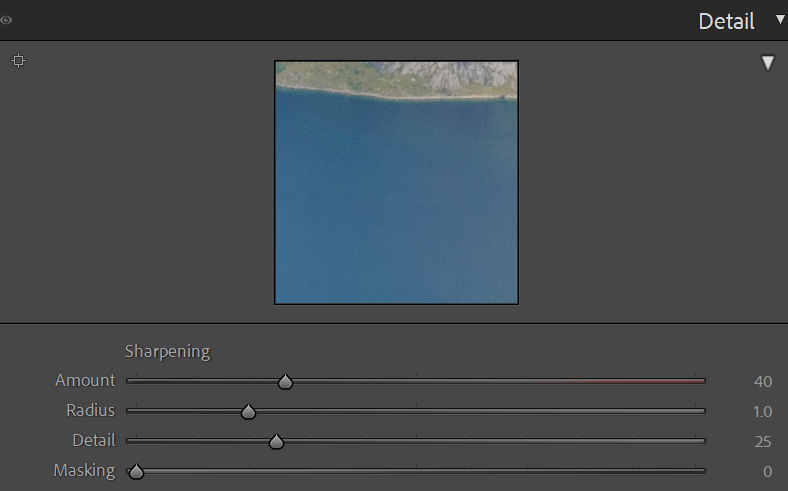
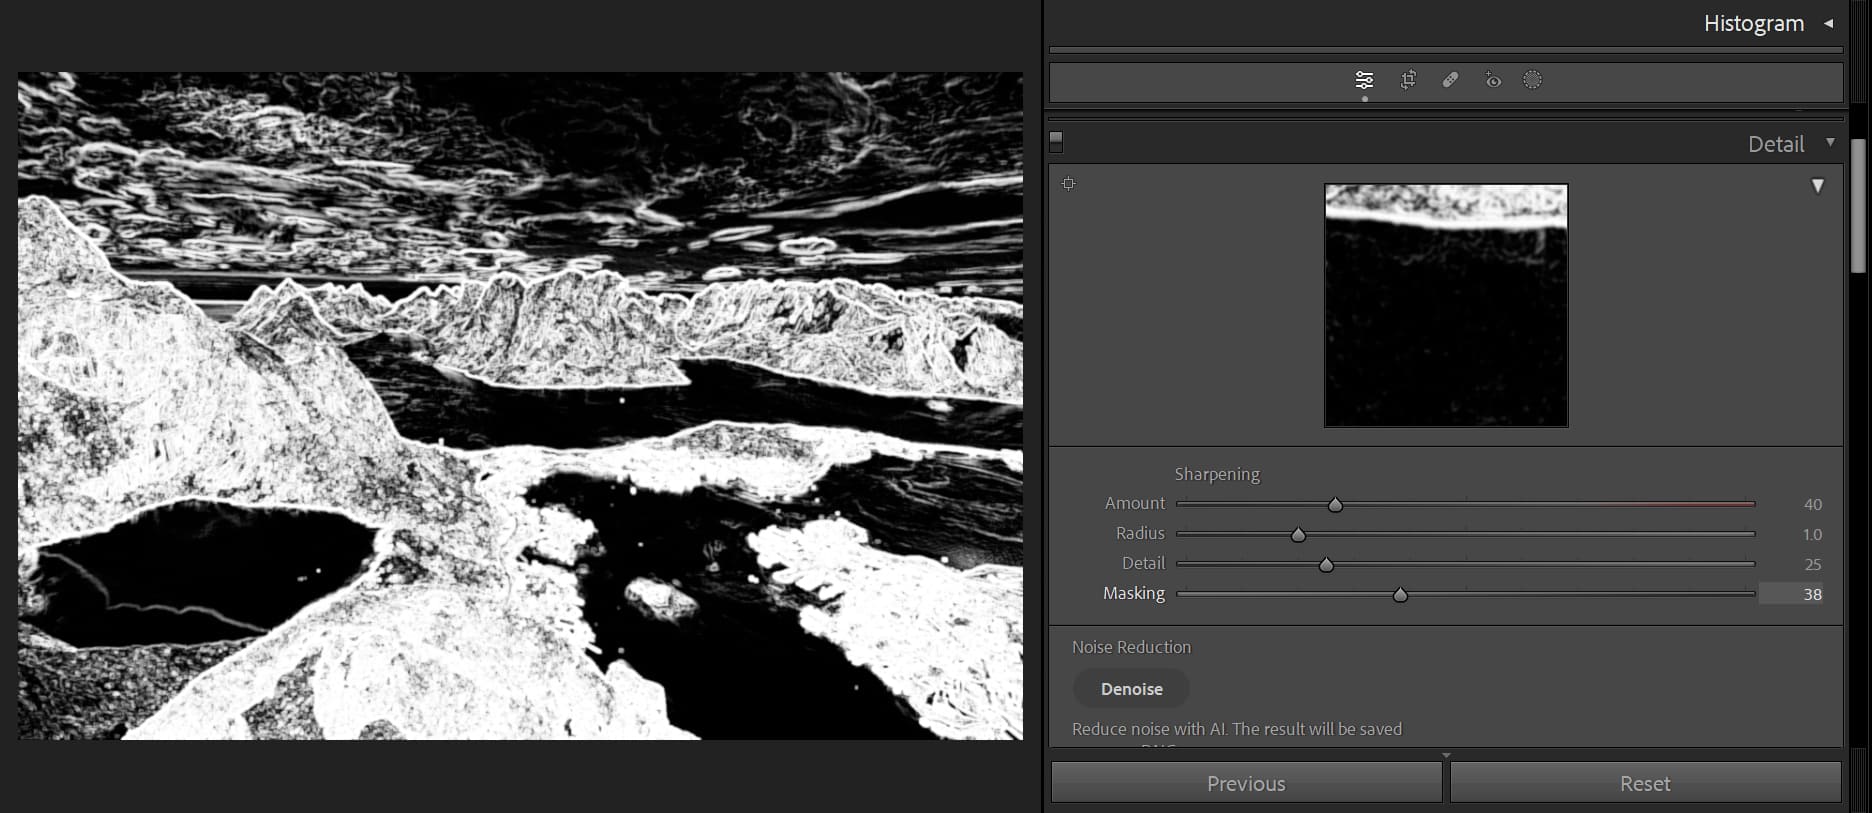
If the image has areas you don't want sharpened, like a calm water surface or a perfectly clear sky, hold the Alt key while dragging the Masking slider.
The image will switch to a grayscale preview: white shows areas where sharpening will be applied, black shows areas that won't be sharpened. Use this to avoid sharpening smooth, low-detail regions.
In short, this basic sharpening step is one every photographer will use when processing their photos.
Method 2: Clarity Sharpening
Lightroom Classic (LrC) and Camera Raw both have a Clarity control.
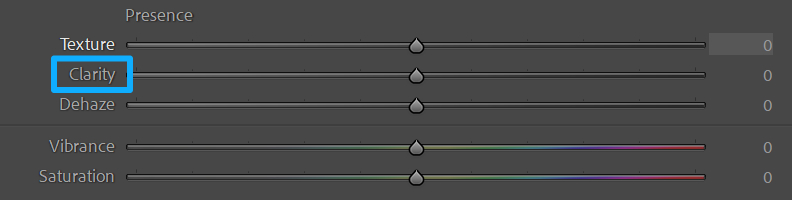
Clarity mainly raises contrast in the midtones. It barely affects highlights and shadows. That means it won't add sharpening to bright skies or very dark areas.
But if you push Clarity too high, the image will look harsh. Noise becomes more visible, and annoying halos can appear along light-to-dark edges.
For example, here is our unedited original:
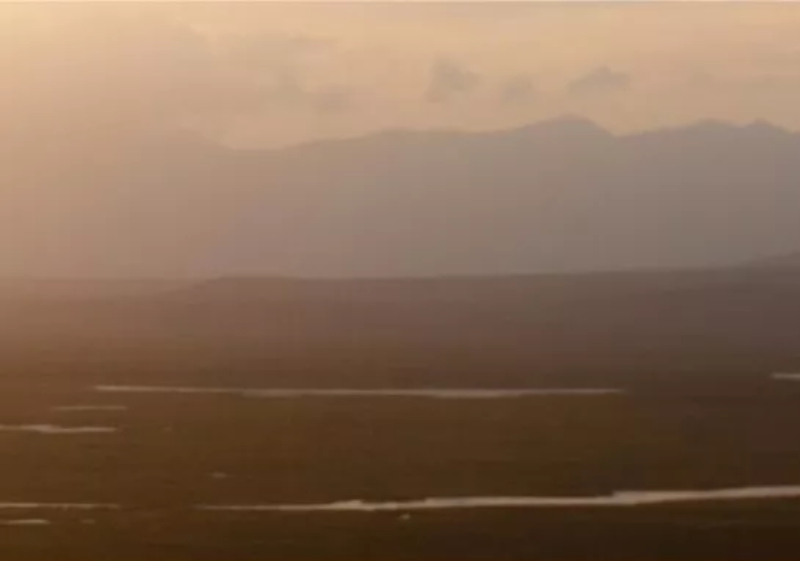
And here is the result with Clarity pushed to the max:
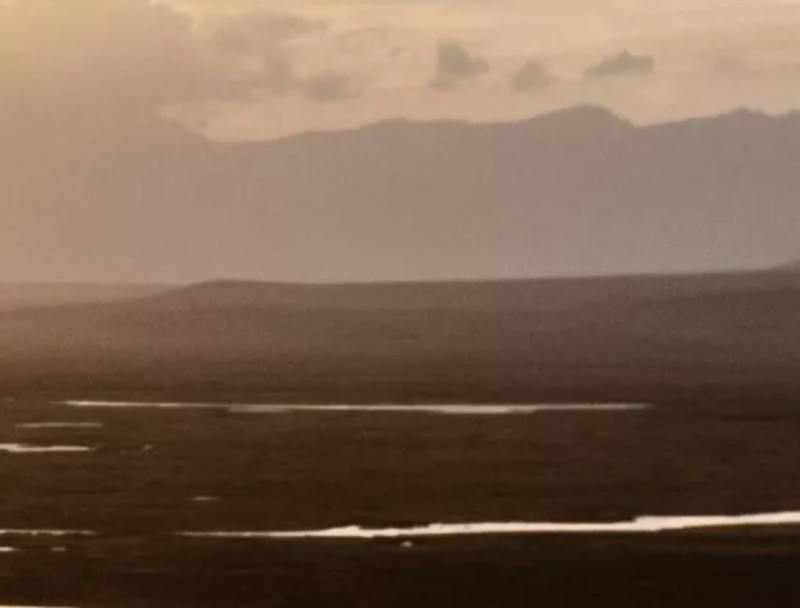
You can see the image quality drops a lot when Clarity is too strong. For that reason, we usually keep Clarity under 30.
Clarity is great for bringing out cloud detail because it boosts contrast in the midtones while leaving the bright sky alone.
Another approach is to use LrC's Adjustment Brush to raise Clarity only in parts of the photo instead of the whole image. Keep the brush values low — overdoing it makes the picture look dirty, so use this tool sparingly.
Method 3: Dehaze
Pushing the Dehaze slider to the right boosts clarity, contrast, and saturation.
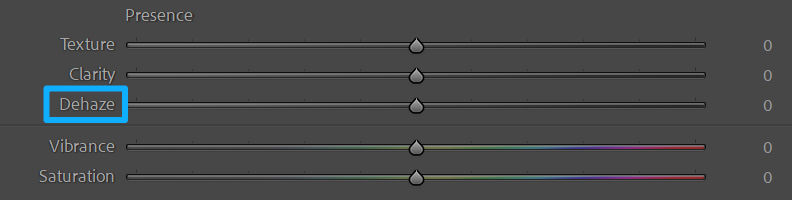
Think of Dehaze as a single control that combines the effects of clarity, contrast, and saturation.
Use it only when an image is noticeably hazy — for fog, mist, or heavy smog. Don't use it on images that are already clear.
Also note: the stronger the Dehaze effect, the more saturated the colors get. You'll often need to reduce saturation afterward.
Further Reading:
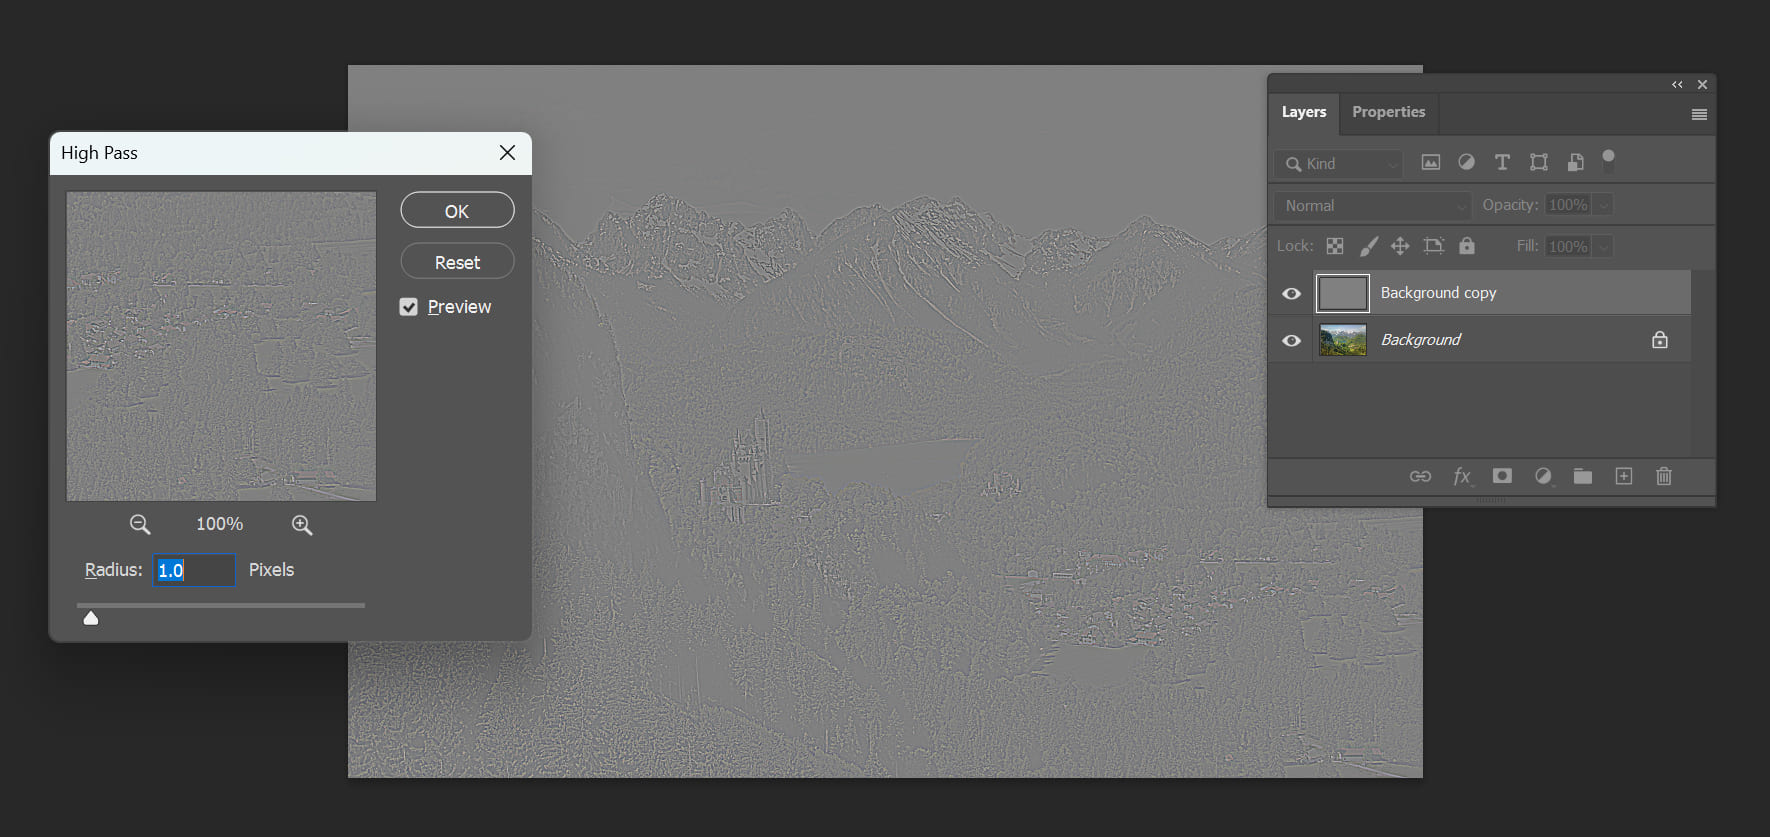
Method 4: High Pass Sharpening
High Pass is a Photoshop filter. It keeps the edges where color or brightness changes a lot. Then you use a layer blending mode to sharpen those edges.
Steps:
- Duplicate the original layer in Photoshop.
- Go to Filter > Other > High Pass. The image turns gray. The bright lines are the edges that will be sharpened.
- Increase the Radius to make the edge lines brighter. A larger radius means a stronger effect. Keep the radius around 1–3 pixels. If it's too big, you'll get halos around the edges.
- Change the High Pass layer's blending mode to Soft Light or Overlay. Overlay gives a stronger sharpening effect than Soft Light.
- Add a layer mask and paint out any areas you don't want sharpened.
Further Reading:
How to Sharpen Your Photos With the High Pass Filter in Photoshop?
Why it works:
High Pass mainly preserves edge detail and hides low-frequency areas. That means less visible noise compared with some other sharpening methods. The High Pass layer is gray, so it won't change the image's color. This method is handy for bringing back and strengthening edges after softening or blur effects.
Method 5: Smart Sharpen and Unsharp Mask
You can find both filters in Photoshop under Filter > Sharpen. Each one gives you controls like Amount and Radius.
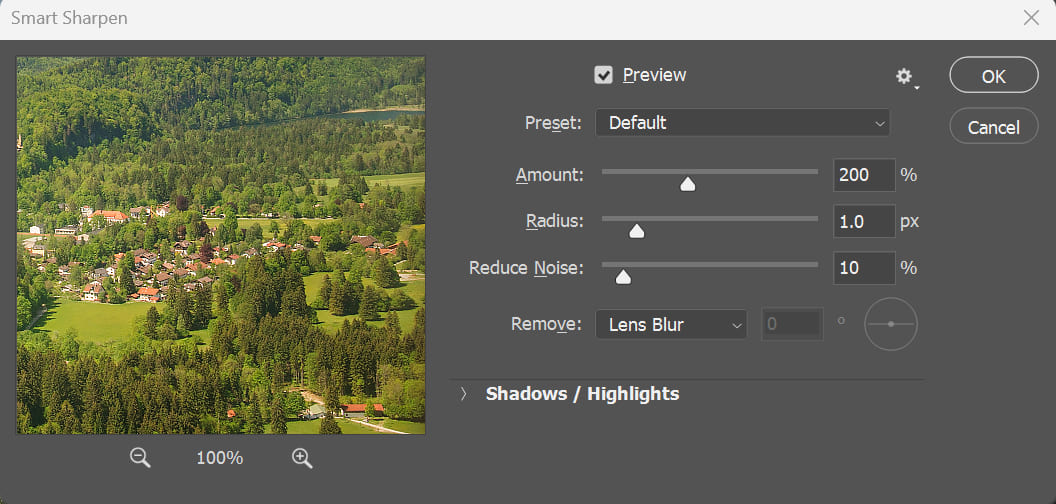
How to choose settings:
- Small radius + high amount — good for fine detail and texture, like rocks, flowing water, or grass.
- Large radius + low amount — good for sharpening big shapes and outlines (similar to High Pass).
- Large radius + high amount — don't do this. It creates halos around edges and looks bad.
After you sharpen, set the layer's blending mode to Luminosity so the color doesn't shift.
Both Smart Sharpen and Unsharp Mask are popular with photographers. In practical use, they work very similarly. For most detail-and-texture work, we recommend the small-radius, high-amount approach.
Method 6: Output Sharpening (Double-Resize Method)
When you upload photos to the web, platform compression often kills detail. To reduce that damage, many photographers resize images before uploading. But downsizing makes images softer, so you should sharpen as part of the resize step.
A widely used workflow called Marc Adamus sharpening (named after the landscape photographer) works very well.
How it works:
- Resize the image to 2× the final width.
- Apply strong (oversharpening) — it's okay if noise becomes visible, but avoid obvious halos.
- Resize the image down to the final width.
Example: if your final long edge is 1000 px, first enlarge to 2000 px, oversharpen, then downsize to 1000 px.
This takes a few steps, so many pros use plugins that include a "Web Sharpen" or output-sharpen feature. Those let you pick output sizes and apply the right sharpening with one click.
Further Reading:
Method 7 — Other Sharpening Options
One choice is to use third-party sharpening plugins, like the Nik Collection.
Also, most digital cameras offer Picture Style (or Picture Control) settings that include a Sharpening slider. That only affects JPEGs. It doesn't change RAW files, because RAW keeps all the original data. For RAW images, sharpen in post so you have full control.
Conclusion
In this article, we covered the common sharpening methods used in post-processing software. One thing to remember: always use a mask so sharpening only affects local areas. Don't apply sharpening to the whole image.
Finally, we recommend the TourBox controller, which many photographers like. You can map common shortcuts and tools from Photoshop, Lightroom Classic, and other apps to TourBox's physical buttons and knobs. It feels more like using a game controller than constantly dragging sliders with a mouse.

TourBox also includes built-in features for specific software. For example, when you color grade in Lightroom Classic, you can use TourBox's Dynamic Panel. It's a customizable floating panel that lets you work in full-screen LrC and see subtle color changes more clearly.

If you're interested, visit our Dynamic Panel page to learn more.