Mastering Video Sharpening in Premiere Pro: A Comprehensive Guide
Are you tired of watching your videos with dull and blurry visuals? Do you wish to enhance the sharpness and clarity of your footage to captivate your audience?
Look no further! In this comprehensive tutorial, we will guide you through the step-by-step process of how to sharpen video in Premiere Pro.
Let's dive in and unlock the secrets to achieving professional-grade sharpening effects in Premiere Pro.
Get ready to take your video editing skills to the next level and make your footage truly come alive!

In this article, you will learn:
- Video Sharpening: What, Why, and Where?
- How to Sharpen Video in Premiere Pro?
- Final Thoughts About Sharpening Video in Premiere
Video Sharpening: What, Why, and Where?
Before we dive into the technical details of the sharpening process, it's important to understand what video sharpening is, why we might need it, and in which scenarios it can be particularly useful.
1. What Is Video Sharpening?
Video sharpening is a post-production process that enhances the contrast along the edges within a video frame. This process makes the edges appear more defined and detail more visible, hence the term "sharpening".
This is done by manipulating the pixels in the image, intensifying the difference in color and luminosity between each pixel and its neighbors.
To better illustrate the principle of sharpening, let's take a closer look at the enlarged texture edge example below, magnified 20 times.

Sharpening, similar to clarity, specifically affects the edges of objects, but the underlying principles differ. Sharpening primarily involves adding alternating high-contrast lines, known as "edge enhancement bands," on both sides of the edge.
This technique enhances the visual appearance of the edge, making it appear more distinct and sharp.

2. Why Sharpen a Video?
Video footage, especially those shot under less-than-ideal conditions, can sometimes appear soft or lack detail. This can be due to factors like poor lighting, low-quality equipment, or long-distance shots.
Sharpening can enhance the clarity and crispness of the video, making it more visually appealing and professional.
Moreover, sharpening can also compensate for the loss of quality that can occur during the video encoding and compression process.
Video platforms like YouTube often compress uploaded videos, which can lead to a reduction in sharpness.
3. When and Where to Sharpen a Video?
Video sharpening can be used in a variety of scenarios, but it's particularly beneficial in the following situations:
- Enhancing Details: If your footage contains small but important details that are not as visible as you'd like, sharpening can help enhance these details.
- Low-quality Footage: If your footage was shot with low-quality equipment or in poor lighting conditions, sharpening can help improve its overall appearance.
- Preparing for Compression: If you know your video will undergo heavy compression when uploaded to a platform like YouTube or Vimeo, a little preemptive sharpening can help retain the video quality.
- Professional Finish: For professional videographers or filmmakers, sharpening is often the final touch in the post-production process, giving the video a polished, high-quality look.
But remember, as with any editing tool, sharpening should be used judiciously. Over-sharpening can lead to an unnatural-looking video with too much contrast and noise.
Now that you have a good understanding of what video sharpening is and when to use it, we'll delve into the step-by-step process of how to sharpen video in Premiere Pro in the following chapters.

How to Sharpen Video in Premiere Pro?
Sharpening your video in Adobe Premiere Pro can enhance your footage, making it look more polished and professional. There are several ways to achieve this in Premiere Pro.
In this tutorial, we'll cover four methods:
- Basic sharpening in the Effects Panel
- Lumetri Color Panel
- Unsharp Mask
- Third-party plugins.
Method 1: Basic Sharpening in the Effects Panel
To begin, import the desired video into Premiere Pro that you wish to enhance with sharpening.
Click on the video file you imported and drag it from the "Project" panel to the "Timeline" panel.

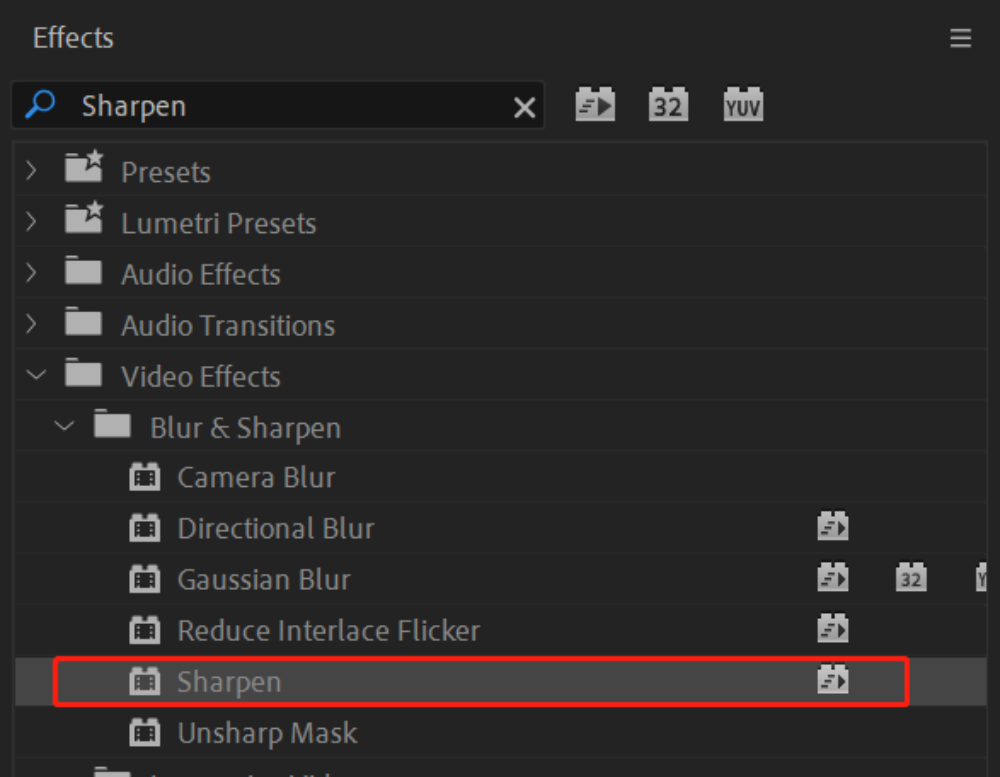
Locate the "Effects Panel" and enter "sharpen" in the search bar. The Sharpen effect will appear in the search results.
Alternatively, you can navigate to "Video Effects > Blur & Sharpen" within the Effects Panel, where you will find the "Sharpen" effect.
Drag and drop this effect onto the video clip in the timeline.
Select the video clip in the timeline and navigate to the Effect Controls panel. Locate the Sharpen effect within the panel.
By default, the value is set to 0, indicating no sharpening is applied. Increase the value to a range between 10 and 25 for subtle sharpening.
It's important to note that excessively high values can result in a degradation of video quality.

Method 2: Lumetri Color Panel
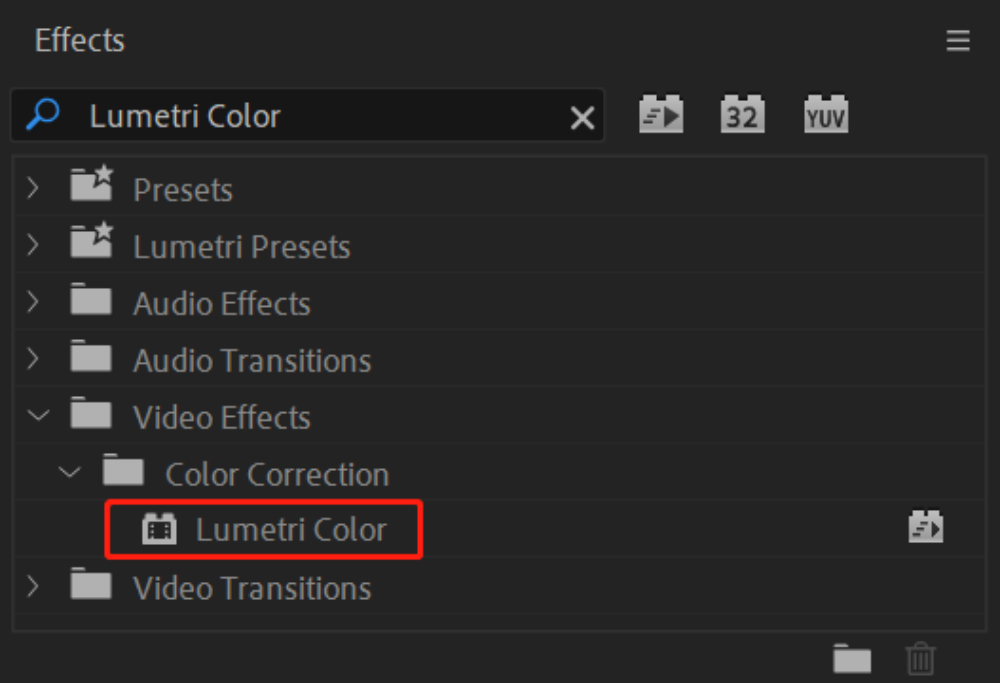
Start by searching for "Lumetri Color" in the Effects Panel and apply it to the desired video clip.
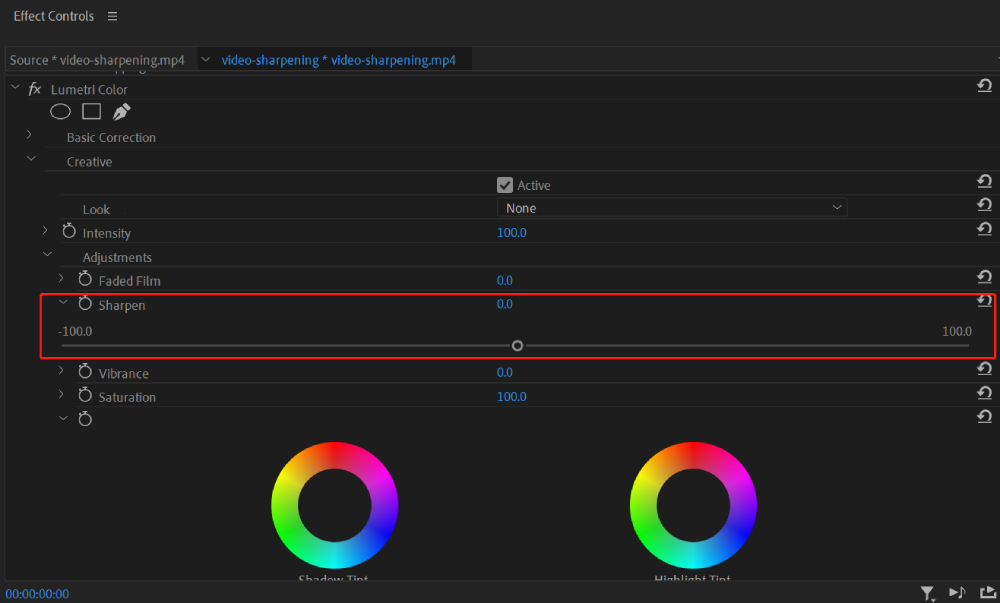
Within the Lumetri Color Panel, navigate to the Creative tab. This tab contains various settings for creative adjustments, including the Sharpen slider.
Locate the Sharpen slider within the Creative tab. To enhance the sharpness of the video, adjust the slider between 20 and 40.
Moving the slider to the left will result in a blur effect while moving it to the right will increase the sharpening effect.
Method 3: Unsharp Mask
Begin by searching for "Unsharp Mask" in the Effects Panel and apply it to the desired video clip.

Click on the video clip within the timeline and navigate to the Effect Controls panel.
Locate the Unsharp Mask effect within the panel. Adjust the following values to achieve the desired sharpening effect:
- Amount: Set the value between 30 and 70. This determines the intensity of the sharpening effect. Higher values result in a more pronounced effect.
- Radius: Set the value between 1 and 2. This controls the size of the details that the sharpening effect targets. Smaller values focus on finer details, while larger values encompass broader areas.
- Threshold: It controls the sensitivity of the sharpening effect and determines which content qualifies for sharpening. Keeping the value at 0 means that sharpening will be applied throughout your image. As you increase the threshold, you are instructing Premiere Pro to prioritize elements that already have a high contrast to a greater extent.
If the applied effect is not noticeable enough, you can consider duplicating the Unsharp Mask effect for stronger sharpening.

Method 4: Third-Party Plugins
Depending on your operating system, there are different third-party plugins available for sharper footage.
Plugin 1: Samurai Sharpen
The Samurai Sharpen Plugin is a third-party plugin designed for use in Adobe Premiere Pro. It provides advanced sharpening capabilities beyond the built-in sharpening effects in Premiere Pro.
The plugin offers a range of tools and settings specifically tailored for sharpening video footage.
The plugin utilizes advanced algorithms to intelligently analyze the image and selectively sharpen the edges while minimizing artifacts and noise.
This helps to maintain the overall quality of the footage while enhancing the sharpness.
Please note that the Samurai Sharpen Plugin is not available for free. If you are willing to invest in this plugin, it is undoubtedly worth considering for its advanced sharpening capabilities.
Here is how to use Samurai Sharpen Plugin to sharpen video:
- Apply Samurai Sharpen Effect: In the Effects Panel, search for "Samurai Sharpen" and apply it to your video clip.
- Adjust the Values: In the Effect Controls panel, set the Amount between 75 and 200, Radius between 1.5 and 2.5, and Edge Mask Strength between 0 and 10.
Plugin 2: Fixel EdgeHancer
The Fixel EdgeHancer Plugin is a third-party plugin designed for use in Adobe Premiere Pro. It offers advanced edge enhancement capabilities, allowing users to enhance the sharpness and definition of edges in their video footage.
With the Fixel EdgeHancer Plugin, users can selectively enhance edge details in their videos, making them appear more crisp and defined.
The plugin provides various parameters and controls that enable precise adjustments, such as edge strength, radius, and threshold.
It's important to note that the Fixel EdgeHancer Plugin is a paid plugin, but it is priced at half the cost of the Samurai Sharpen Plugin.
For users seeking advanced edge enhancement capabilities in Premiere Pro but don't want to spend too much money, this investment may be worthwhile.
Here is how to use Fixel EdgeHancer Plugin to sharpen video:
- Apply Fixel EdgeHancer Effect: In the Effects Panel, search for "Fixel EdgeHancer" and apply it to your video clip.
- Adjust the Values: In the Effect Controls panel, set the Edge Radius between 3 and 15, Threshold between 0 and 10, and Intensity between 15 and 60.
And there you have it! Four different methods to sharpen your video in Adobe Premiere Pro. Each method has its strengths, so try them out and see which one works best for your footage.
Final Thoughts About Sharpening Video in Premiere
In conclusion, sharpening your videos in Premiere Pro can significantly enhance their visual quality and make them more engaging.
We have explored several methods to achieve this, including basic sharpening using the Effects Panel, utilizing the Lumetri Color Panel, and applying the Unsharp Mask effect.
Each method offers its own unique features and controls to fine-tune the sharpening effect according to your preferences.
As you sharpen your videos, it's important to keep a few tips in mind:
- Subtlety is key: Avoid over-sharpening your videos, as it can lead to artifacts and a loss of image quality. Aim for a subtle enhancement that maintains a natural look.
- Experiment with different values: Adjust the parameters such as Amount, Radius, and Threshold to find the optimal settings for your specific footage. Every video may require different adjustments.
- Preview and compare: Always preview the sharpening effect in real-time and compare it with the original footage. This will help you make informed decisions and ensure the desired outcome.
Product Recommendation:
Additionally, we would like to recommend the TourBox as a valuable tool for video editing workflows. The TourBox is a versatile and intuitive controller that can greatly enhance your editing experience in Premiere Pro.

With its customizable buttons and dials, you can assign shortcuts and functions specifically for sharpening or any other editing tasks.
Its ergonomic design and seamless integration make it a fantastic companion for video editing enthusiasts.
We hope this tutorial has provided you with the knowledge and techniques of how to sharpen video in Premiere Pro. Remember to experiment, trust your eye, and enjoy the creative process of refining your footage.