[DaVinci Resolve Tutorial] Edit Page and Video Trimming
Welcome to our comprehensive DaVinci Resolve tutorial series! If you've been searching for a guide to help you with video editing in DaVinci Resolve, you've come to the right place.
DaVinci Resolve is a powerful and professional video editing tool widely used by industry experts worldwide. It offers advanced functionalities that allow for incredible customization and control over your video projects.
But fret not if you're a beginner. This guide is designed to help users at all levels fully harness the potential of DaVinci Resolve.
In this tutorial, we'll focus on the fundamentals of trimming videos in DaVinci Resolve. We'll dive deep into the Edit panel, which is at the core of DaVinci Resolve's editing capabilities.
From importing your footage to cutting, trimming, and assembling your clips, we'll guide you through each step to ensure you're well-prepared to start creating your video masterpieces.

In this article, you will learn:
- Explore the DaVinci Resolve Page
- Edit Page: How to Trim Video in DaVinci Resolve?
- Additional Tips for Triming and Editing Videos
Explore the DaVinci Resolve Pages
Initially, DaVinci Resolve emerged as a color grading tool. However, with the software's continual updates and advancements, DaVinci Resolve has evolved into a powerful video editing software, capable of fulfilling the needs of both professionals and hobbyists.
DaVinci Resolve comes in two versions: free and paid. You can view and download either from Blackmagic Design's (the company behind DaVinci Resolve) official website.
The choice between the free and paid versions depends on your individual needs. However, the free version is already quite robust and sufficient for most users.
Further Reading:
For more information and features of DaVinci Resolve, check out the following article:
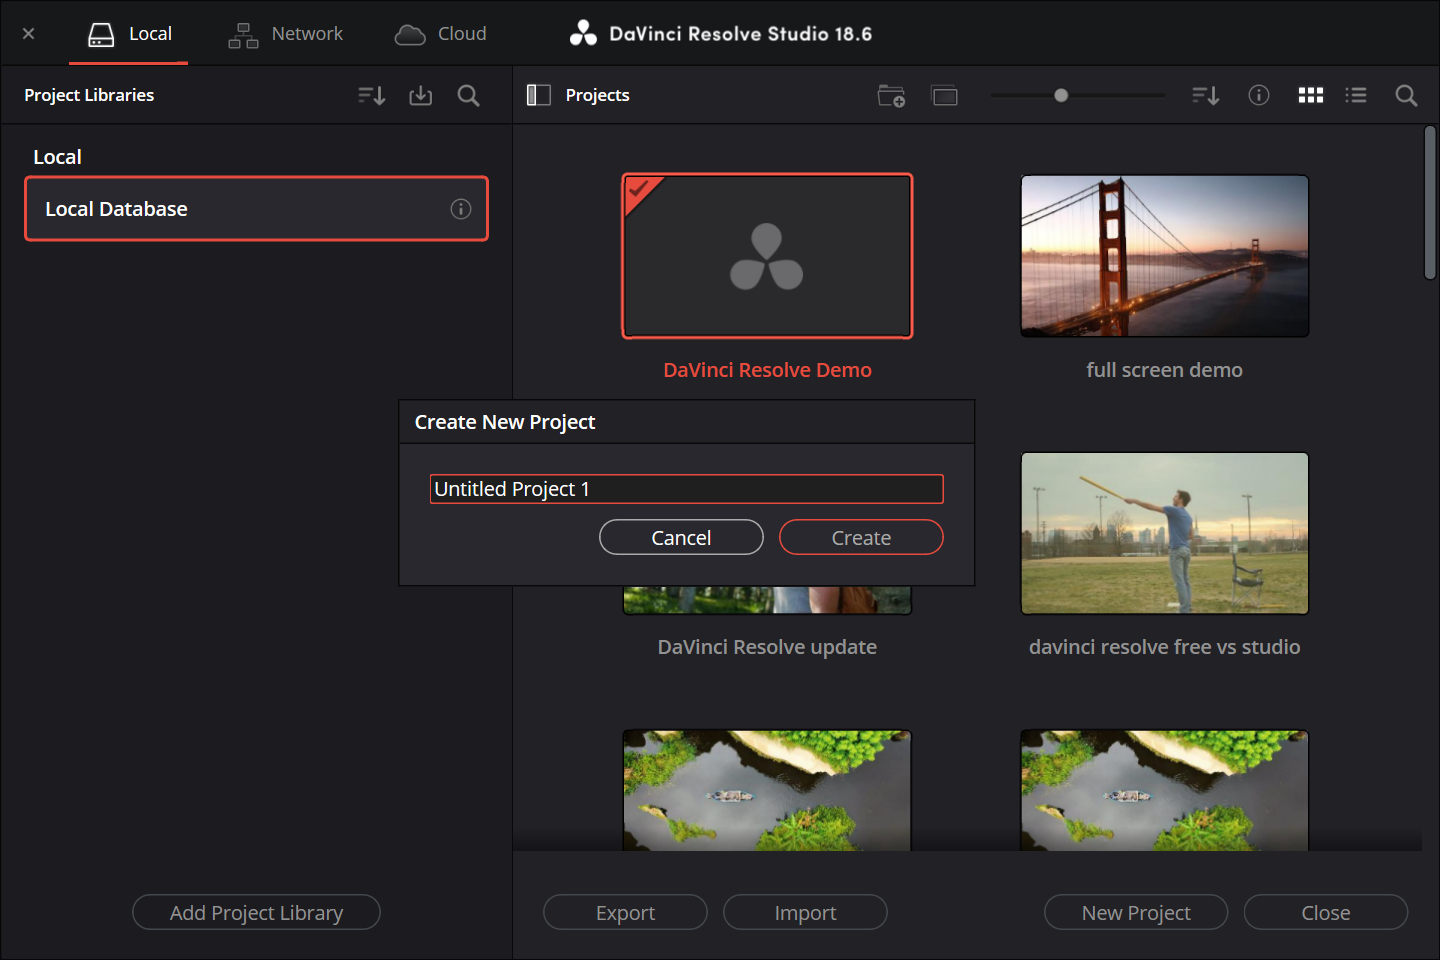
When you've finished downloading and installing, the first page you'll see upon opening DaVinci Resolve is the Project Management workspace.
As the name suggests, this is where all your video projects are created and managed. You can click on "New Project" to start a new one.
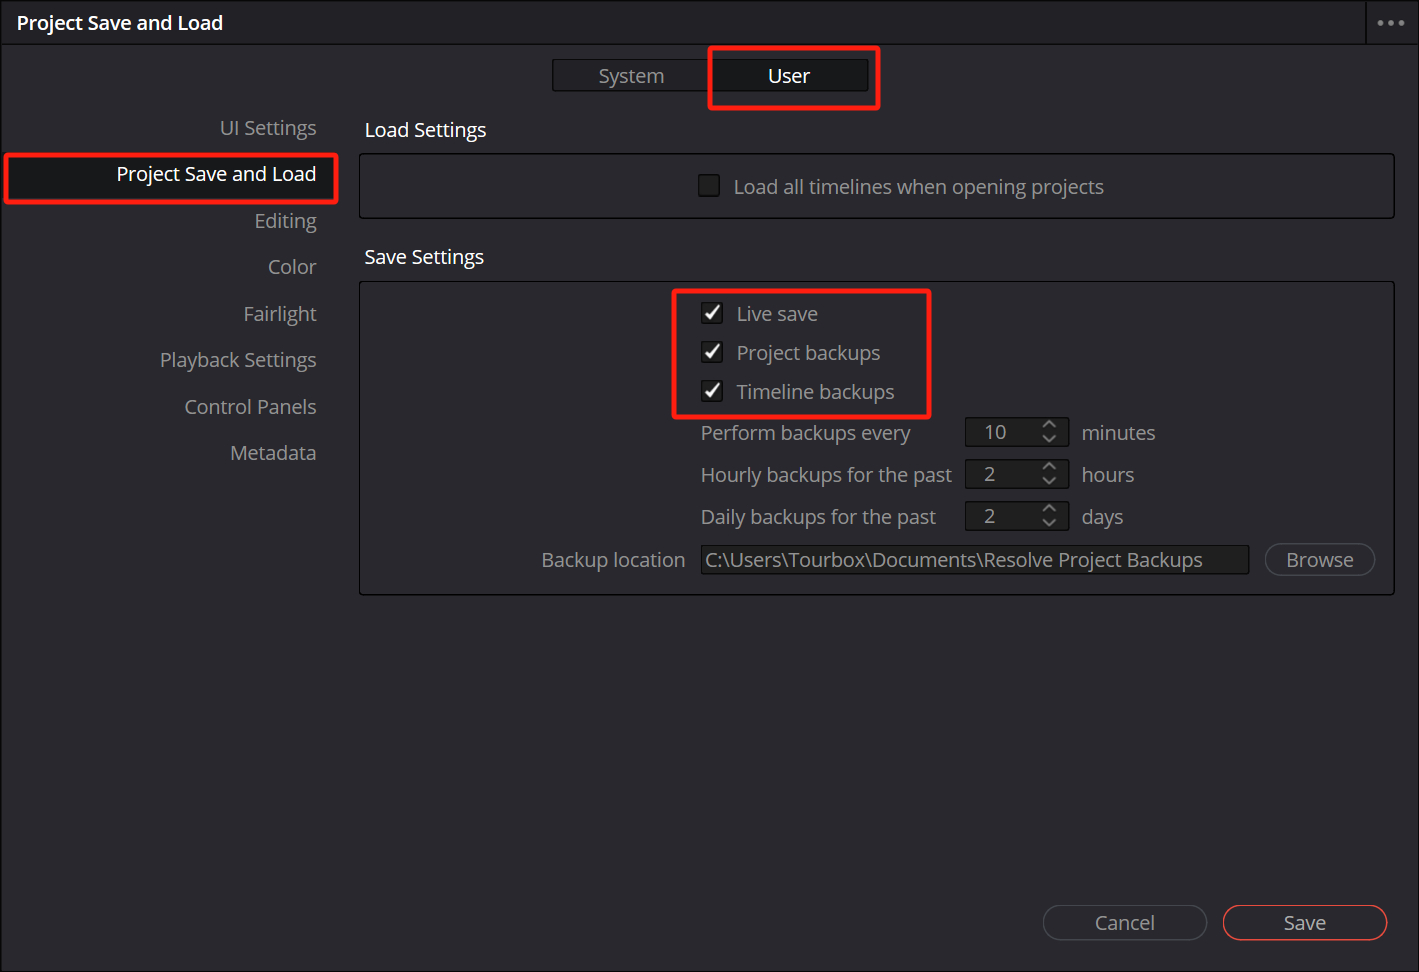
The first time you open DaVinci Resolve, there's a setting you should adjust right away:
Click on "DaVinci Resolve", then click "Preferences", where you can find the settings panel for DaVinci Resolve. Click the "User" tab in the center top of the panel, then click "Project Save and Load", and check "Live Save", "Project backups" and "Timeline backups".
The benefit of doing so is that even if DaVinci Resolve unexpectedly crashes, your project information won't be lost.
Once you have finished setting up, you officially enter the operating interface of DaVinci Resolve. First, let's pay attention to the bottom of the screen, where you can see different panels, each corresponding to different stages of video operation.
Let's explore each page and what they're used for in video editing:
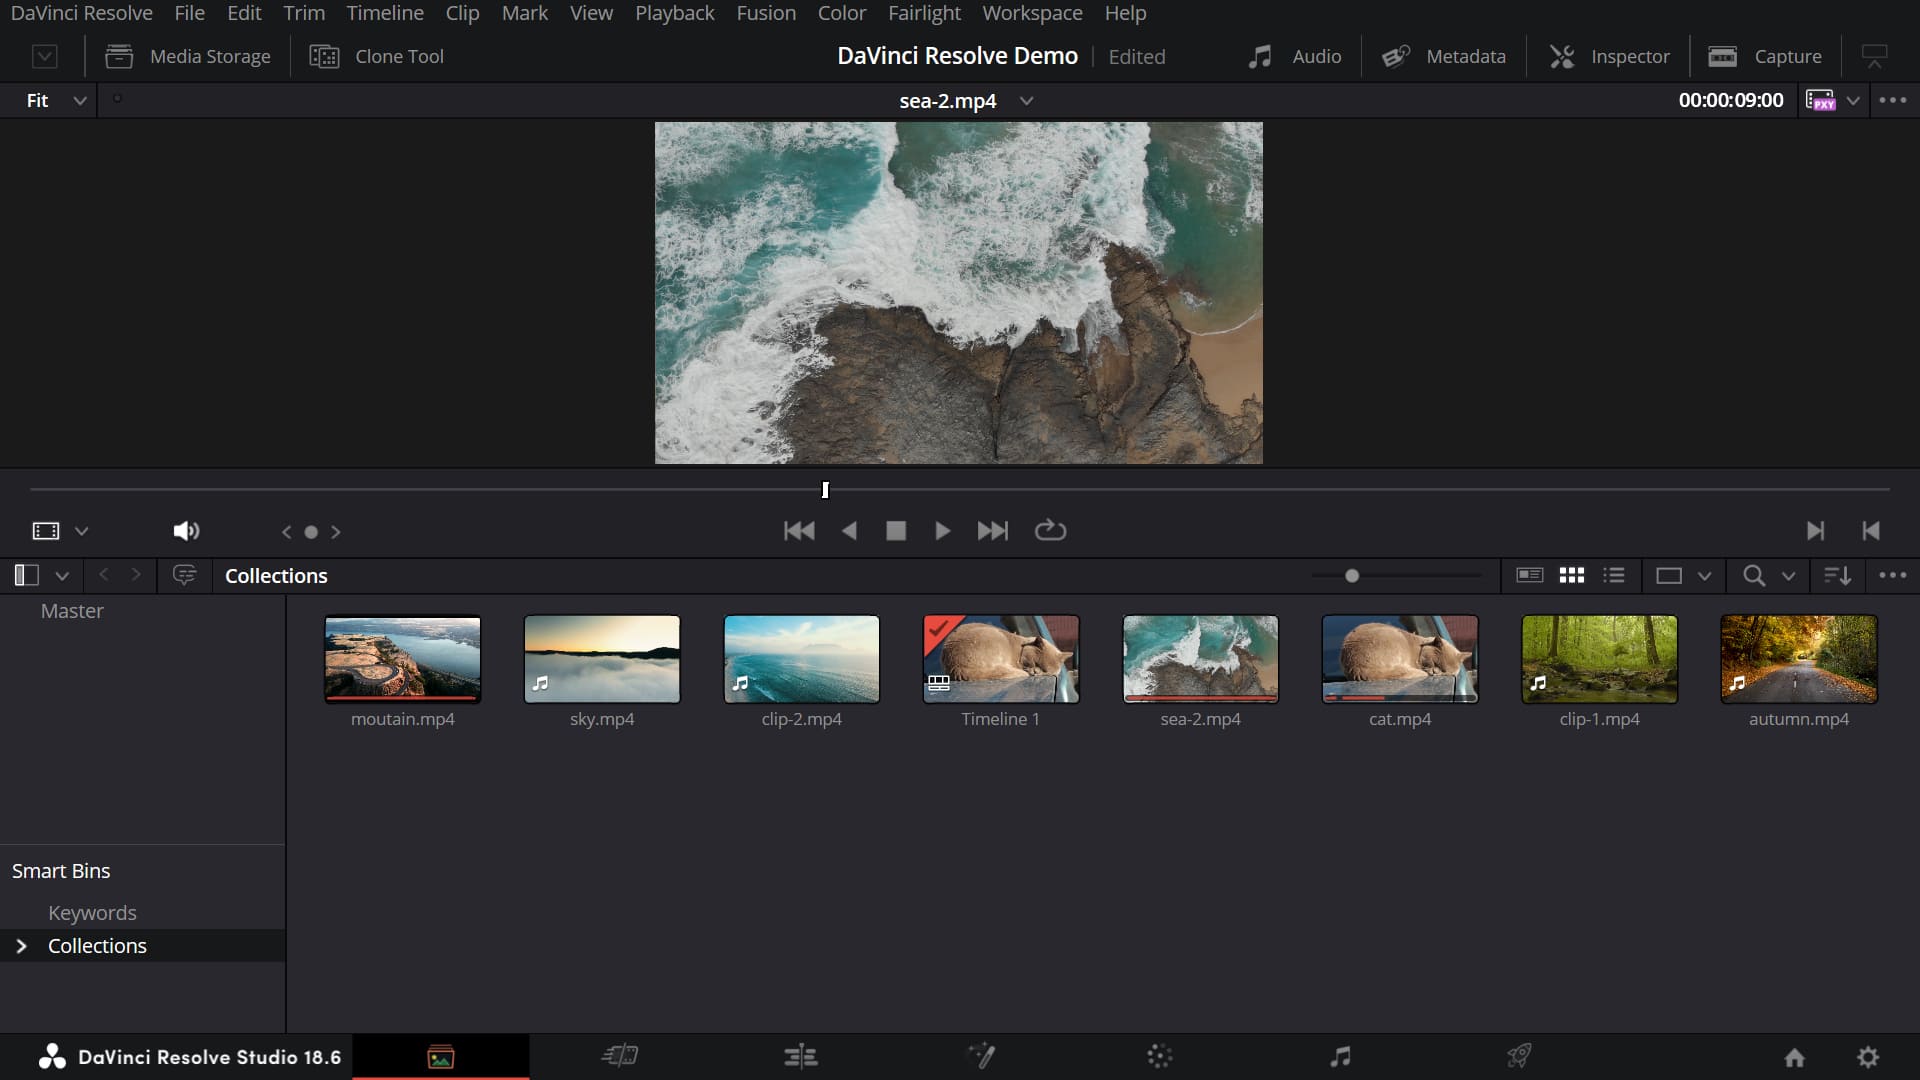
- Media: This is the first step in your post-production process. The Media page allows you to import, manage, and organize your video clips, audio files, and other media. You can preview your clips and even perform some basic metadata editing.
- Cut: The Cut page is designed for fast, precise editing. It's great for assembling rough cuts and trimming your clips down to the desired length. It provides a dual timeline structure for more efficient navigation and editing.
- Edit: The Edit page is a fully-featured, non-linear editing environment. It's where you can arrange your clips on the timeline, add transitions, apply effects, and fine-tune your edit. You can also work with multi-camera setups and composite shots together on this page.
- Fusion: Fusion is DaVinci Resolve's built-in tool for visual effects and motion graphics. Here, you can create complex effects, perform advanced compositing, and even do 3D modeling and animation. It's all node-based, which can offer a more flexible workflow than layer-based systems.
- Color: This page is where DaVinci Resolve really shines as it was originally a color grading software. You can perform detailed color correction, create looks with color grading, and apply secondary corrections like power windows and qualifiers.
- Fairlight: Fairlight is a full-featured audio post-production suite. You can record, edit, mix, and master your audio all within this page. It also includes features for sound design, like ADR tools, sound libraries, and plugins.
- Deliver: The last stage in the video editing process is exporting, and the Deliver page is where you set up your exports. You can choose your format, resolution, codec, and more. You can also queue multiple outputs for different platforms or versions.
You may have already noticed that the workflow in DaVinci Resolve is quite intuitive. It follows a linear progression, so it's not complicated.
In the next section, we will start our tutorial from the DaVinci Resolve Edit page. (The logic between the Cut and Edit page is essentially the same, but the Cut page is more suitable for rough cuts of the video, so we will start with the Edit page.)

Edit Page: How to Trim Video in DaVinci Resolve?
In the previous chapter, we provided a brief overview of the roles of various pages in DaVinci Resolve. In this chapter, we'll delve into the Edit panel of DaVinci Resolve, where we'll truly start editing and trimming videos.
Editing can essentially be divided into two parts: the creative and the execution:
- The creative aspect determines the final structure of your piece, including its rhythm and emotion.
- The execution determines whether you can implement these creative ideas, and also factors like efficiency and quality.
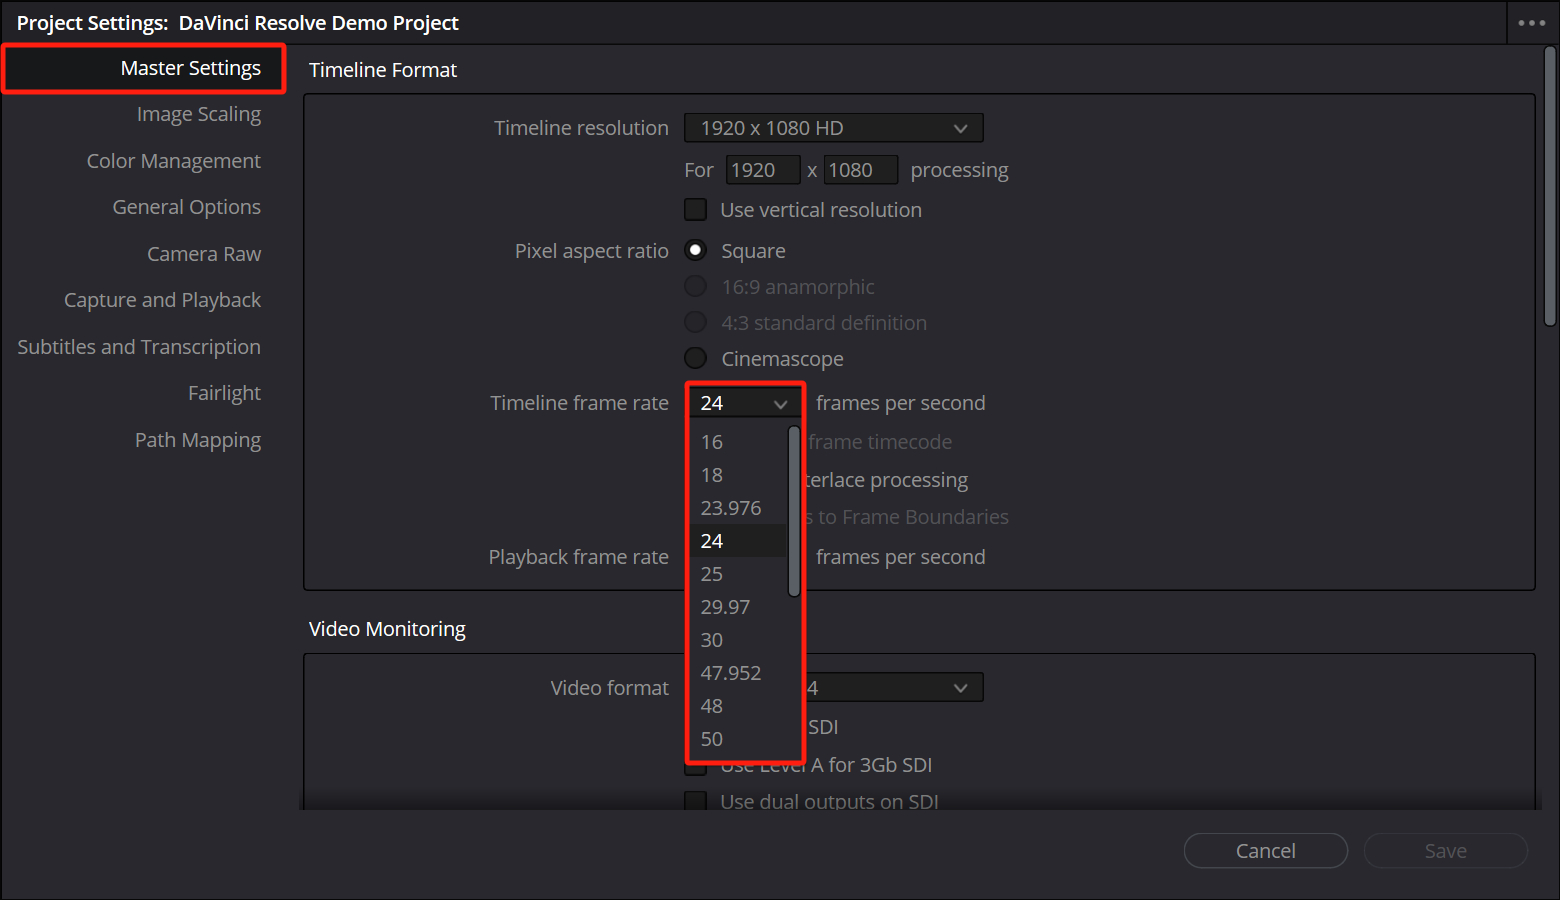
DaVinci Resolve doesn't allow you to change the project's frame rate after you've imported your media. Therefore, the first thing you should do when creating a project is to click "File" > "Project Settings", and change the frame rate to the correct value according to your actual project needs.
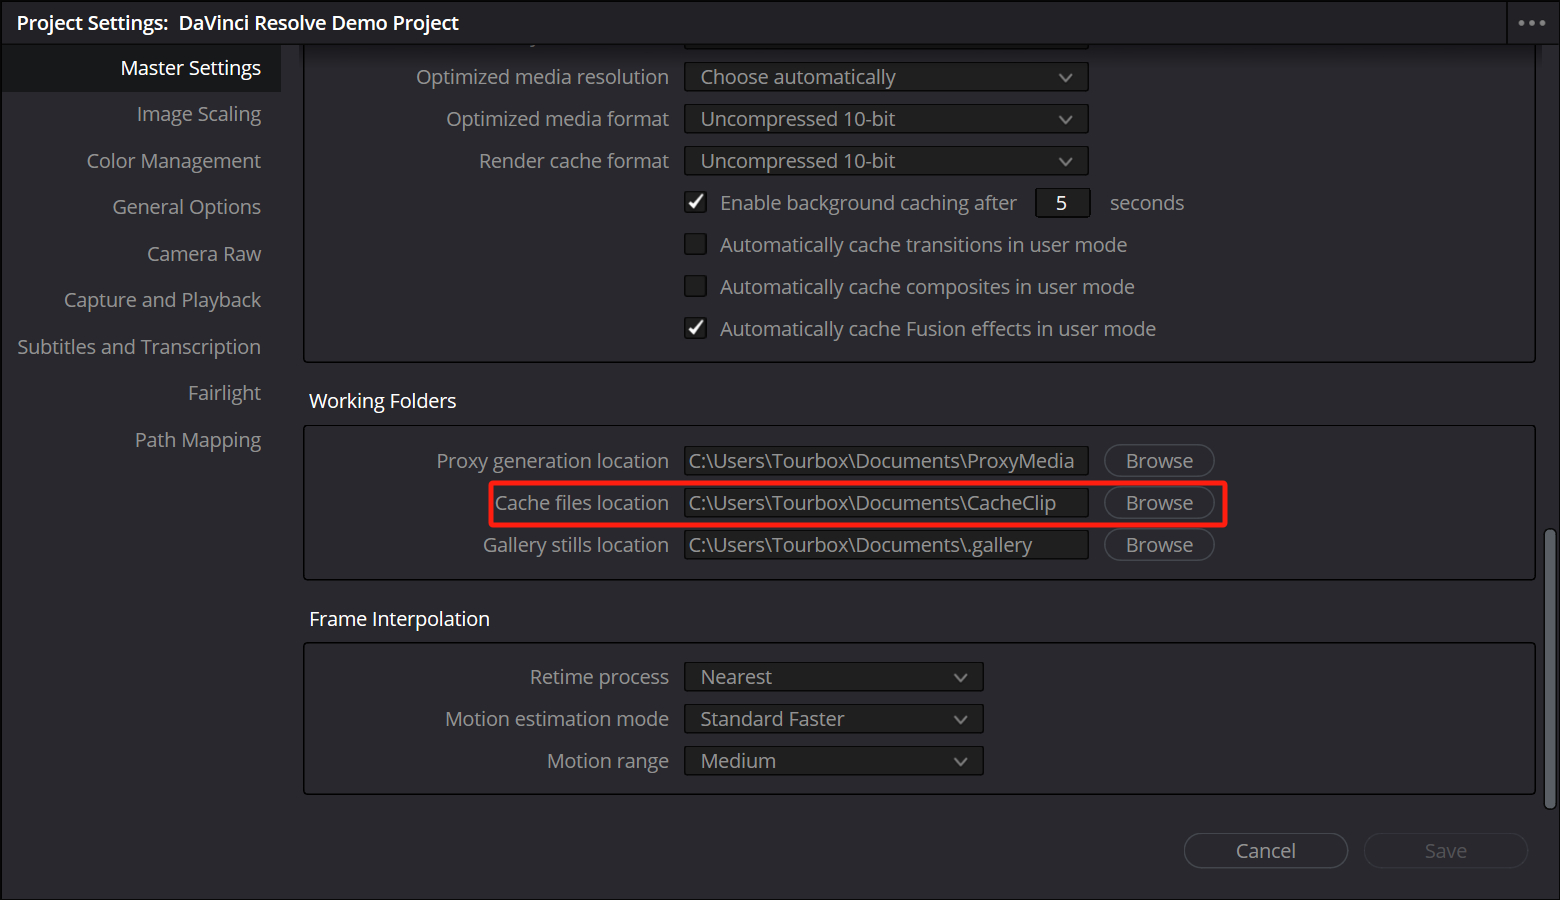
Additionally, you should also change the location of the project cache. If you don't, your C drive may quickly become filled with DaVinci's cache files.
Then, let's start importing video clips. Importing videos in DaVinci Resolve is a straightforward process. On the bottom of the screen, you'll see a series of workspace tabs.
Click on the 'Media' tab. This is where you'll import your video files. There are two main ways to import video:
- Using the Media Storage Panel: On the top left side of the Media page, you'll see the 'Media Storage' panel. This allows you to browse your computer's file system directly from DaVinci Resolve. Navigate to the folder that contains your video file, then click and drag the file to the 'Media Pool' at the bottom of the screen.
- Using the File Menu: Go to 'File' > 'Import File' > 'Import Media...'. This will open a standard file browser window. Navigate to your video file, click on it to select it, then click 'Open'. The video file will be added to your Media Pool.
You can preview the imported video by double-clicking it in the Media Pool.
Additional Tip:
- Import all your media, and then organize them into folders in the media pool. For larger video editing projects, this can help keep your project more organized and clear.
- DaVinci Resolve doesn't move or copy your video files when you import them. Instead, it references the original files in their current location, so make sure not to move or delete the original files while you're working on your project.
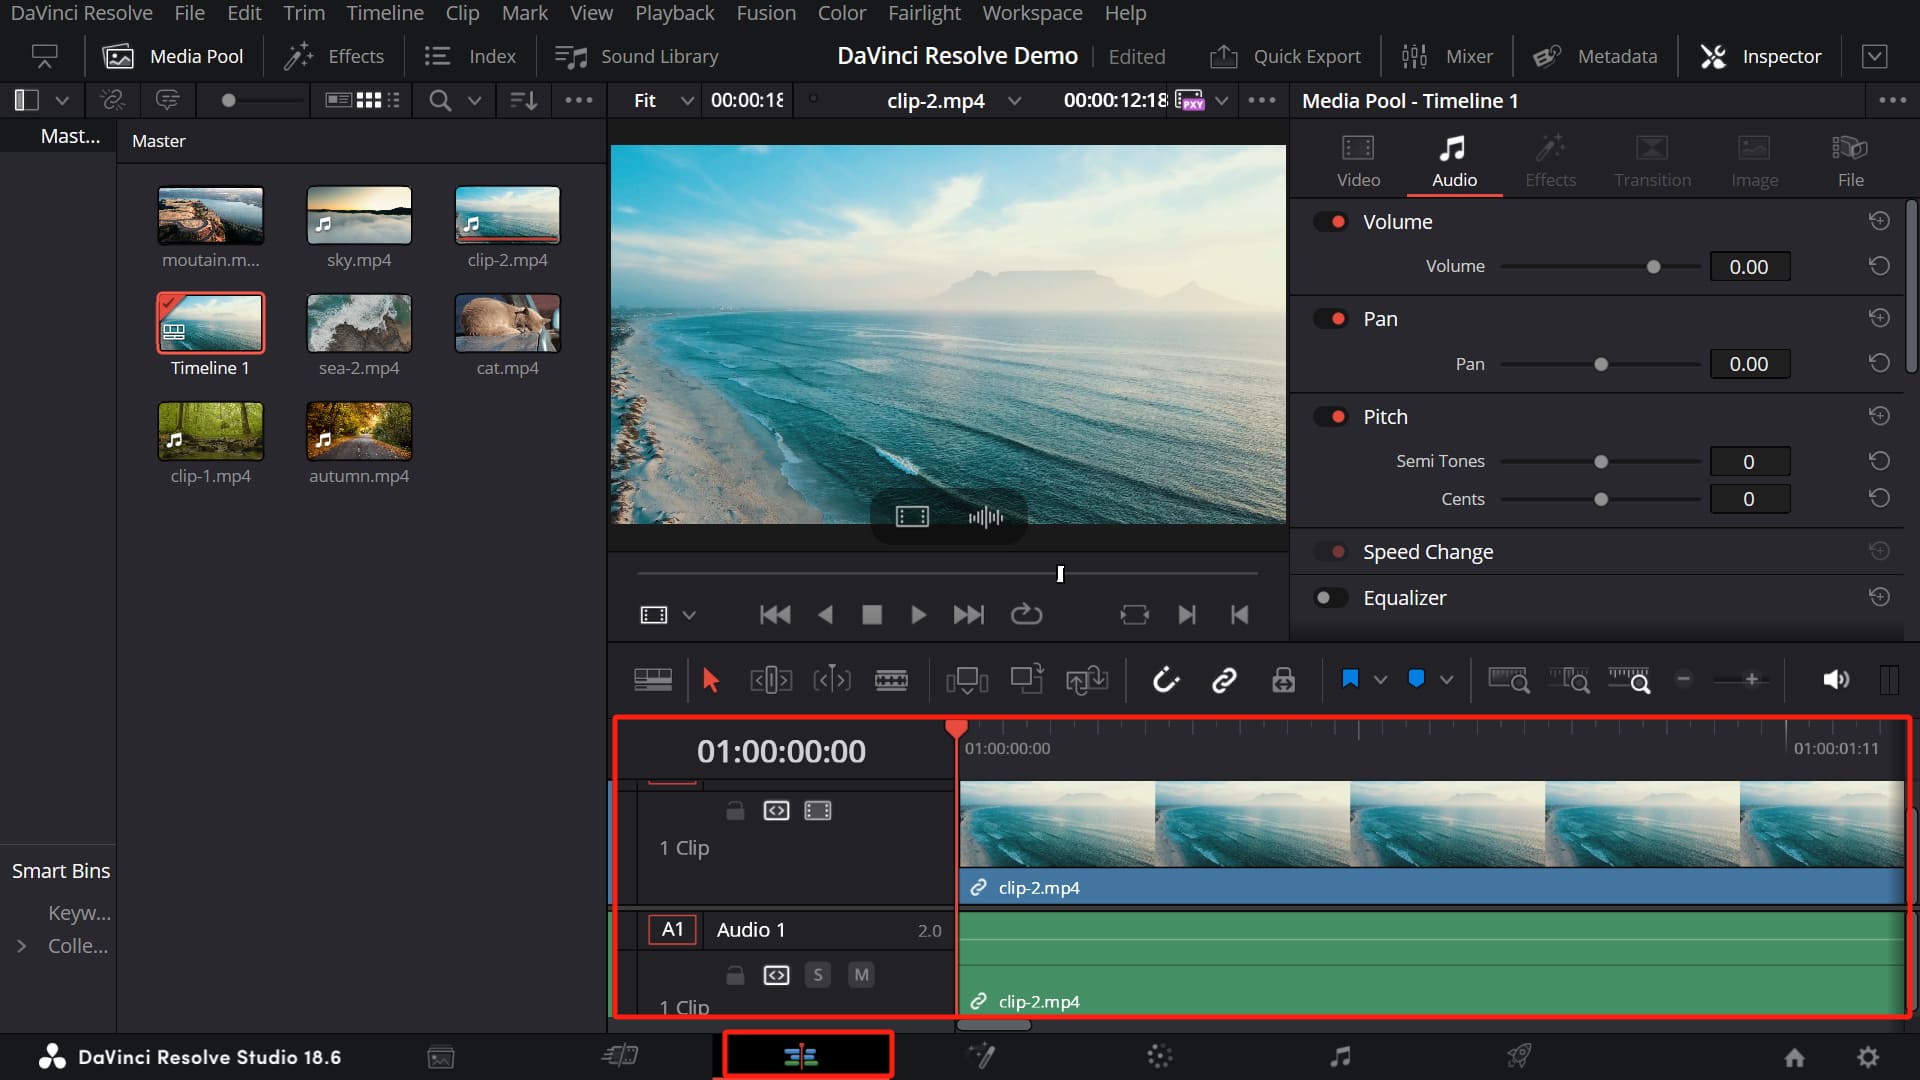
Click on the 'Edit' tab at the bottom of the interface. This page is where you'll perform most of your editing tasks, including trimming.
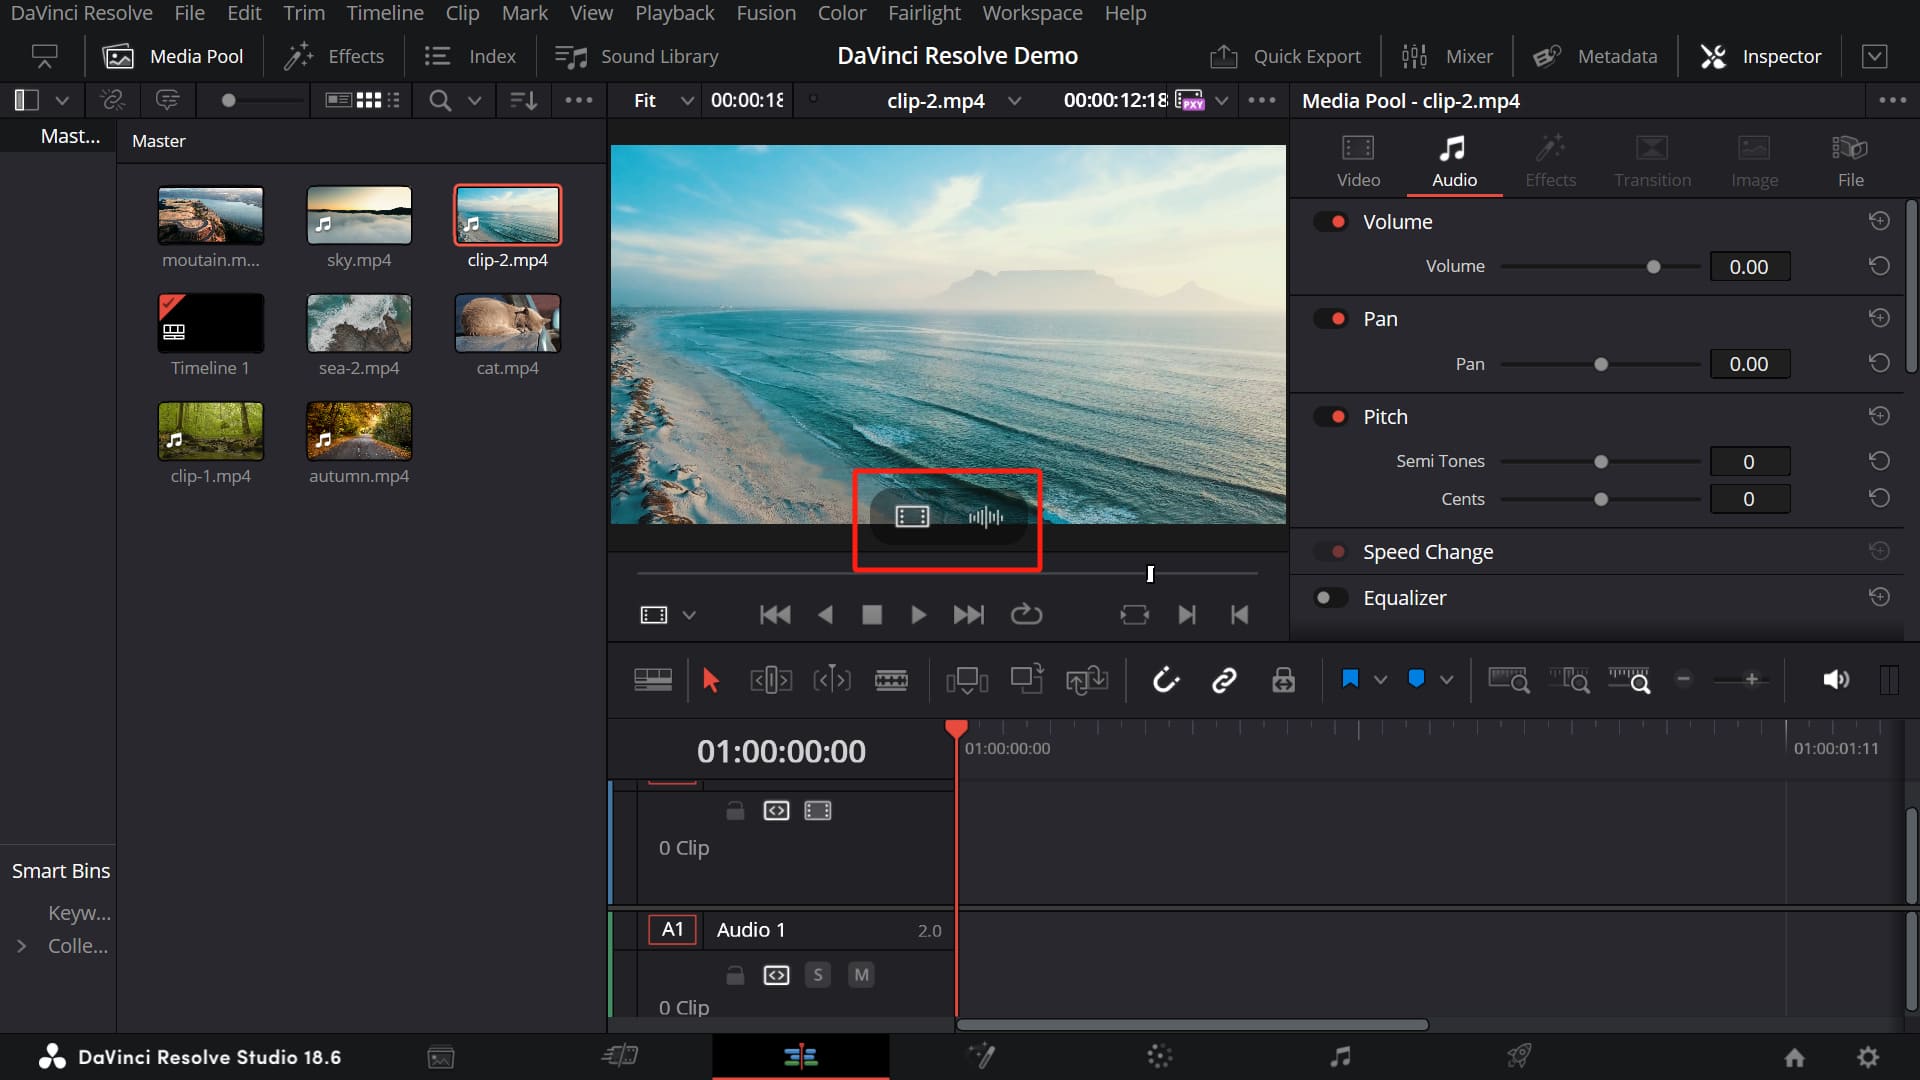
You can click on the Media Pool in the top left corner of the 'Edit' page, where you can see all the media you have imported. You can select each piece of media in the Media Pool and press the space bar or the play button to play the video clips in the viewer next to it.
You can further refine our media selection. By using the "I" and "O" keys on the keyboard, you can set the in-point and out-point for each video clip in the viewer. You'll be able to see a bold timeline on the viewer displaying the clips of the video that you have selected.
At this point, you can drag and drop the video from the viewer to the timeline at the bottom of the Edit page.
When dragging a video onto the timeline, you have multiple options:
- You can click on the video thumbnail to drag both the video and audio together onto the timeline.
- Alternatively, you can select a clip from the Media Pool and preview it in the Viewer panel. While previewing the clip, click on the video or audio icon below the clip. This allows you to individually drag and drop the video or audio tracks onto the timeline.
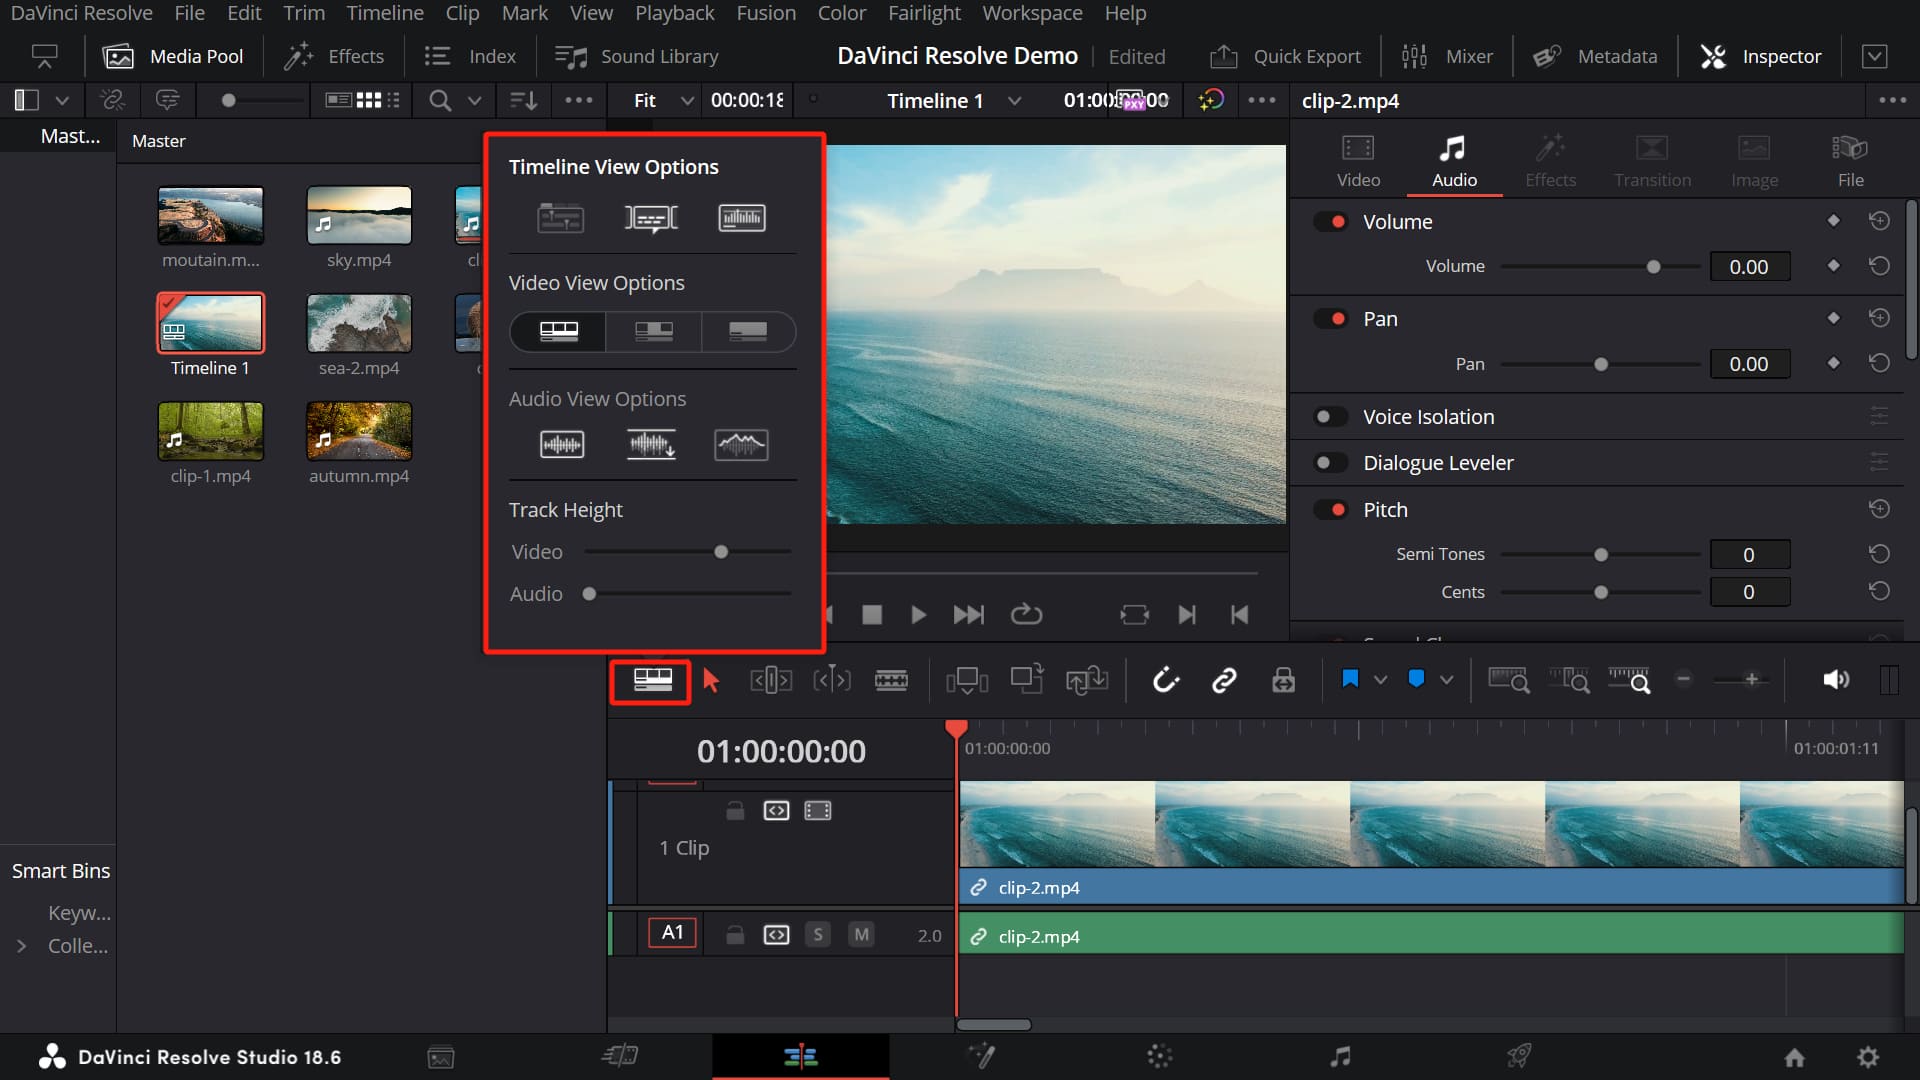
DaVinci Resolve offers numerous ways to navigate the timeline. You can adjust these settings by clicking on the "Timeline View Options". Feel free to customize these settings according to your preferences and specific needs.
In addition, you can hold down the Alt key and scroll with the middle mouse button to zoom in and out of the timeline.
Once you've familiarized yourself with the timeline, you can truly begin video editing. You'll notice that your mouse cursor has different functions depending on where it is within the clip. You can click to select a clip and then drag it around.
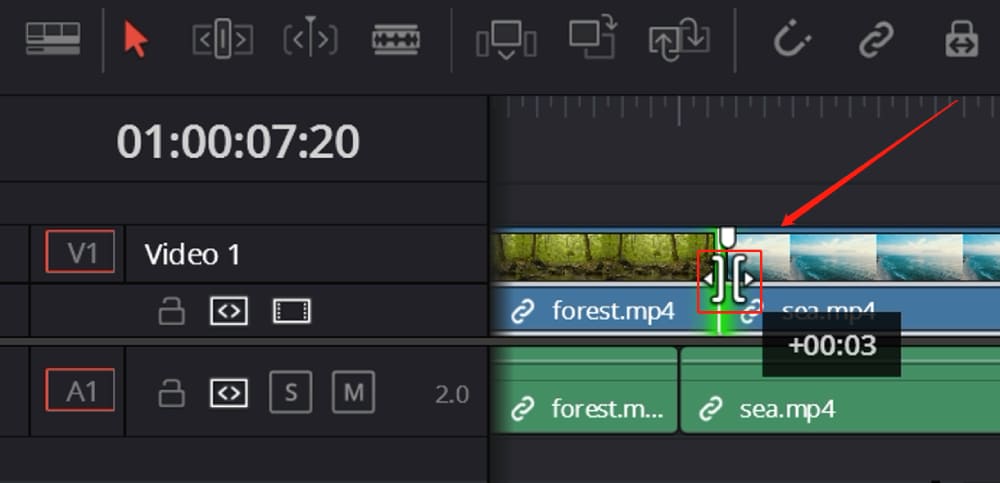
You can also hover your cursor over the edges between clips, where you'll see two types of symbols.
The first one allows you to quickly trim clips by simply dragging the edge of the clip. You can select the gap between two clips, hit delete, and the clips will merge together.
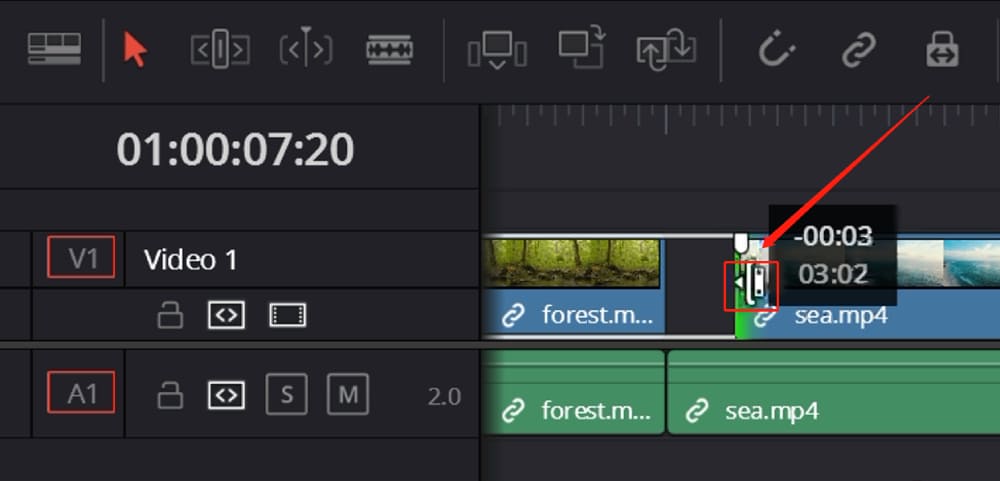
The second symbol appears when you drag a clip on the timeline. As you move a clip, the preceding clip will shorten and the following clip will lengthen, or vice versa, until one of the clips reaches its maximum length and can't be extended further.
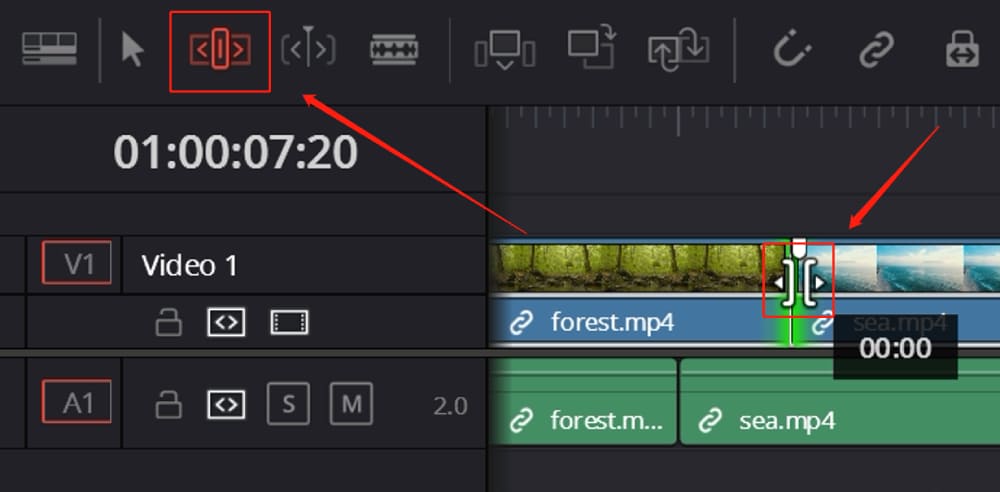
The two editing tools we mentioned above are part of the default Selection Mode, but there are more editing tools available in the toolbar at the top. Let's go through them one by one.
First up is the Trim Edit Mode, which can be activated using the shortcut key 'T'. When this mode is active, you'll notice that when you drag a clip, the subsequent clips move along with it.
Once this mode is activated, you no longer need to delete gaps between clips, which can greatly increase your efficiency. This mode is perfect for fine-tuning the content of each clip.
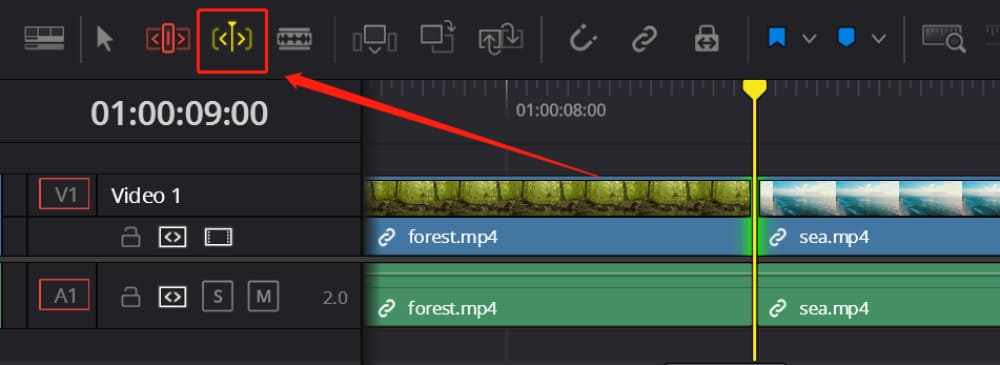
Next is the Dynamic Trim Mode, with the shortcut key 'W'. This mode isn't used often. Simply put, it automatically jumps back a bit during video playback, helping you see if the transition between two cut points is natural.
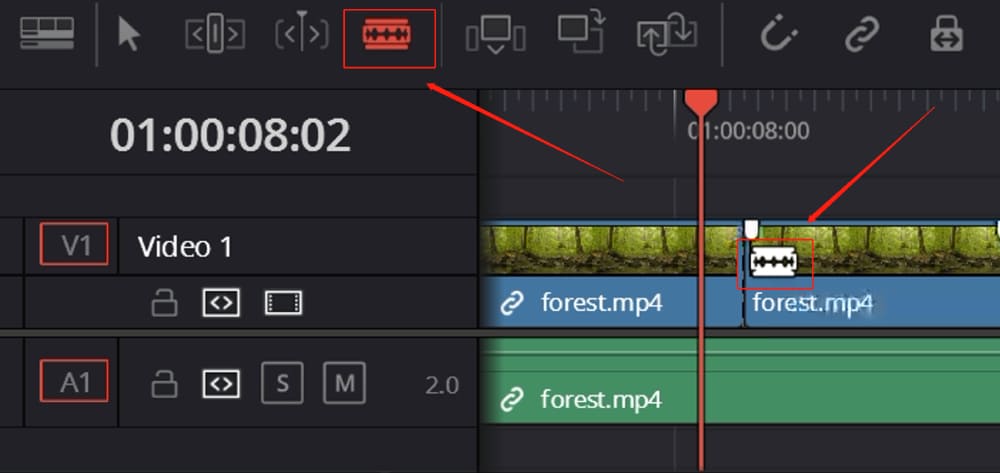
Then there's the Blade Edit Mode, activated with the shortcut key 'B'. This is a very handy feature. Once activated, you can split a single clip into two for further trimming and processing.
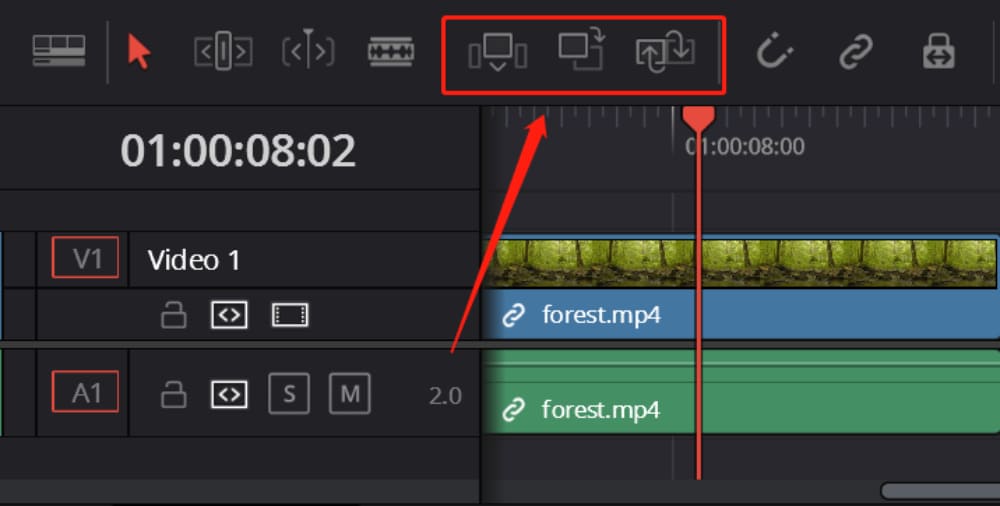
The following three tools are mainly for the convenient import of media. You can throw media onto the timeline in different ways:
- The first is simply Inserting. After clicking, the video will be inserted at the position of your playhead, and the clips behind it will automatically shift backward.
- The second is Overwrite. The positions of all clips remain unchanged and the newly inserted video only replaces the existing content.
- The third is Replace. The newly inserted media automatically replaces the existing clips, and the total length and other clips are not affected.
Once you've used these operations in practice, it should be fairly easy to understand the differences between them.
The following few buttons are all functional buttons.
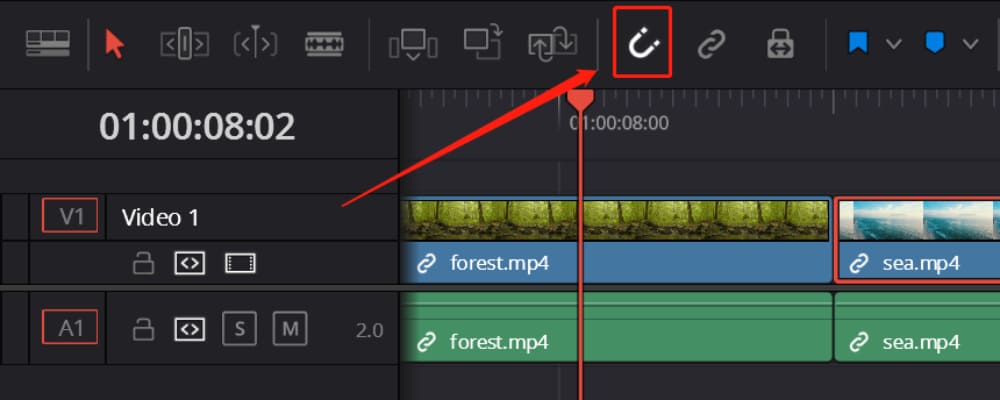
First up is Snapping, which can be activated using the shortcut key 'N'. When you drag a clip towards the end of another, it will automatically snap into place.
Turning off this feature would require you to be precise down to the frame. Therefore, we recommend keeping this feature active 99% of the time.
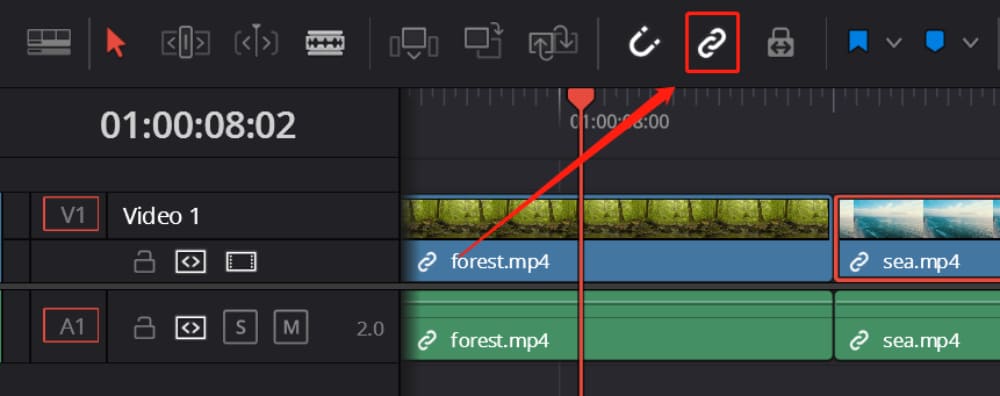
Next is Linked Selection, activated with the shortcut key 'Ctrl (Command on Mac) + Shift + L'. When you drag a piece of media onto the timeline, the audio and video are automatically linked together.
This means that, as long as this feature is active, when you move the video, the audio will move along with it. We recommend having this feature active most of the time.
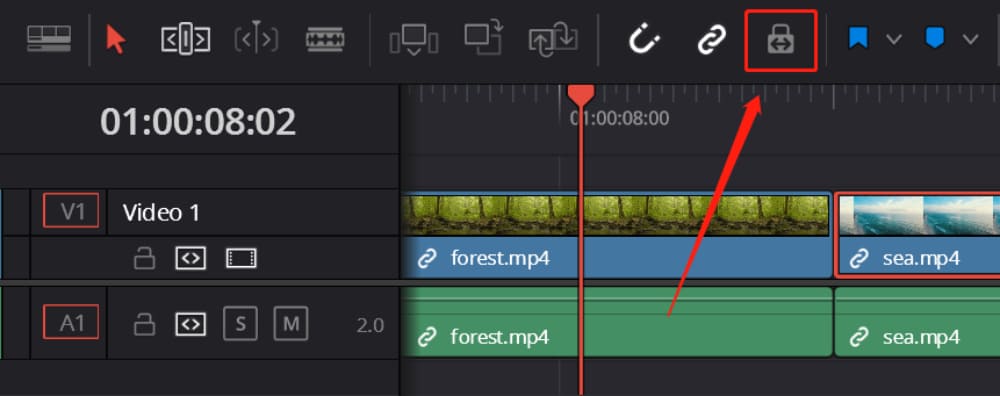
The third button is Position Lock, a less frequently used button. Once activated, you will not be able to move clips on the timeline.
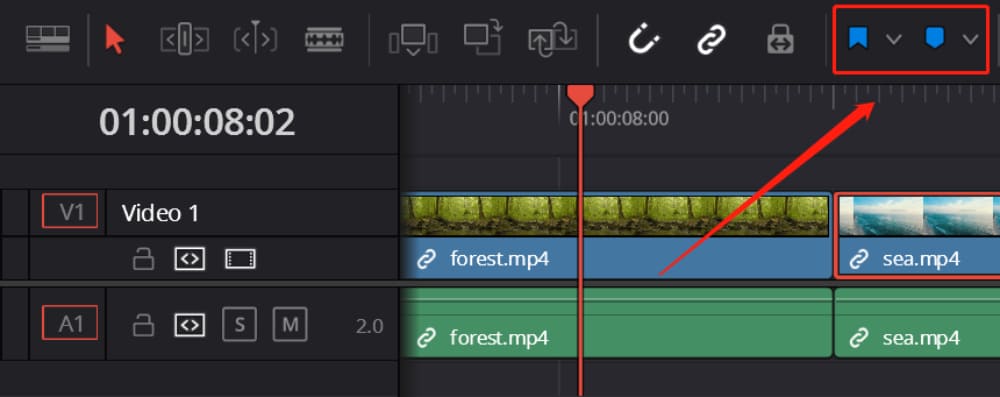
The last two buttons are annotation buttons, namely Flags (shortcut key 'G') and Markers (shortcut key 'M').
As you'll be dealing with a lot of media while editing, proper annotations, text descriptions, or color markings can save you a significant amount of time searching for media.
These two buttons function differently:
- Flags are used to mark entire original clips, and you can differentiate clips by using different colored Flags.
- Markers, on the other hand, are often used on the timeline. You can mark media or timeline points, and add comments or keywords freely.
This way, just by hovering your mouse over it, you can get a description of the media and extract valuable information.
Additional Tips for Triming and Editing Videos
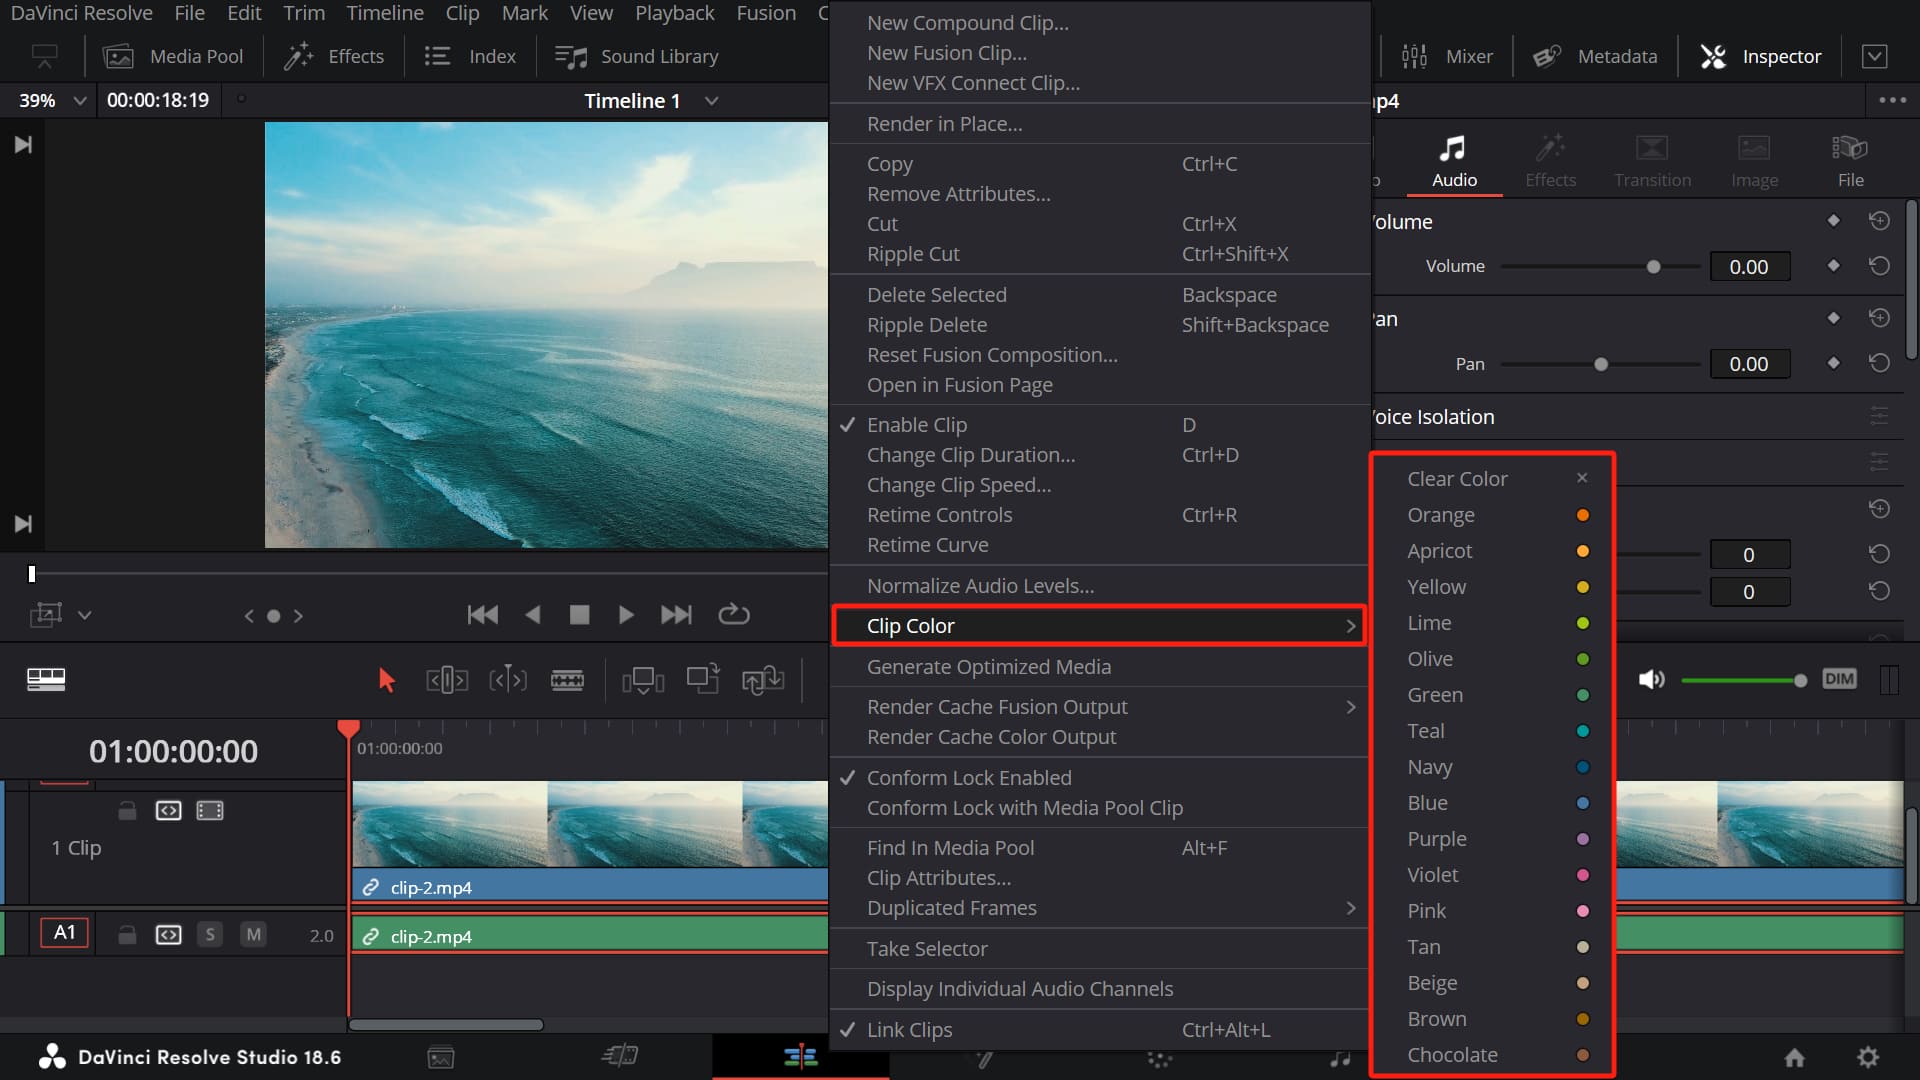
In the final section of our tutorial on how to trim video in DaVinci Resolve, we would like to share an extra tip that makes the editing process more efficient.
By right-clicking on a clip in the timeline and selecting 'Clip Color' from the context menu, you can assign different colors to your various video clips. This helps in visually distinguishing between them.
Product Recommendation
Frequent adjustments are a natural part of the video editing process. In light of this, we would like to recommend the TourBox to you.

This powerful controller is designed specifically for creative work in software like DaVinci Resolve.
It offers a range of customizable buttons, knobs, and wheels, allowing you to tailor your toolset to your workflow, improving efficiency, and making your editing process more intuitive.
We believe this guide has equipped you with the fundamental knowledge required for trimming videos in DaVinci Resolve. You are now ready to put this knowledge into practice, experiment, and start creating your own projects.

It's important to cultivate good editing habits: organize your media well, manage your timeline efficiently, and keep your tracks properly separated. Furthermore, consider utilizing the TourBox tool, as it can significantly improve your efficiency when using DaVinci Resolve.
With that, we conclude our lessons on the Edit Page in DaVinci Resolve. Stay tuned for more tutorials in this series, where we'll continue to delve deeper into the powerful capabilities of DaVinci Resolve.