How to Interpret Footage in Premiere Pro: A Beginner's Guide
Interpreting Footage is a crucial feature in Premiere Pro. It allows you to modify certain attributes of your footage, such as frame rate or alpha channel so that it integrates smoothly into your sequence.
But how do you set up interpreted footage in Premiere Pro? This tutorial will provide a comprehensive guide on using the Interpret Footage feature in Premiere Pro. So let's get started and learn how to make the most out of this powerful tool!

In this article, you will learn:
- Where to Access Interpret Footage Settings in Premiere Pro?
- How to Interpret Footage in Premiere Pro?
- Frequently Asked Questions About Premiere Interpret Footage
Where to Access Interpret Footage Settings in Premiere Pro?
There are two ways to access the Interpret Footage settings in Premiere Pro.
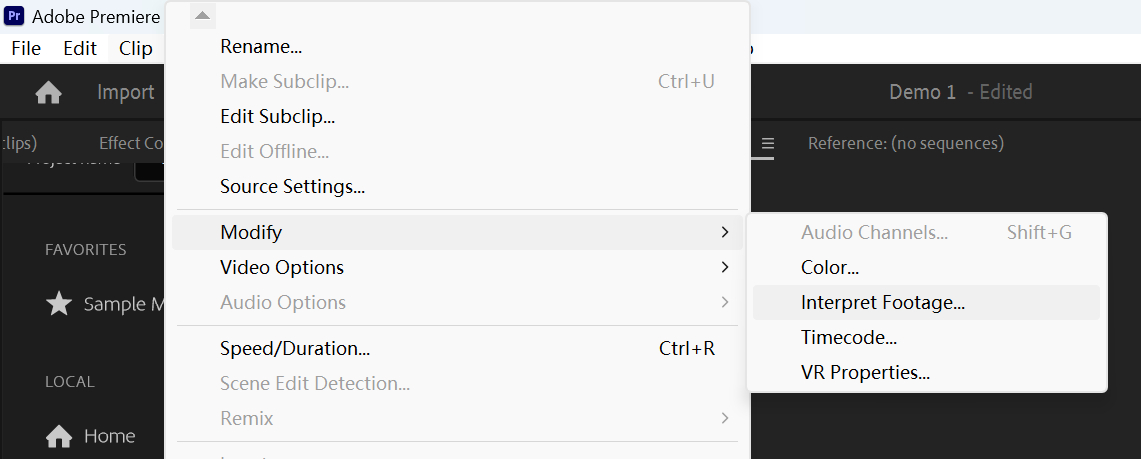
Method 1: In the top menu bar of Premiere Pro, click on the Clip dropdown menu, then navigate to Modify and select Interpret Footage from the dropdown.
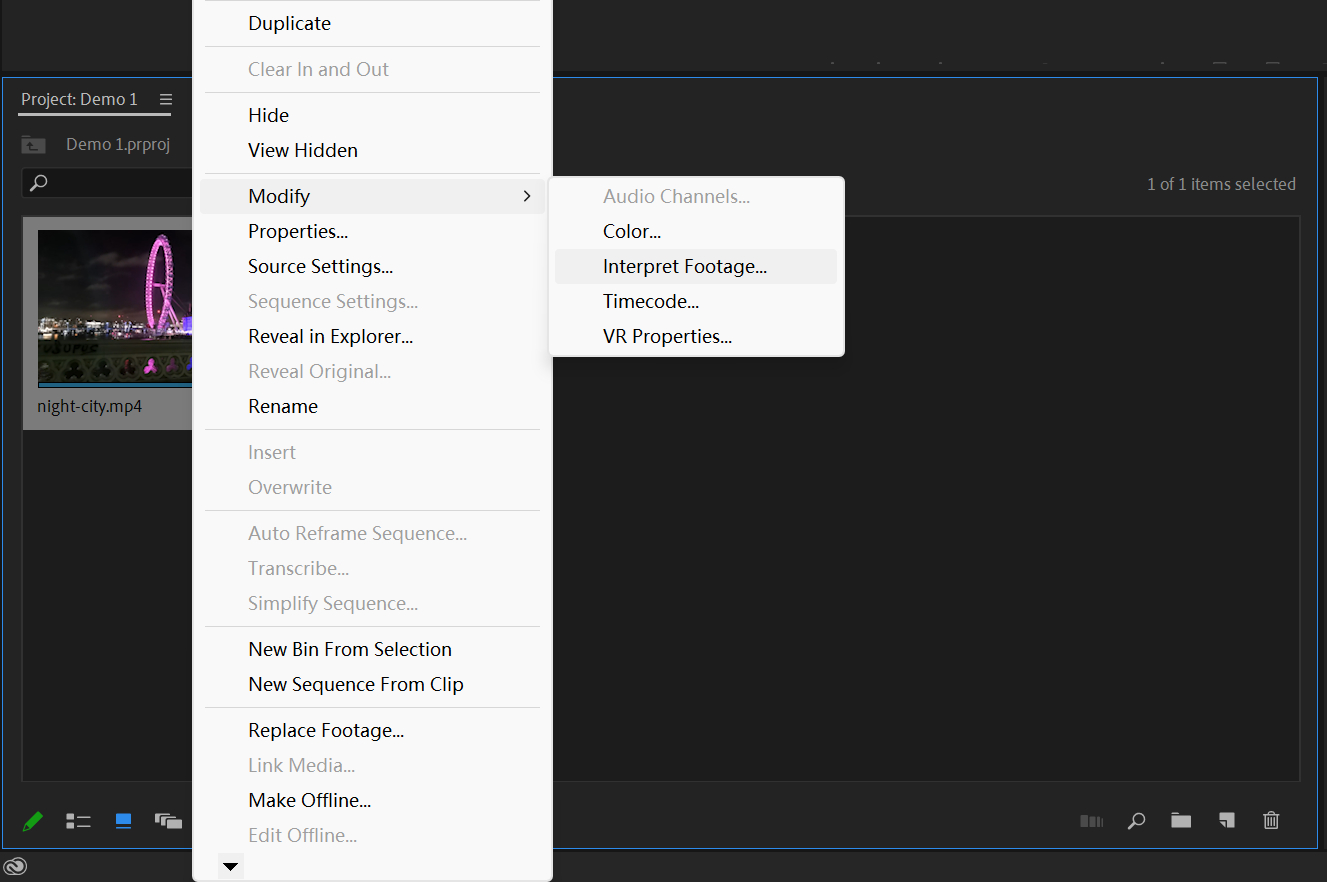
Method 2: In the Project panel, right-click on the footage file and choose Modify, then select Interpret Footage from the menu.
Tip:
After modifying the properties of the footage, it will impact all the edits related to that footage in the sequence.
How to Interpret Footage in Premiere Pro?
In the Interpret Footage settings panel, you will see several parameters you can adjust. We will explain each one to help you better understand how to interpret footage in Premiere Pro.
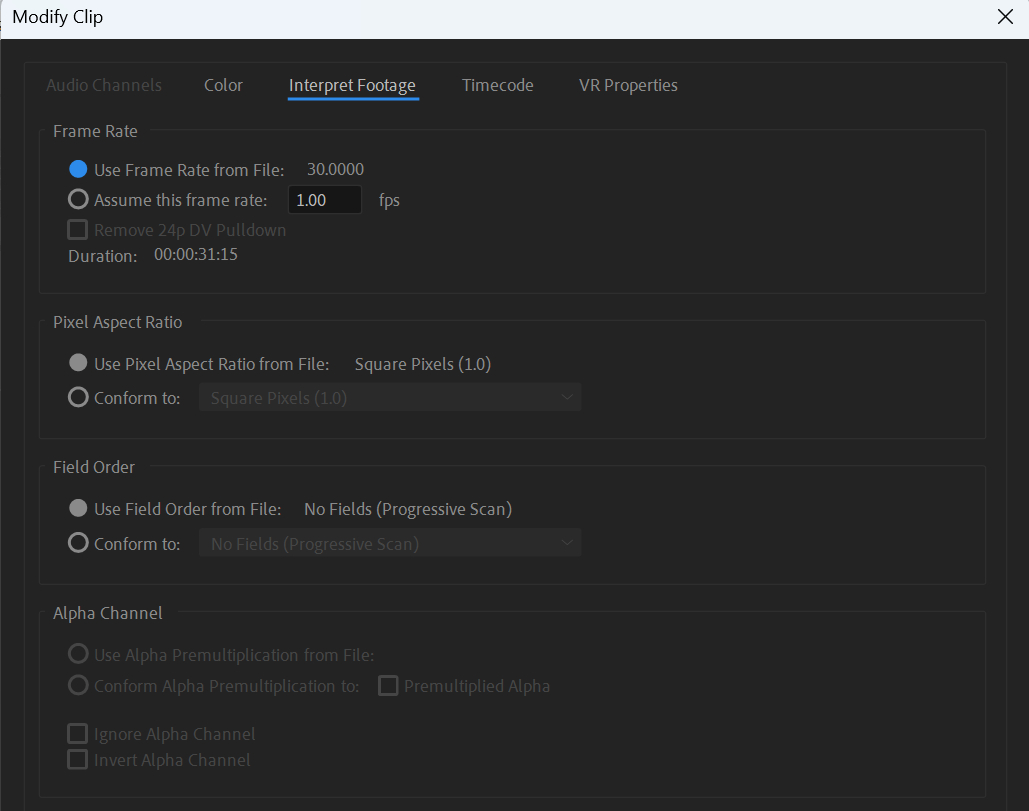
1. Frame Rate
As the name suggests, Frame Rate is used to adjust the frame rate of your footage.
Changing the frame rate will not alter the total number of frames in the footage, ensuring the original quality, but it will affect the duration.

When you add the interpreted footage to a sequence, Premiere Pro will maintain the same duration as the interpreted footage, which may result in dropped frames or additional frames being added.
For example, let's say you have an original footage with a duration of 10 seconds and a frame rate of 60 fps. If you drag this footage directly into a sequence set to 25 fps without interpreting it, the duration of the clip in the sequence will still be 10 seconds, but there will be dropped frames.
However, if you interpret the 60 fps footage as 120 fps, the duration of the footage will become 5 seconds, and it will be in fast motion. If you add this interpreted footage to a 25 fps sequence, the duration will still be 5 seconds, but there will be dropped frames.
Therefore, the correct approach is to interpret high frame rate footage as a lower frame rate and add it to a sequence matching the lower frame rate, preserving the original quality in slow motion.
Similarly, you can interpret low frame rate footage, such as 12 fps with a duration of 10 seconds, as 25 fps and place it in a 25 fps sequence. This will result in a fast motion shot that maintains the original quality and has a duration of 4.8 seconds.
2. Pixel Aspect Ratio
Pixel Aspect Ratio refers to the ratio of the width to the height of a pixel. For digital video, the aspect ratio is typically 1:1, meaning square pixels.
If you notice significant distortion in your footage, you can try interpreting the pixel aspect ratio. For example, if you have a distorted footage with dimensions of 1440 x 1080, you can interpret it with a pixel aspect ratio of 1.333.
3. Field Order
All analog TV standards use Interlaced Scan technology, while digital TV standards include both Interlaced Scan and Progressive Scan (No Fields) technologies.
Currently, Interlaced Scan is considered outdated. To improve TV signals, most digital displays use Progressive Scan, which eliminates the need for fields.
Difference Between Analog TV and Digital TV:
- Analog TV works by converting analog signals into images, while digital TV processes signals in a digital format.
- Analog TVs have a "TV" mode as the signal source, while digital TVs have an "AV" mode.
- Compared to analog TV, digital TV offers higher picture and sound quality, enhanced functionality, and more diverse content.
In the "Conform to" option below, you will see the choices of Upper Field First and Lower Field First.
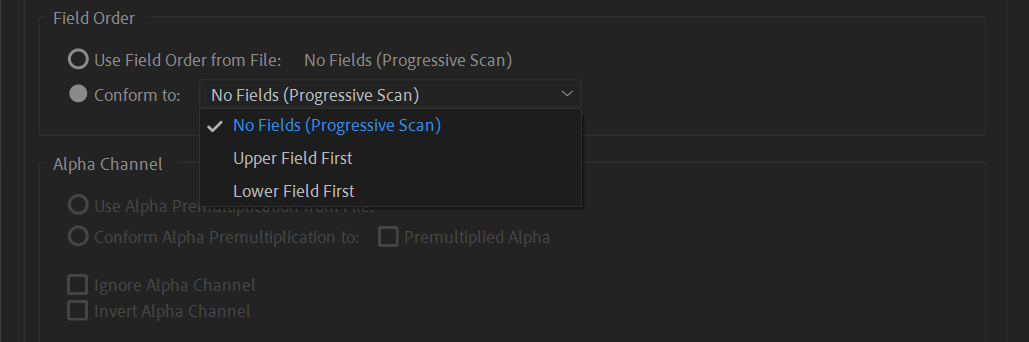
When transmitting a video signal, it doesn't matter whether you use Upper Field First or Lower Field First. What matters is that the receiving device knows the field order of the received signal to display the image correctly.
Tip:
To control field order and perform deinterlacing operations on your clips, you can go to the Premiere Pro menu bar and click on Clip > Video Options > Field Options.
4. Alpha Channel
Some videos or images come with an Alpha channel, which allows you to determine which parts of the image are visible and which parts are transparent.
The Alpha Channel option in the Interpret Footage panel determines how the transparency information of the pixel is handled.
There are two ways in which the transparency information is stored in the file: Straight or Premultiplied. Although the Alpha channel is the same, the difference lies in the primary color channels.
Here are the instructions for setting up Alpha Channel:
- Straight Alpha (Use Alpha Premultiplication from File): The R, G, and B channels exist independently from the Alpha channel, so the transparency is determined solely by the Alpha channel.
- Premultiplied Alpha: Premultiplication means that the R, G, and B channels are multiplied by the value of the Alpha channel, so the transparency information is also stored in the R, G, and B channels. Therefore, you can directly read the R, G, and B channels to obtain the color value with transparency information.
- Ignore Alpha Channel: The Alpha channel of the footage is not considered, and the entire image is displayed. The originally transparent areas will appear as black.
- Invert Alpha Channel: The originally visible areas become transparent, and the originally transparent areas become black.
Tip:
The Straight Alpha method preserves more accurate transparency information, while the Premultiplied Alpha method is more compatible with various software. Premiere Pro can automatically detect whether the footage has an Alpha channel and generally analyze its method.
Frequently Asked Questions About Premiere Interpret Footage
Question: What Is Interpret Footage in Premiere Pro?
Interpret Footage is a feature in Premiere Pro that allows you to modify how Premiere Pro handles your media files, including frame rate, pixel aspect ratio, and more.
Question: What Is the Purpose of Interpret Footage?
Interpret Footage helps you better manage and organize your media files in your projects. For example, you can use Interpret Footage to change the frame rate of a media file, which is useful for creating slow-motion or fast-motion videos.
Question: Does the Interpret Footage Setting Affect the Project Output?
Yes, the Interpret Footage setting does affect your project output. For instance, if you change the frame rate of a media file, it will impact the playback speed of your video.
Product Recommendation:
When using Premiere Pro for creative work, we all want a tool that can enhance our productivity. This is where TourBox comes in and brings a game-changing experience.

TourBox is a controller designed specifically for creative professionals, digital artists, and content creators. It helps you operate Premiere Pro (and other image editing, video editing, and digital painting software) faster and more intuitively.
In the latest TourBox built-in functions, it seamlessly integrates with Premiere Pro's Effect Controls. Just imagine, with a simple twist of the TourBox's rotary control, you can effortlessly adjust the parameters of the Effect Controls.
If you haven't tried TourBox yet, we highly recommend giving a shot to the latest product, TourBox Lite. It offers great value for money and is perfect for first-time TourBox users. We believe you will fall in love with it!

That concludes our article on Interpret Footage in Premiere Pro. We hope it has helped you understand how to handle media files in Premiere Pro without feeling overwhelmed.