Landscape Photography Guide: What Is It and How to Shoot It?
In daily life, when we talk about photography, we often first think of taking landscape photos. Even people who rarely take pictures will usually snap a few landscape shots as keepsakes when they travel.
Taking landscape photos is called landscape photography in the photography world. Today, we'll look at what landscape photography is and how to shoot it.

In this article, you will learn:
- What Is Landscape Photography?
- What Kind of Landscape Photography Aesthetic Should You Have?
- How to Shoot Landscape Photography?
- Conclusion
What Is Landscape Photography?
Landscape photography is a type of photography that focuses on showing the beauty of natural scenery. This includes mountains, forests, lakes, oceans, and other natural settings. It also covers human-made scenes like city buildings, night views, and rural landscapes.
In other words, it is a way to use the camera to record and express the beauty of nature and cityscapes.
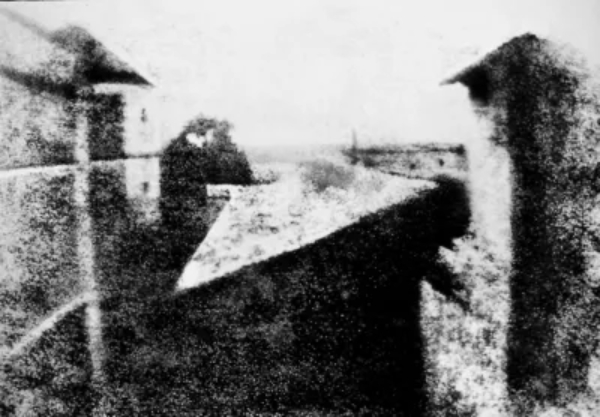
Since the day photography was born, landscape photography has held a leading place. The very first permanent photograph made by humans was a landscape. In 1826, the Frenchman Nicéphore Niépce took a picture of the view outside his window titled "View from the Window at Le Gras."
What Kind of Landscape Photography Aesthetic Should You Have?
Before we talk about how to shoot landscape photos, let's expand a bit on what landscape photography is. We want to talk about what kind of landscape photos you should shoot — in other words, what your shooting aesthetic should look like.
If you're new to photography and plan to mainly shoot landscapes, a real question is: why do you want to shoot landscapes?
There are basically three reasons: for fun, to make money, or for art.
1. For Fun
First, let's look at the hobby side. If you're a photography hobbyist and you post your photos on social media, which of these two images will get more likes?
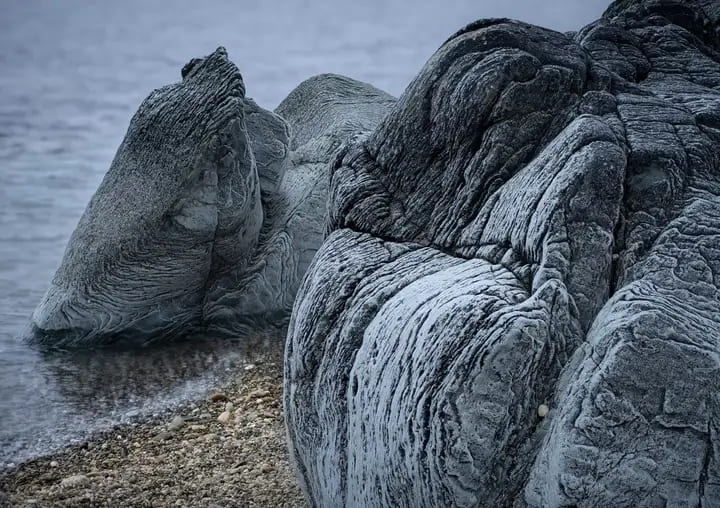
Image 1
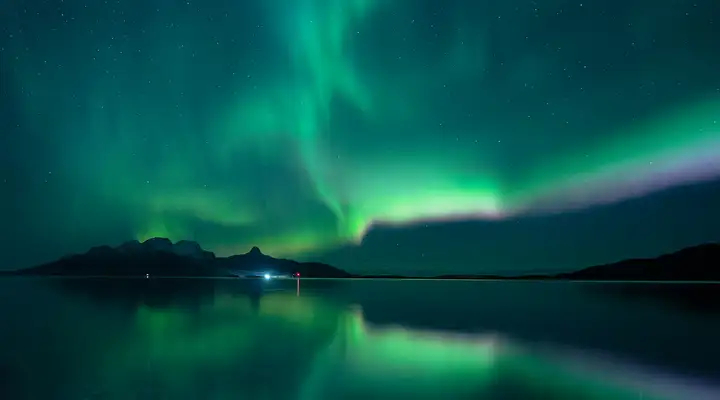
Image 2
No doubt about it, without much testing, the second photo will get more likes than the first. But artistically, the first photo is clearly better.
We are not putting down the second photo or the hard work of landscape photographers. But the second photo doesn't need much thought. You just find a natural scene and press the shutter.
Also, there are so many photos like the second one that we can't tell them apart. But the first photo leaves a strong impression.
So when you treat landscape photography as a hobby, you are basically seeking personal satisfaction. That satisfaction often comes from outside approval. Your audience then is the general public, and the public's taste is usually mainstream.
When you try to please a mainstream audience, "unreal-looking landscapes" are a great fit. These images look strange, rare, and shocking to most people. That means you can keep getting positive feedback from this kind of landscape photography.
2. To Make Money
Now imagine you are a professional photographer teaching landscape shooting and post-processing. Which image would you choose as your promo photo?
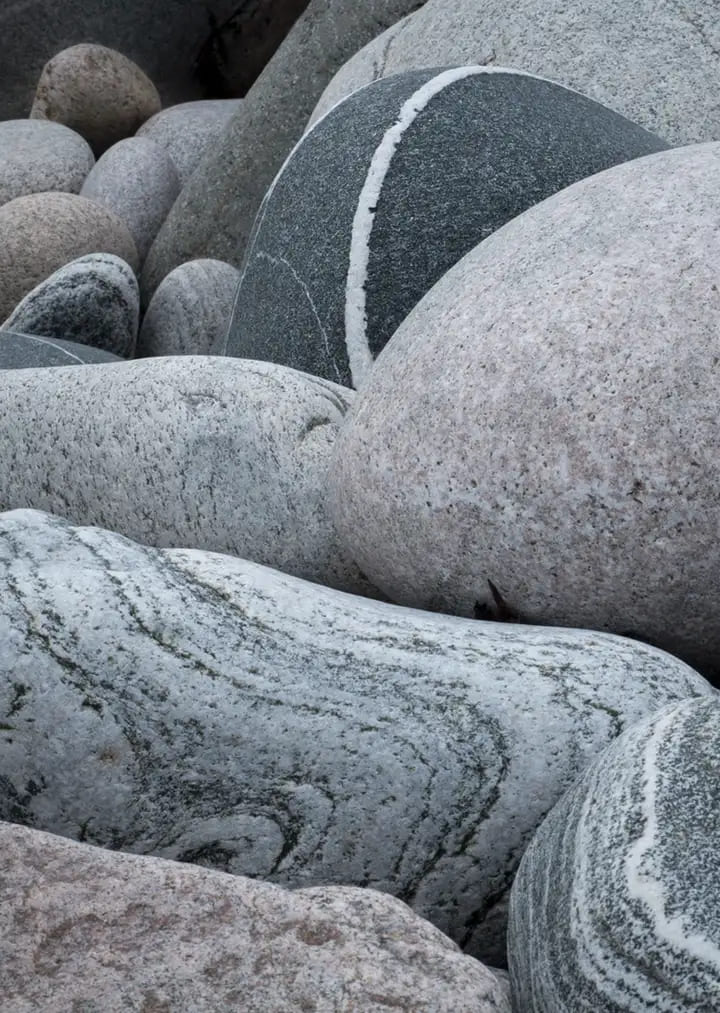
Image 1
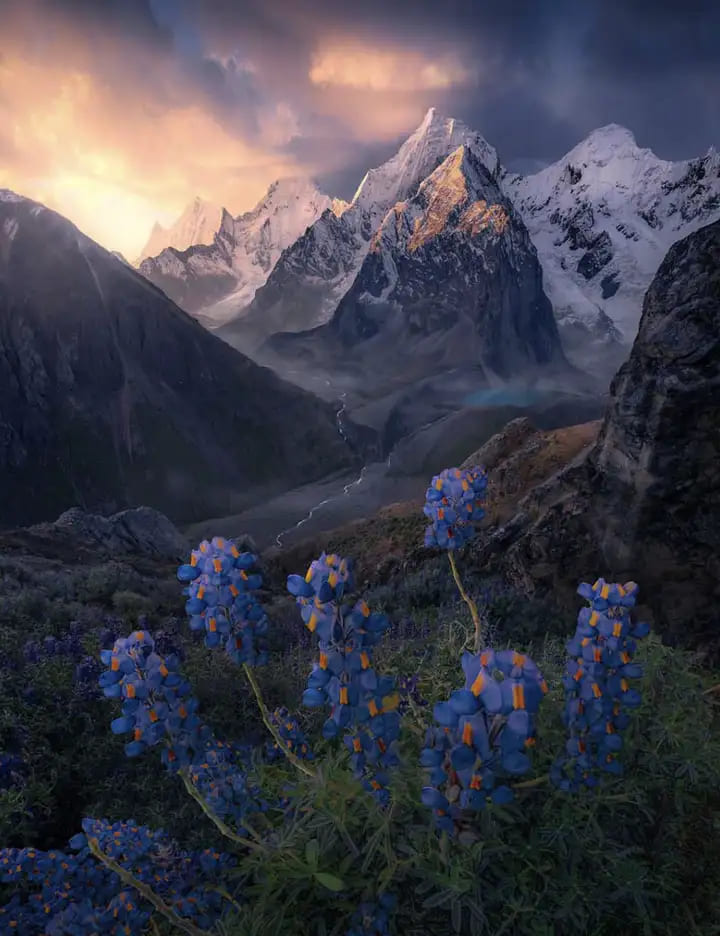
Image 2
If you use the first photo as your promo, students will be confused: What is this? Isn't this the kind of photo anyone can take with a phone? You want to teach me with this?
But if you use the second photo, students will shout: Amazing! Cinematic! High-end! I want to learn! SHUT UP AND TAKE MY MONEY!
Do you feel that the second photo is too formulaic, too magical, too dependent on postwork — too unreal? The first photo, by contrast, feels simple and real and unforgettable.
If you want to make money from landscape photography, you need a wide audience. Your style can't be too rare or hard to sell. Also, what you sell should be repeatable and measurable, such as concrete post-processing techniques, not just an artistic taste.
And your photos must grab attention and shock at first sight. In today's fast-food attention economy, people won't stop for you unless your image hits hard. "Unreal-looking landscapes" often meet these needs. What would you choose?
Quick ad break. If you prefer "unreal" landscapes, you'll rely a lot on editing and color grading. One post-processing app you'll almost certainly use is Lightroom.
The problem is Lightroom's native fixed panels have many sliders. For different photo styles, you have to hunt through lots of sliders every time to find the one you want. It's tedious. And dragging sliders with a mouse often makes your adjustments imprecise.

So take a look at our TourBox. Besides mapping your favorite software functions to TourBox's physical buttons and knobs, it has many built-in features that help your post workflow.
For example, we built a Dynamic Panel for Lightroom. It's a floating, highly customizable grading panel. With it, you can leave Lightroom's native panels behind and grade photos full screen, so you can focus on the image itself.

3. Artistic Pursuit
One fact is hard to deny: most landscape photos in the world have little lasting value. Especially now, when photography is so common, after the first great image, many later works are just copies. If you truly want your work to leave a mark in the history of photography, following those magical, trendy photos is not a good choice.
Still, few photographers pursue pure art. It's like one drop of syrup in the ocean — it won't make the sea sweet. Those dramatic, almost CG-looking landscape edits are like spices. Any raw photo can be doused in that spice and end up looking "high-end," earning praise on social media.
But spices are spices — if you use them, others can use them too. And if everyone uses them, the audience may say: this is too much. So in pure photographic art, these unreal-looking landscape works are rare. More often you find photos that seem dull, boring, dry, or plain.
In this fast-paced age, we do need landscape photos that instantly grab the viewer. Only those photos can reach maximum commercial value.
Of course, this is not to say such eye-catching photos can't be good art. It's not to say they are bad taste. It's just that eye-catching landscape photos can narrow many people's idea of good landscape photography. They make people think only this kind of photo is good.
As for what style you should shoot and what your aesthetic should be — that choice is yours.
Our view is: If your main goal is getting social media exposure or paying students, some "bold colors / stylized editing" do make it easier to grab short-lived attention. There's no doubt this is a strategy of trading a repeatable look for traffic and business returns.
But this style is a creative choice, not a technical standard. Beginners should learn to tell the difference between the "technical side" (like exposure, composition, and accurate color) and the "stylistic side" (like dramatic color or compositing), and decide which part of landscape photography to focus on based on their own goals.
How to Shoot Landscape Photography?
Next, let's get to the main topic. We'll look at how to shoot landscape photography from three angles: gear, camera settings, and shooting techniques.
1. What Gear Should You Choose?
(1) Wide-Angle Lens
Wide-angle lenses are a common choice for shooting wide-open landscapes, because shorter focal lengths can fit more of the scene into the frame.
However, the exact meaning of "wide-angle" depends on sensor size: on full-frame cameras, 16–35mm and 14–24mm are true wide or ultra-wide. 24–70mm is a standard zoom (on full-frame, 24mm is only mildly wide). Because it covers a lot and is versatile, 24–70mm is often recommended as a travel or beginner lens.
If you want a stronger "wide-angle feel" and more foreground extension, pick a lens with a shorter focal length. If you want one lens to do everything, 24–70mm is a good compromise.
(2) Tripod
Most landscape shots use a small aperture and often face low light. You can get a good exposure, but that usually means using a shutter speed of 1/30 second or slower.
If you try to handhold below 1/30 second, you will likely end up with an unusable blur unless you are very steady and very skilled.
That's when a tripod helps. Use it to steady the camera and keep the image sharp at 1 second, 5 seconds, or even 30 seconds.
2. How Should You Set up Your Camera?
(1) Use a Small Aperture for Maximum Depth of Field
In landscape photography, a large depth of field is almost always best. This keeps as much of the scene in focus as possible. Sharp detail from front to back fills the frame with beautiful detail and feels more real, like the viewer could step into the scene.
The easiest way is to pick a small aperture (for example, f/11 or f/16). The smaller the aperture, the greater the depth of field, and the sharper the landscape.
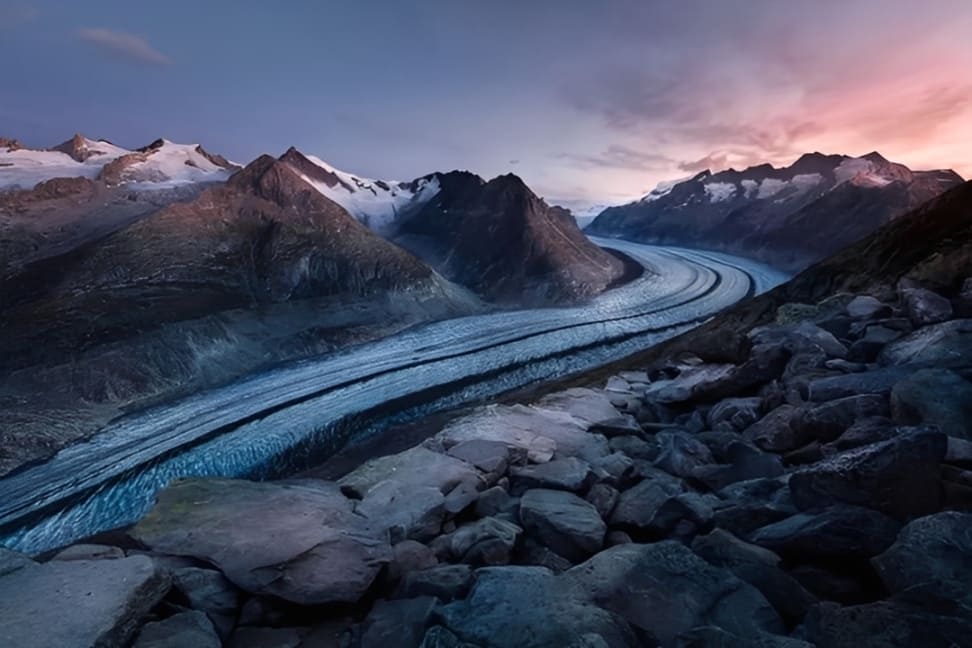
For example, the photo below, with sharp detail from foreground to background, needs at least f/11.
(2) Choose a Slower Shutter Speed and a Low ISO
Using a small aperture usually means pairing it with a slower shutter speed. A slower shutter, especially 1/60 second or slower, lets more light hit the sensor. This balances out the reduced light from a small aperture.
Raising ISO will make the image brighter, but it's a double-edged sword. High ISO adds noise. Keep ISO low. If you need more exposure, change the shutter speed first.
3. What Landscape Shooting Techniques Should You Use?
(1) Find a Focal Point
Almost every strong landscape photo needs a focal point: a main subject that draws the eye. A landscape without a focal point can look flat and empty.
- A focal point can take many forms, including:
- A building
- A striking tree
- A large rock or rock formation
- A silhouette of wildlife
- A person
Once you pick a focal point, think carefully about where to place it in the frame.
(2) Consider Using a Foreground
A strong foreground grabs the viewer's attention and helps them enter the scene. A good foreground also adds depth.
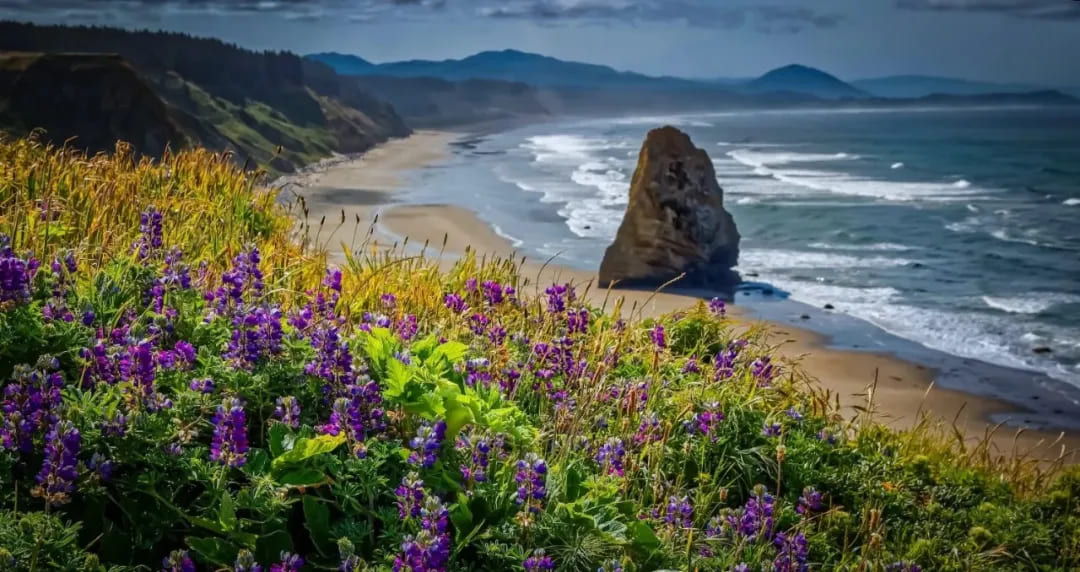
Good foregrounds often have nice detail, like flowers, leaves, a flowing stream, sparkling rocks, or waves hitting the shore. For example, the photo below uses a field of flowers to add interest in the foreground.
(3) Don't Forget the Sky
In landscape photography, use the sky well.
Tip: A clear blue sky often looks flat and lifeless. A mix of clouds and sun gives you more interest (and color at sunrise and sunset).
If the sky is clear, consider waiting to see if a few clouds appear.
(4) Simplify the Image
Sometimes less is more. Focusing on fewer elements can make the photo stronger.
Simplicity pulls the viewer in and guides the eye through the image with no effort.
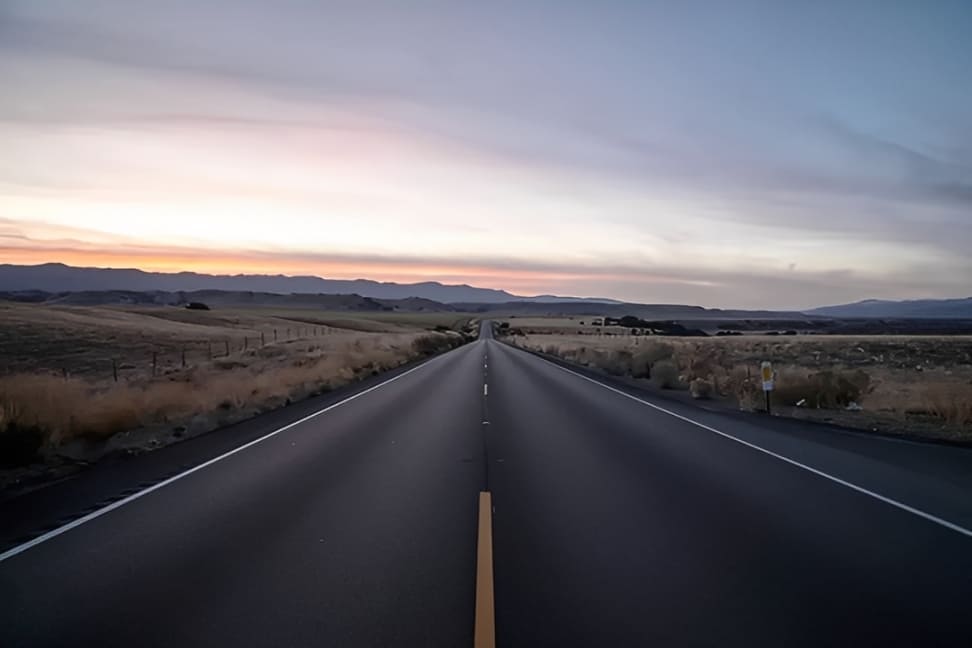
(5) Use Leading Lines to Add Energy
One or two good leading lines can be the difference between a snapshot and an excellent image.
Leading lines draw the viewer into the photo and add depth.
You might think leading lines are rare, but they're actually common. You just need to know where to look. Examples include:
- Roads
- Receding waves
- Rivers
- Cracks in ice
- Rows of leaves
- Fallen logs
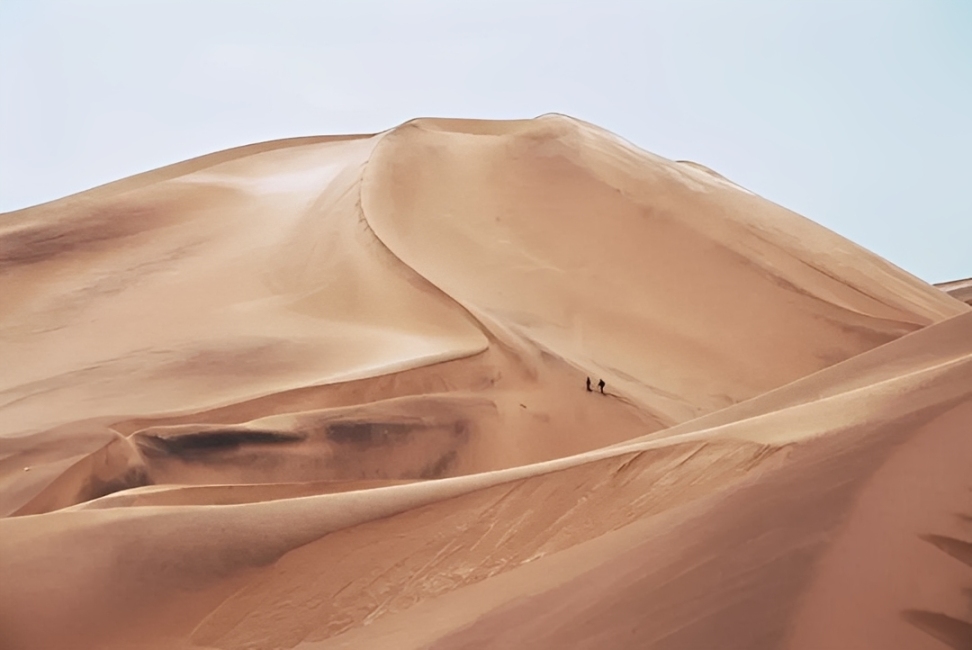
(6) Include a Human Element to Add Scale
Capturing a vast scene can be a real challenge. Many photos fail to show how grand the scene is because there is no sense of scale. One solution is to include a person in the frame.
Remember balance is key. The human element should add to the image, not distract. Don't include too many people.
(7) Pay Attention to Golden Hour and Blue Hour
Golden hour (golden hour) usually means the short period after sunrise and before sunset. At this time, the sun is low in the sky, the light is warm and soft, and it's often used to shoot landscapes with rich layers and warm tones.
Blue hour (blue hour) is the time before sunrise or after sunset when the sun is a few degrees below the horizon (about −6° to −4°). The sky turns a deep blue, and the contrast is gentle. This brief period is great for creating calm, cinematic images.
The exact times for both change with latitude, season, and longitude, so use a sunrise/sunset calculator or a weather app to confirm the times for the day.
Conclusion
With a basic understanding of landscape photography, taking great landscape photos is not too hard. But it often takes persistence. You may need to hike long distances and stay up all night just to catch the brief, most stunning light at sunrise.
Post-processing is a common step in digital photography. It helps you correct issues caused by the camera, lens, or shooting conditions (like white balance or local exposure) and achieve the visual effect you want to convey.
But for landscape photography, whether you need heavy post-processing depends on your creative goal: for work meant for commercial use or exhibition, post-processing often improves quality and consistency; if you want a natural record, you can keep post-processing to a minimum.
So we recommend treating post-processing as part of your landscape photography workflow, and learning to find a balance between preserving detail and avoiding over-processing.