How to Use OpenFX Effects in DaVinci Resolve?
When making effects in DaVinci Resolve, OpenFX is a core framework you must know. It is an open, cross-platform plugin system. It not only lets Resolve include many built-in ResolveFX plugins, but it also supports third-party plugins like Roboformfx, Redgiant, and others. That gives colorists and effects artists a lot of possibilities for grading and visual effects.
Many beginners get stuck on node operations and how to use plugins. In this tutorial, we'll show how to use OpenFX effects in DaVinci Resolve. From finding and applying plugins to fine-tuning parameters, we'll walk you through each step so you can master effects in Resolve.

In this article, you will learn:
- Key Prerequisite for Using OpenFX: Nodes
- How to Use OpenFX Effects in DaVinci Resolve?
- How to Make OpenFX Effects More Efficient?
- Conclusion
Key Prerequisite for Using OpenFX: Nodes
OpenFX plugins in DaVinci Resolve are mainly used on the Color page. That page uses a node-based workflow, and that is the key requirement for using OpenFX. When you add a plugin, it only affects the node it's on and the nodes that come after it. Nodes that come before it are not affected.
Put simply, where you place a plugin determines which downstream nodes will carry that effect. So the plugin's node placement directly sets the effect's scope. Don't place it randomly — be careful.
Once you understand the core idea of nodes, you can use OpenFX. The process has four main steps: finding the effect, applying it, adjusting its parameters, and managing it. Follow these steps, and even beginners can get started easily.
Further Reading:
How to Use OpenFX Effects in DaVinci Resolve?
Step 1: Find the Plugin You Want
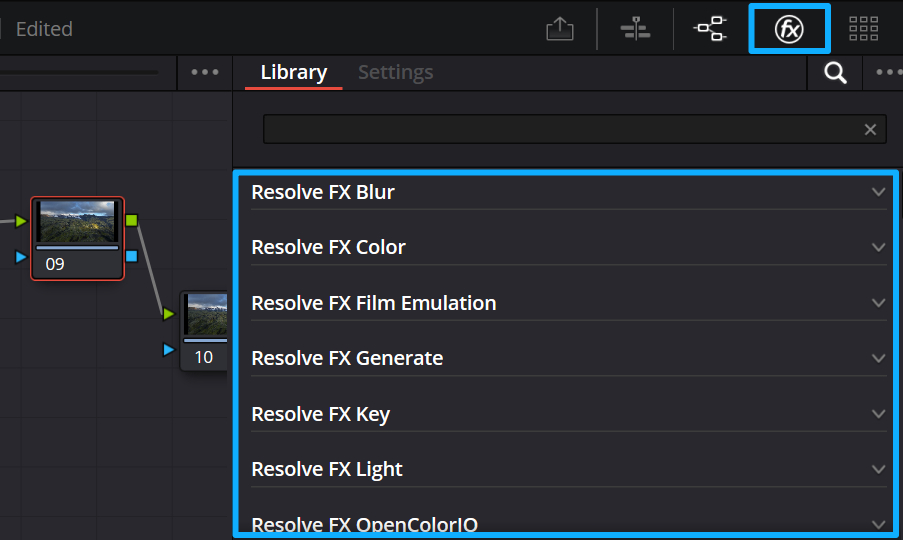
Open the Color page in DaVinci Resolve. In the Effects Library, all OpenFX plugins are sorted into categories. Browse those categories and pick plugins that match your project needs.
If you know the plugin's name, type it into the search box in the Effects Library. That will find it right away and save you from digging through menus. It's much faster.
Step 2: Drag the Effect onto a Node
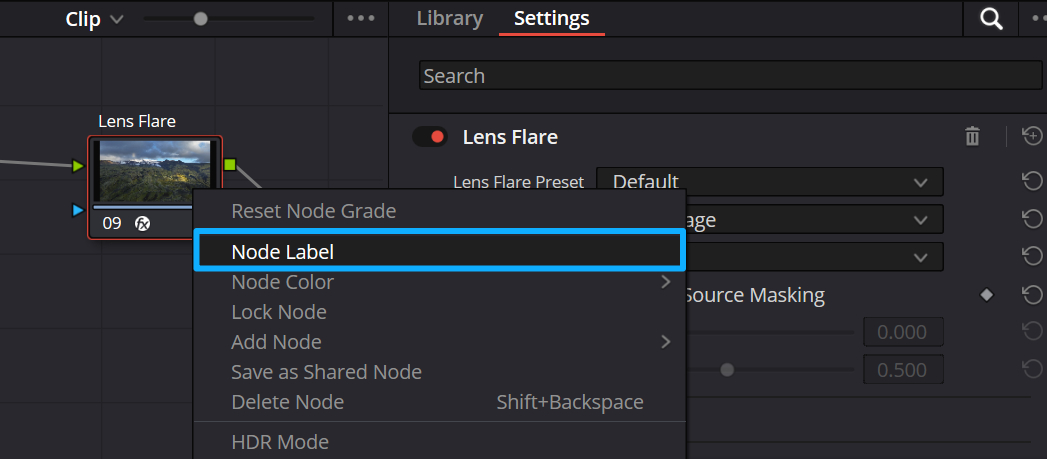
Once you find the plugin, drag it onto an existing node or onto a new, empty node. After you add an OpenFX plugin, the node will show the FX icon. That makes it easy to see which node has an effect.

To make it even clearer, right-click the node, choose "Node Label," and add a short label (for example, the plugin's name). That way, you can find and edit the effect faster later.
Step 3: Adjust the Effect's Parameters
After you drop the plugin onto a node, the settings panel on the right will light up. This is where you change the plugin's parameters. Different plugins have different controls.
For example, a denoise plugin may have noise strength and processing range. A film-emulation plugin may have color temperature, grain, and tone controls. Tweak the settings to suit your video.
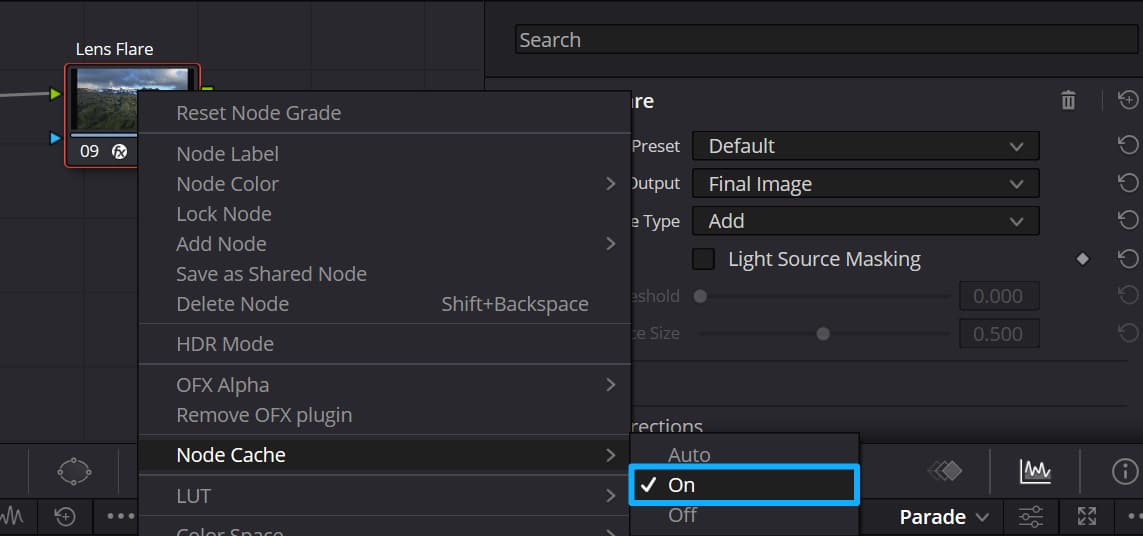
Tip: If the preview gets slow after you change settings, don't lower the image quality first. Turn on the render cache, or right-click the node and enable Node Cache. That will make the preview much smoother while you work.
Step 4: Manage Your Plugins
Adjusting an effect isn't the last step. Managing plugins afterward matters too. You can remove unused effects or save the ones you use often.
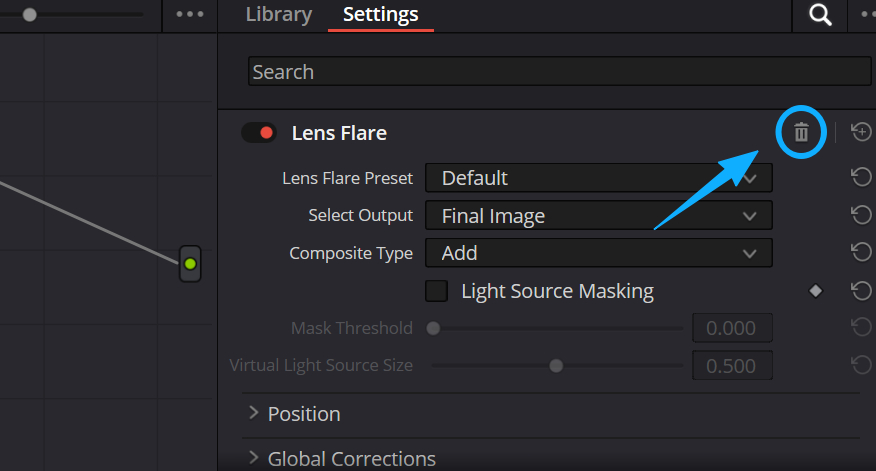
If an effect isn't working for you, click the trash can icon in the top-right of the settings panel. That deletes the effect and the node returns to how it was before the plugin was added.
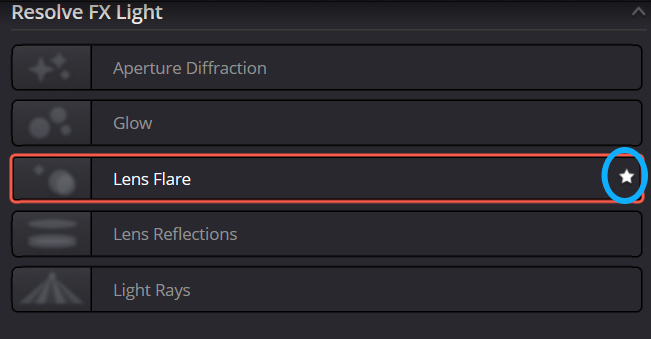
To save a plugin you use a lot, click the star next to its name. That adds it to your Favorites. Later, open the three-dot (…) menu on the right side of the Effects Library and choose Favorites to see your saved effects. Pick one from there instead of searching again — it saves time.
How to Make OpenFX Effects More Efficient?
Besides the four basic steps, one simple trick speeds up your work: plan the node order for your plugins. DaVinci Resolve uses a node workflow, so placing plugin types in the right spots makes effects look more natural and cuts down on later tweaking.
Best practice: Put fixing plugins (like denoise, skin smoothing, and patch/repair tools) in the early nodes. Fix the raw footage first so the image has a clean base.
Then put styling plugins (like film emulation, color filters, and lighting effects) in later nodes. Add the style on top of the cleaned image. This keeps image quality high and makes the style more effective.
Conclusion
That's the core way to use OpenFX in DaVinci Resolve. The main thing is to get how nodes work. Then follow the four steps: find the effect, apply it, tweak the settings, and manage it. Also, plan where each plugin sits in the node tree. Do that and you can make the effects you want with less trouble.
If you're a beginner, start with the built-in ResolveFX plugins. Practice with them until you feel comfortable, then try third-party plugins. Over time you'll unlock more ways to make effects in DaVinci Resolve.
At the end of this article, we'd like to introduce TourBox. TourBox is a creative controller that helps editors, colorists, and content creators work faster and enjoy the process more. Think of it like a game controller or a custom keyboard. You can map any command from your favorite video editing software — not just DaVinci Resolve — to TourBox's physical buttons and dials.

With TourBox, you don't have to memorize software shortcuts anymore. It gives you the speed of shortcuts, and the knobs and buttons feel great to use. You'll love how it changes your editing workflow.

TourBox is more than a shortcut mapper. It also has useful built-in features, like HoverAdjust, which improves the DaVinci Resolve color-grading experience. If you're interested, visit our Video Editing page to learn more.