[DaVinci Resolve Tutorial] A Complete Guide to Nodes
In this tutorial, we will share techniques for utilizing nodes in DaVinci Resolve. By understanding how to construct a node structure, you will be able to enhance your color grading skills and achieve a more professional outcome in DaVinci Resolve.

In this article, you will learn:
- What You Should Know About Nodes in DaVinci Resolve
- How to Use Nodes in DaVinci Resolve?
- Final Thoughts About Nodes in DaVinci Resolve
What You Should Know About Nodes in DaVinci Resolve
Nodes are powerful tools in DaVinci Resolve. They are not only found in DaVinci Resolve but also in top software used in the film and gaming industries. These software applications utilize node-based logic to construct complex scenes.
The popularity of nodes stems from their non-destructive nature. When modifications are needed, you can revisit any step in the node tree to make adjustments.
This is especially valuable in complex projects, as traditional layer-based logic, like that in Photoshop, can be challenging to meet practical requirements. Determining the relationships between layers can be difficult, and accidental missteps are common during adjustments.
Nodes provide a global perspective and clear sequential relationships, making it easier to organize your workflow during video editing.
It's important to note that more nodes do not necessarily equate to better results. It's crucial to approach node usage with a rational mindset and aim to achieve the best outcome with as few nodes as possible. This approach will ensure optimal color grading in DaVinci Resolve.
How to Use Nodes in DaVinci Resolve?
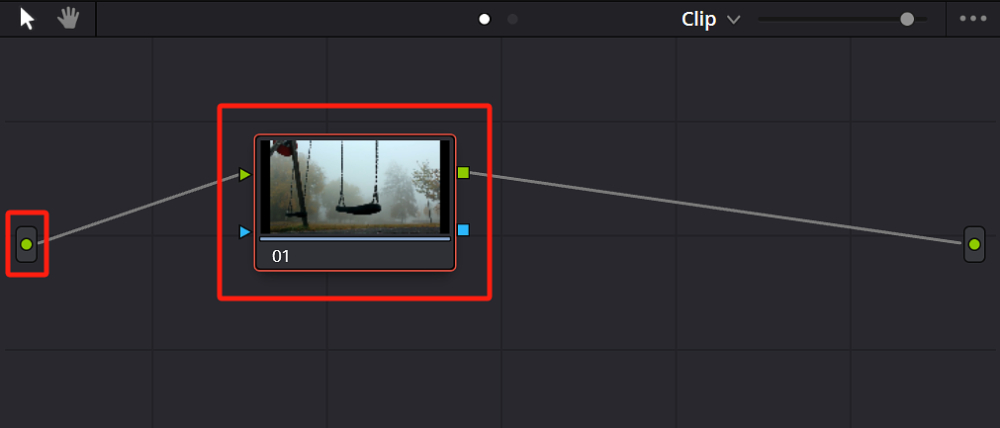
To begin color grading your footage in DaVinci Resolve, import your media into the timeline and switch to the Color page. Click on the Nodes button located in the top right corner, and you will see the node structure as shown in the image below. Every clip starts with a similar initial node setup.
Nodes flow from left to right. The green node on the left represents the input media, which then passes through correction nodes. The correction nodes are where we actually make adjustments to the footage.
1. How Nodes Work in DaVinci Resolve?
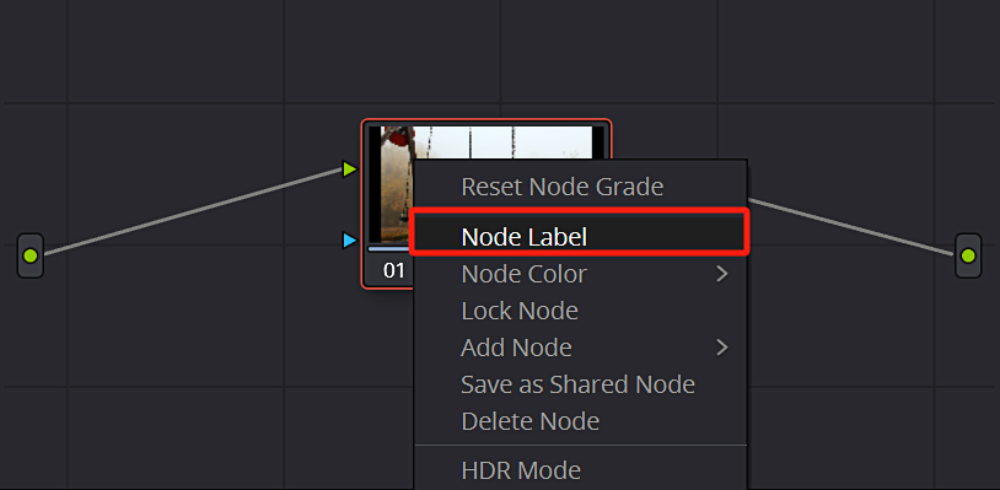
Nodes are incredibly intuitive. Whenever you use any color grading tool on the Color page, a small icon will appear on the node, indicating the adjustments you have made. This way, you can quickly identify the modifications within each node.
![]()
If that's not enough, you can right-click on a node and select "Node Label" from the pop-up menu to add text annotations for that specific node.
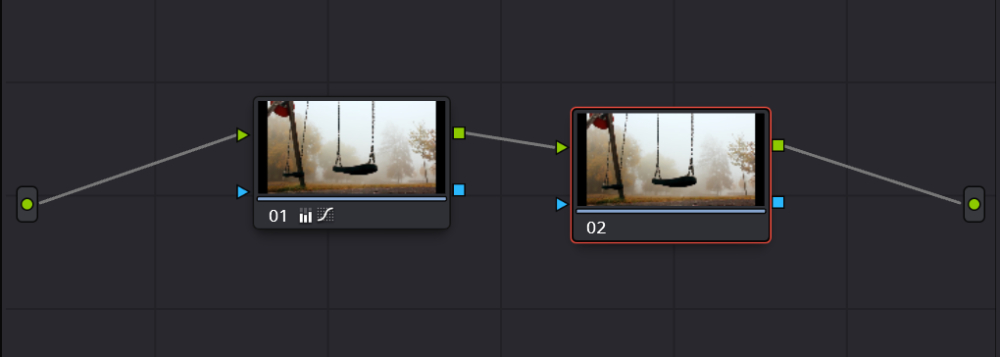
Each node is independent, meaning that any adjustments made within the previous node will not affect the parameters of the color grading tools below on the Color page once you create a new node.
However, since the previous node's adjustments feed into the new node, the initial footage of the new node is already influenced by the previous node. This is why the order of nodes directly affects the final result.
You can try color grading operations on two different nodes separately and then experiment by swapping the order of the two nodes. You will notice that the results differ, even though the nodes themselves remain unchanged.
2. How to Create a New Node?
It seems like we missed an important step: how to create a new node. The process is quite simple.
Serial Nodes
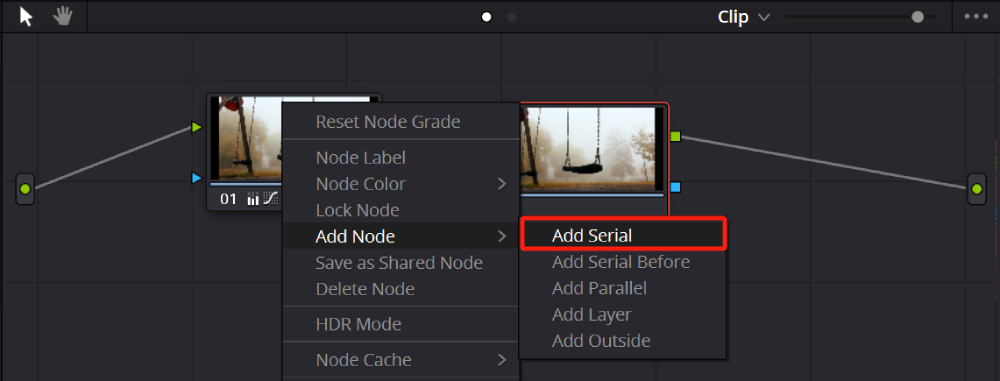
Right-click on any node and select "Add Node" > "Add Serial" from the menu list. This will create a new node in the sequence, automatically connecting it to the previous and subsequent nodes. Alternatively, you can select a node and press the "Alt/Option + S" shortcut key for a faster method.
Serial nodes are fundamental and commonly used in node-based workflows. For example, in a typical color grading workflow, you can use the first node to correct white balance and exposure issues in your footage, and then use subsequent Serial nodes to stylize the clips according to your desired look.
Parallel Nodes
You might be wondering why we need other types of nodes, such as Parallel and Layer nodes if the Serial node already fulfills our needs.
The Serial node works well for general adjustments, but when you need to make more subtle tweaks, like color grading a specific area separately, the linear flow of the Serial node can become problematic, making your workflow unnecessarily complex.
This is where Parallel nodes come in. Parallel nodes are designed for Secondary Color Grading. In simple terms, Parallel nodes branch out from the same source, creating identical branches or substreams where you can perform independent adjustments.
No matter how you adjust the color within one node, it won't affect the other nodes within the Parallel node. The nodes within a Parallel node do not have any hierarchical relationship, but they will be mixed together when outputting.
In practical color grading work, you can use DaVinci Resolve's Window and Magic Mask feature to isolate specific areas for color adjustments. In secondary color grading, Parallel nodes are essential.
Creating a Parallel node is also straightforward. You can right-click on a specific node, then select "Add Nodes" > "Add Parallel" from the menu, or use the shortcut "Alt/Option + P".
Layer Nodes
So, what is the difference between Layer nodes and Parallel nodes? Layer nodes, like layers in Photoshop, have a hierarchical relationship. For example, in the image below, we have three Layer nodes, and you can see that the red, green, and blue circles have a hierarchical relationship.
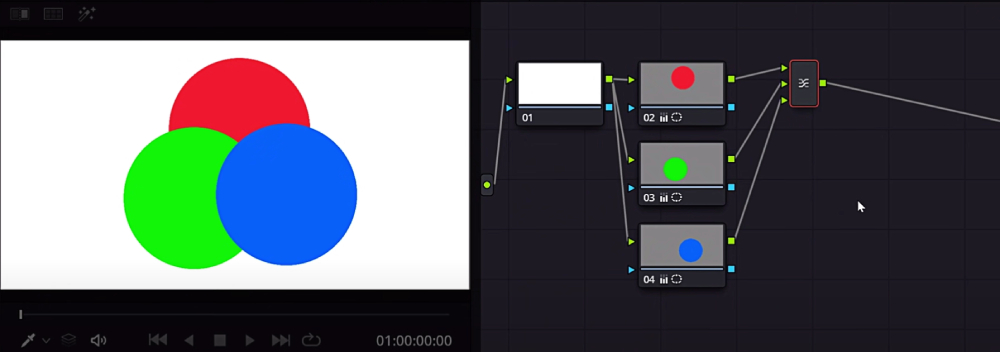
By right-clicking on the Layer Mixer output of the Layer node and selecting Composite Mode, you will see familiar layer blending modes, just like in Photoshop.
But what can you do with this? Besides using layer blending modes to overlay colors like in Photoshop, you can also do some basic visual effects compositing.
You can drag effects like glows or noise from the Media Pool into the node panel, link them to the Layer node, and then choose the Composite Mode.
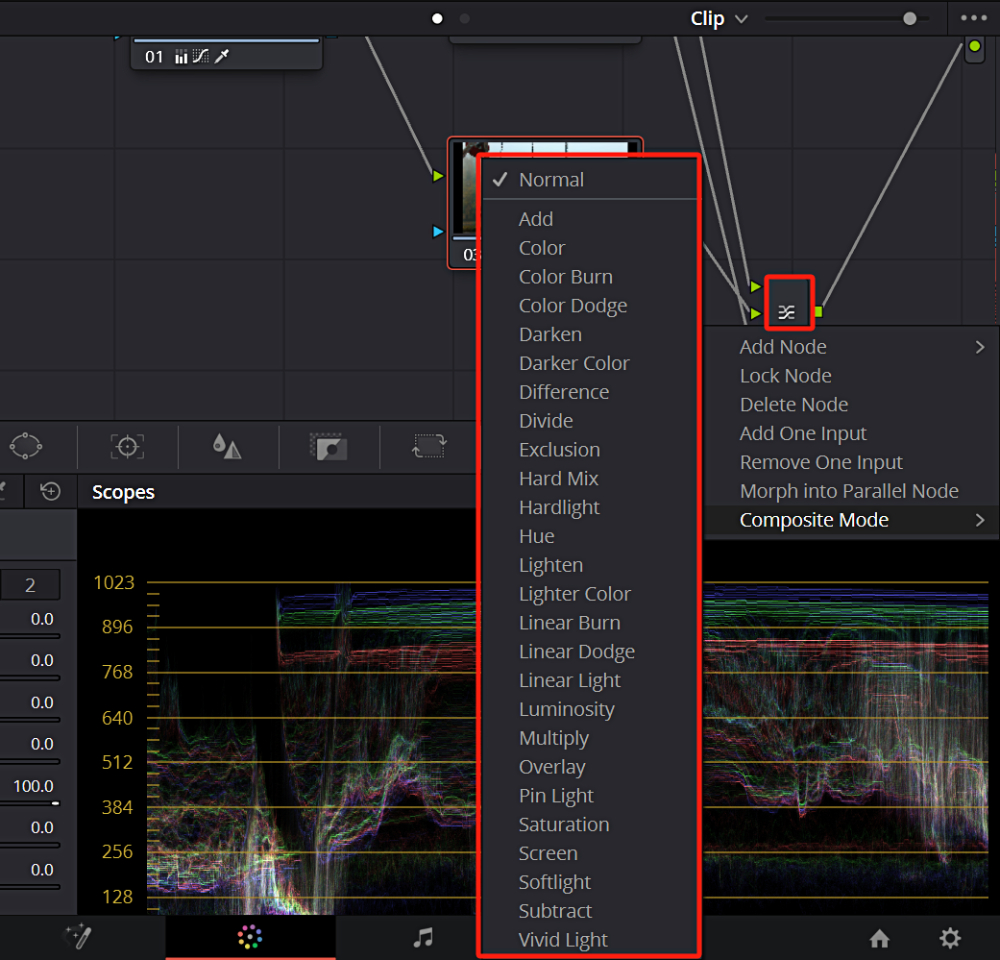
It's important to note that the layer logic in DaVinci Resolve is opposite to Photoshop. In DaVinci Resolve, lower layers have a higher hierarchy than the layers above.
To quickly create a Layer node, simply press "Alt/Option + L".
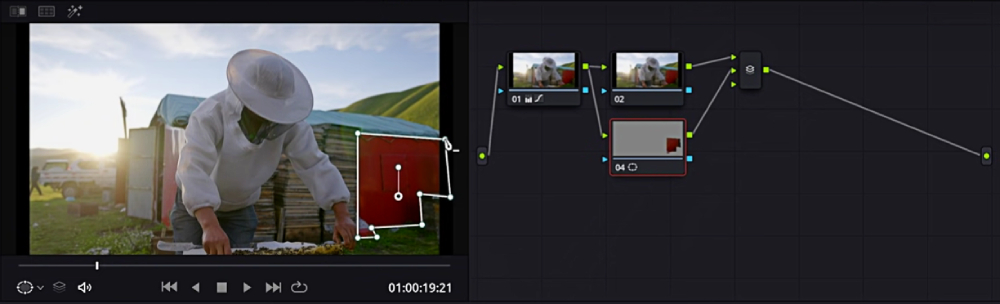
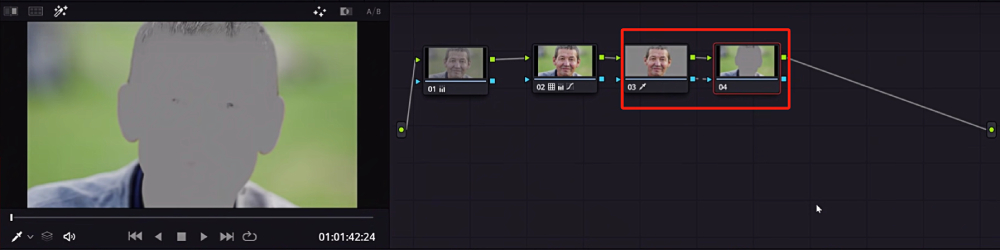
Outside Nodes
When you create a mask, you have the option to create an Outside Node in DaVinci Resolve. This Outside Node will automatically generate a inverted mask that changes along with the main mask.
As shown in the image below, if we isolate the face of a person using a mask, the automatically generated inverted mask in the Outside Node will select everything except the face. This ensures that when we color grade the background, the colors of the person's face remain unaffected.
In addition, Outside Nodes can also be used in conjunction with "Alpha Output" to remove green screen backgrounds. By creating an Outside Node to preserve the subject, you can right-click on the Nodes panel and select "Add Alpha Output". You will notice that a blue Alpha Output point is added to the output section.
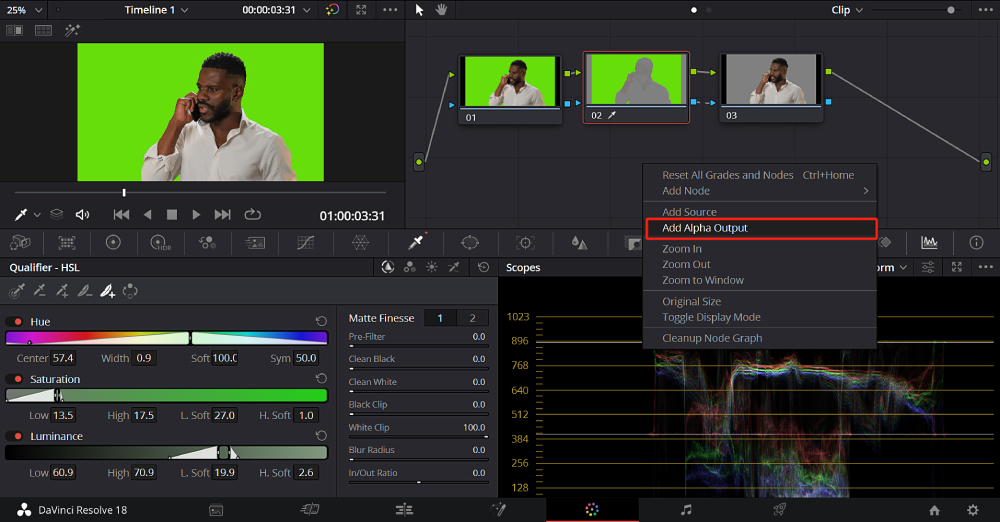
To remove the green screen background from a clip, simply connect the blue output point of the Outside Node to the blue input point of the Alpha Output. This will successfully remove the green screen background from the footage.

Final Thoughts About Nodes in DaVinci Resolve
In reality, the nodes in DaVinci Resolve are not overly complicated. The key lies in how you combine different nodes and tools to precisely control the areas you want to adjust.
However, this is not something that can be easily achieved through theory alone. It requires practice and critical thinking. Only then can your mind quickly generate adjustment solutions when faced with a new frame.
Now, with that in mind, we highly recommend TourBox, a product that seamlessly integrates with DaVinci Resolve.

With the one-handed operation of TourBox, you can quickly create color nodes and say goodbye to complicated operations.
This innovative tool enhances your editing experience by providing intuitive control over various parameters, making your workflow even more efficient and enjoyable. It will undoubtedly elevate your editing capabilities and help you achieve even greater precision and control over your adjustments.
If you enjoy editing videos and creating content on your iPad, check out our new TourBox Elite Plus. You can use it on both PC and iPad to speed up your workflow and make your creative process smoother. Its matte finish feels amazing — you'll love holding it.

And that concludes our tutorial on DaVinci Resolve nodes. Now, it's time to embark on your creative journey!