[DaVinci Resolve Tutorial] Secondary Color Grading & Color Correction
In DaVinci Resolve, once you've applied overall color grading to your footage on the Color Page, you may find the need to make specific color adjustments to certain details within the clips. This is where the concept of secondary color grading comes into play.
The essence of secondary color grading lies in how you separate different elements within the frame to make independent adjustments.
In this tutorial, we will delve into various methods of isolating elements in your footage and demonstrate how to utilize different tools in DaVinci Resolve to achieve the best results in secondary color grading. So, without further ado, let's dive in and get started.

In this article, you will learn:
- What Is Secondary Color Grading?
- How to Secondary Color Grade in DaVinci Resolve?
- Final Thoughts About Secondary Color Grading in DaVinci Resolve
What Is Secondary Color Grading?
The purpose of secondary color grading is to make adjustments to specific parts of the image to achieve a better overall result.
In simple terms, it involves tweaking elements such as the skin tones of a person, grass colors in the frame, or even the color of a car within the scene. These adjustments fall under the realm of secondary color grading, which typically takes place after the primary color grading is completed.
You may find yourself confused between the concepts of color grading and color correction, but fear not! The distinction between the two lies in their purpose and approach:
- Color correction involves adjusting factors like exposure, contrast, and white balance to achieve a realistic and balanced look.
- Color grading focuses on stylizing the footage with a specific color palette, giving it a subjective and artistic touch. This process allows for extreme or subtle adjustments to create a desired visual tone.
In reality, the differences between the two are not as significant as they may seem. The techniques and tools you use for color grading can also be applied to color correction.
So, don't worry if you're familiar with one but not the other – your color grading skills will certainly come in handy during the color correction process.
How to Secondary Color Grade in DaVinci Resolve?
If you've captured footage in Log format using your camera, the first step when importing it into DaVinci Resolve is to create a node and apply the corresponding Viewing LUT (also known as Correction LUT) that matches the Log format of your camera.
Additional Tips:
- During the process of secondary color grading, you need to utilize Parallel Nodes. We have a detailed tutorial on nodes in DaVinci Resolve in this article, which you can check out if you're interested: [DaVinci Resolve Tutorial] A Complete Guide to Nodes
- We have provided a detailed explanation of LUTs and Log formats in DaVinci Resolve. If you're interested, you can check it out: [DaVinci Resolve Tutorial] How to Apply LUTs?
Next, you can adjust the global exposure and white balance in the node before the Viewing LUT. This ensures that the image is not overexposed or color-shifted during the correction stage.
Once you have a properly balanced image, you can add another node and apply a stylistic LUT, such as a film-inspired look, and make any subtle adjustments as needed.
Of course, the color grading process doesn't always align perfectly with your vision. Let's take an example, like the footage shown below, where the forest area has a slightly yellowish tone.
You want to adjust the color of the forest to be more green without affecting the colors in other areas of the clip. This is where secondary color grading comes into play.
Here, we'll share two simple methods: Curves and Qualifier.
1. Curves
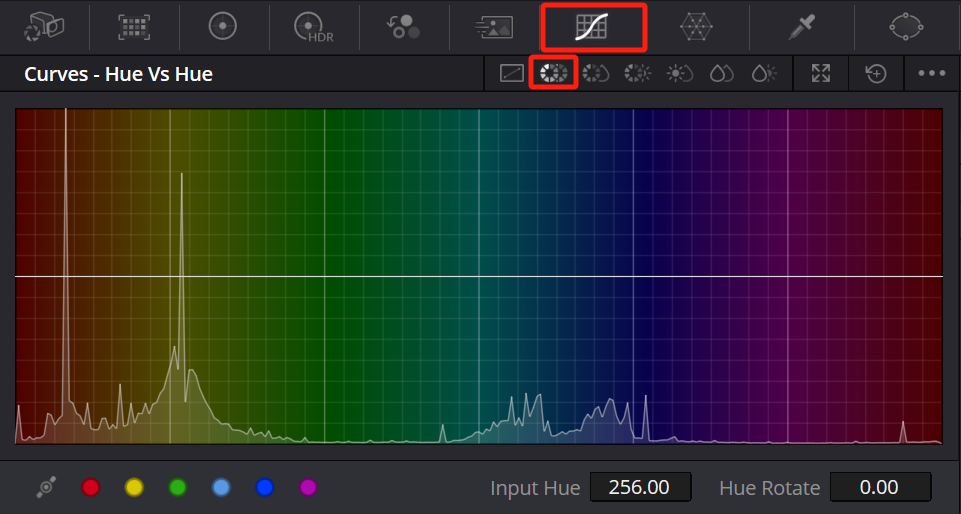
Navigate to the curves panel below the Color page. In the navigation bar at the top of this panel, you can switch between different curve modes.
On the right side of the Custom Curve option, you'll see various types of curves. Although they may seem complex, the patterns are similar.
For example, the Hue VS Hue curve shows a color gradient background. The line in the middle represents the current state of the image.
You can directly create two points in a specific color range or simply click on a color range in the Viewer, and DaVinci Resolve will automatically create points on the Hue VS Hue curve for that color range. (To delete a point, simply right-click on it with your mouse)
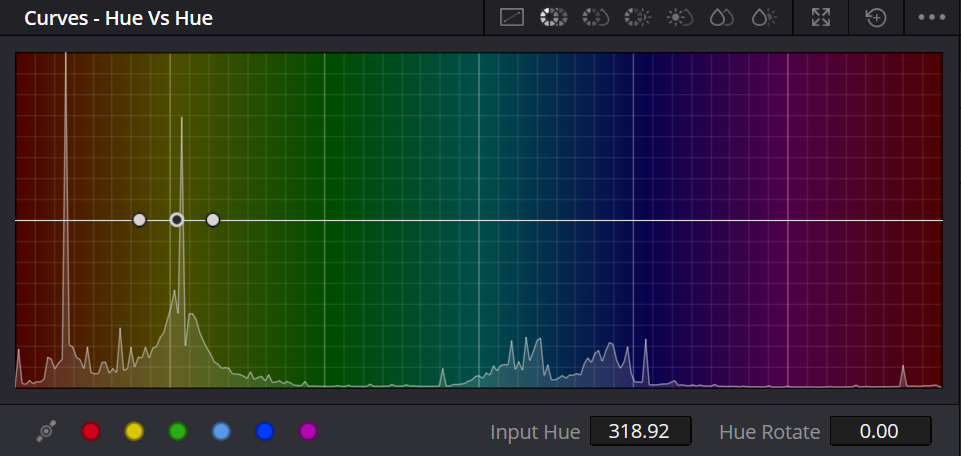
By dragging the line between the two points, you'll see a change in the hue of that color range in the footage.
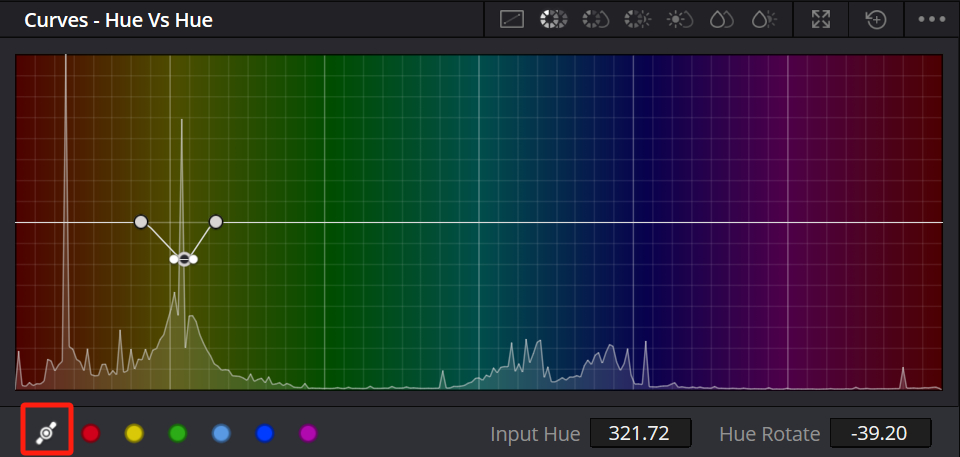
As demonstrated in the video below, if we drag the middle line slightly downward, the yellowish forest in the footage immediately turns greener. The effect is quite intuitive.
If you want to expand the affected area, simply drag the points on both sides to increase the selection. Of course, you can also create more points to color grade more color ranges.
You can click on the Spline handles below to further modify the gradient and falloff of the entire selection.
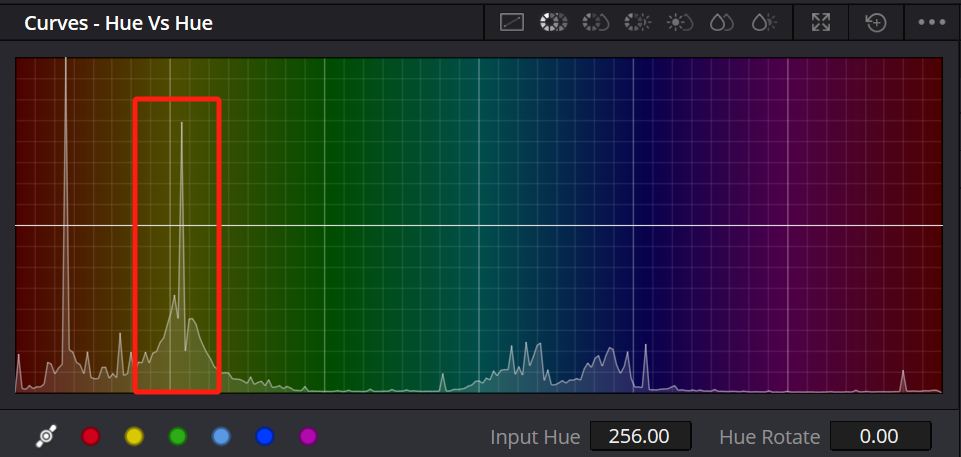
The background of this curve not only shows you the corresponding colors but also presents the pixels belonging to that color in a histogram-like form.
For example, in the footage we're using, the forest has a yellowish tone, so the histogram for the yellow area will have a peak. You can use it directly to help determine the selection.
Note:
When using color curve adjustment tools like this, make sure to apply the correction LUT first. If you apply it directly to the LOG footage, the color differences between each color will be minimal, making it difficult to select the desired areas.
You can try out other curves as well. In fact, the principles behind these curves are the same, and their usage is interchangeable. Once you give them a try, you'll master them all.
These curve tools are incredibly useful, but you might have noticed that they may not be able to precisely select a specific color.
Now, it's time to introduce another tool for secondary color grading: the qualifier. If you've used image processing tools like Photoshop or Lightroom, you should find it quite familiar.
2. Qualifier
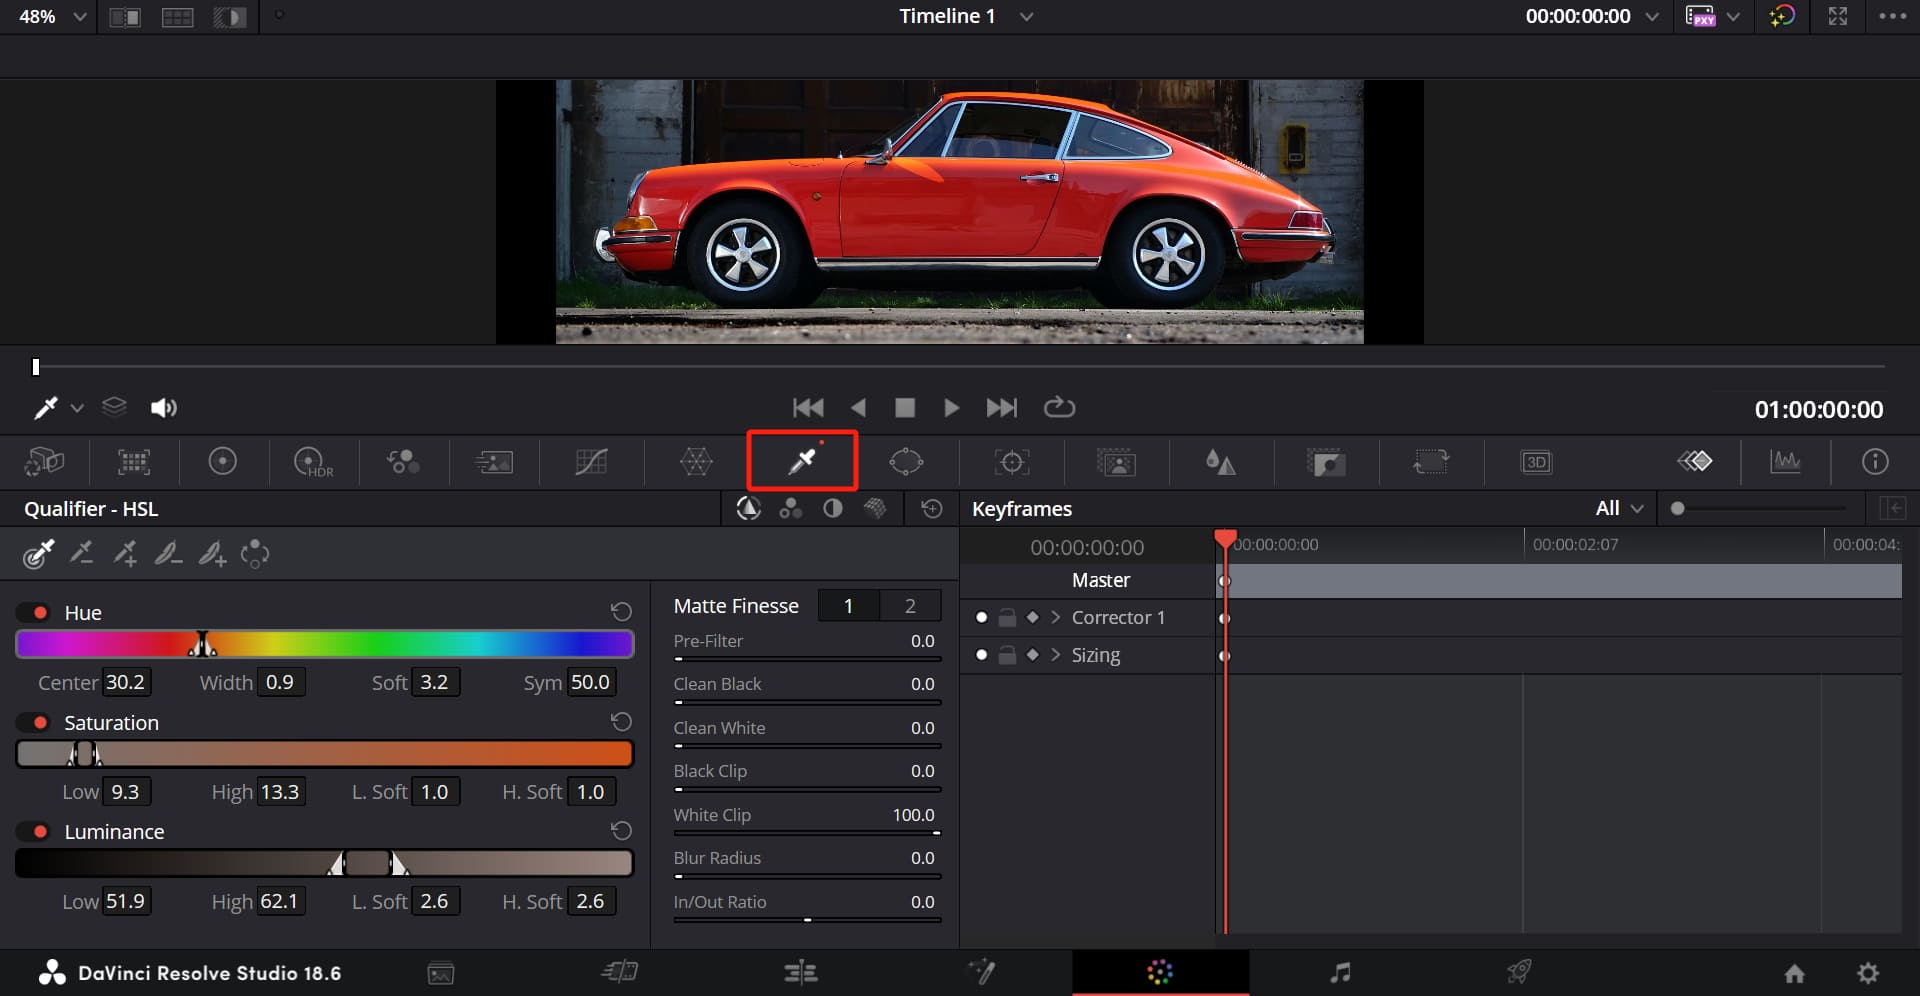
In the toolbar located below the Color Page, click on the Qualifier tool. Then, simply click on the color you want to select on the Viewer. That's it!
If you want to quickly preview the result of your selection, just press the "Shift + H" shortcut key.

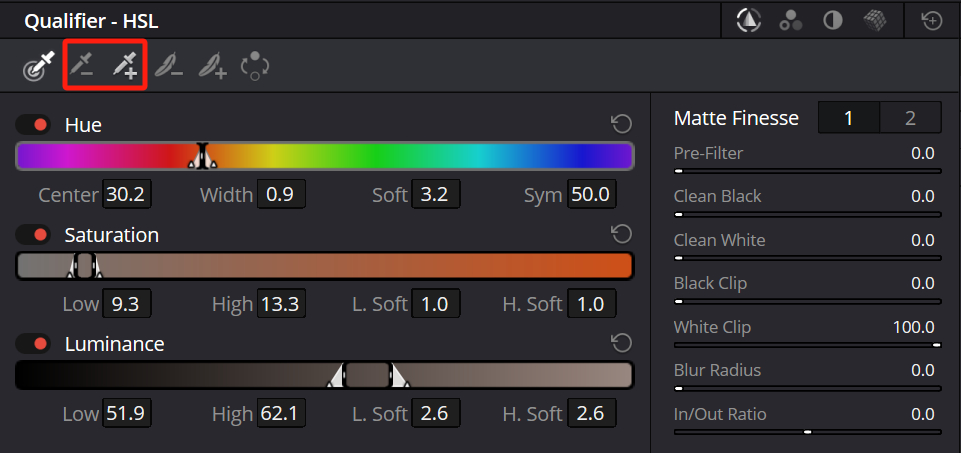
If you feel that the selection result is not satisfactory, you can click on the Picker Add or Picker Subtract tools in the toolbar above the Qualifier panel to add or subtract from the selection. The effect is quite intuitive.
However, relying solely on the Picker tool for selection may not be precise enough. You can further optimize the selection by using the Hue, Saturation, and Luminance sliders below.
You can use the Hue slider to choose the color range you want to select. You can set its center point, as well as its start and end points. Then, adjust the Soft parameter below to add some gradient transitions for a more natural transition.
Similarly, the Saturation and Luminance sliders are customizable tools that can help you refine the selection to be more specific.
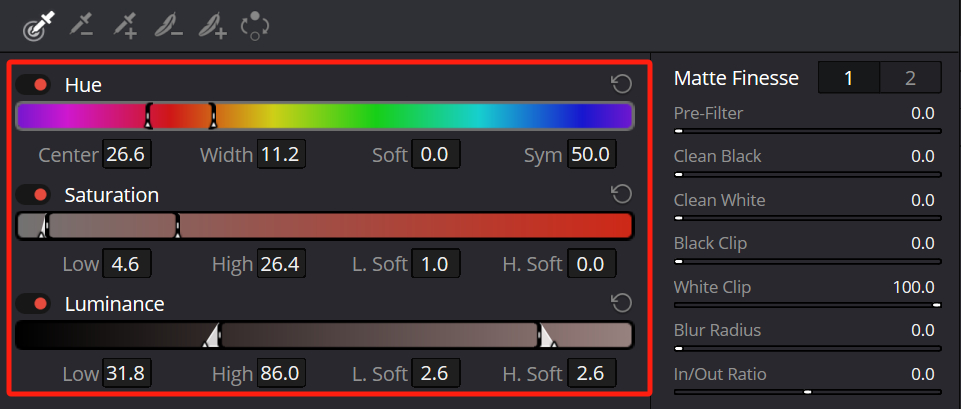
In fact, these three slider tools are essentially another form of curve tools, but they allow for more precise adjustments to the selection.
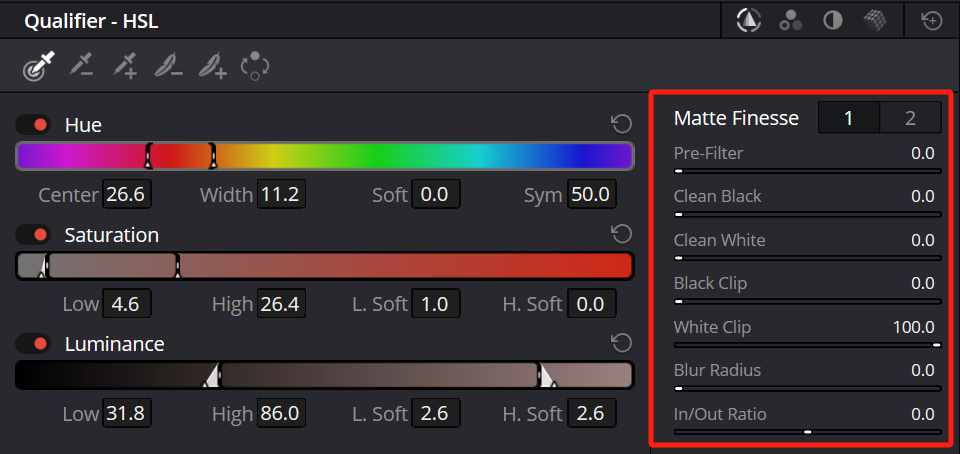
For example, you can remove unnecessary color blocks, adjust the black and white levels, or blur the radius, all of which can be done in the Matte Finesse section of the qualifier panel.
Note:
The functionality of the qualifier tool can be affected by the quality of your footage. Higher-quality footage makes it easier to separate the tones.
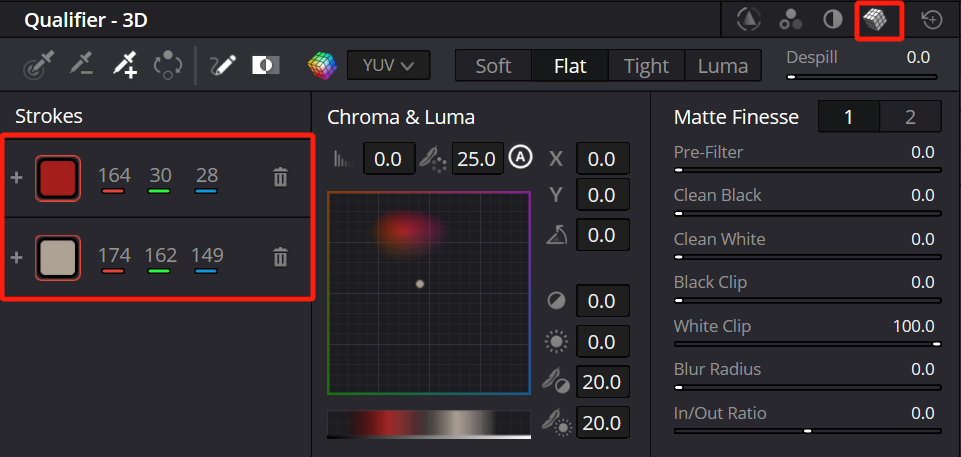
To accommodate different scenarios, the qualifier tool actually has various modes. You can switch between them using the navigation bar above the qualifier template.
For example, the 3D qualifier. Its main advantage over the default HSL qualifier is that it allows you to select multiple completely different color ranges at the same time.
For instance, you can adjust both blue and red colors together. This is particularly useful when color-grading faces or clothing in different lighting conditions. If there are issues that the HSL qualifier cannot solve, giving the 3D qualifier a try might yield some unexpected surprises.
3. Other Secondary Color Grading Tools
As we mentioned above, the key to secondary color grading lies in how you combine different tools. Often, you may not be able to ensure that your selection includes exactly what you want.
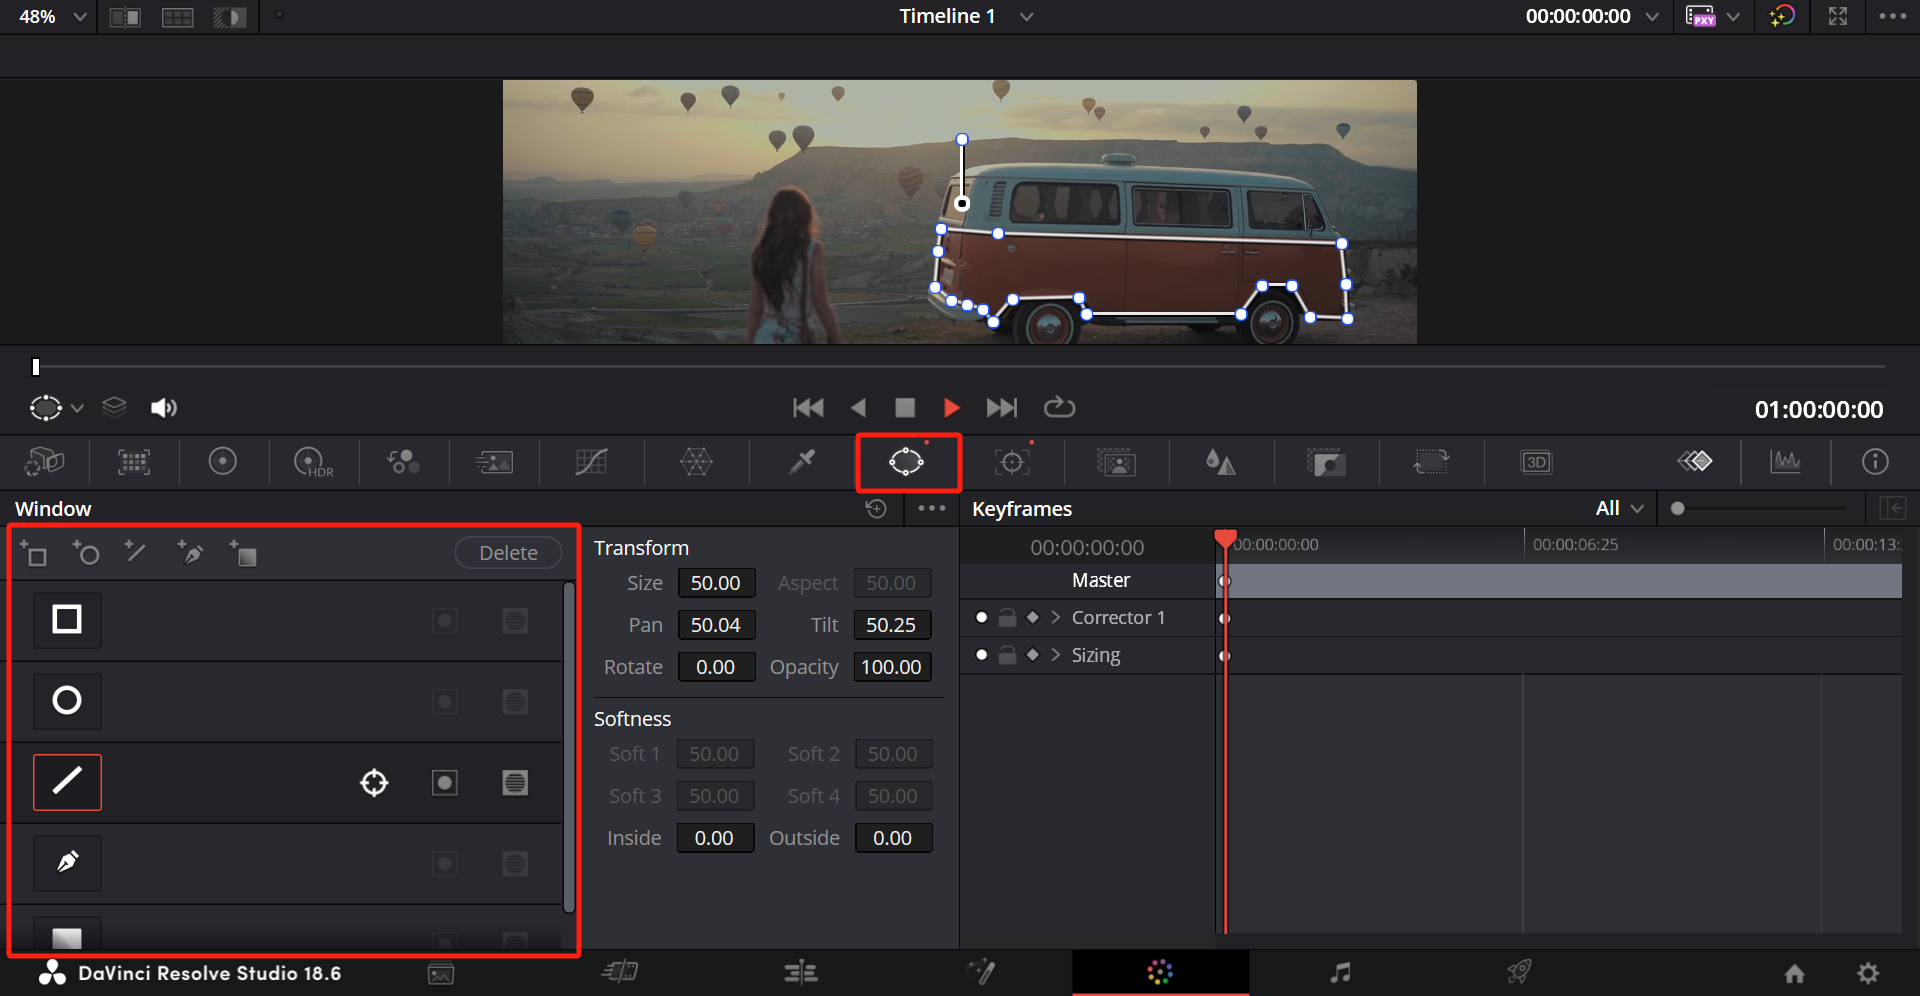
For example, let's say we want to isolate the body of a vehicle in the footage below. However, if we use the qualifier tool to make the selection, due to the similarity in color, parts of the sky in the background might also be included. In such cases, you can consider using the Window tool.
By using the selection tool in the Window tool, you can adjust its shape and size to fit the object you want to isolate, as shown in the image below.
Next, switch to the Tracker panel in the toolbar below the Color Page and click the "Track Forward" button to begin tracking. In most cases, you'll get a good result. However, it's important to make adjustments based on the specific movement of the object.
Once you have a specific selection, using curves and qualifiers will greatly enhance the precision of your selection.
![]()
However, if you want to track a specific person, have you realized that the methods we mentioned earlier, like curves, qualifiers, and the Window tool, can be challenging for accurately selecting the person?
Why not give the Magic Mask feature in DaVinci Resolve a try? This feature is truly powerful and intelligent, saving editors from the tedious task of manually selecting frame by frame.
Note:
To access the features of Magic Mask, you will need to upgrade to DaVinci Resolve Studio.
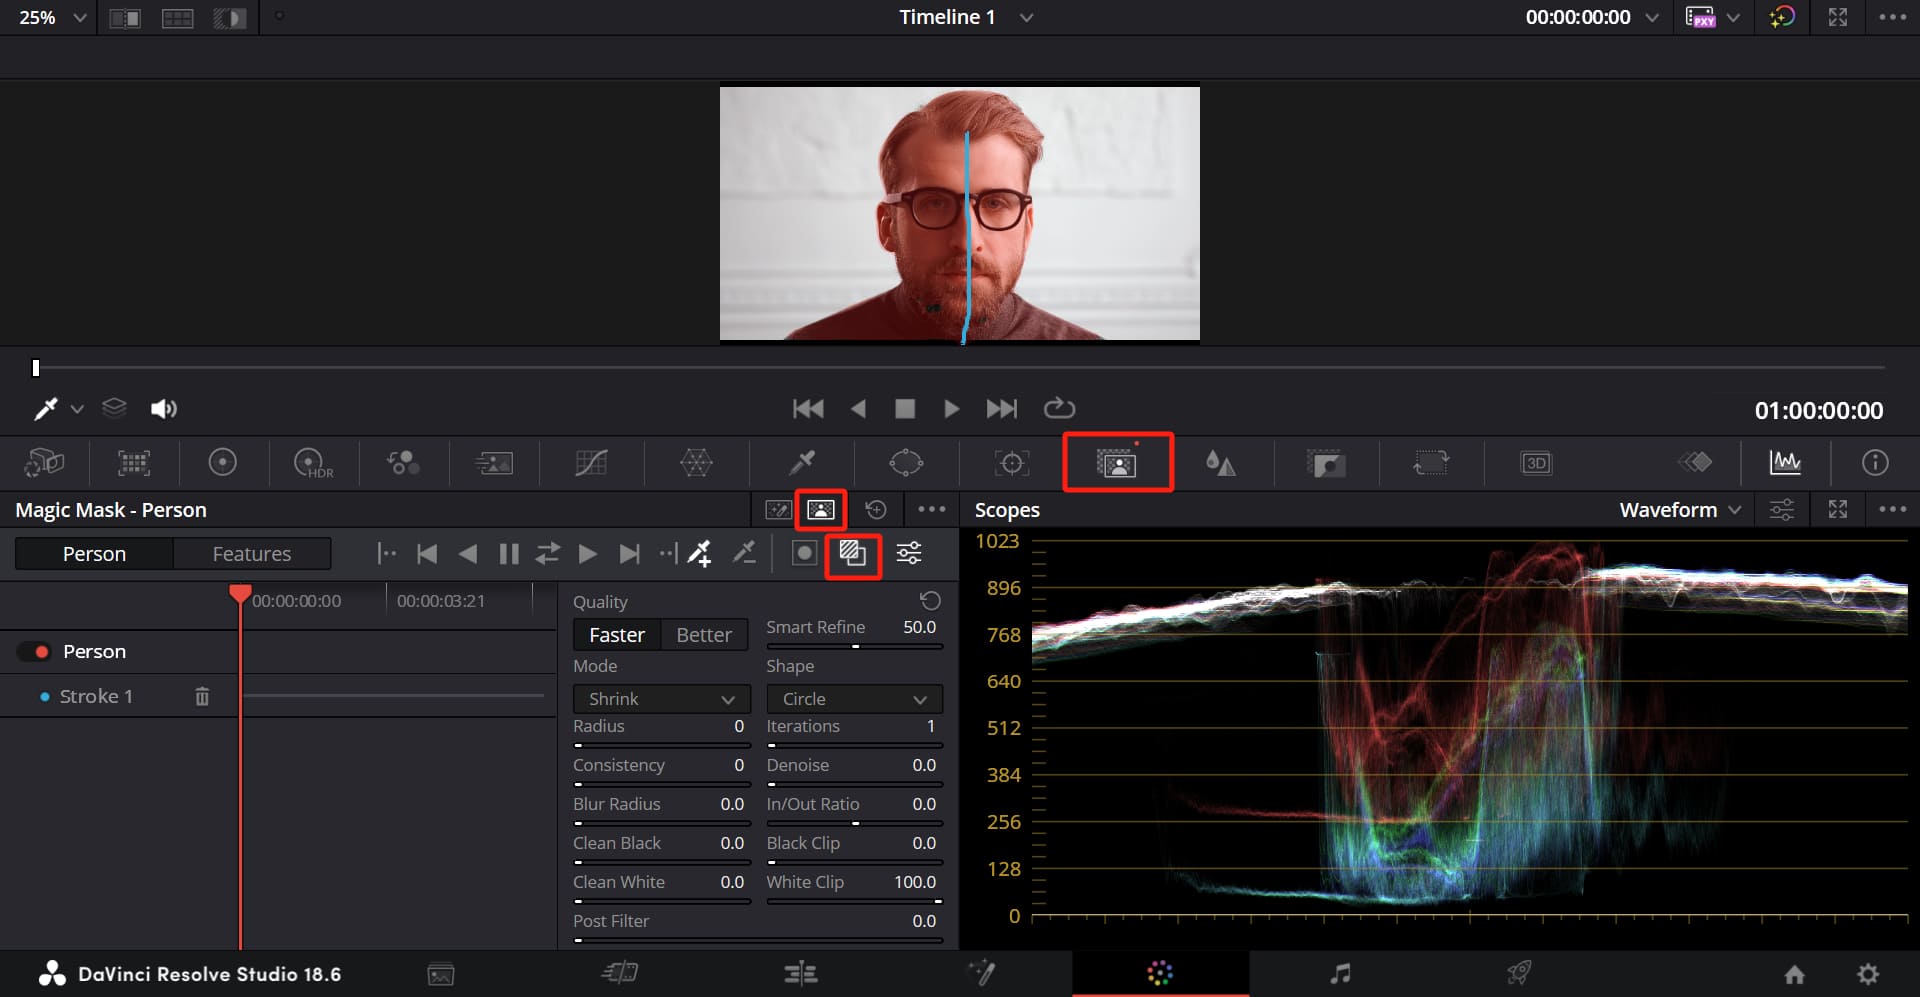
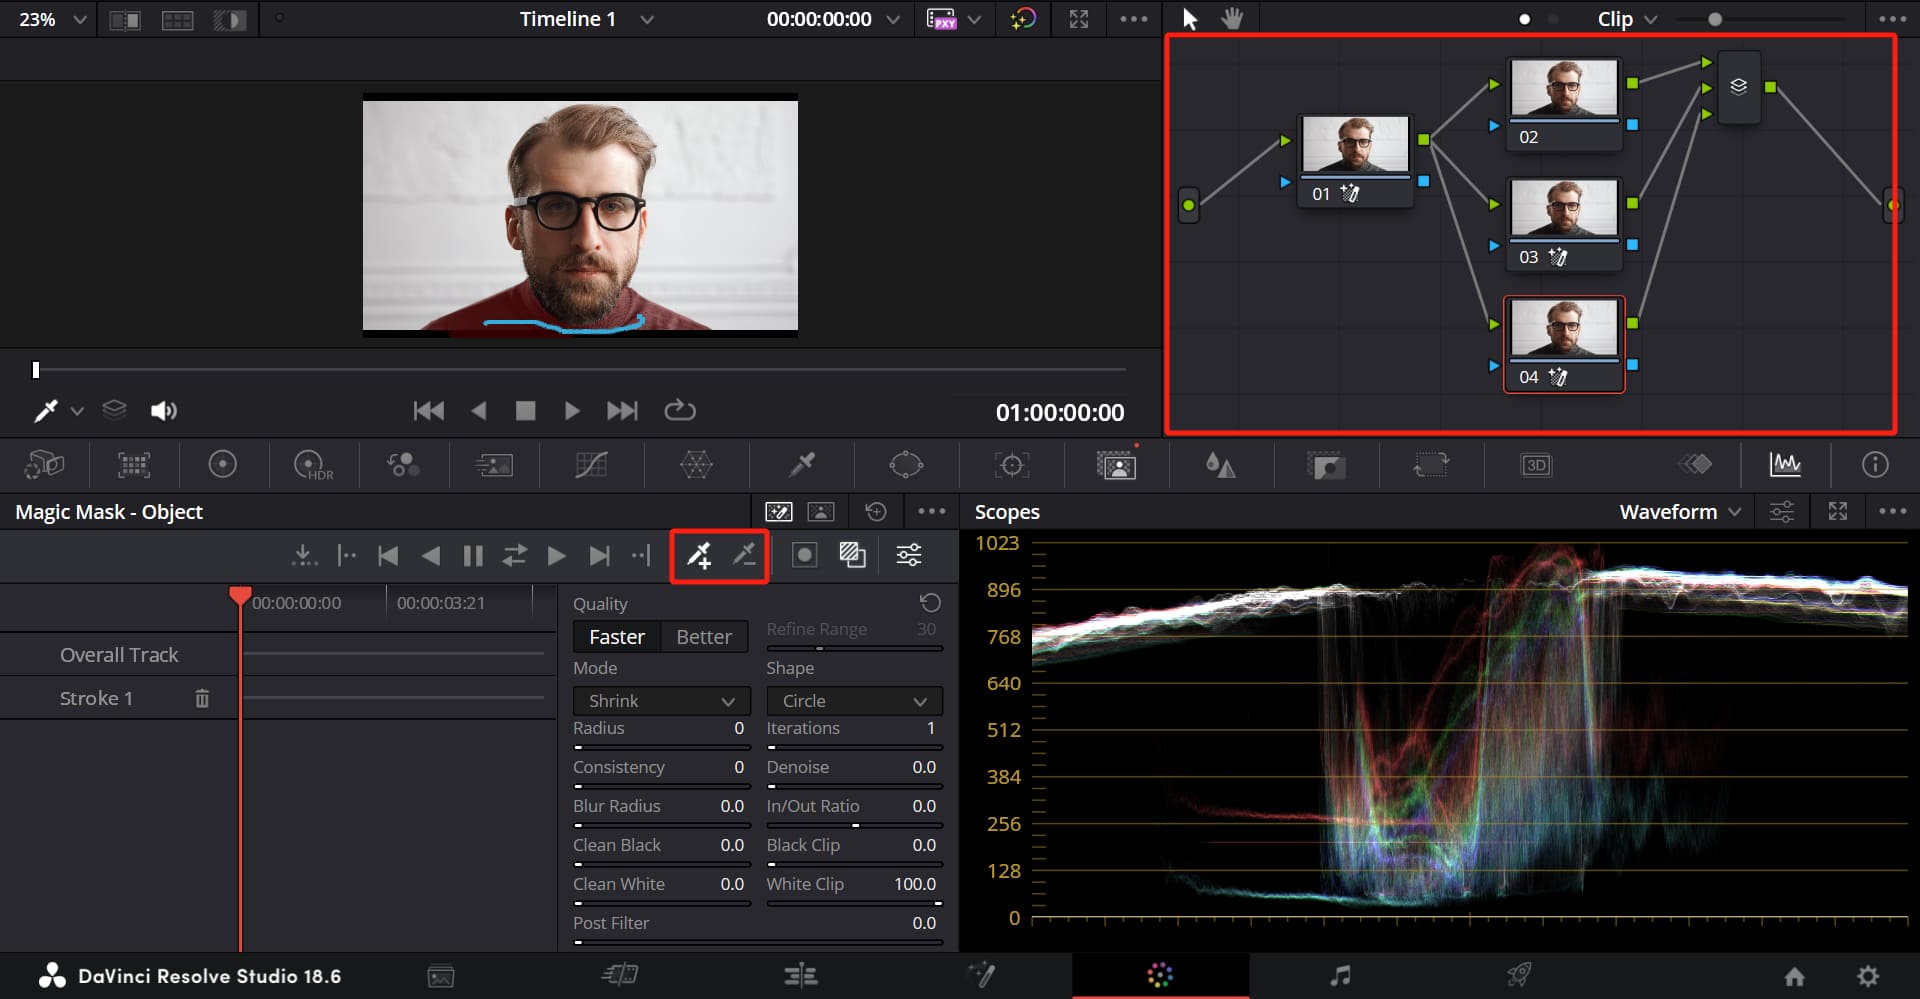
Switch to the Magic Mask panel and choose the Person Mask mode at the top. Then, all you need to do is simply draw lines on the person's body, and the software will quickly create a mask around them.
Enabling the Toggle Mask Overlay option below will display a red mask overlay, making it easier for you to see the effect.
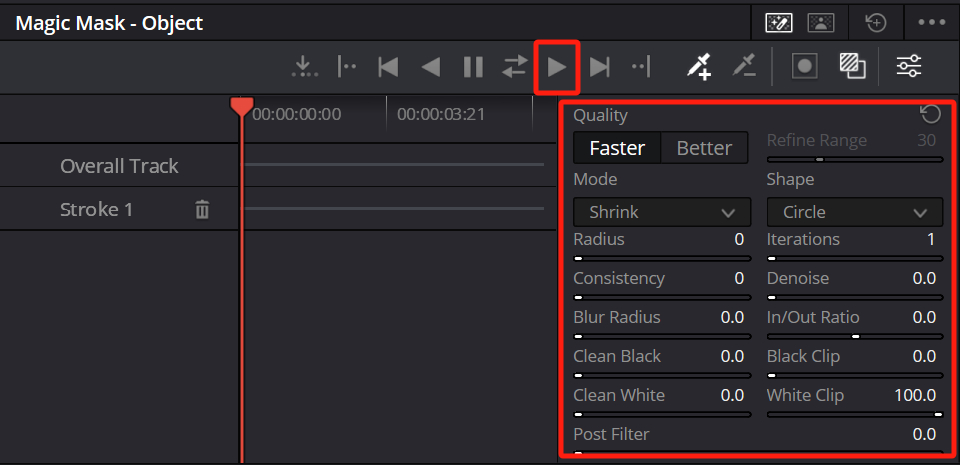
If you want to make further adjustments to the mask selection, you can fine-tune it in the mask settings. Once you're satisfied with the mask selection, click the "Track Forward" button in the Magic Mask panel to track the person (or object).
Of course, the best approach is to create multiple Parallel Nodes. Divide the person into different parts, such as hair, face, hands, clothing, and so on. Then, use curves or qualifiers to color grade each region separately.
Afterward, you can use the Color Wheels for more precise adjustments. You'll discover that performing secondary color grading in DaVinci Resolve has never been easier.
Additional Tip:
Even with intelligent masking tools like Magic Mask in DaVinci Resolve, extracting people from complex scenes can still be a highly challenging task. Therefore, if conditions permit, it is highly recommended to use or shoot footage with a green screen whenever possible. This will greatly simplify your post-production editing work.
Final Thoughts About Secondary Color Grading in DaVinci Resolve
If you're an outdoor photography enthusiast, you've probably heard of GoPro, a well-known brand of action cameras.
When you watch their product promos on the GoPro website or social media, you might wonder why the footage you capture with your own GoPro doesn't look the same. (Of course, this doesn't mean that GoPro cameras are not good, LOL!)
In fact, GoPro's promos undergo extensive and in-depth color grading. If you're interested, you can delve into GoPro's color grading techniques to see how they achieve such vibrant and dynamic colors.
That's why we strongly recommend opening DaVinci Resolve and trying the methods we've shared to isolate and color grade different elements in your footage, bringing out colors that reflect your own unique style.
By now, you've learned how to perform powerful secondary color grading in DaVinci Resolve, taking your footage to the next level. But do you know that there's a fantastic tool that can enhance your editing workflow even further?
Allow us to introduce TourBox, a game-changing device designed specifically for creative professionals like you. This sleek and compact controller is fully compatible with DaVinci Resolve, making your color-grading process even more efficient and intuitive.

With TourBox, you can easily adjust parameters like exposure, saturation, and contrast, all at your fingertips. Its customizable buttons and dials provide a seamless editing experience, allowing you to fine-tune your color grades with precision and speed.
Whether you're working on a simple project or a complex composition, TourBox will be your trusty companion.
Our tutorial on secondary color grading in DaVinci Resolve (or secondary color correction) comes to an end. We hope it has been helpful on your creative journey. Now, it's time to fire up your DaVinci Resolve and embark on your creative adventure!