Photoshop 8-Bit vs 16-Bit vs 32-Bit: Which Bit Depth Should You Use?
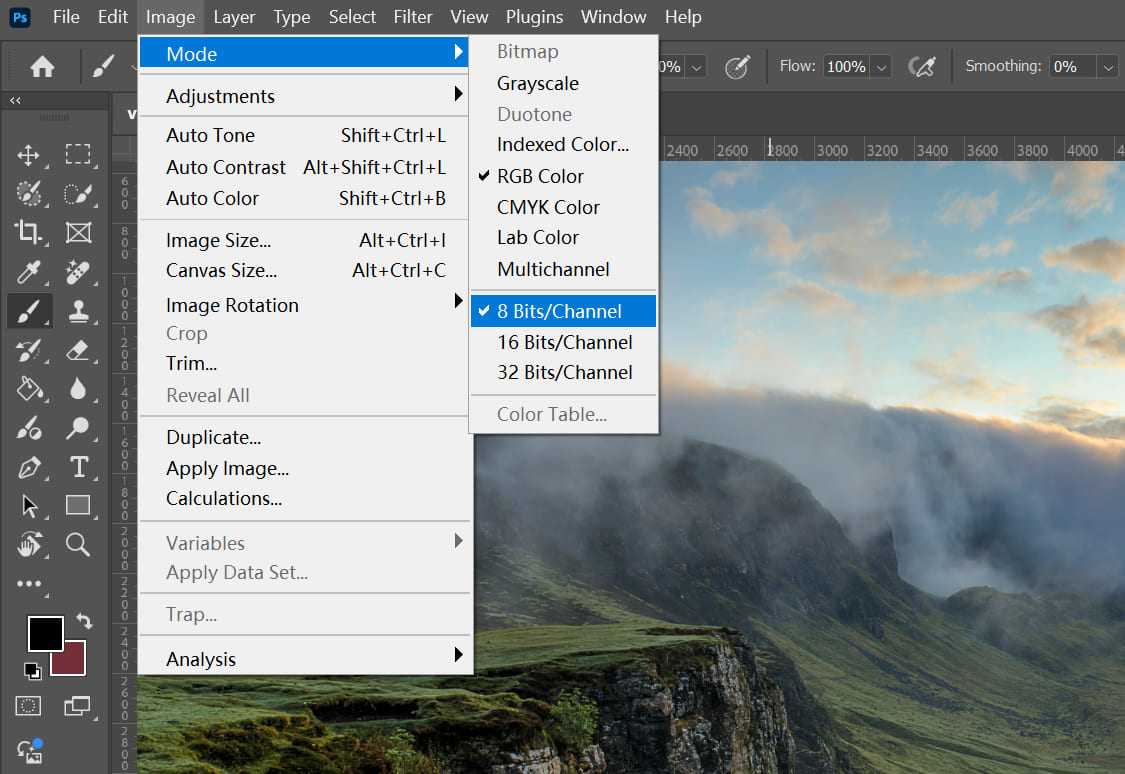
If you often use Photoshop for photo editing, you may have noticed three confusing options under Image > Mode: 8 Bits/Channel, 16 Bits/Channel, and 32 Bits/Channel.
Many photographers know that professional editing workflows usually recommend working in 16-bit, and they may have heard that HDR images require 32-bit. But what do these modes actually change? Why is 8-bit perfectly fine for some photos, while it can cause noticeable problems during more advanced editing?
What Does Bits/Channel Mean in Photoshop?
To understand the difference between 8 Bits/Channel, 16 Bits/Channel, and 32 Bits/Channel, we first need to understand one basic concept: bit depth.
In Photoshop, Bits/Channel refers to the amount of color information stored in each color channel. It determines how many levels of brightness Photoshop can record and process for each channel. A higher bit depth means more image data, smoother color transitions, and more flexibility when making adjustments.
However, a higher bit depth does not always mean a better-looking image. Different bit depths are designed for different editing workflows.
Take the most common RGB image as an example. A photo is made up of three color channels: Red, Green, Blue.
Each channel stores the brightness value of its own color. For example, in an 8-bit RGB image, each channel can store 256 levels of brightness, ranging from 0 (pure black) to 255 (maximum brightness).
When these three channels are combined, they can theoretically produce: 256 × 256 × 256 = 16,777,216. That is about 16.7 million colors.
This is why 8-bit RGB is also known as "True Color" and has remained the standard for digital photography, web images, and most display devices for many years.
But the real importance of bit depth is not the number of colors we can see in the final image. It is about how much image information Photoshop has available when editing.
When you adjust exposure, modify curves, recover shadow details, or apply complex color grading, Photoshop needs to recalculate the image data. The more information the file contains, the more detail it can preserve during editing.
What Are the Differences Between Bit Depths in Photoshop?
1. 8 Bits/Channel
8-bit is the most common image mode and the one most users are familiar with. JPEG photos, web images, social media images, and many standard print files are usually saved in 8-bit format. Its biggest advantage is excellent compatibility. Almost every device, software, and online platform can handle 8-bit images without problems.
For many everyday editing tasks, 8-bit is more than enough. For example:
- Adjusting brightness
- Changing colors
- Adding text and graphic elements
- Creating images for websites
- Preparing content for social media
Because each channel only contains 256 levels of brightness, 8-bit files are also smaller and easier for Photoshop to process. However, this limited data is also the biggest weakness of 8-bit images.
When you make heavy adjustments, such as dramatically lifting shadows, lowering highlights, or changing the overall color tone, Photoshop has to stretch the limited information available in the file.
For example, imagine a photo of a blue sky with a smooth color gradient. If you apply strong Curves adjustments to an 8-bit image, those smooth color transitions may break into visible steps. This is known as banding.
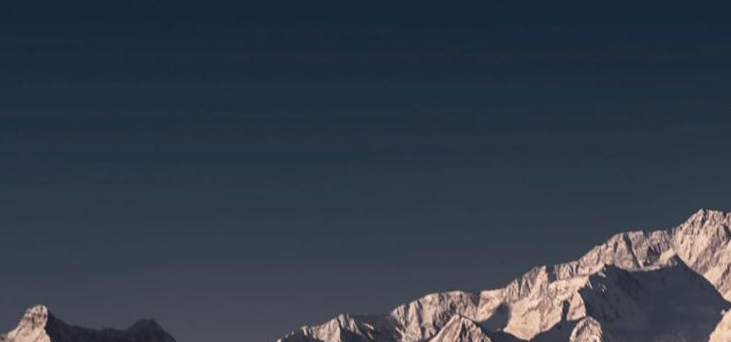
Color Banding
Banding is especially common in areas like:
- Blue skies
- Skin tones
- Gradient backgrounds
- Fog and shadow areas
So, 8-bit does not mean poor quality. It is simply better suited for final delivery and display, rather than as a working file for complex editing.
2. 16 Bits/Channel
For photographers, 16-bit is usually the ideal choice for Photoshop editing. Modern cameras, especially when shooting in RAW, capture far more information than a standard 8-bit JPEG. Many RAW files contain 12-bit, 14-bit, or even higher image data.
If you convert a RAW file to an 8-bit JPEG before editing, a large amount of the original information is already discarded. A 16-bit workflow helps preserve much more of that data.
In a 16-bit image, each channel contains: 65,536 levels of brightness. Compared with the 256 levels available in 8-bit, 16-bit provides more than 250 times the data precision.
This does not mean our eyes can suddenly see hundreds of times more colors. Instead, it means Photoshop has much more room to make adjustments without damaging the image.
For example, when editing a high-contrast landscape photo, you may need to:
- Brighten details in dark areas
- Recover highlight details in the sky
- Adjust the overall color balance
- Add multiple adjustment layers
In an 8-bit workflow, these edits can gradually lead to banding and loss of detail. In a 16-bit workflow, the extra image data helps Photoshop maintain smoother transitions and preserve more details.
Another advantage of 16-bit is that it works better with wide-gamut color spaces such as Adobe RGB and ProPhoto RGB. This is especially important for professional photography, commercial retouching, and high-quality printing.
Of course, 16-bit also has some limitations:
- First, file sizes are much larger. An RGB image with the same dimensions will usually be about twice the size of an 8-bit file, which means it requires more memory and storage space.
- Second, not every Photoshop feature supports 16-bit. Some older filters, third-party plugins, and special effects may still require you to convert the image back to 8-bit.
However, for most photography workflows, these limitations do not affect the main editing process.
A common professional workflow looks like this: RAW file → Camera Raw adjustments → 16-bit TIFF/PSD editing → Convert to 8-bit JPEG for final output.
3. 32 Bits/Channel
32-bit is the most misunderstood mode in Photoshop. Many people assume that 32-bit is always better than 16-bit for photo editing, but that is not true.
32-bit is mainly designed for working with High Dynamic Range (HDR) images. Unlike 8-bit and 16-bit images, 32-bit images usually store brightness information using floating-point data. This allows them to record a much wider range of brightness, including values far beyond what a normal display can show.
For example, in the real world, the brightness of the sun can be far beyond what a regular photo can capture, while indoor shadow areas can be extremely dark.
A standard photo usually has to make a compromise between these two extremes. A 32-bit HDR file, however, can preserve:
- Details in extremely bright areas
- Information in deep shadows
- Brightness values beyond the normal white point range
Because of this, 32-bit is commonly used for:
- HDR exposure blending
- 3D rendering
- Visual effects production
- HDR environment map creation
For example, when photographing architecture or landscapes, photographers may capture multiple images at different exposures and combine them into an HDR file in Photoshop. The 32-bit workflow keeps the full brightness range during the merging process. The image can then be converted into a viewable format through tone mapping.
However, for regular photo editing, 32-bit is usually not the best choice. The drawbacks include:
- Extremely large file sizes
- Many Photoshop tools and filters are unavailable
- The image still needs to be converted to 16-bit or 8-bit for normal display and output
So, if your goal is simply to edit portraits, landscapes, or commercial photos, 16-bit is usually the best balance between image quality, flexibility, and performance.
How Should You Choose Between 8-bit, 16-bit, and 32-bit?
After learning the differences between the three bit depths, many people still have the same question: Which one should I choose for my actual Photoshop workflow?
The answer depends on what you are doing, not simply choosing the "highest" number.
A higher bit depth means more image data, but it also means larger files, higher performance requirements, and more compatibility limitations. For most creators, the best workflow is not to always use the highest bit depth. Instead, choose the right mode for each stage of your process.
1. Everyday Design and Simple Image Editing: 8-bit Is Enough
If your work mainly involves web design, social media graphics, e-commerce images, UI design, or simple photo adjustments, 8-bit is usually more than enough.
For example:
- Adjusting exposure and white balance
- Adding text and graphic elements
- Creating promotional images
- Exporting JPEG or PNG files
- Preparing images for websites and social media
These types of projects usually do not require heavy color adjustments, so the color precision provided by 8-bit is sufficient.
In fact, most images used online are eventually converted to 8-bit because most platforms and devices still use this format as the standard.
So, 8-bit is not a "low-quality mode." It is simply optimized for different needs.
2. Photo Editing: 16-bit Is the Recommended Choice
If you are a photographer, especially if you shoot in RAW, 16-bit should usually be your default working mode.
One of the biggest advantages of RAW files is that they preserve a large amount of unprocessed sensor data, including exposure information, color data, and highlight and shadow details.
If you convert a RAW file directly into an 8-bit JPEG before editing, you are essentially giving up part of your editing flexibility too early.
A 16-bit workflow gives Photoshop much more room to work with this data. 16-bit is especially important for:
- Landscape photography
- Portrait retouching
- Wedding photography
- Commercial photography
- Product photography
- High-quality print work
For example, a landscape photo may contain both a bright sky and a dark foreground. If you need to recover a lot of shadow detail, adjust the sky color, or make complex local adjustments, 16-bit can help reduce detail loss and prevent color banding.
For professional photographers, a common workflow looks like this: RAW file → Initial adjustments in Lightroom or Camera Raw → Export as 16-bit TIFF or PSD → Fine-tune in Photoshop → Convert to 8-bit for final output.
This workflow provides both editing flexibility and good compatibility for the final image.
3. HDR, 3D, and VFX Work: This Is Where 32-bit Matters
32-bit is not designed for regular photo editing. It is mainly built for extreme brightness ranges and professional image processing. If your work involves:
- HDR photography
- Film and video post-production
- Visual effects (VFX)
- 3D rendering
- Game environment creation
Then the wider dynamic range of 32-bit can be very important. For example, a realistic lighting environment in 3D rendering may include:
- Extremely dark shadow areas
- Normal ambient light
- A very bright sunlight source
A standard 8-bit or 16-bit image cannot fully store all these brightness differences. A 32-bit floating-point image can preserve information that is much closer to what we see in the real world. However, for regular photo editing, 32-bit often brings more limitations than benefits.
Frequently Asked Questions
1. What Happens When You Convert from a Higher Bit Depth to a Lower One?
In a Photoshop workflow, you will often need to convert between different bit depths, such as 32-bit to 16-bit or 16-bit to 8-bit. This type of conversion is usually not reversible. In other words, when you convert a higher bit depth image into a lower one, Photoshop has to discard some of the image data.
For example, a 32-bit HDR file may contain highlight information beyond the normal display range. When it is converted to 16-bit or 8-bit, this extra brightness information needs to be redistributed through tone mapping or compression. After the conversion, the original data cannot be fully recovered. The same applies in the other direction.
If an 8-bit JPEG image has already lost color and brightness information, converting it to 16-bit will not magically create new details. This is a common misunderstanding among beginners.
Converting an 8-bit image to 16-bit does not improve image quality. It only gives the existing data more storage space. It cannot add information that was never there.
The real advantage comes from starting with a high-quality source file and editing in a higher bit depth environment.
2. How Does Bit Depth Affect Your Monitor?
Another common question is: "If my monitor can only display 8-bit, does editing in 16-bit really matter?" The answer is yes.
Bit depth does not only affect the final image you see. It also affects the entire editing process. Even if your monitor cannot display all the information in a 16-bit image, Photoshop can still use that extra data when processing adjustments.
For example, imagine you are editing the sky area of a RAW photo. In an 8-bit file, the sky may only contain a limited range of blue tones. When you keep adjusting Curves, those limited values can be stretched too far and create visible banding.
A 16-bit file contains much more original data, allowing Photoshop to maintain smoother transitions throughout the editing process, even if the final image still needs to be converted for display.
Of course, if you use a wide-gamut monitor designed for photography and design work, you can see more subtle color differences. But the display is only one part of the workflow.
The biggest benefit of higher bit depth is still protecting image quality during editing.
3. Which File Formats Support Different Bit Depths in Photoshop?
Different file formats support different bit depths.
Common 8-bit formats:
- JPEG
- PNG
- GIF
- PSD
- TIFF
- WebP
JPEG can store almost only 8-bit data, so it is mainly used for final output. PNG is a little different. While many PNG images are 8-bit, PNG can also support higher bit depths, such as 16-bit PNG. However, this format is not commonly used in most everyday workflows.
Common 16-bit formats:
- PSD
- TIFF
- Files converted from RAW
- DNG
Among these, PSD and TIFF are the most commonly used formats for photographers who need to save high-quality editing files.
Common 32-bit formats:
- PSD
- TIFF (with limited support)
- OpenEXR
- Radiance HDR
These formats are mainly used for HDR, 3D, and visual effects workflows.
4. Does a 16-bit Photo Always Look Better Than an 8-bit Photo?
Not necessarily. If two photos are simply opened and viewed without any editing, they may look exactly the same.
The advantage of 16-bit appears during the editing process. It becomes important when you need to:
- Make large exposure adjustments
- Change colors significantly
- Apply multiple adjustment layers
- Recover shadow and highlight details
This is where 16-bit can provide a clear advantage.
5. Since 32-bit Is the Highest, Should You Always Use It for the Best Image Quality?
This is a common misunderstanding. The purpose of 32-bit is not to make normal photos look better. Its main purpose is to preserve brightness information beyond the normal range.
For regular portraits, landscapes, and commercial photos, 16-bit usually already provides enough editing flexibility.
Using 32-bit instead may actually cause more problems, such as:
- Extremely large file sizes
- Limited Photoshop features
- Slower workflow
For most photographers and designers, choosing the right bit depth for the job is much more important than simply choosing the highest number.
Conclusion
Photoshop's 8-bit, 16-bit, and 32-bit modes are not about which one is simply "better." Each one is designed for different needs. If you are still not sure which one to use, you can follow this workflow:
- 8-bit: It offers great compatibility, smaller file sizes, and faster performance. For simple designs, web images, and everyday photo editing, the workflow is usually 8-bit editing → 8-bit output.
- 16-bit: It gives photographers more room for adjustments and is the best choice for RAW processing, high-quality retouching, and printing. Many professional photographers use the workflow RAW capture → 16-bit editing → 8-bit output.
- 32-bit: It is designed to store images with an extremely wide range of brightness information. In film, 3D, and HDR workflows, the typical process is multiple exposures → 32-bit HDR merge → tone mapping → 16-bit/8-bit output.
For most photographers, the most reliable choice is simple: shoot with high-quality source files, do your main edits in a 16-bit environment, and convert to 8-bit output based on the final use.
For professional photographers, a 16-bit workflow is only the first step toward better image quality. The real challenge often comes during editing. Repeated adjustments to exposure, curves, colors, shadows, and highlights can interrupt your creative flow and take your focus away from the image itself.
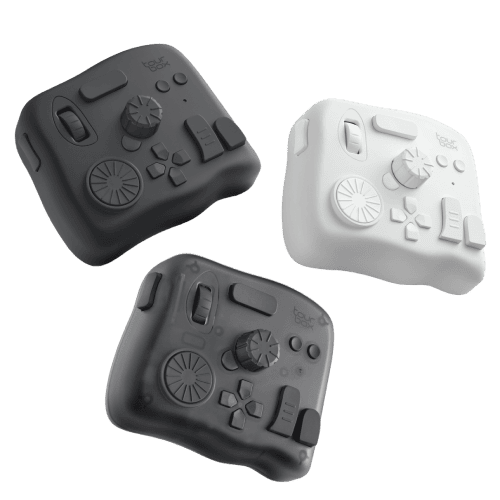
That's why more photographers are using creative controllers to optimize their Photoshop and Lightroom workflows. TourBox is designed for creators, combining frequently used adjustments, shortcuts, and parameter controls in one ergonomic device.
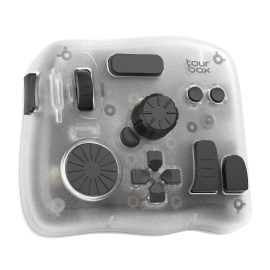
With customizable buttons, knobs, and wheels, photographers can fine-tune settings faster and reduce unnecessary mouse and keyboard switching, making the editing process smoother and more efficient. If you want to focus more on your creative vision and less on repetitive operations, check out our link to learn more.


