Unraveling the Power of Photoshop Channels: A Comprehensive Guide
There's a saying that channels are the core and masks are the soul of Photoshop, emphasizing the significance of channels in this powerful software. Understanding channels is the key to advancing from a beginner to an expert level.
So, what exactly are channels, and what can they do? Let's embark on this tutorial to answer these questions and explore the wonders of channels in Photoshop.

In this article, you will learn:
- What Are Channels in Photoshop?
- What Are Color Information Channels?
- What Are Alpha Channels?
- What Are Spot Colors and Spot Color Channels?
- How to Use Channels for Color Grading in Photoshop?
- Final Thoughts About Channels in Photoshop
What Are Channels in Photoshop?
Channels in Photoshop refer to a storage format for color data information within an image file, closely related to the color mode of the image. By combining multiple color channels, an image with various shades of color can be created.
You can think of channels as containers in which color, selections, and other image information are stored. Channels store this information using shades of black, white, and gray.
In Photoshop, there are primarily three types of channels:
- Color information channels: These channels primarily control the colors in an image.
- Alpha channels: These channels are commonly used for selections and masking operations.
- Spot color channels: These channels are used in the printing industry.
You might be more puzzled and seeking a clearer understanding of what Photoshop channels are. Don't worry, let's try to explain it in a simple and easy-to-understand way.
What Are Color Information Channels?
When you edit an image in Photoshop, you are essentially editing its color channels. But what is the underlying principle behind this? Let's start by understanding the basics of how a camera captures an image.
1. How Cameras Capture Images
Think of a camera sensor (CMOS) as an electronic retina that gathers color information. The sensor is made up of numerous pixels, each with a tiny mirror reflecting different colors: red, green, and blue.
When light passes through the lens and reaches the sensor, each pixel records a specific color. When these colors are combined, they form an image.
Based on the principle of trichromatic color perception, all the colors that humans can perceive can be created by mixing the three primary colors: red, green, and blue. Therefore, these three colors can form a complete image.
2. Why RGB Are the Primary Colors, Not Others?
This is because the human eye has two types of light-receiving cells: cone cells and rod cells.
Cone cells come in three types: red, green, and blue. You can think of them as antennas that receive specific wavelengths of light. Yes, our eyes are quite limited and can only perceive these three colors.
Rod cells, on the other hand, do not perceive color. In other words, they don't know what red or blue is, but they can detect light and darkness.
Animals have mostly rod cells and few cone cells, which is why they can see in the dark.
You can imagine each pixel on the CMOS sensor as an eye with only three cone cells: red, green, and blue.
3. The Principle Behind Photoshop Channels
Each pixel is composed of a mixture of red, green, and blue, which means that they inherently contain these three colors. This explains why Photoshop channels are limited to red, green, and blue (RGB).
When we separate the colors into their individual channels, we discover that each color has a different proportion of red, green, and blue. Therefore, it becomes necessary to assign a value to each color, known as the brightness or luminosity.
You can select an individual RGB channel, which will only display the hue associated with that channel at 100% purity. The only adjustable aspect of that channel is its brightness.
"Brightness" refers to the lightness of a color, with white representing the highest value, indicating the visible portion, and black representing the lowest value, indicating the non-visible portion.
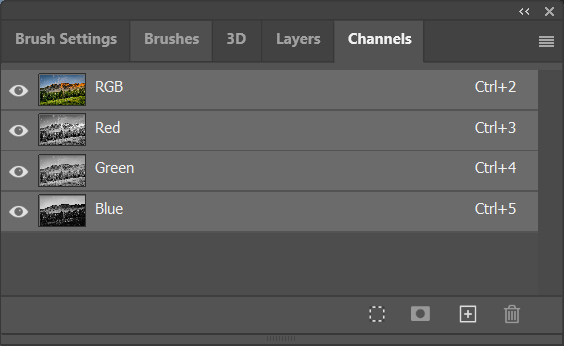
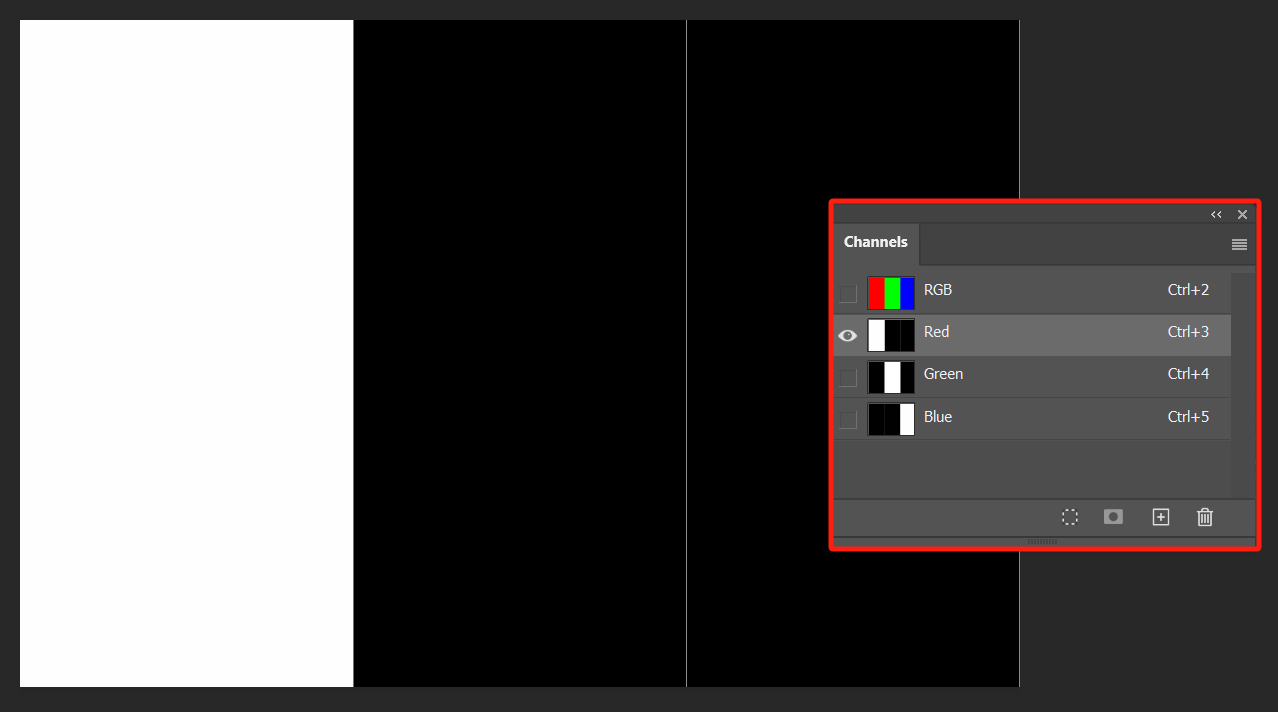
To observe this in Photoshop, you can import an image that contains all three RGB colors, as shown in the image below, and examine it using the Channels panel.

In the red channel, for example, only the color information related to red will be displayed. The same applies to the blue and green channels. It is evident that when selecting a specific color channel, the corresponding color area will appear white, indicating the visible portion.
4. Why Channels Are Used for Selections
This leads us to another question: What is the basis for selection tools like the Magic Wand or Quick Selection in Photoshop?
The answer lies in brightness. These selection tools determine the range of selection by recognizing the difference in brightness between different colors in the image.
Since channels can independently adjust brightness, they can be used to amplify the contrast between adjacent colors, providing a clearer selection area for the selection tools.
To learn how to use channels for selections, you can check out our article: A Comprehensive Guide to Creating Flame Text in Photoshop. In this tutorial, we share how to use channels to extract a blazing fire.
What Are Alpha Channels?
The Alpha channel refers to the transparency and translucency of an image. It involves complex computer graphics techniques, but all you need to know is that it is a dedicated channel designed to store selection areas.
Typically, a newly created channel becomes the Alpha channel. This channel doesn't store the colors of the image but instead stores the selection area as an 8-bit grayscale image, which is added to the image's color channels.
Therefore, the content of the Alpha channel doesn't represent the colors of the image, but rather the selection area. In this channel, white represents a fully selected area, black represents a non-selected area, and shades of gray represent partially selected areas (also known as feathered areas).
Using white on the Alpha channel expands the selection area while using black shrinks the selection. Applying gray can increase the feathering range.
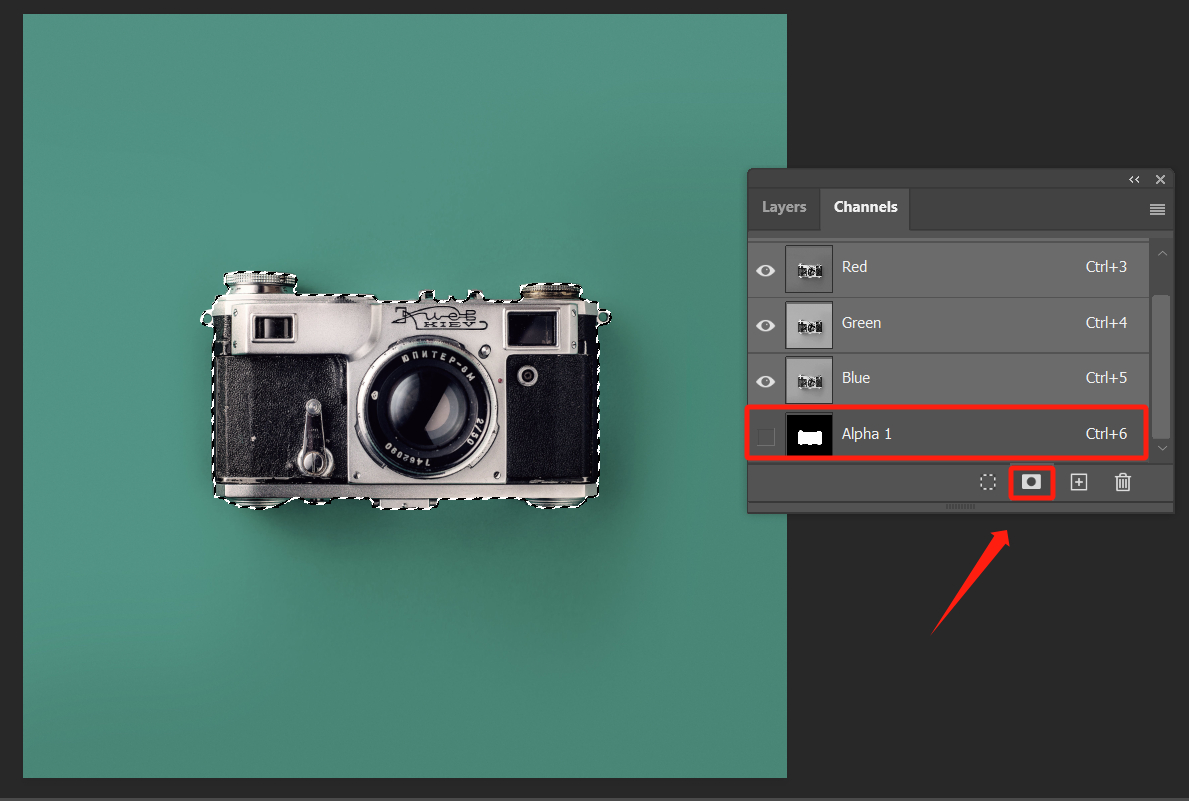
1. How to Save a Selection Using the Alpha Channel?
You can use any selection tool to choose an area in the image. Then, click the "Save selection as channel" button in the Channels panel to save the selection as an Alpha channel, as shown in the image.
There is another method. After making a selection, right-click on the Photoshop workspace and choose "Save Selection" from the drop-down menu. Then, click on "Save" to save it. Photoshop will automatically save this selection as an Alpha Channel.

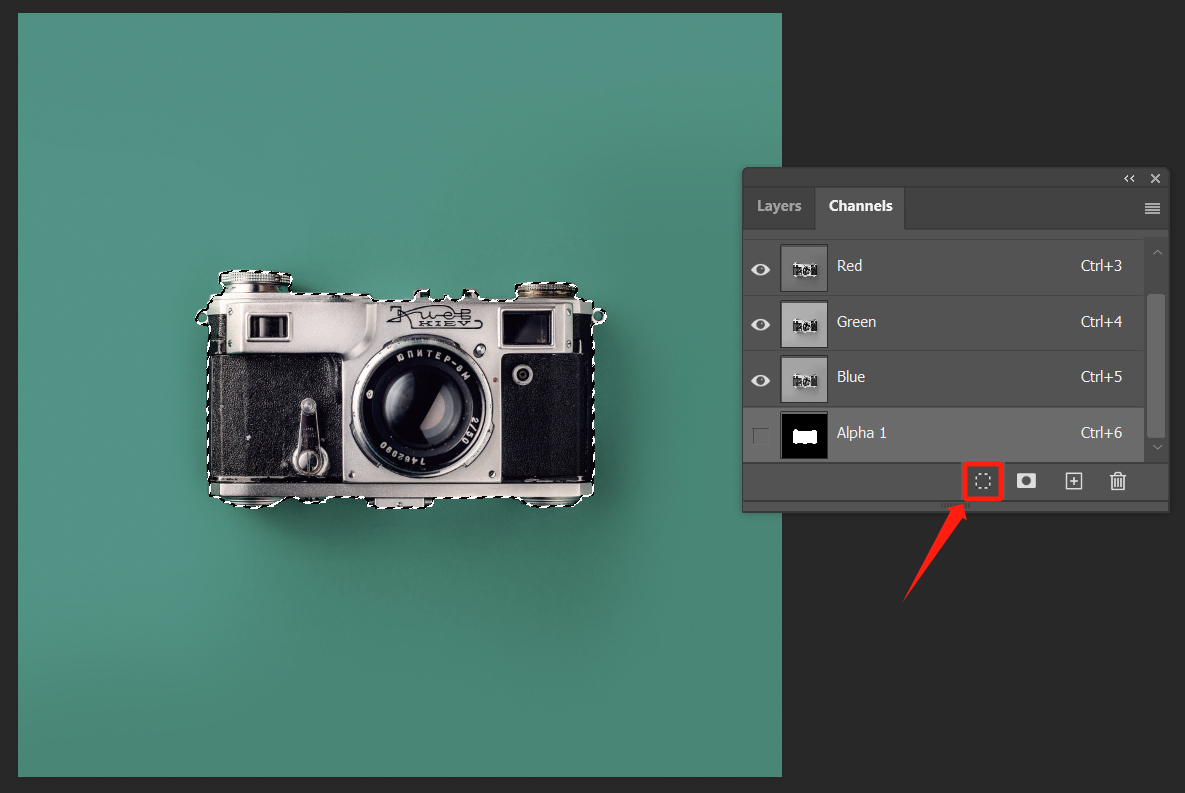
2. How to Import a Selection Saved in the Alpha Channel?
Go to the Channels panel and select the Alpha Channel that contains the desired selection. Then, click on the "Load channel as selection" button to load the selection from that Alpha Channel.
Additionally, you can hold down the Ctrl key and click on the Alpha Channel to load the selection.
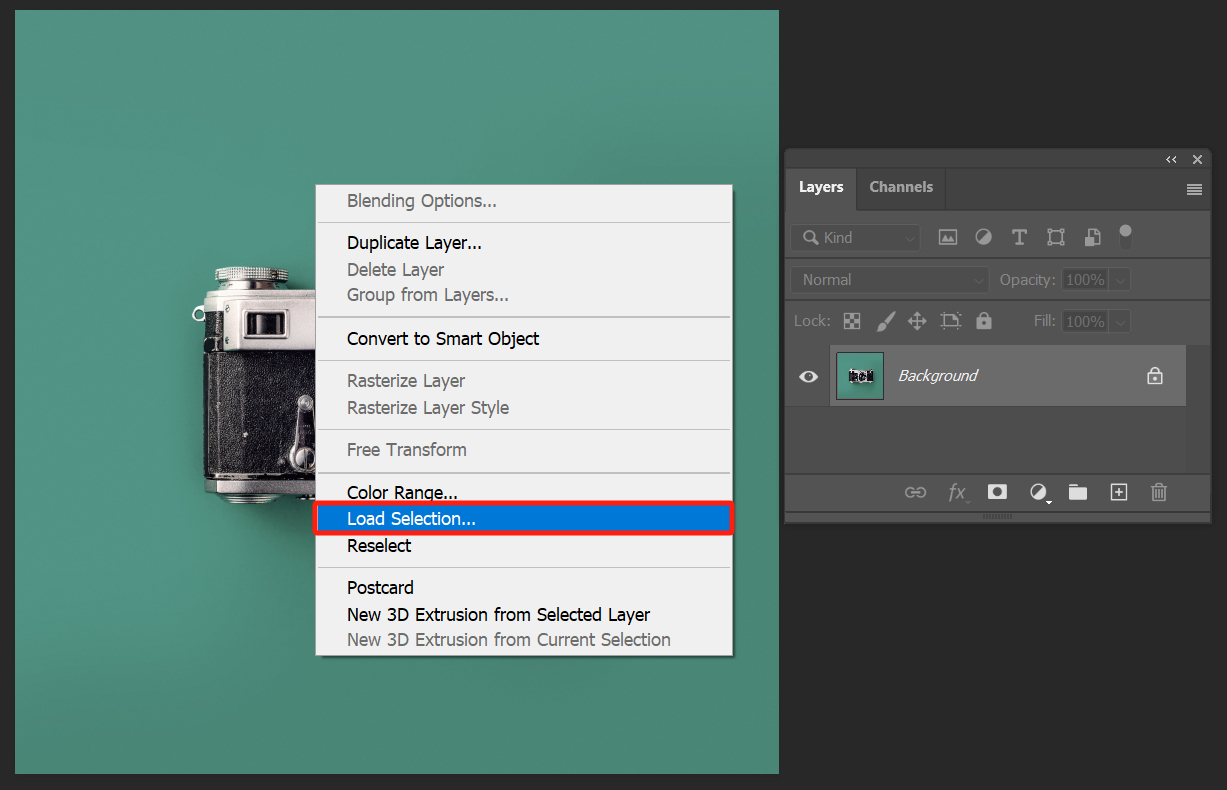
Alternatively, you can right-click on the Photoshop workspace, just like when saving a selection, and choose "Load Selection" from the pop-up menu in the panel.
What Are Spot Colors and Spot Color Channels?
Spot colors are commonly used in the printing industry. They refer to pre-mixed specific colored inks that are used to replace or supplement the standard CMYK inks.
Examples of spot colors include vibrant oranges, greens, fluorescent colors, metallic gold, and silver inks.
Spot colors are specially formulated and not achieved by mixing the standard CMYK inks. Each spot color requires its dedicated printing plate during the printing process.
Editing colors using spot color channels ensures accurate color reproduction and avoids any color loss that may occur when converting between different color modes.
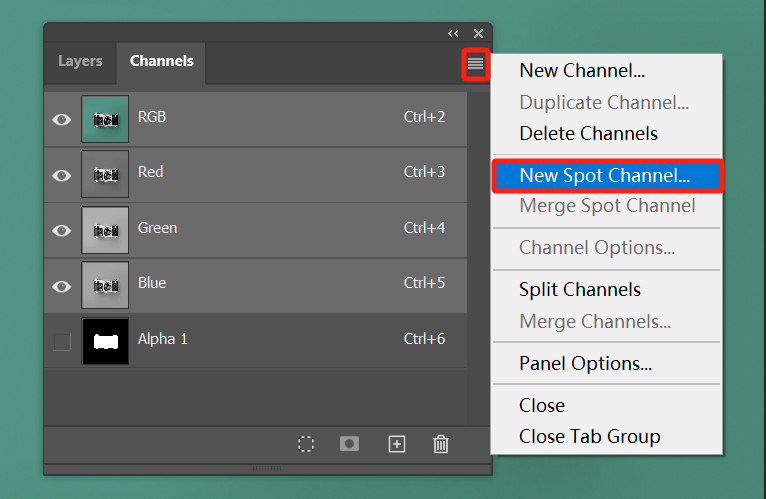
To create an empty spot color channel, you can select "New Spot Channel" from the drop-down menu in the Channels panel.
Alternatively, you can use a selection tool to choose an area in the image and then click on "New Spot Channel" to create a spot color channel based on that selection.
If you want to convert an Alpha channel into a spot color channel, you can select the Alpha channel and then choose "Channel Options" from the drop-down menu in the Channels panel. From there, select "Spot Color" and confirm the selection.

How to Use Channels for Color Grading in Photoshop?
Based on our previous discussion about the principles of channels, you can utilize and combine them when adjusting colors in Photoshop.
For example, when using the Curves tool, you might think it's just a tool for adjusting brightness and darkness. However, it can also be used to make color adjustments based on channels.
Without further ado, let's import an image into Photoshop and explore its possibilities.
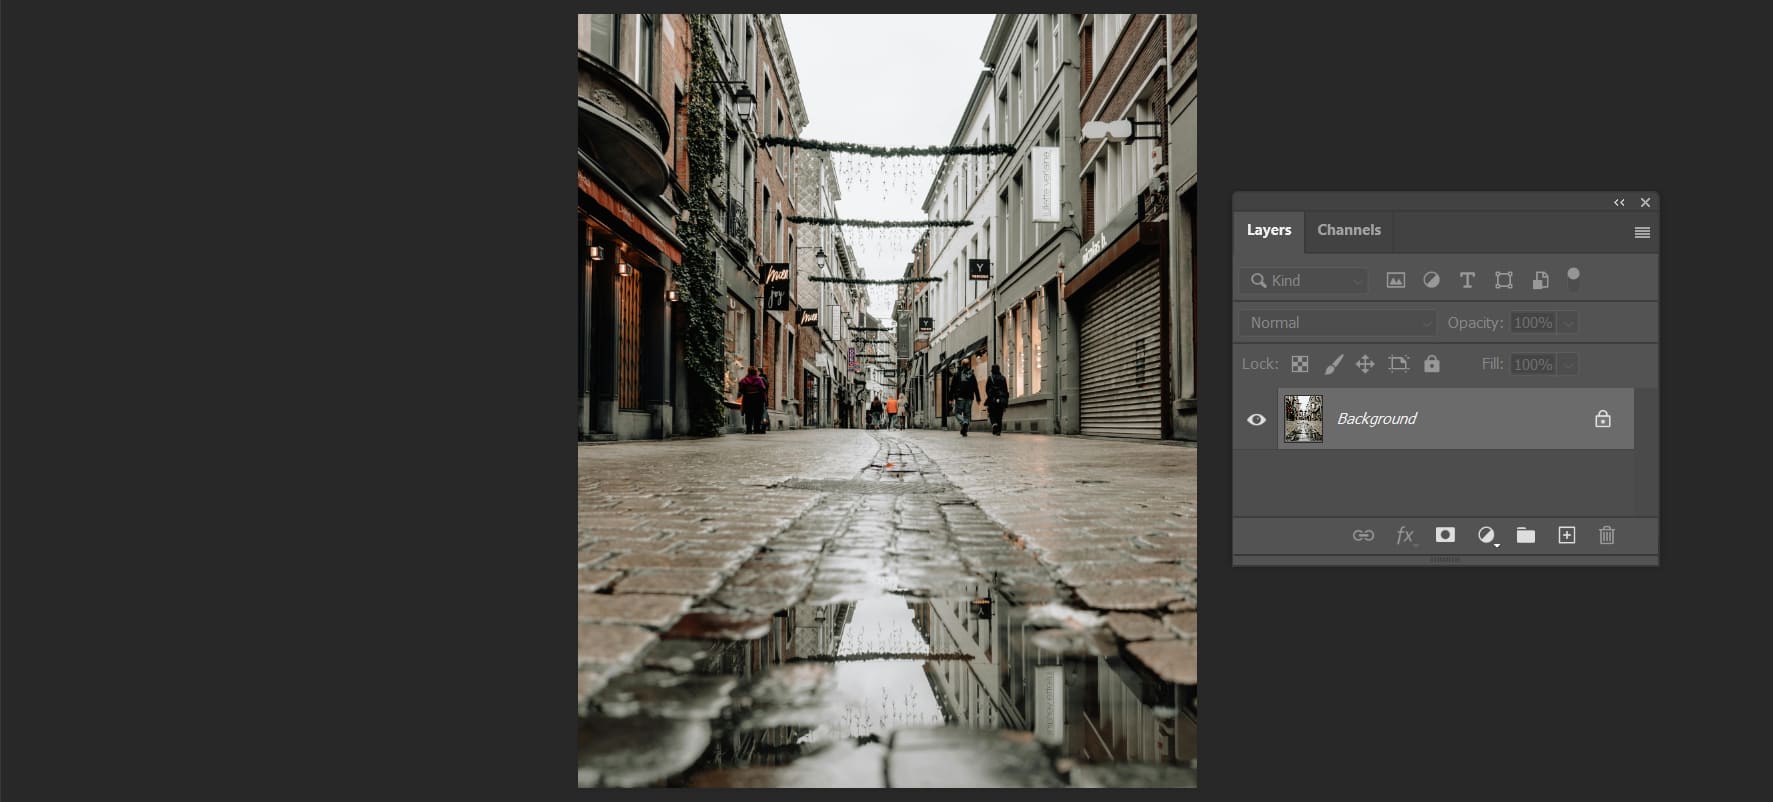
Create a Curves adjustment layer for this image. Select the red channel and make adjustments that only affect the red channel, regardless of other channels.
You can drag the curve upwards, and this will make the overall tone of the image relatively warmer.
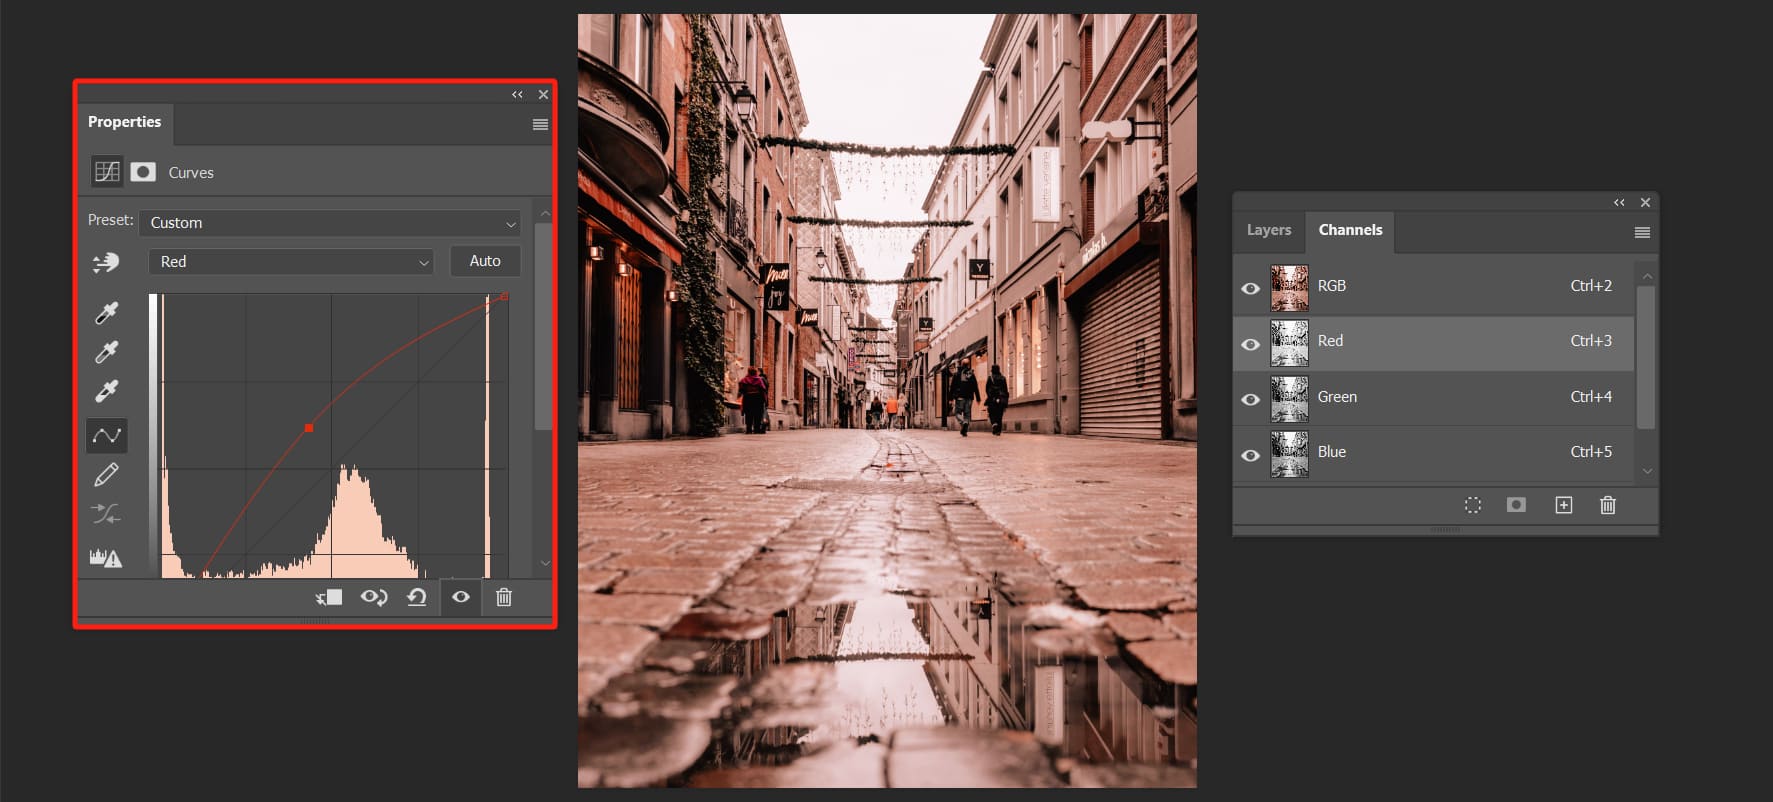
If you only look at the image in the red channel, how does it compare before and after adjustments?
The image on the left in the following image is the original red channel before using the Curves adjustment layer, while the image on the right is the red channel after using the Curves adjustment layer.

The difference should be quite noticeable - the image on the right is noticeably brighter compared to the one on the left.
In summary, based on the principle of channels in Photoshop, channels are used to adjust the brightness of the three primary colors in an image without altering the hue and saturation.
In addition to the Curve adjustment, there are other tools like Channel Mixer, Levels, and more that can be used to control channels and change the overall color tone of an image. You can experiment with each of these tools separately to see their effects.
Final Thoughts About Channels in Photoshop
In this tutorial, we have explored the basics of Photoshop channels. However, we want to emphasize that this tutorial only scratches the surface of what channels can do. Countless advanced techniques are waiting to be discovered and experimented with.
We encourage you to take what we have shared and dive deeper into the world of Photoshop channels. To enhance your creative workflow even further, we would like to introduce you to a game-changing tool called TourBox.

TourBox is a revolutionary device designed to enhance your Photoshop experience. It is a compact and ergonomic controller that gives you unparalleled control and efficiency, allowing you to unleash your creativity like never before.
Imagine having all your favorite Photoshop tools and shortcuts at your fingertips. With TourBox, you can assign specific functions to each button, dial, or knob according to your preferences.
Whether you're adjusting brush sizes, navigating layers, or fine-tuning adjustments, TourBox empowers you to work seamlessly and efficiently, saving you valuable time and effort.
We hope this tutorial has sparked your curiosity and inspired you to explore the limitless possibilities of Photoshop channels. Stay tuned for more exciting tips and techniques as we continue to share our expertise with you.