How a Portrait Photographer Works: Sam Barton Interview
What should a portrait photographer's workflow look like? This time, we are honored to work with Sam Barton and take a closer look at his full shooting process. Sam has always loved blending people with natural landscapes. He uses simple setups and natural light to keep the focus on the subject.
From pre-shoot planning and communication with the model, to outdoor shooting, lighting, and composition, and then post-processing and final delivery, Sam shared many useful tips and insights from his real-world portrait work.
We put this interview together in the hope that it will help photography fans and TourBox users better understand the heart of portrait photography. Once again, thank you to Sam Barton for sharing his experience and photos!
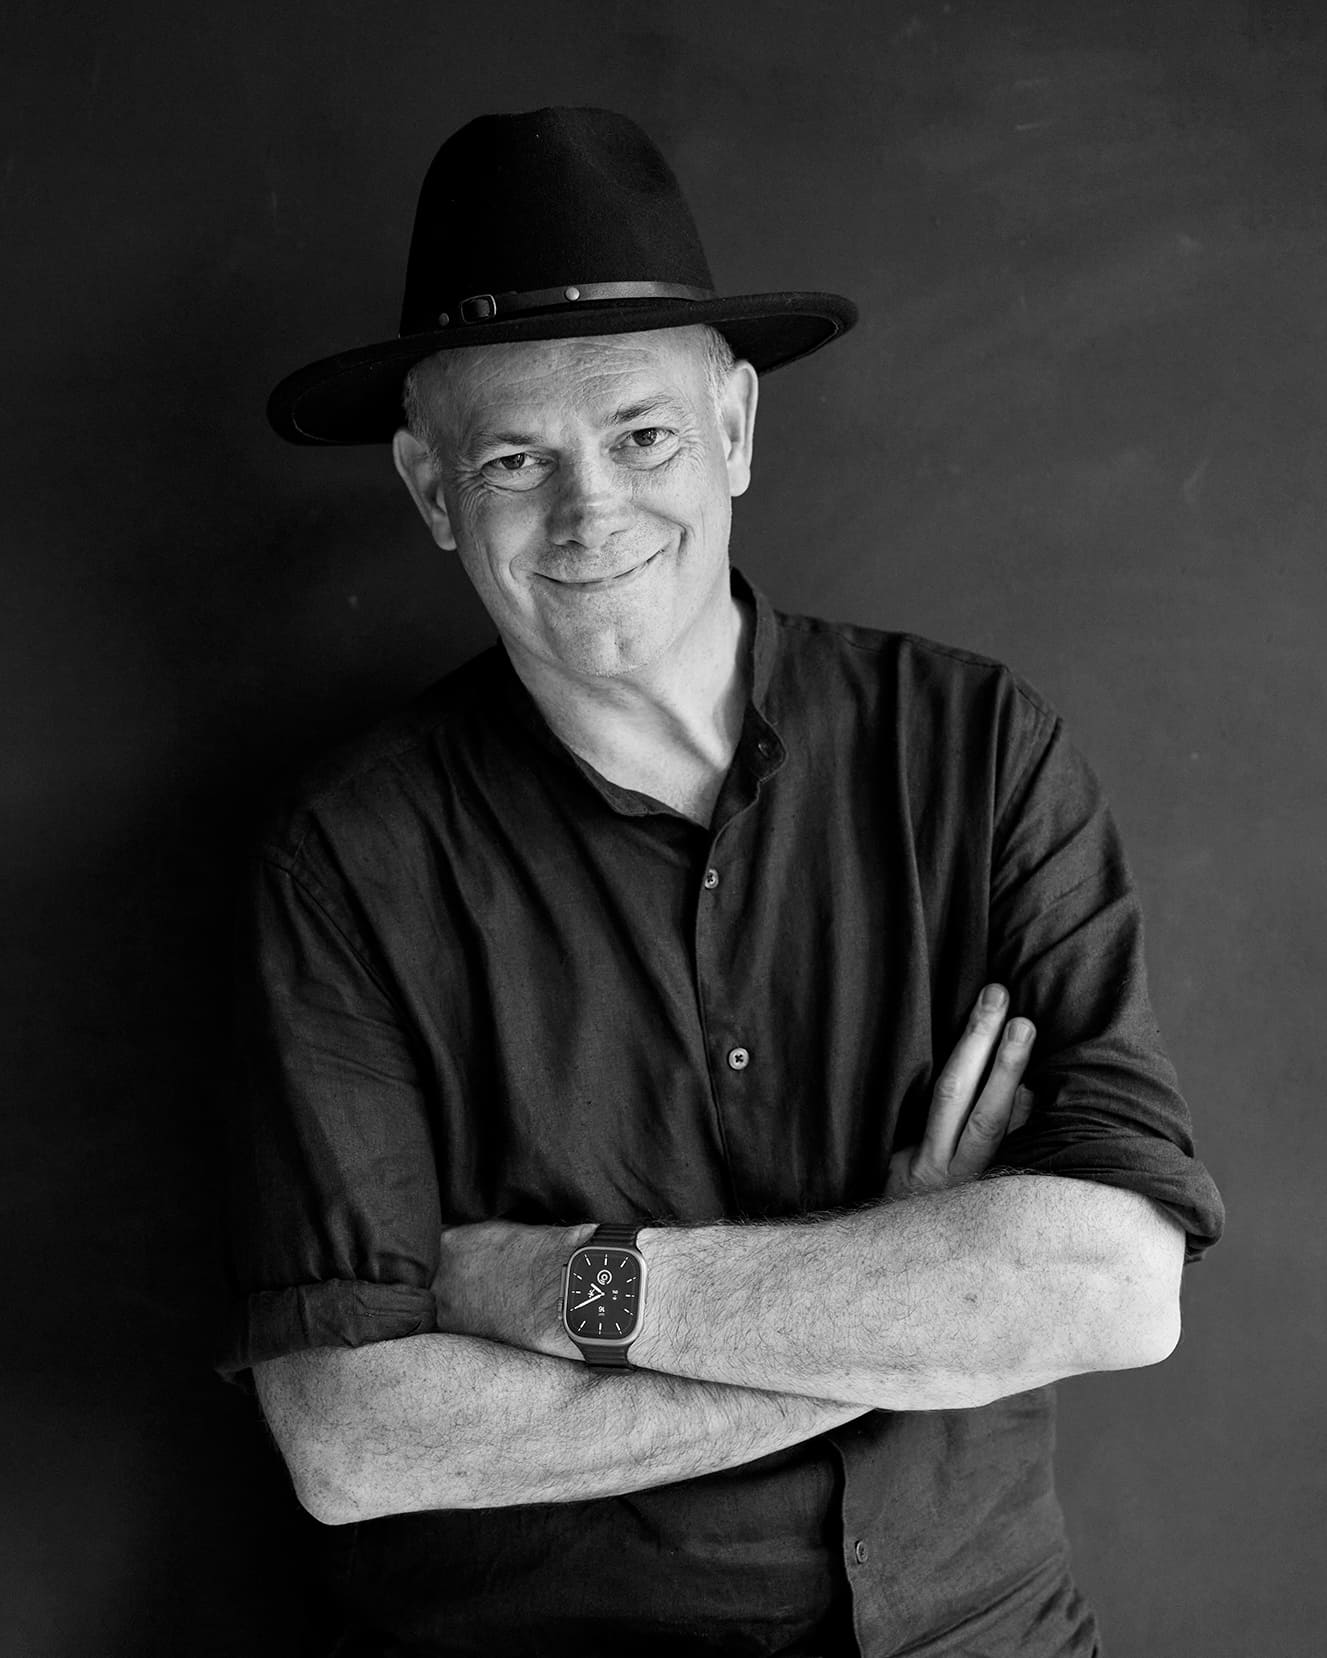
Sam Barton
1. Interview
TourBox Team: Hi, Sam. To start, could you briefly introduce your photography background and shooting style?
Sam: Hello, everyone. Photography is a passion of mine and for many years it was a day job. I've worked with some amazing people both behind and in front of the camera in fashion, editorial, and advertising. I love to travel and have had many photographic adventures around the world that have helped create the images I print today.
I really enjoy capturing human emotion, whether in portraiture or in wider environmental images that explore how people connect with nature. For me, a landscape photo always feels like it is missing something. A scene only feels complete when people are part of it.
That idea also inspired my recent "Elemental" series. Whether I was in Utah or Iceland, I was always looking for human presence in those otherworldly landscapes. I wanted to respond to nature through people, so the images would have both the context of the scenery and, importantly, genuine human interaction.
I also really like simple setups and black backgrounds. With only a simple black cloth and natural light, I can give each person the same "canvas." That keeps the focus on the subject. It also lets me pay more attention to facial expressions, emotions, and the feeling behind the image. I'll happily trade an image that conveys someone's personality for one that is perfectly exposed.
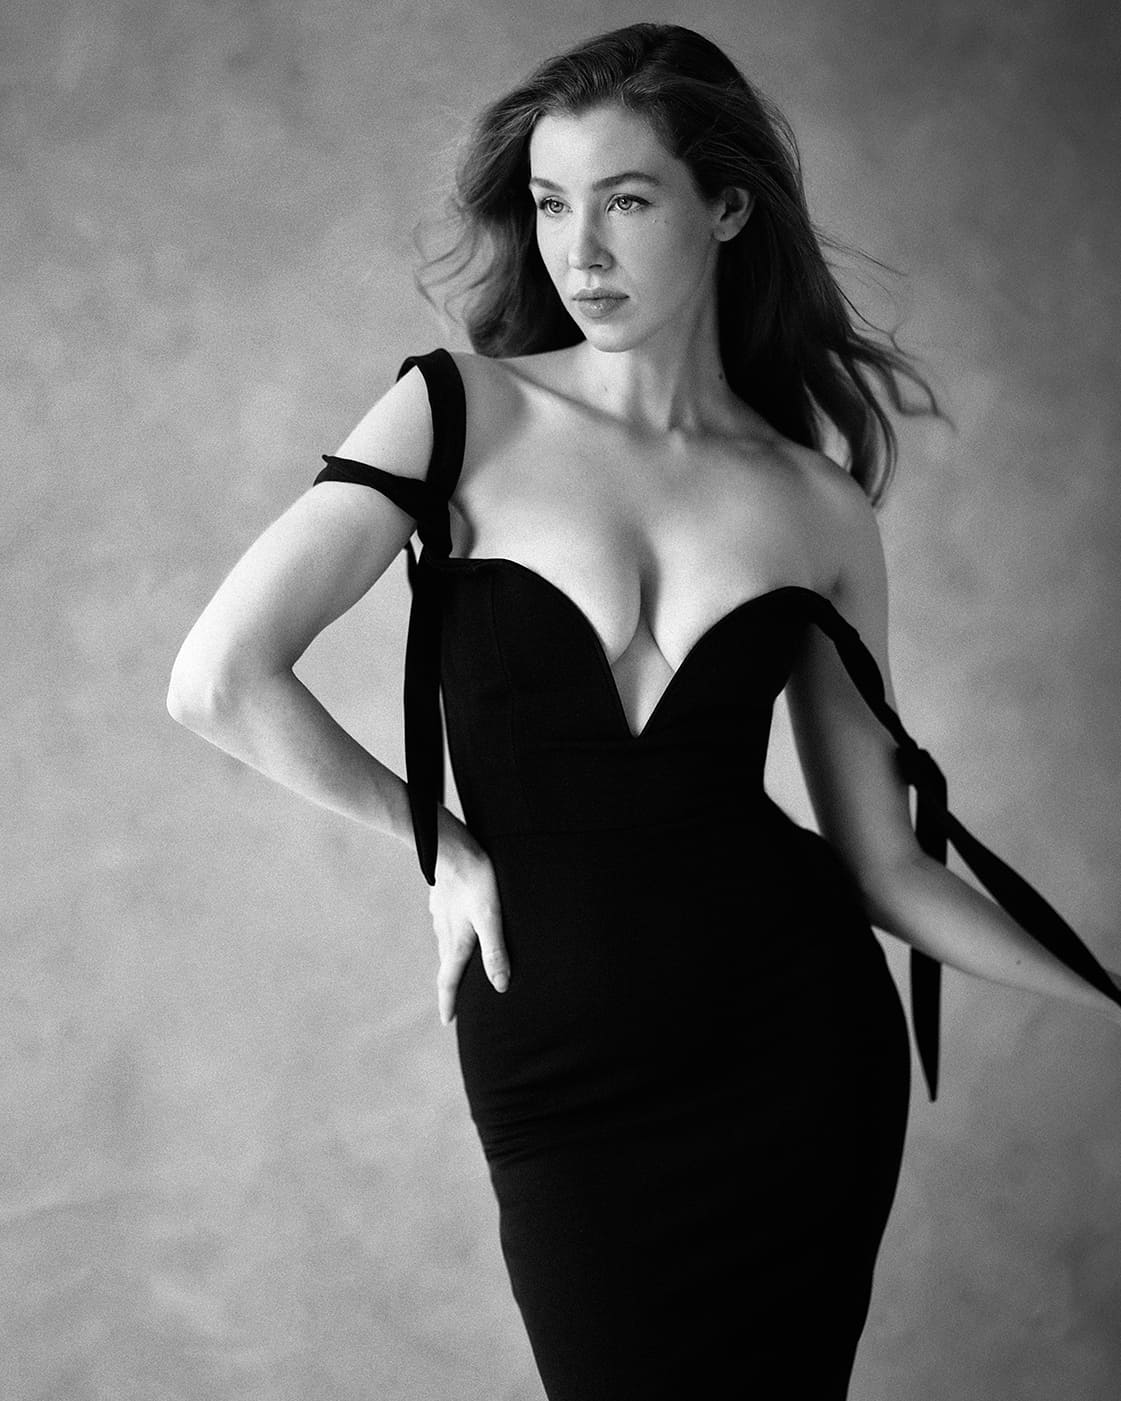
Photographer: Sam Barton | Model: Marisa Roper
TourBox Team: What do you usually do before a formal shoot?
Sam: By formal, I am assuming you mean studio shoot, rather than my personal projects which tend to be organised around locations and sunrise times or tide timetables.
So, focusing on portrait and fashion-editorial style shoots, I believe pre-shoot preparation is very important to create a sense of direction, but also trust early on. I usually start by thinking about the overall theme and style, then I reach out to the model in advance to talk things through. First, I look at their portfolio to understand their usual style and preferences. Sometimes I also send them similar work from my website, so both sides can quickly see whether the styles fit and build trust more easily.
I also prepare a mood board, such as a Pinterest board, so the model can choose outfits based on the direction I have in mind. But I want to be clear that this kind of preparation is more of a guide, not a strict plan that must be followed exactly. I always have a general idea, but when I am actually shooting, I care even more about inspiration and quick reactions on set.
Logistics matter too. I try to learn about the model's food preferences ahead of time, and I make sure to have water and food ready on the shoot day. It may sound small, but keeping everyone fed and comfortable often plays a big part in making the shoot go smoothly.
TourBox Team: What is your process on set? What should people pay special attention to?
Sam: To me, an efficient shoot is not about following every detail in a rigid way. It is about staying flexible after the basic setup is ready.
On the shoot day, I usually set up the scene and lighting first. The first set of photos usually starts as planned. But if the natural light suddenly creates a beautiful angle, I will adjust the plan right away and focus on catching that moment.
I remember one winter shoot when sunlight suddenly came through the window in long, dramatic lines. It's instinctive, you know the light won't last so you have to use it. I just asked the model to step into the light and start shooting right away. Moments like this are fleeting, but they are also a good test of that trust that I think is important to create early on. I want the subject to feel the same enthusiasm as I have and for that enthusiasm to be evident in the images we create.
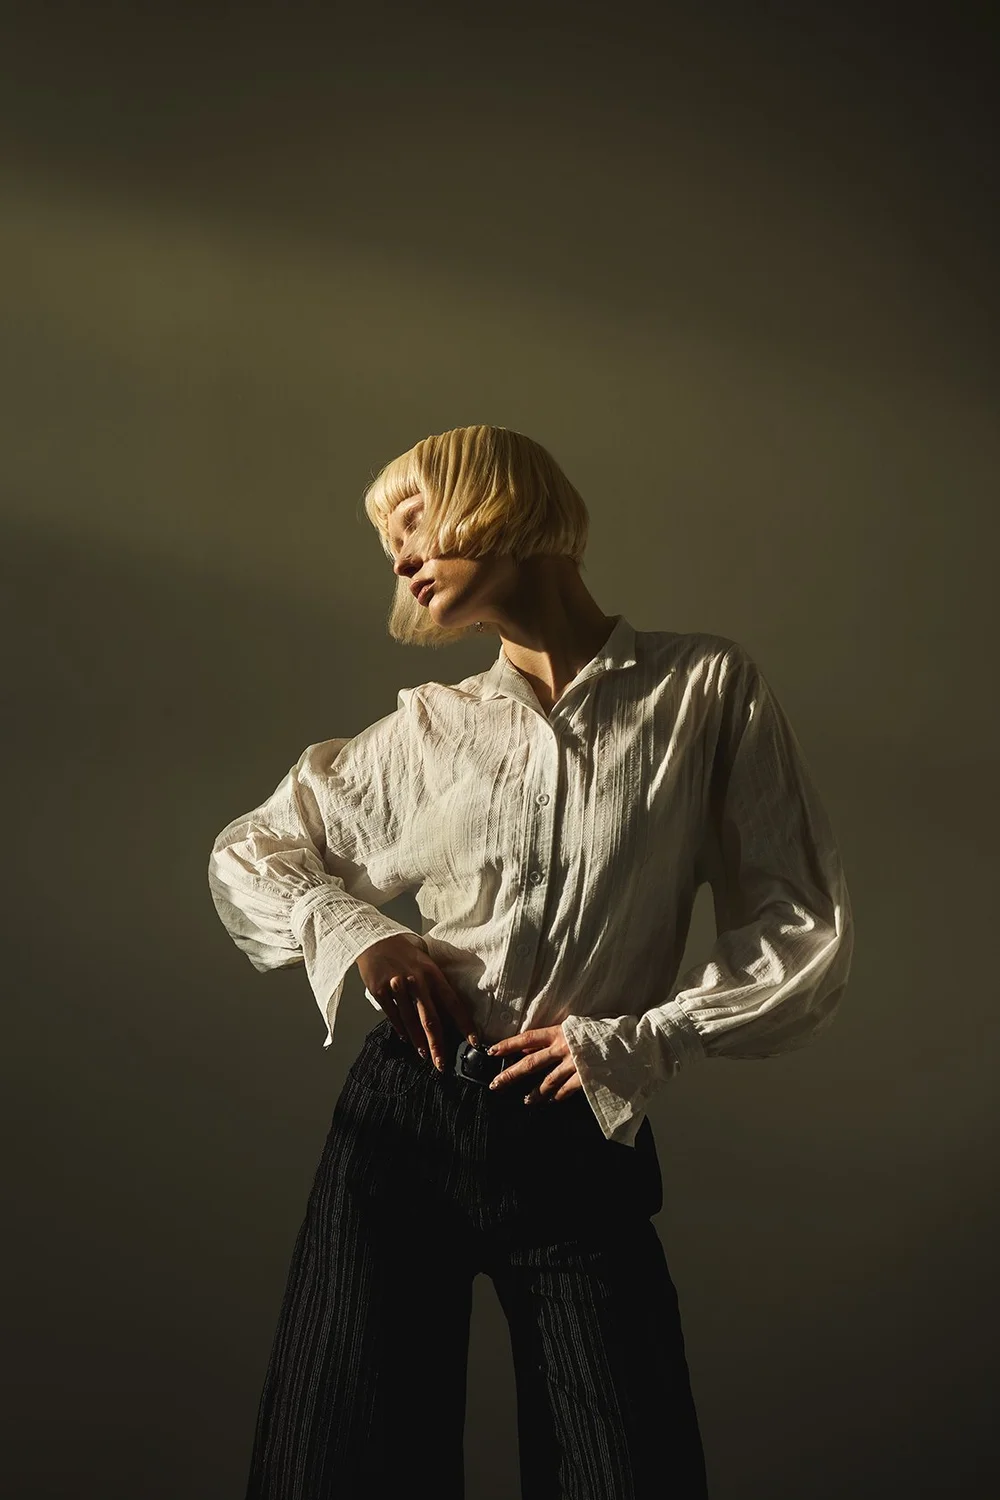
Photographer: Sam Barton | Model: Saida Mickeviciute
Building on this, I also like to capture those unexpected moments. For example, when the model slowly relaxes or closes their eyes, that is often when you witness a truly natural and honest expression. To catch that state, I sometimes ask the model to pause, close their eyes, take a deep breath, and then continue. That small break can move the model from posing to being themselves.
I also pay close attention to changes in light. I even use a sun-tracking AR app on my phone to predict the sun's path, so I can make the most of natural light. If there are strong lines of light and shadow in the scene, I also like to use them as creative elements in the image. When needed, I will even use a small fan to create movement in the hair, so the photo feels more alive.
At lunch, I usually let the model relax and eat while we look through the photos we have just taken. I often shoot with my camera tethered to my laptop for live viewing, so the model can see how they look on camera and rate any photos they like. That kind of interaction not only helps us connect, but also helps me decide where to take the next part of the shoot.
TourBox Team: Do you have any tips for lighting and composition?
Sam: I have always liked natural light and simple setups. Whether I am shooting indoors or outdoors, I usually prefer a wide-aperture prime lens, like a 50mm or 85mm, so the background falls softly out of focus and the subject stands out more naturally.
One of my favourite techniques is using strong lines of light and shadow. For example, in winter, sunlight coming through a window can form clear patterns on the floor. That kind of hard light and shadow can make the image feel more geometric and dramatic.
When I shoot outdoors, I like to use the environment or juxtapose it with a black cloth backdrop. There is no question that a compelling city backdrop will excite the viewer. But I favour images that narrow the viewer's attention and focus on the person. The black backdrop does just this, even if there is a hint of those buildings just above the backdrop stand, the eye remains focused on the person.
For composition, I don't have an exact rule here. It really depends on the situation. I do tend towards the rule of thirds, but equally I love negative space in an image. Somewhat controversially I will pick an image that conveys real human emotion over one that has perfect symmetry.
I was editing a shot this morning that did just this, it was of Tezz taken recently in Ibiza. We were about to go out for supper but I persuaded her to stand in front of my camera in her jeans and t-shirt. Just two people taking photos in the last of the soft light.
It was relatively quick, my compositions changing in the small space. I'd move back and forth as she changed position and move in as her expressions changed. In those moments, I'm watching her face and not how I'm cropping her body. Back home, I'm smiling as yes, I may have poorly cropped her arm, but more importantly, I have captured her. That honesty always beats symmetry.
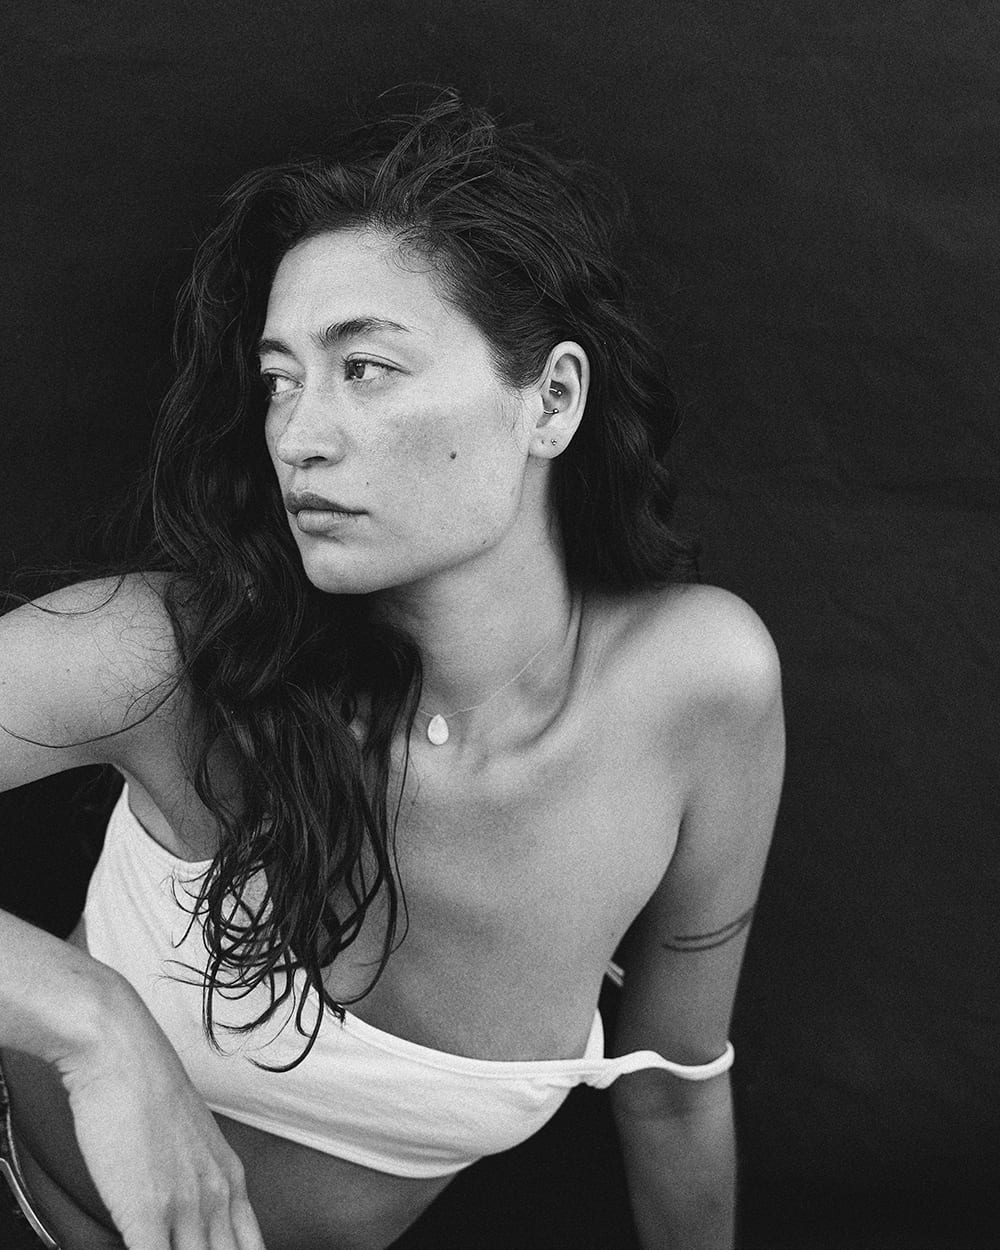
Photographer: Sam Barton | Model: Tezz Tran
TourBox Team: How do you usually handle your post-processing workflow?
Sam: My post-processing workflow mainly has three steps: selecting images, RAW colour grading, and retouching.
First, I back up all the files, then do a first round of image selection in Capture One. I pick the photos that feel the strongest and best convey emotion, and then I do the basic RAW edit. I try to keep the image as natural as possible so these are small adjustments to highlights and shadows and a small amount of curve.
Once I move into Photoshop, I make some simple edits on a new layer, like cleaning up stray hairs or fixing small blemishes. But I do not try to make people look too "perfect." To me, keeping the image honest is very important because that is part of a person's character too.
I enjoy those post-shoot drinks and listening to the stories models have. One recurring theme is how they hate it when a photographer removes a mole or birthmark. It's part of their identity and that is what people want to see.
Next, I use the dodge and burn tools to brighten the highlights and deepen the shadows a bit, so the subject has more depth and shape. This does not need to be too dramatic, just enough to add some natural contrast.
Lastly, I'll do any colour grading if I feel the image warrants it. I find that I edit much like I used to print when I had a darkroom. The key is to balance making the image impactful, whilst also making the person look natural and genuine.
TourBox Team: How has your experience with TourBox been? Which features have helped improve your workflow the most?
Sam: Overall, I am very happy with TourBox. It feels solid, well-made, and very stable on the desk. It does not slide around easily. As a right-handed person, I keep it on the left side of my tablet and over the past few weeks of use, I have found my muscle memory adapting to the shape of each button and knob. It's much more instinctive now, and I enjoy its tactile nature.
I was pleasantly surprised by the rich set of functions TourBox comes with out of the box. It's perhaps obvious, but I like how the same buttons seamlessly map to different features when switching from Capture One to Photoshop. They each do the correct thing that you expect, like adjusting brush size or moving to the next image. I also like that I can map my own shortcuts using macros. Something I have done to help with the exporting process in Photoshop.
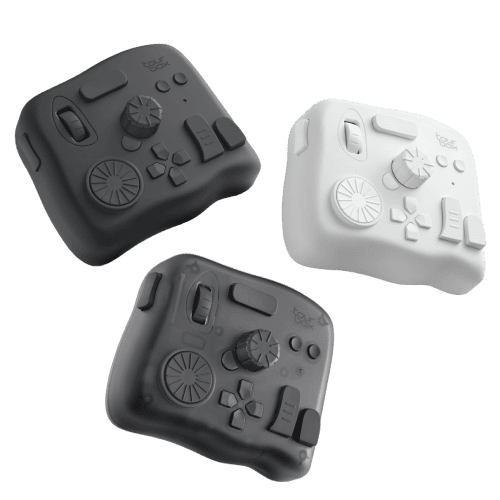
The biggest help for me is its deep integration with Photoshop. For example, the virtual numeric keyboard lets me quickly enter numbers in the export dialog, and I can also use the D-pad to switch tools and adjust settings quickly. Because of that, I hardly need to move my hands away from TourBox while editing. The whole process feels smoother, and it is easier for me to stay focused.
Of course, when I switch between different devices, I sometimes run into small issues, like needing to pair the Bluetooth connection again or adjust macro trigger positions. But these are not major problems. Overall, TourBox helps me stay more focused and work more efficiently in post-processing, and I would even say that I am using my keyboard less which is perhaps the best compliment I can give.
For more of Sam's real experience using TourBox, check out his blog post: TourBox Elite Plus Review.
TourBox Team: Based on your experience, what are some common problems in photography? Any advice for other photographers and beginners?
Sam: If you don't mind, I'm going to answer this in another way. Let's trade common problems with common misconceptions. I like to share my images on social media and always reply to the comments. The one that always surprises me is: "what lens did you take that with?"
I'll happily share the details, but also state that buying a new lens isn't going to make you a better photographer. It goes without saying that photography is expensive and attracts people who like buying equipment. But some of the most iconic photographs ever taken were captured with relatively simple cameras and standard lenses.
Henri Cartier-Bresson famously used a 50mm lens for much of his work and nobody remembers those images because of the aperture or the sharpness in the corners. They remember the moment. A new lens can be tempting (trust me I've been there too), but it won't make you a better photographer on its own.
So treat this not as a problem, but as a challenge. Go out there and shoot, then shoot some more. Photography is ultimately about how you see the world. That vision can be shaped by building trust with people, learning how to get the best out of them and understanding when to use the light. A new lens doesn't create atmosphere, you do. Experience teaches you how and when to take the photograph.
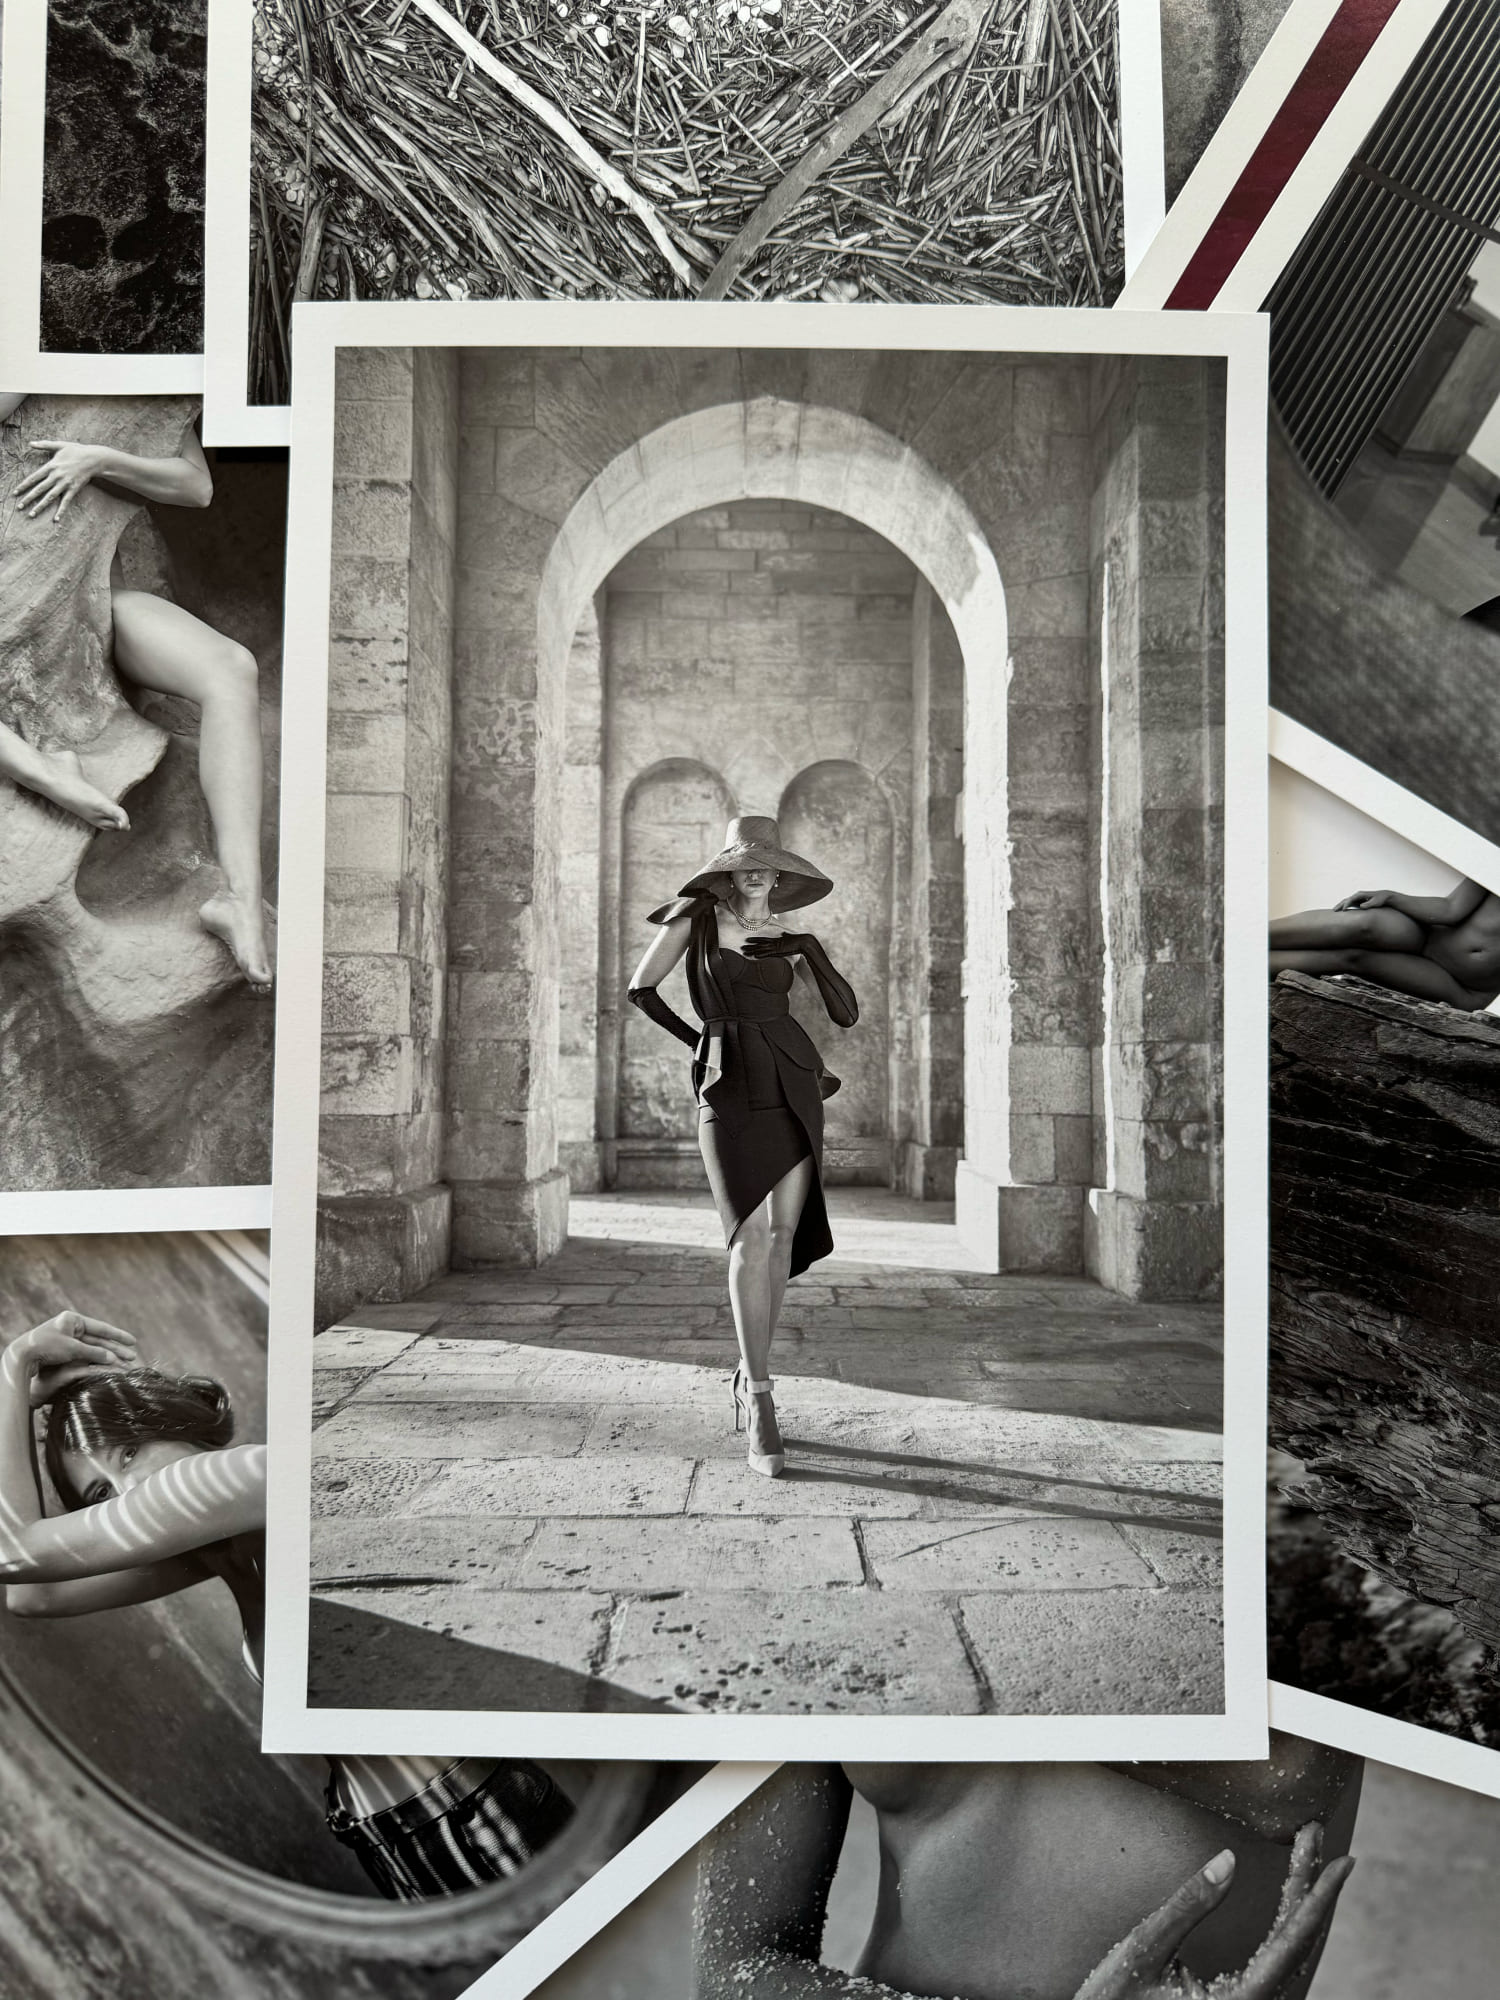
One final thought. The next time you have a shoot planned, go into it with the goal of creating just one image worthy of printing and hanging on your wall. It may sound simple, but the act of printing a photograph, something you can physically hold in your hands, changes how you value it. And that inevitably changes how you approach taking the image in the first place.
Photographer: Sam Barton
Key Workflow Steps in Sam's Portrait Photography
Here are some of the key steps in Sam's portrait photography workflow that he shared with us. We have put them into the table below:
| Stage | Main Tasks | Timing | Tools / Gear | Notes |
|---|---|---|---|---|
| Pre-shoot Planning | Define the creative concept, shooting style, and model selection; build a mood board | 1 week to a few days before the shoot | Camera, lenses, flash, backdrops | Communicate the style and expectations with the model in advance, build trust, and prepare backup ideas |
| Gear & Location Prep | Check camera gear, batteries, and memory cards; set up the studio or location | 1 day before the shoot | Camera, flash, reflector, backdrop fabric | Test the setup early and check how the light may change |
| On-set Shooting | Build the scene, fine-tune the lighting, and capture the main portraits and make sure you capture the personality | On the day of the shoot | Camera, lenses, lighting gear, black backdrop | Stay flexible and adjust the plan as needed; pay attention to natural light and the model's mood; keep communicating with the model |
| Breaks & Recharging | Eat, organize gear, and review the images with the model | Midway through the shoot | —— | Give everyone a chance to rest and recharge; listen to the model's feedback and adjust the direction if needed |
| Post-production | Back up files, cull images, do basic RAW adjustments, and finish retouching | A few hours after the shoot | Computer, monitor, TourBox, drawing tablet | Keep your original files safe; use TourBox shortcuts and macros to speed up editing |
| Final Delivery | Export the final JPEG (web and print) files and share them with the client or publish them online | After editing is complete | Cloud drive / hard drive, publishing platform | Double-check size and color accuracy; archive the source files |
Final Thoughts
Once again, we want to thank Sam Barton for generously sharing his experience and insights into portrait photography.
Every shoot is different, but the core ideas stay the same: know your subject, understand the light, stay flexible, and be ready to catch great moments when they happen. Do that, and you will almost always come away with photos worth keeping.


