How to Round the Corners of a Rectangle in Photoshop?
When working on designs in Photoshop, you often need to draw rectangular shapes, and rounded rectangles are especially common in projects.
So here's the question, how to round the corners of a rectangle in Photoshop. This tutorial will provide you with the answer.

In this article, you will learn:
- How to Round the Corners of a Rectangle in Photoshop?
- How to Round the Corners of a Photo in Photoshop?
- Final Thoughts About Rounding the Corners of a Rectangle in Photoshop
How to Round the Corners of a Rectangle in Photoshop?
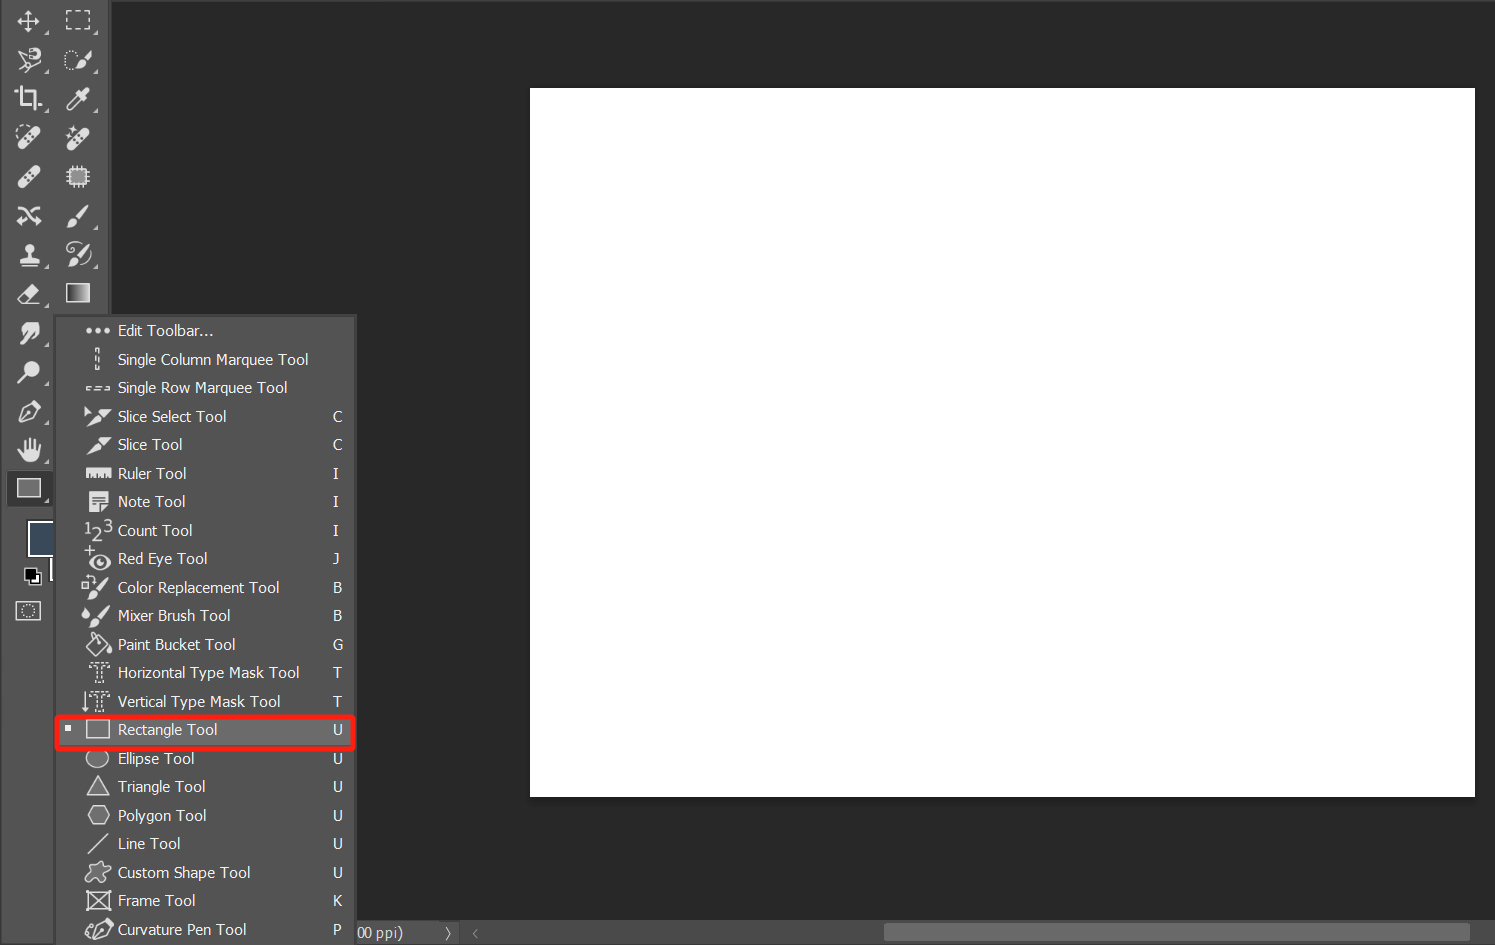
To start, open Photoshop and create a new blank canvas. Then, select the Rectangle Tool from the Photoshop toolbar on the left. If you can't locate it, you can find the tool in the hidden Toolbar menu at the bottom.
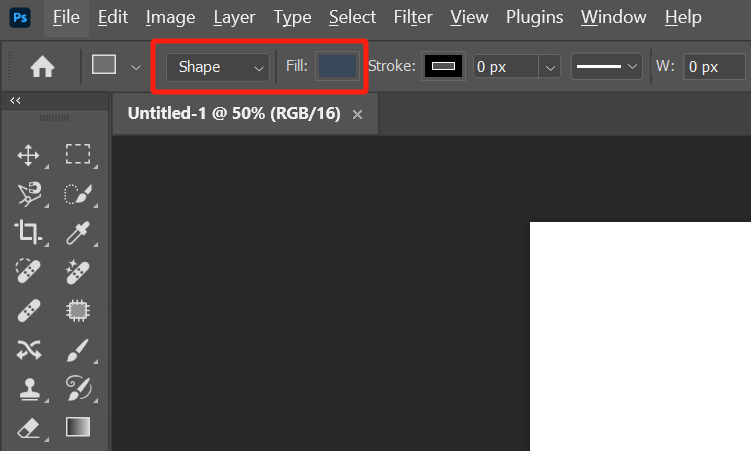
After selecting the Rectangle Tool, ensure that "Shape" is chosen in the top toolbar and select a fill color (e.g., blue).
Next, draw a rectangle shape on the canvas, as shown in the image below. Take a look at the Layers panel, and you'll see that you've created a shape layer without affecting the background layer.
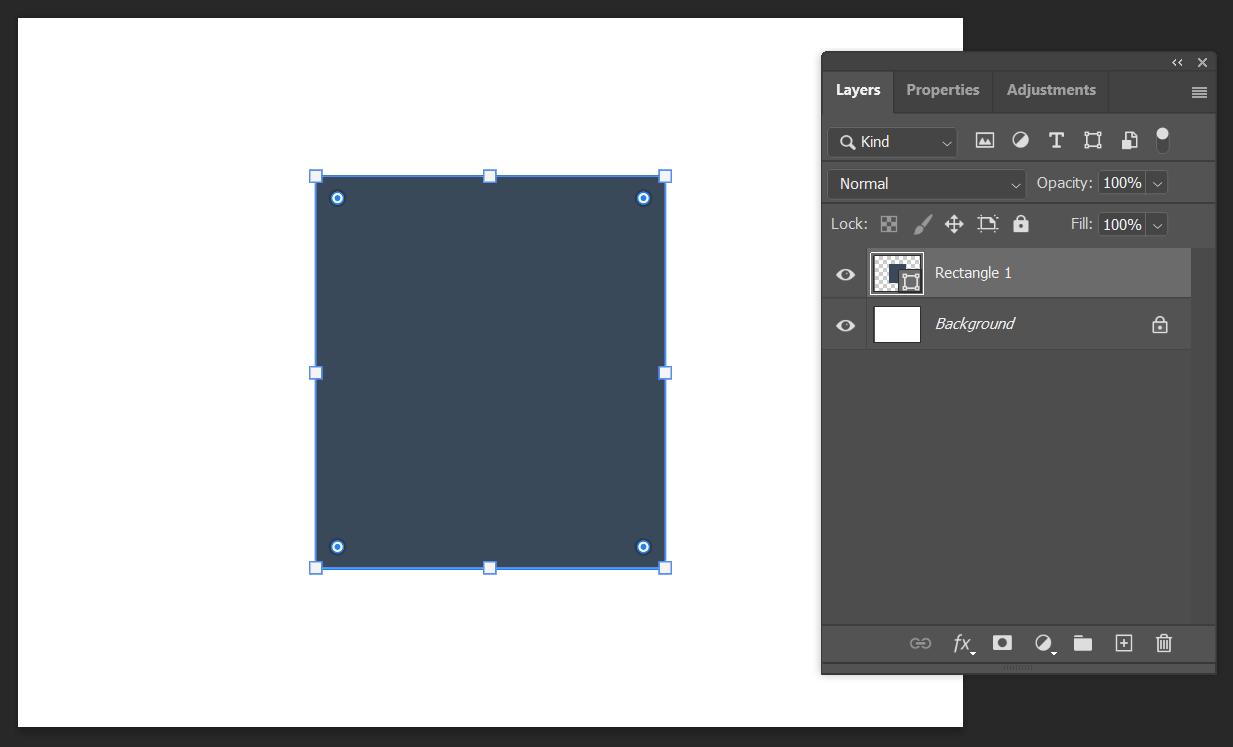
Now, select the shape layer in the Layers panel and switch to the Properties panel. (If you can't find the Properties panel, you can access it from the top Windows menu bar.)
In the Appearance section of the Properties panel, you'll find the corner radius settings for all four rectangle corners.
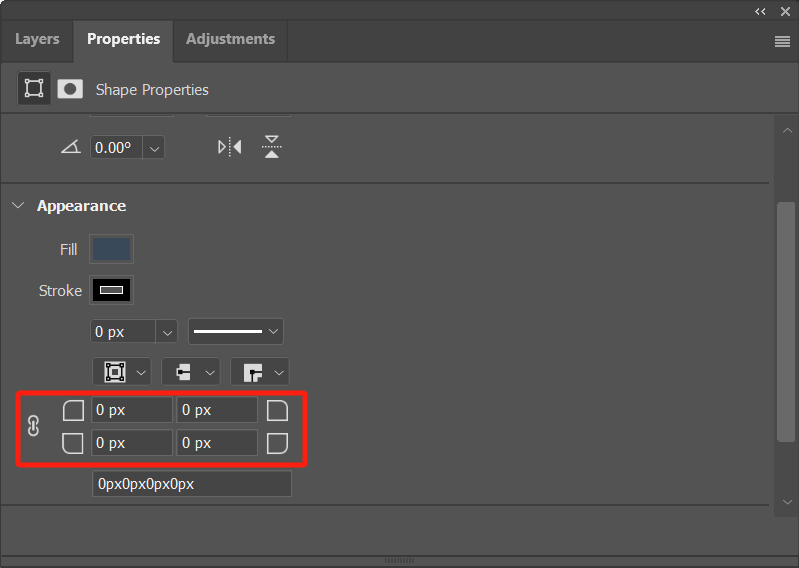
To round just the top-left corner, make sure you unlink the corner radius value link on the left and set the value to 50 pixels.
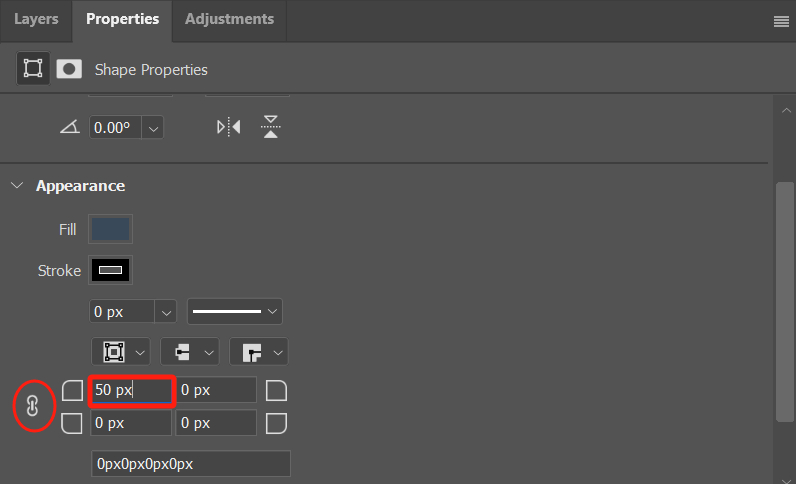
You'll notice that the top-left corner of the rectangle becomes rounded. Voila! You've easily made a rectangle with rounded corners using Photoshop. Mastering this skill will greatly assist you in your graphic design endeavors.

How to Round the Corners of a Photo in Photoshop?
Building upon the method from the previous section, you can easily add rounded corners to a photo.
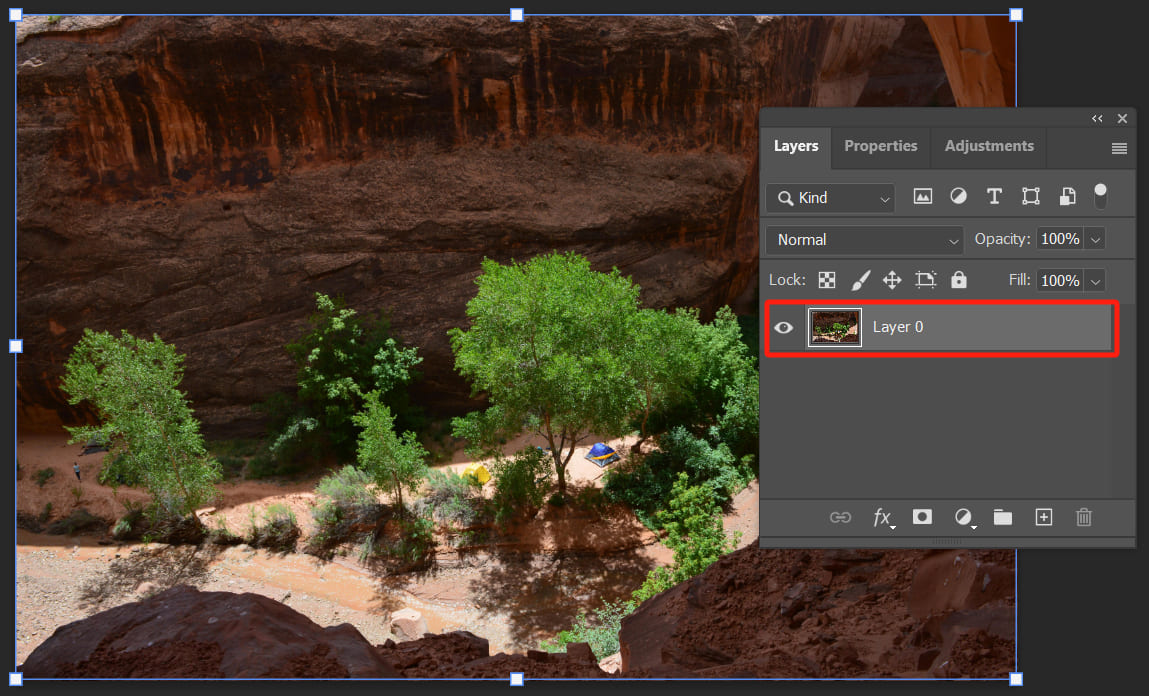
Open the photo you want to add rounded corners to in Photoshop. Double-click the background layer in the Layers panel to unlock it and convert it to a regular layer.
Select the Rectangle Tool and directly set a corner radius value in the top toolbar. Alternatively, you can follow the method we discussed in the previous chapter, where you create a rectangle and round its corners.
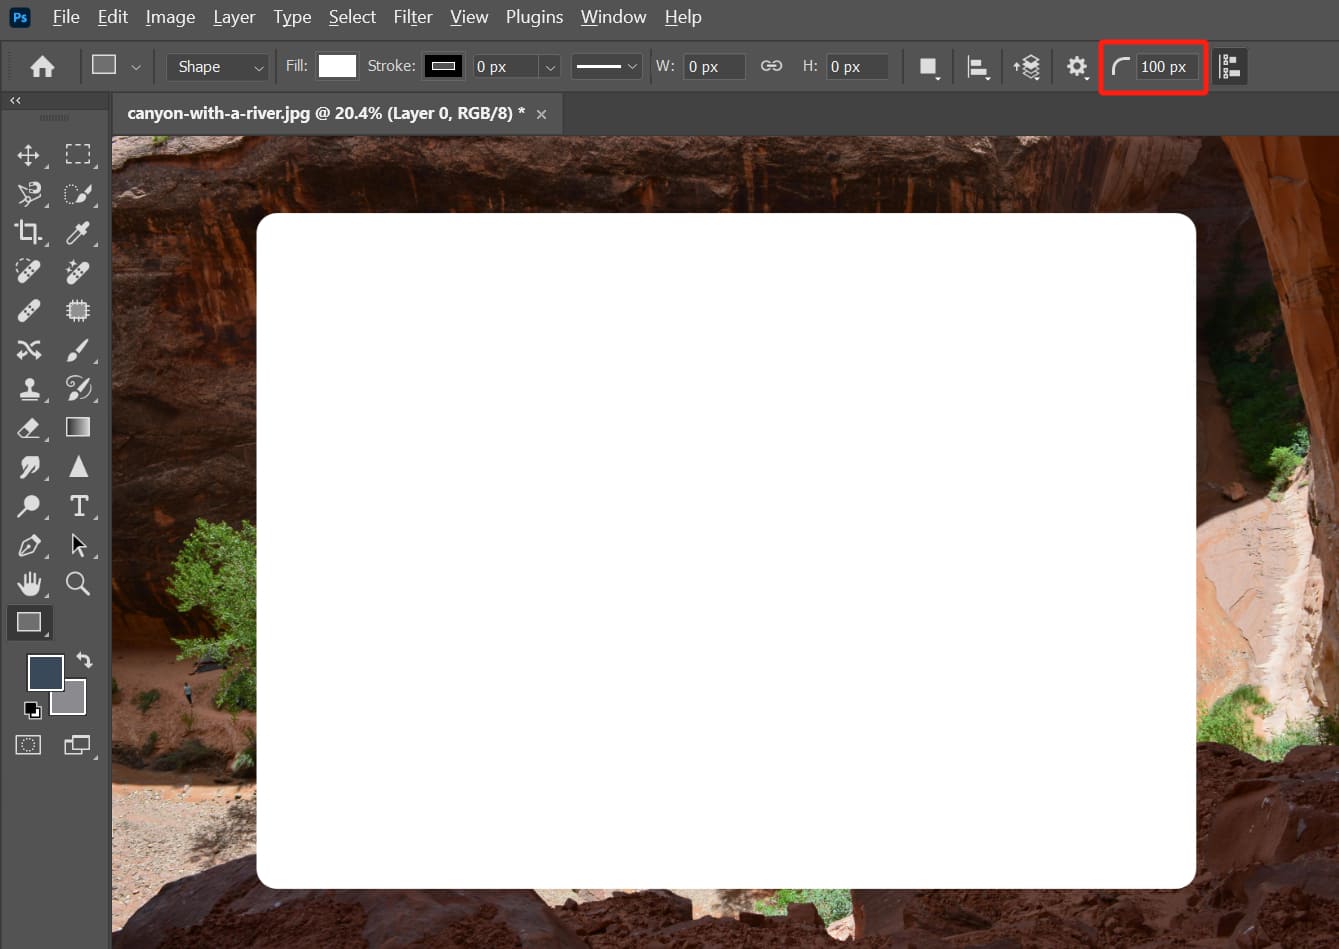
Next, adjust the size of the rectangle to cover your photo or any specific area of the photo that you want to display.
Press "Ctrl/Command + Enter" on your keyboard to activate the selection of the rectangle.
Click on the "Select" option in the top Photoshop menu bar and choose "Inverse" (shortcut: "Shift + Ctrl/Command + I").
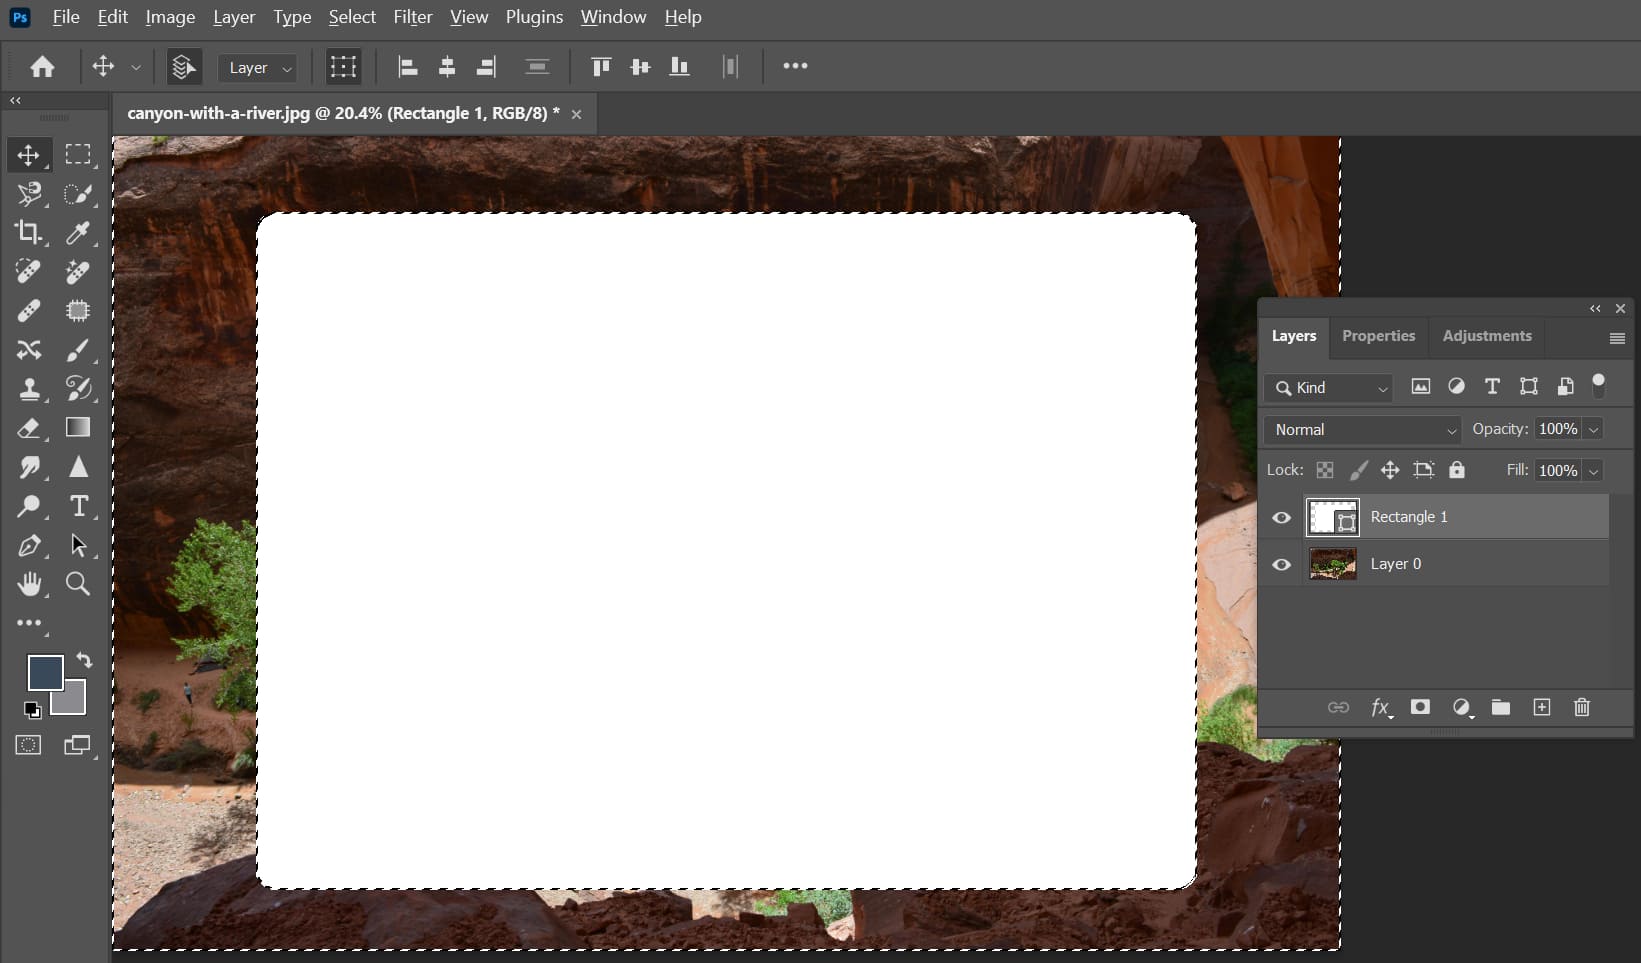
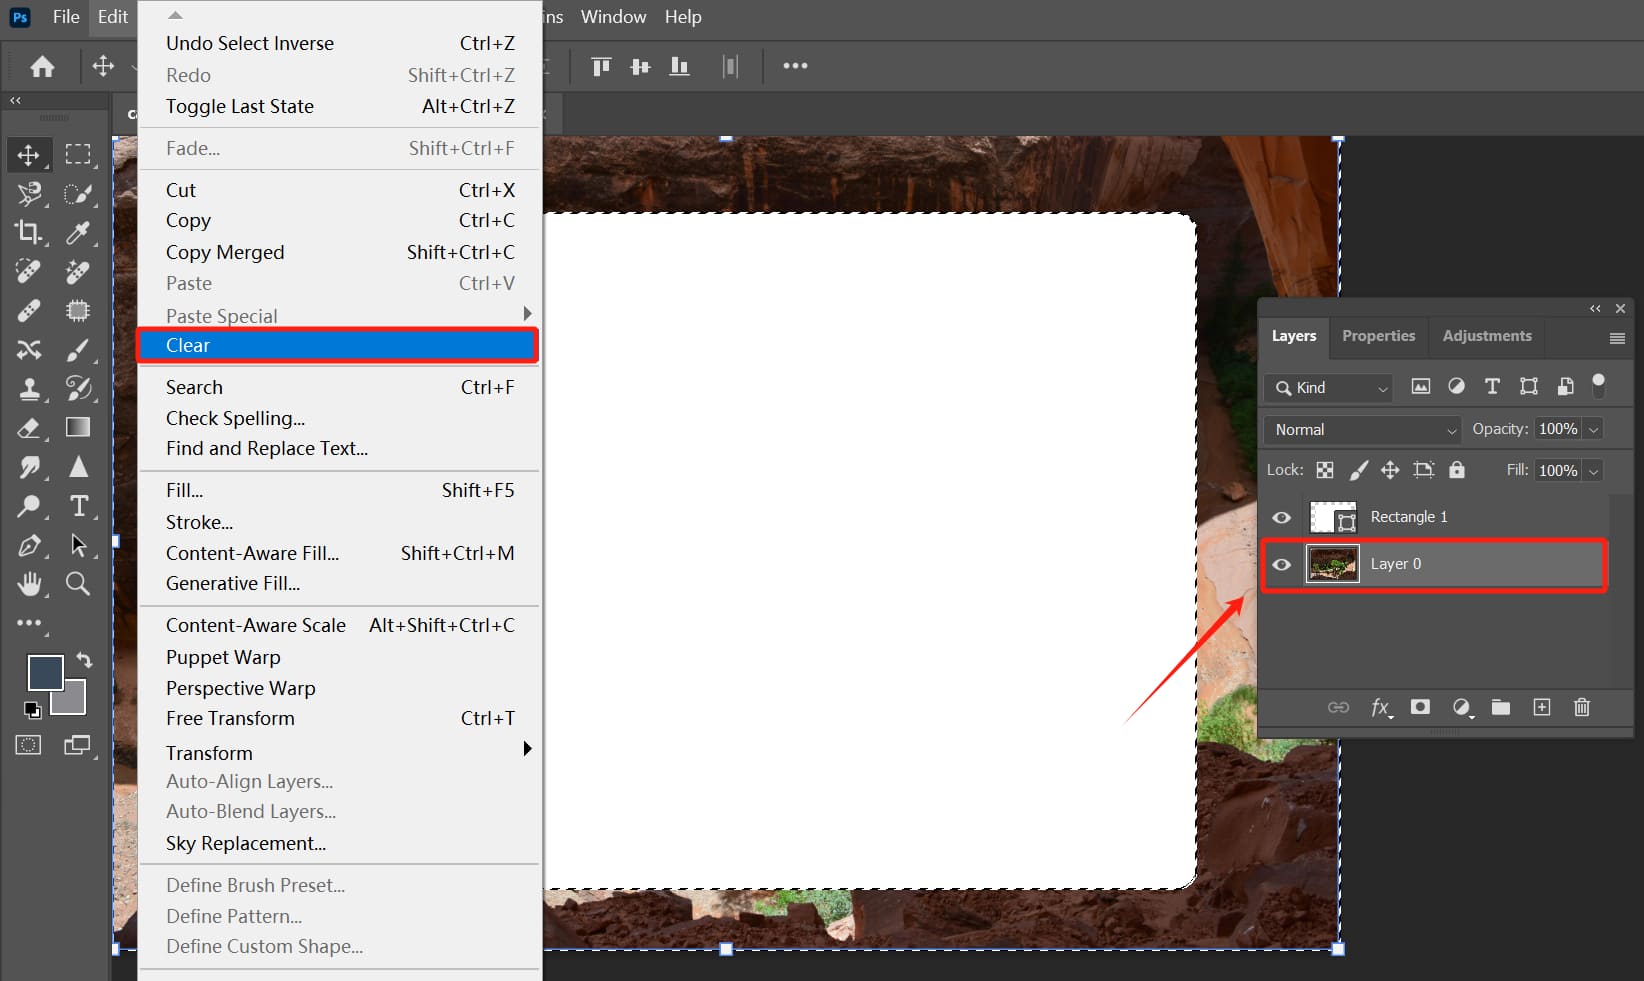
Select the photo layer in the Layers panel. Then, press the "Delete" key on your keyboard or click on the "Edit" menu in the top menu bar and select "Clear".
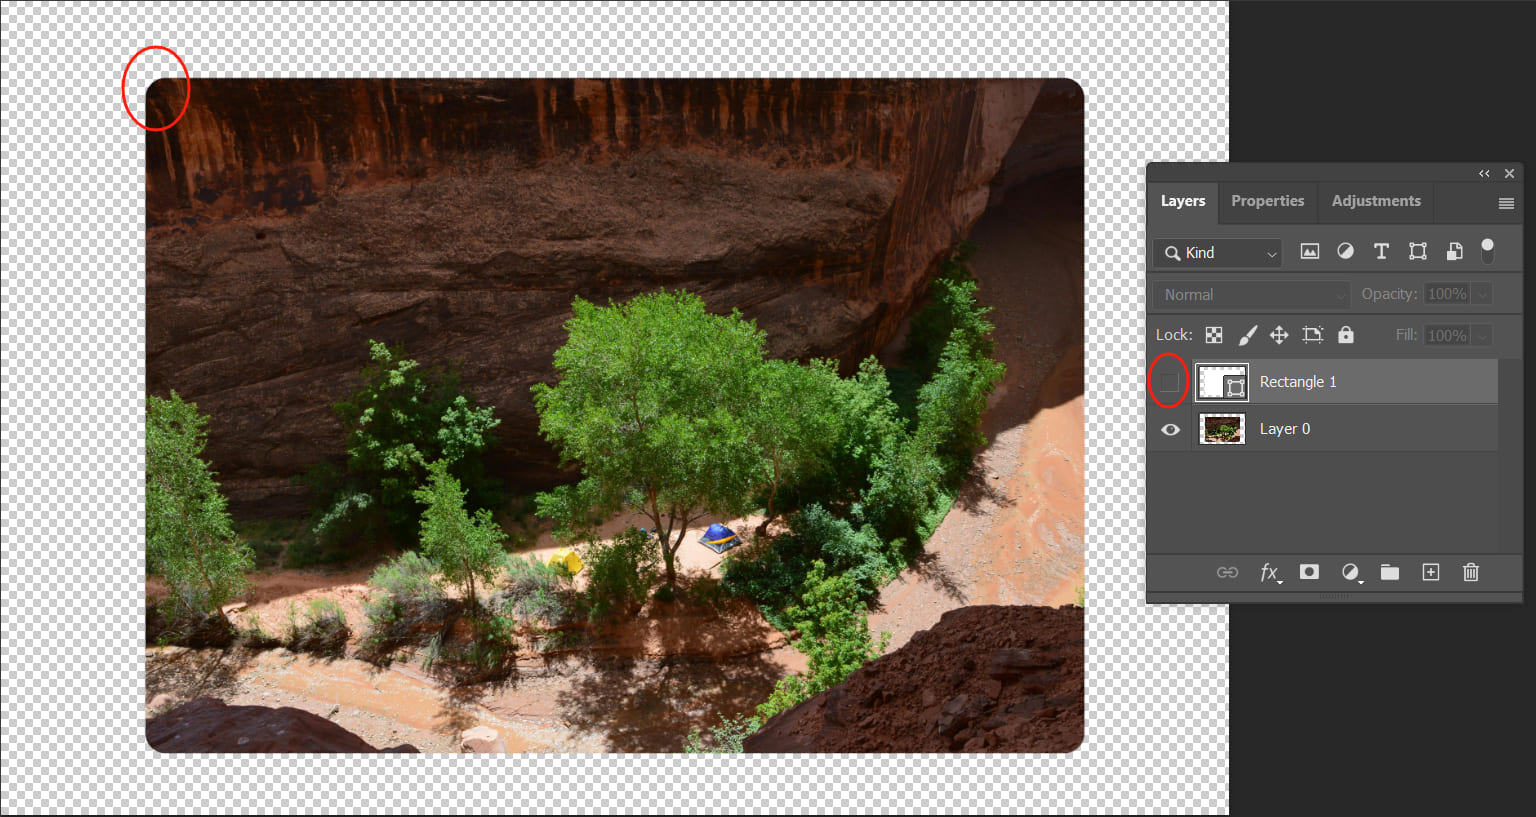
Hide the rectangle shape layer that is above the photo layer, or more directly, delete it altogether.
You'll notice that the four corners of the photo have become rounded. However, this method permanently deletes pixels from the original image, which is not ideal.
Alternatively, you can use layer masks to erase the corners of the photo to achieve rounded corners, but it's also not the best method.
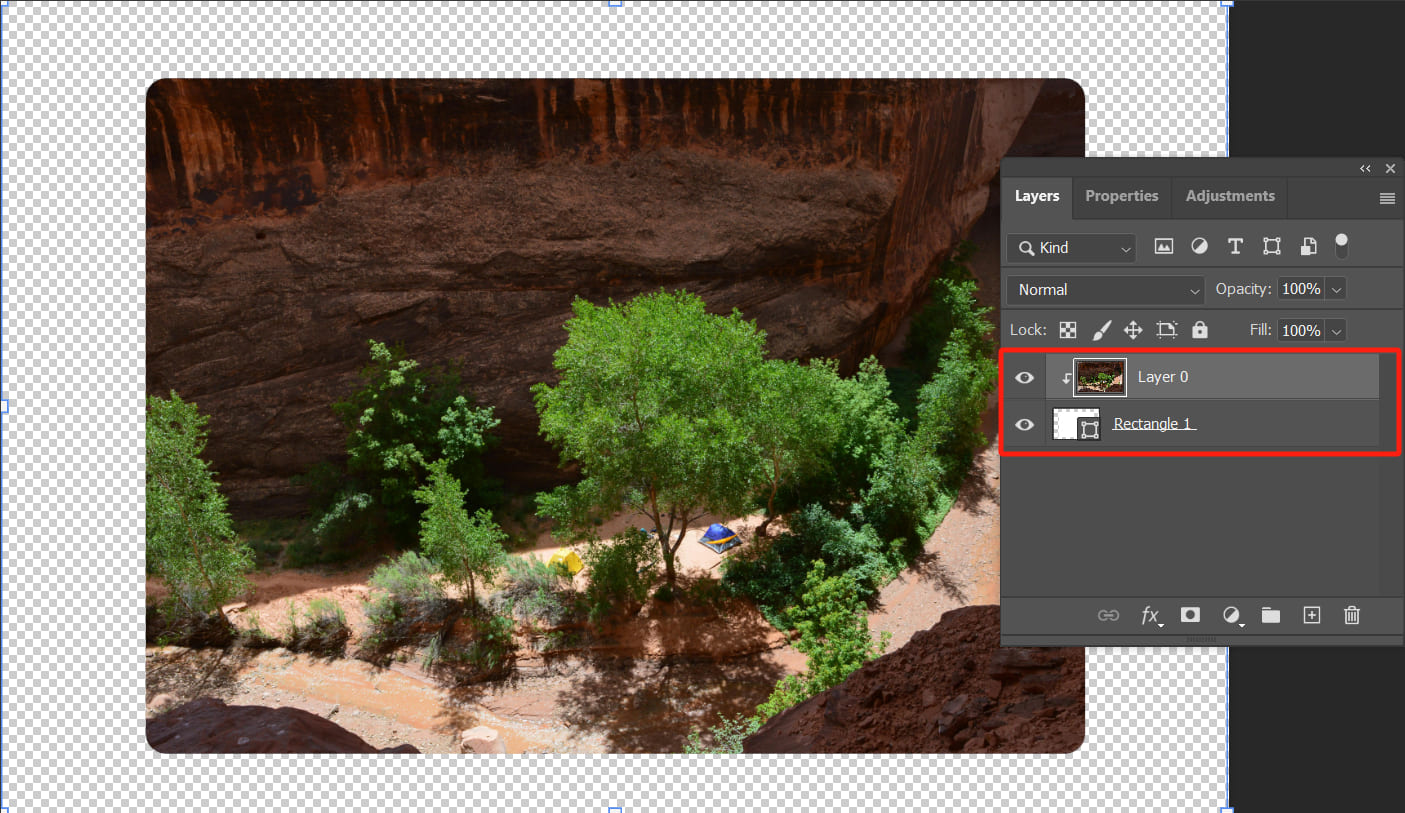
The best approach is to use a clipping mask. First, move the photo layer above the rectangle shape layer, then press "Ctrl/Command + Alt/Option + G" to create a clipping mask. (Alternatively, hold the Alt key and click between the two layers to create a clipping mask.)
Further Reading:
To learn more about using clipping masks in Photoshop, check out our article: "The Complete Guide to Clipping Masks in Photoshop"
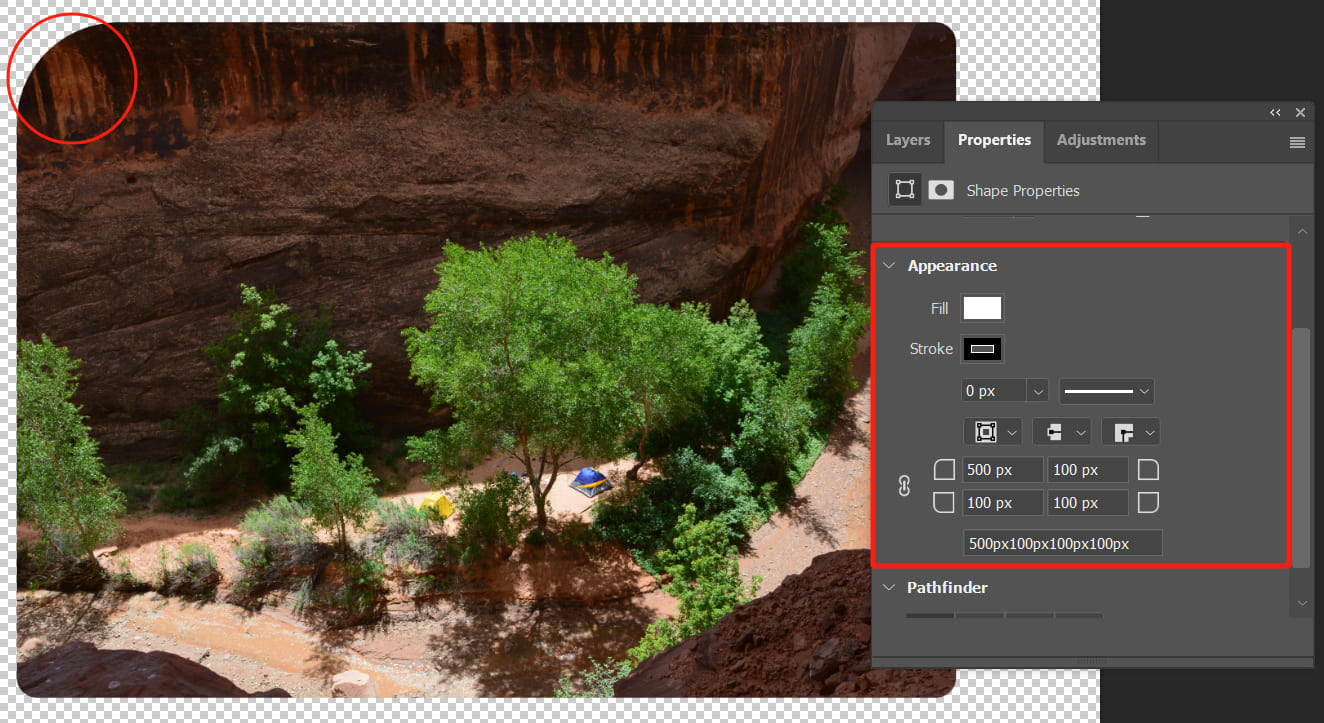
The great thing is that with a clipping mask, you can reselect the rectangle shape layer, switch to the Properties panel, and dynamically adjust the shape properties according to your needs. You'll see that the rounded corner effect on the photo can be changed on the fly.
You can also add border effects to the rectangle shape. With a clipping mask, you can apply patterns to the border and adjust each corner radius individually.
If you find the process of creating clipping masks in Photoshop cumbersome or struggle to remember their keyboard shortcuts, you might want to take a look at TourBox, a creative tool loved by designers and digital artists.
TourBox offers a more intuitive way to interact with Photoshop.

No more need to memorize countless keyboard shortcuts or navigate through long menus to find the desired commands. With a simple setup (TourBox also provides default presets for multiple software), you can effortlessly control TourBox with one hand and perform operations similar to creating clipping masks.
The best part is that TourBox provides an exceptional tactile experience, making it feel like operating a game controller. Check out our photo editing page to see how TourBox simplifies every step of your workflow.
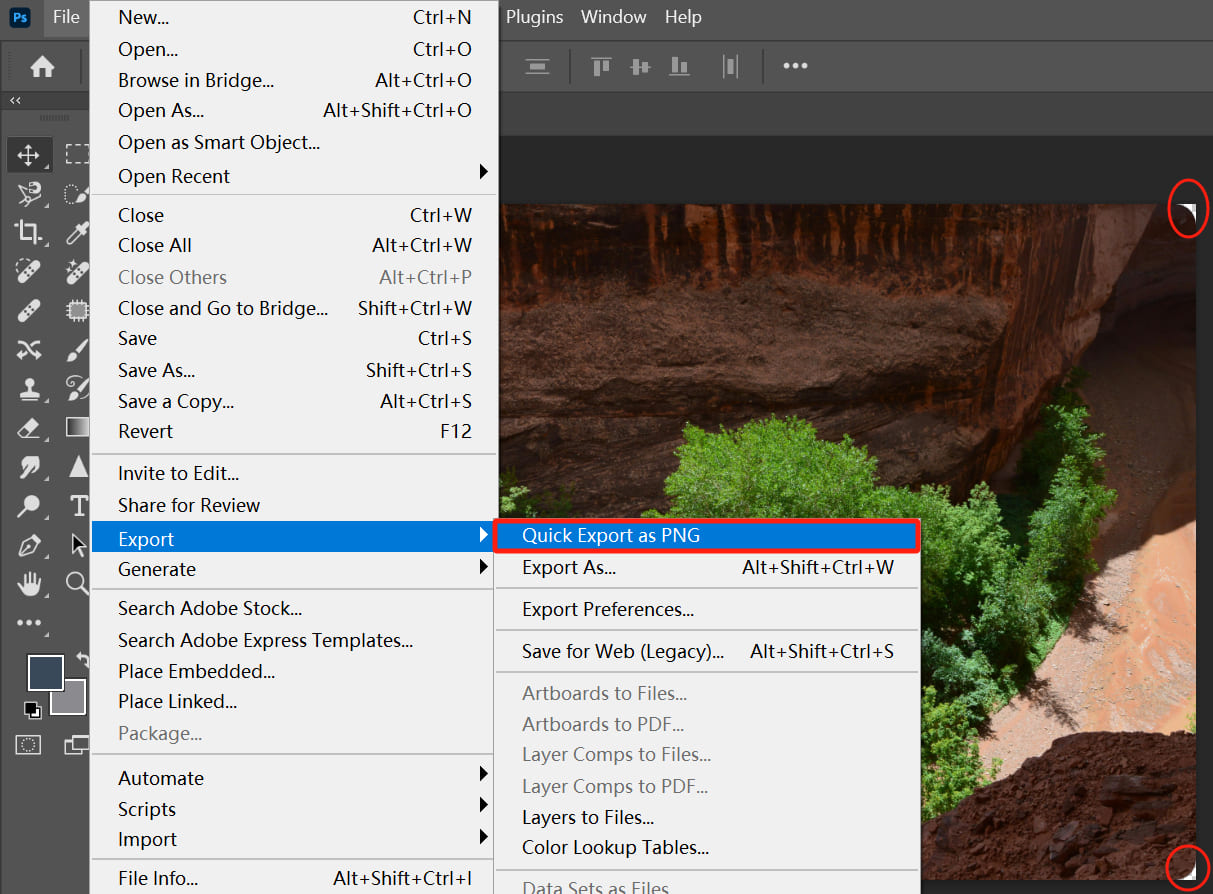
Lastly, save your photo quickly as a PNG file. If the transparent area is a bit large, you can also crop the photo as needed.
Further Reading:
The method we shared here equally applies to various design projects you may have. Give it a try and see for yourself!
Final Thoughts About Rounding the Corners of a Rectangle in Photoshop
In this tutorial, we shared the method for rounding the corners of a rectangle in Photoshop and extended it to round the corners of a photo. You can apply the techniques we discussed above to various design or photo editing projects.
Mastering this skill will greatly assist you in your graphic design endeavors in Photoshop. If you want to further enhance your proficiency in using Photoshop, consider our latest product, TourBox Lite.

TourBox Lite is a more compact version of TourBox. It offers excellent value for money, and you're sure to enjoy the improved workflow experience it provides.